
1. Important Safety Instructions
Read and understand all safety warnings and instructions before operating this welding machine. Failure to follow these instructions may result in electric shock, fire, serious injury, or death.
- Electric Shock Can Kill: Do not touch live electrical parts. Wear dry insulating gloves and protective clothing.
- Fumes and Gases Can Be Dangerous: Keep your head out of the fumes. Use ventilation or exhaust to remove fumes from the breathing zone.
- Arc Rays Can Burn Eyes and Skin: Wear a welding helmet with a proper shade of filter lens to protect your eyes and face. Wear protective clothing to protect your skin.
- Fire and Explosion Hazard: Remove all flammable materials from the welding area. Have a fire extinguisher nearby.
- Hot Parts Can Cause Severe Burns: Allow the welding gun and workpiece to cool before handling.
2. Product Overview
The AZZUNO MIG-155F is a versatile 5-in-1 welding machine designed for various welding applications. It supports Flux Core MIG, Gas MIG, Aluminum MIG, Stick (MMA), and Lift TIG welding modes. This machine features dual voltage compatibility (110V/220V) and an intuitive control panel for ease of use.
2.1 Key Features
- 5-in-1 Welding Modes: Flux Core MIG, Gas MIG, Aluminum MIG, Stick (MMA), Lift TIG.
- Dual Voltage: Operates on 110V or 220V power supply.
- Simplified Aluminum MIG: Engineered for efficient aluminum welding without special liners or spool guns.
- SYN/2T/4T Functions: Synergic mode for automatic settings, 2T for manual, and 4T for continuous welding.
- User-Friendly Interface: Two buttons and two knobs for easy operation.
2.2 Package Contents
Verify that all items listed below are included in your package:
- AZZUNO MIG-155F Welder Machine (x1)
- 14AK MIG Torch (x1)
- Flux-cored Wire .030" (2 lbs) (x1)
- Ground Clamp (x1)
- Electrode Holder (x1)
- 110V~220V Adapter (x1)
- Brush & Hammer (x1)
- Gas Hose (x1)
- Hose Band (x2)
- Drive Roller (x2)
- Contact Tip (x2)
- Gas Nozzle (x1)
- User Manual (x1)
- WP-17V TIG Torch (x1)
- Ceramic Cups (x3)
- Collet (x2)
- Collet Body (x1)
- Long Back Cap (x1)
- Short Back Cap (x1)

Figure 1: AZZUNO MIG-155F Welder and its included accessories. This image displays the main unit, MIG torch, electrode holder, ground clamp, gas hose, adapter, brush, hammer, drive rollers, contact tips, gas nozzle, and flux-cored wire.
3. Setup and Installation
3.1 Power Connection
The AZZUNO MIG-155F supports both 110V and 220V power inputs. Use the provided adapter if converting from 220V to 110V. Ensure the power source matches the machine's requirements and is properly grounded.
3.2 Connecting the Ground Clamp
Connect the ground clamp cable to the negative (-) terminal on the front panel of the welder. Securely attach the ground clamp to the workpiece or a clean, bare metal part of the welding table to ensure a good electrical connection.
3.3 MIG Torch Installation
- Insert the MIG torch connector into the positive (+) terminal on the front panel.
- Twist to secure the connection.
- If using gas MIG, connect the gas hose from the torch to the "GAS OUT" port on the machine, and then connect the other end of the gas hose to your gas cylinder regulator.
- Install the appropriate contact tip and gas nozzle for your wire size and welding process.
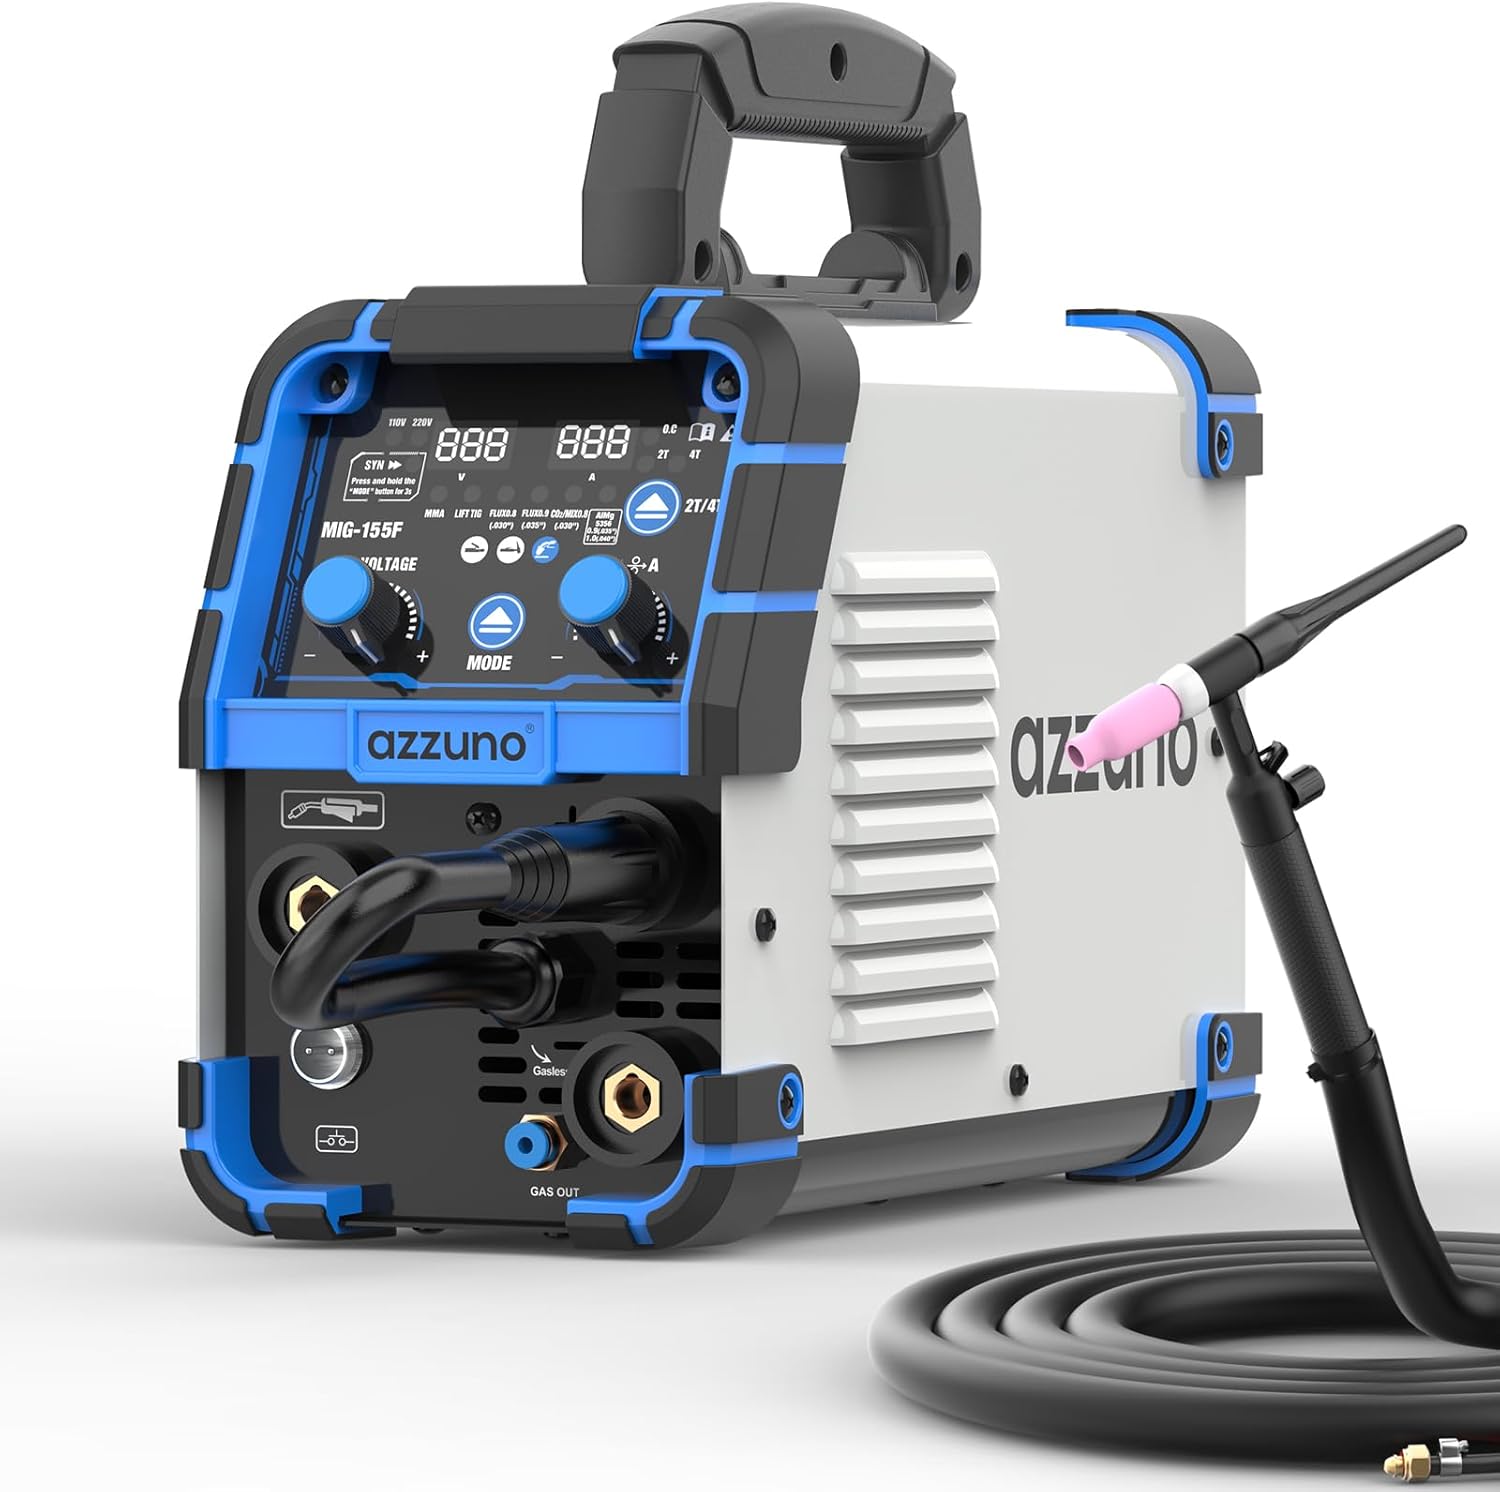
Figure 2: Front panel of the AZZUNO MIG-155F Welder showing connection points for MIG torch, ground clamp, and gas output. The control panel with display and knobs is also visible.
3.4 Wire Feed Setup (MIG/Flux Core)
- Open the wire feed compartment.
- Place the wire spool onto the spindle, ensuring it rotates freely.
- Thread the welding wire through the guide tube and into the drive roller mechanism.
- Close the drive roller tension arm and adjust the tension according to the wire type and diameter.
- Ensure the drive roller groove matches the wire diameter being used.
3.5 TIG Torch Installation (Lift TIG)
- Connect the WP-17V TIG torch cable quick connector to the negative (-) terminal on the front panel.
- Connect the gas hose from the TIG torch to the "GAS OUT" port on the machine.
- Connect the ground clamp to the positive (+) terminal.
- Install the appropriate ceramic cup, collet, collet body, and tungsten electrode into the TIG torch.

Figure 3: The WP-17V TIG torch, featuring a 13-foot (4-meter) cable, quick connector (10-25mm²), and gas hose connector. This image highlights the components for TIG welding setup.

Figure 4: A detailed view of the WP-17V TIG torch accessories. This includes ceramic cups (#4, #5, #6), collets (.063", .078", .094"), a collet body, and both short and long back caps, essential for TIG welding.
3.6 Electrode Holder Installation (Stick/MMA)
Connect the electrode holder cable to the positive (+) terminal on the front panel. Connect the ground clamp cable to the negative (-) terminal.
4. Operating Instructions
4.1 Control Panel Overview

Figure 5: The user-friendly control panel of the AZZUNO MIG-155F Welder. It highlights the power light, overheat indicator, SYN mode button, 2T/4T mode button, and welding mode selection, along with voltage and amperage adjustment knobs.
- Power Light: Indicates the machine is powered on.
- Over Heat Indicator: Illuminates if the machine overheats. Allow it to cool down before resuming operation.
- SYN Mode Button: Activates Synergic mode for automatic parameter adjustment. Press and hold for 3 seconds to activate.
- 2T/4T Mode Button: Toggles between 2-Touch (manual) and 4-Touch (continuous) welding modes.
- Welding Modes: Select between MMA, Lift TIG, Flux Core MIG, Gas MIG, and Aluminum MIG.
- Knobs: Adjust voltage and amperage settings.
4.2 Selecting Welding Mode
Press the "MODE" button to cycle through the available welding processes: Flux Core MIG, Gas MIG, Aluminum MIG, Stick (MMA), and Lift TIG. The selected mode will be displayed on the digital screen.
4.3 Parameter Adjustment
- Synergic Mode (SYN): Press and hold the "MODE" button for 3 seconds to activate SYN mode. The machine will automatically set optimal voltage and wire feed speed based on the selected amperage and material.
- Manual Adjustment: In non-SYN modes, use the left knob to adjust voltage and the right knob to adjust amperage/wire feed speed. Refer to welding charts for recommended settings for different materials and thicknesses.
4.4 Welding Process Specifics
4.4.1 MIG Welding (Flux Core, Gas, Aluminum)
- Ensure correct wire type and size are loaded.
- For Gas MIG and Aluminum MIG, ensure the appropriate shielding gas is connected and flowing.
- Select 2T for short welds or 4T for longer, continuous welds.
- Adjust voltage and wire feed speed.

Figure 6: An illustrative diagram detailing the five welding capabilities of the AZZUNO MIG-155F: Gasless MIG, Gas MIG, Aluminum MIG, MMA (Stick), and Lift TIG. Each mode is accompanied by typical wire/electrode specifications.

Figure 7: The AZZUNO MIG-155F Welder in operation, demonstrating simplified aluminum MIG welding. The image shows the machine's interface with aluminum welding settings and highlights that no Teflon tube or spool gun is required.

Figure 8: The AZZUNO MIG-155F Welder in use, illustrating efficient MIG welding. The image highlights the 2T, 4T, and SYN modes and compares a clean AZZUNO weld bead with a less consistent weld from another machine.
4.4.2 Stick Welding (MMA)
- Select MMA mode.
- Insert the appropriate electrode into the electrode holder.
- Adjust amperage based on electrode type and diameter.
4.4.3 Lift TIG Welding
- Select Lift TIG mode.
- Ensure the TIG torch is properly set up with tungsten and gas.
- Adjust amperage.
- Initiate the arc by gently touching the tungsten to the workpiece and lifting it slightly.
5. Maintenance
Regular maintenance ensures the longevity and safe operation of your welding machine.
- Cleaning: Periodically clean the machine's exterior with a dry, soft cloth. Use compressed air to blow out dust from inside the machine, especially around cooling vents. Ensure the machine is unplugged before cleaning.
- Torch Maintenance: Inspect MIG and TIG torches regularly for wear and tear on nozzles, contact tips, collets, and ceramic cups. Replace worn parts as needed.
- Cable Inspection: Check all cables (power, ground, torch) for cuts, cracks, or damaged insulation. Replace damaged cables immediately.
- Wire Feed System: Clean the drive rollers and wire guide tubes to prevent wire feeding issues. Ensure proper tension on the drive rollers.
6. Troubleshooting
| Problem | Possible Cause | Solution |
|---|---|---|
| No power | Power cord unplugged, circuit breaker tripped, machine switch off. | Check power connections, reset breaker, turn on machine switch. |
| No arc | Poor ground connection, incorrect settings, worn contact tip/electrode. | Ensure good ground, verify settings, replace consumables. |
| Wire feeding issues | Incorrect drive roller tension, clogged liner, wrong drive roller groove. | Adjust tension, clean liner, ensure correct groove. |
| Overheat indicator on | Exceeded duty cycle, poor ventilation. | Allow machine to cool down, ensure adequate airflow. |
7. Specifications
| Feature | Detail |
|---|---|
| Model | MIG-155F |
| Input Voltage | 110V/220V Dual Voltage |
| Welding Processes | Flux Core MIG, Gas MIG, Aluminum MIG, Stick (MMA), Lift TIG |
| Max Amperage | 155A |
| TIG Torch Type | WP-17V (Air-cooled) |
| TIG Torch Cable Length | 13 ft / 4 m |
| Quick Connector Size | 10-25mm² |
| Dimensions (Approx.) | 13" (Length) x 5.7" (Width) x 8.5" (Height) |
| Weight (Approx.) | 12 lbs |

Figure 9: The AZZUNO MIG-155F Welder with its approximate dimensions (13" length, 5.7" width, 8.5" height) and weight (12 lbs) indicated, providing a visual reference for its compact size.
8. Warranty and Support
For warranty information or technical support, please refer to the warranty card included with your product or visit the official AZZUNO website. You can also contact AZZUNO customer service through the retailer where the product was purchased.
AZZUNO Official Store: Visit the AZZUNO Store on Amazon


