
Introduction
This manual provides comprehensive instructions for the safe and effective operation of your Sharper Image Stealth Recon Video Drone. Designed for beginner flyers, this drone offers real-time video streaming to your smartphone, intuitive flight controls, and one-button stunts. Please read this manual thoroughly before operating the drone to ensure proper setup, flight, and maintenance.
Safety Information
Always prioritize safety when operating the drone. Failure to follow these guidelines may result in injury or damage to the drone.
- Age Recommendation: This drone is recommended for users aged 8 years and older. Adult supervision is advised for younger operators.
- Flight Environment: Operate the drone in open, clear areas, away from people, animals, buildings, and power lines. Avoid flying in strong winds or adverse weather conditions.
- Propeller Safety: Keep hands, face, and loose clothing away from rotating propellers. Do not attempt to catch the drone while it is flying.
- Battery Safety: Use only the provided charging cable. Do not overcharge batteries. Disconnect the battery when not in use. Do not expose batteries to extreme temperatures or direct sunlight.
- Visual Line of Sight: Always maintain visual line of sight with the drone during flight.
- Respect Privacy: Be mindful of privacy when using the camera feature. Do not record individuals without their consent.
Package Contents
Verify that all items are present in the package:
- Sharper Image Stealth Recon Video Drone
- Remote Control
- USB-C Charging Cable
- Instruction Manual (this document)
Components Overview

Figure 1: The Sharper Image Stealth Recon Drone, its remote control, and a smartphone mounted on the remote for live video streaming. This image provides an overall view of the product components.

Figure 2: A close-up view highlighting the drone's digital camera for panoramic views, its resilient foam frame designed for durability, and the live video streaming feature to a smartphone.
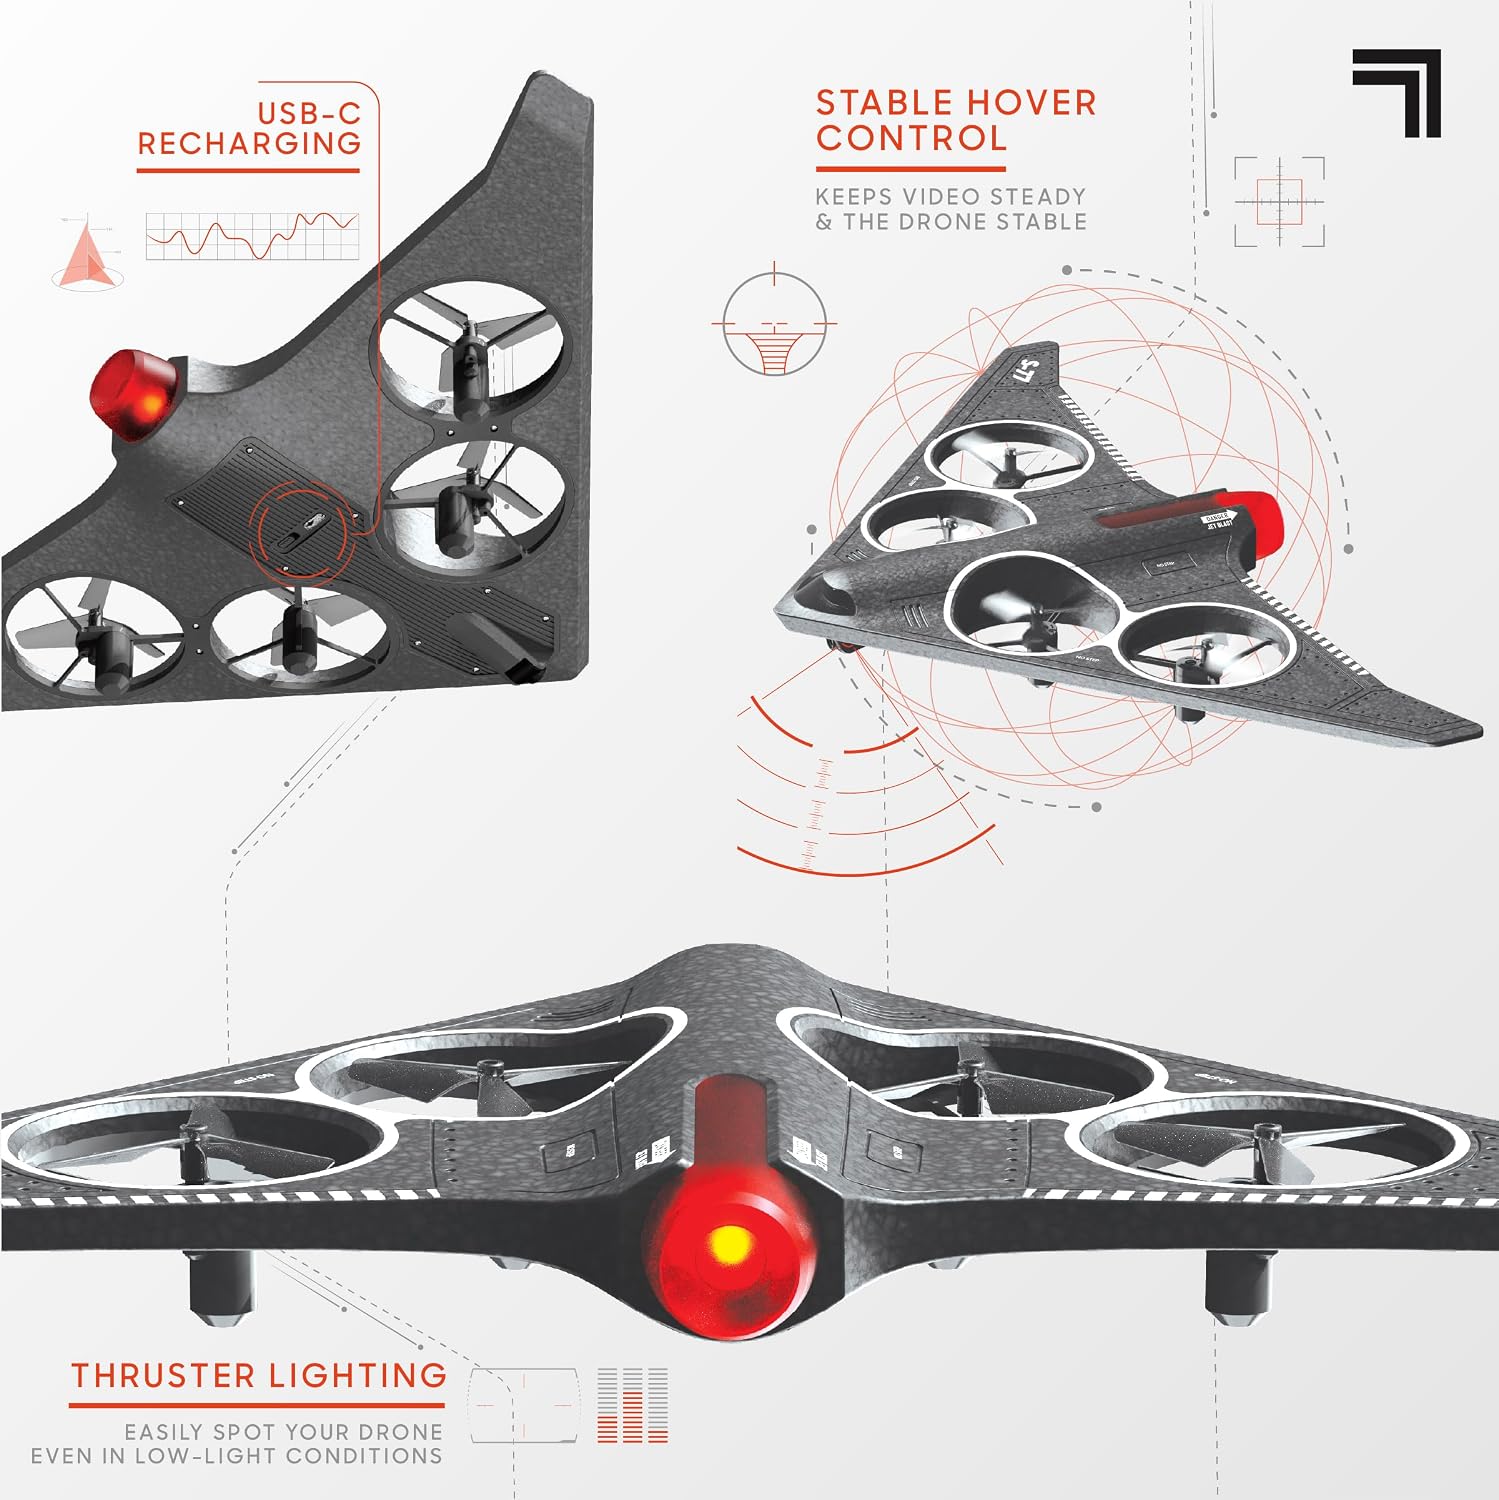
Figure 3: This image illustrates key features such as the USB-C recharging port for convenient power, the stable hover control system for steady flight, and the thruster lighting for enhanced visibility.
Drone Components:
- Propellers: Four sets of propellers for lift and thrust.
- Digital Camera: Located on the underside, capable of panoramic video and photo capture.
- Thruster Lighting: LED lights at the rear for visibility, especially in low-light conditions.
- USB-C Charging Port: For recharging the drone's internal battery.
- Resilient Foam Frame: Lightweight and durable construction to protect the drone.
Remote Control Components:
- Left Joystick: Controls altitude (up/down) and rotation (left/right).
- Right Joystick: Controls forward/backward and left/right movement.
- Auto-Orientation Button: Activates/deactivates auto-orientation mode.
- Takeoff/Landing Button: Initiates assisted takeoff or landing.
- Speed Button: Toggles between speed modes.
- Stunt Button: Performs one-button aerial flips.
- Power Button: Turns the remote control on/off.
- Smartphone Mount: Adjustable holder for your smartphone to view live video feed.
Charging the Drone
The drone is powered by an internal rechargeable lithium battery. Ensure the drone is fully charged before each flight.
- Locate the USB-C charging port on the drone.
- Connect the small end of the provided USB-C charging cable to the drone's charging port.
- Connect the larger USB end of the cable to a USB power source (e.g., computer USB port, USB wall adapter).
- The charging indicator light on the drone will illuminate during charging and turn off when fully charged.
- Charging typically takes approximately 60-90 minutes. Do not leave the drone charging unattended for extended periods.
Remote Control Setup
The remote control requires 3 AAA batteries (included). Install them as follows:
- Open the battery compartment on the back of the remote control.
- Insert 3 AAA batteries, ensuring correct polarity (+/-).
- Close the battery compartment securely.
- Press the Power Button on the remote control to turn it on. The indicator light will illuminate.
App Installation and Connection (Live Streaming)
To utilize the live streaming camera feature, you will need to download the dedicated Sharper Image drone app to your smartphone. Refer to the packaging or a quick start guide for the specific app name and QR code for download.
- Download and install the Sharper Image drone app from your smartphone's app store (iOS or Android).
- Ensure your drone is powered on and fully charged.
- On your smartphone, go to Wi-Fi settings and connect to the drone's Wi-Fi network (usually named something like "SharperImage_Drone_XXXX").
- Open the installed drone app. The live video feed from the drone's camera should appear on your smartphone screen.
- Mount your smartphone securely onto the remote control's smartphone mount.
Pre-Flight Checklist
Before each flight, perform the following checks:
- Ensure the drone battery is fully charged.
- Ensure the remote control batteries are installed and functional.
- Check that all propellers are securely attached and free from damage.
- Select an open, clear area for flight, free from obstacles, people, and animals.
- Ensure the drone and remote control are properly paired.
- If using live streaming, ensure your smartphone is connected to the drone's Wi-Fi and the app is open.
Operating Instructions
Pairing the Drone and Remote:
- Place the drone on a flat, level surface.
- Turn on the drone's power switch. The drone's lights will blink.
- Turn on the remote control.
- Push the left joystick (throttle) all the way up, then all the way down. The drone's lights will stop blinking and become solid, indicating successful pairing.
Takeoff and Landing:
- Assisted Takeoff: After pairing, press the "Takeoff/Landing" button once. The drone will automatically ascend to a stable hovering height.
- Assisted Landing: During flight, press the "Takeoff/Landing" button once. The drone will slowly descend and land automatically.
- Manual Takeoff: After pairing, slowly push the left joystick (throttle) up to make the drone ascend.
- Manual Landing: Slowly pull the left joystick (throttle) down to make the drone descend and land.
Flight Controls:
- Altitude: Push the Left Joystick up to ascend, pull down to descend.
- Rotation: Push the Left Joystick left to rotate counter-clockwise, right to rotate clockwise.
- Forward/Backward: Push the Right Joystick up to fly forward, pull down to fly backward.
- Left/Right Movement (Strafe): Push the Right Joystick left to fly left, right to fly right.
- Speed Modes: Press the "Speed" button to cycle through different speed settings (e.g., low, medium, high).
- Auto-Orientation: Press the "Auto-Orientation" button to activate this feature, which simplifies flight by making the drone's forward direction relative to the remote control, regardless of the drone's actual orientation.
Performing Stunts:
- Ensure the drone is at a sufficient height (at least 6-10 feet) and in an open area.
- Press the "Stunt" button once. The drone will perform an aerial flip in the direction the right joystick is pushed (forward, backward, left, or right).
Live Streaming and Recording:
- With your smartphone connected to the drone's Wi-Fi and the app open, you will see the live video feed.
- Use the controls within the app to start/stop video recording or capture still photos. Refer to the app's interface for specific button layouts.
Official Product Videos:
No official seller-provided videos were found for this product. Please refer to the written instructions and diagrams for guidance.
Maintenance and Care
- Cleaning: Wipe the drone and remote control with a soft, dry cloth. Do not use harsh chemicals or abrasive cleaners.
- Propeller Inspection: Regularly check propellers for cracks, bends, or debris. Replace damaged propellers immediately.
- Storage: Store the drone and remote control in a cool, dry place, away from direct sunlight and extreme temperatures. Remove batteries from the remote control if storing for extended periods.
- Battery Care: Do not fully discharge the drone's battery. Recharge it periodically even if not in use to maintain battery health.
- Foam Frame: While resilient, avoid excessive force or sharp impacts to the foam frame to prevent damage.
Troubleshooting
| Problem | Possible Cause | Solution |
|---|---|---|
| Drone does not respond to remote. | Not paired; Remote batteries low; Drone battery low. | Re-pair drone and remote; Replace remote batteries; Charge drone battery. |
| Drone flies erratically or drifts. | Not calibrated on a flat surface; Damaged propeller; Wind interference. | Ensure drone is placed on a flat surface for pairing/takeoff; Check and replace damaged propellers; Fly in calm conditions. |
| Live video feed is choppy or disconnected. | Weak Wi-Fi signal; Too far from drone; Interference. | Ensure smartphone is close to the drone; Reduce distance between drone and phone; Avoid areas with strong Wi-Fi interference. |
| Drone does not take off. | Battery not charged; Not paired; Propellers obstructed. | Charge drone battery; Re-pair drone and remote; Clear any obstructions from propellers. |
Specifications
| Feature | Detail |
|---|---|
| Model Number | 1213022160-2 |
| Model Name | Jet Drone |
| Manufacturer | THREESIXTY |
| Product Dimensions | 21.8 x 18.1 x 40.2 cm |
| Product Weight | 648.64 g |
| Drone Battery | Rechargeable Lithium Battery (internal) |
| Remote Control Batteries | 3 x AAA batteries (included) |
| Max Range | Up to 200 ft (approx. 60 meters) |
| Max Altitude | Up to 120 ft (approx. 36 meters) |
| Recommended Age | 8+ years |
| Color | Grey |
| Connectivity Technology | USB (for charging) |
| Special Features | Remote Control, Live Streaming Camera, Auto-Orientation, Hover Control, One-Button Stunts, Assisted Takeoff/Landing, LED Lights, Durable Foam Frame |
Warranty and Support
For warranty information, product support, or to purchase replacement parts, please refer to the documentation included with your purchase or visit the official Sharper Image website. You can also visit the Sharper Image Store on Amazon for more details.
Please retain your proof of purchase for any warranty claims.


