
1. Introduction
This manual provides detailed instructions for the safe and effective operation of your GODOX V1 Pro F Round Head Camera Flash for Fujifilm. Please read this manual thoroughly before use to ensure proper functionality and to prevent damage to the product or injury to yourself.
The GODOX V1 Pro F is a versatile camera flash designed for Fujifilm cameras, featuring 2.4G wireless TTL, High-Speed Sync (HSS) up to 1/8000s, a 2980mAh Li-ion battery, and a detachable SU-1 sub-flash. It supports both M (Manual) and TTL (Through-The-Lens) flash modes and offers convenient Type-C charging.
2. Product Components
The package includes the following items:
- 1x GODOX V1Pro-F Fuji Flash
- 1x Storage Bag
- 1x Detachable Sub Flash SU-1
- 1x Lithium Battery (7.2V/2980mAh)
- 1x USB-C Charging Cable
- 1x Charger (VC26)
- 1x Camera Flash Stand
- 1x LETWING Cleaning Cloth

Image 2.1: Contents of the GODOX V1 Pro F package, including the main flash unit, detachable sub-flash, battery, charger, cables, and other accessories.
3. Setup
3.1 Battery Installation and Charging
The GODOX V1 Pro F uses a 7.2V/2980mAh lithium battery. Ensure the battery is fully charged before first use.
- Insert the lithium battery into the battery compartment located on the flash unit. Ensure it clicks securely into place.
- To charge the battery, you have two options:
- Direct Type-C Charging: Connect the provided USB-C charging cable directly to the Type-C port on the battery.
- VC26 Charger: Use the included VC26 charger with the Type-C cable to charge the battery.
- The flash also features an extra power port for seamless connection to external Godox power packs like the PB960 (sold separately) for extended use.

Image 3.1: Illustration of the multiple charging methods for the GODOX V1 Pro F, including direct Type-C charging, charging via the VC26 charger, and connection to an external power pack like the PB960.
3.2 Attaching to Camera
To attach the flash to your Fujifilm camera's hotshoe:
- Ensure both the camera and flash are powered off.
- Slide the flash's mounting foot into the camera's hotshoe.
- Tighten the locking mechanism on the flash to secure it firmly to the camera.
3.3 Detachable Sub Flash SU-1
The GODOX V1 Pro F includes a detachable SU-1 sub-flash, which can function as both a bounce flash and a fill light. This component enhances lighting versatility.
- To attach the SU-1, align it with the designated slot on the main flash body and slide it into place until it clicks.
- To detach, press the release button (if present) and slide the SU-1 off.
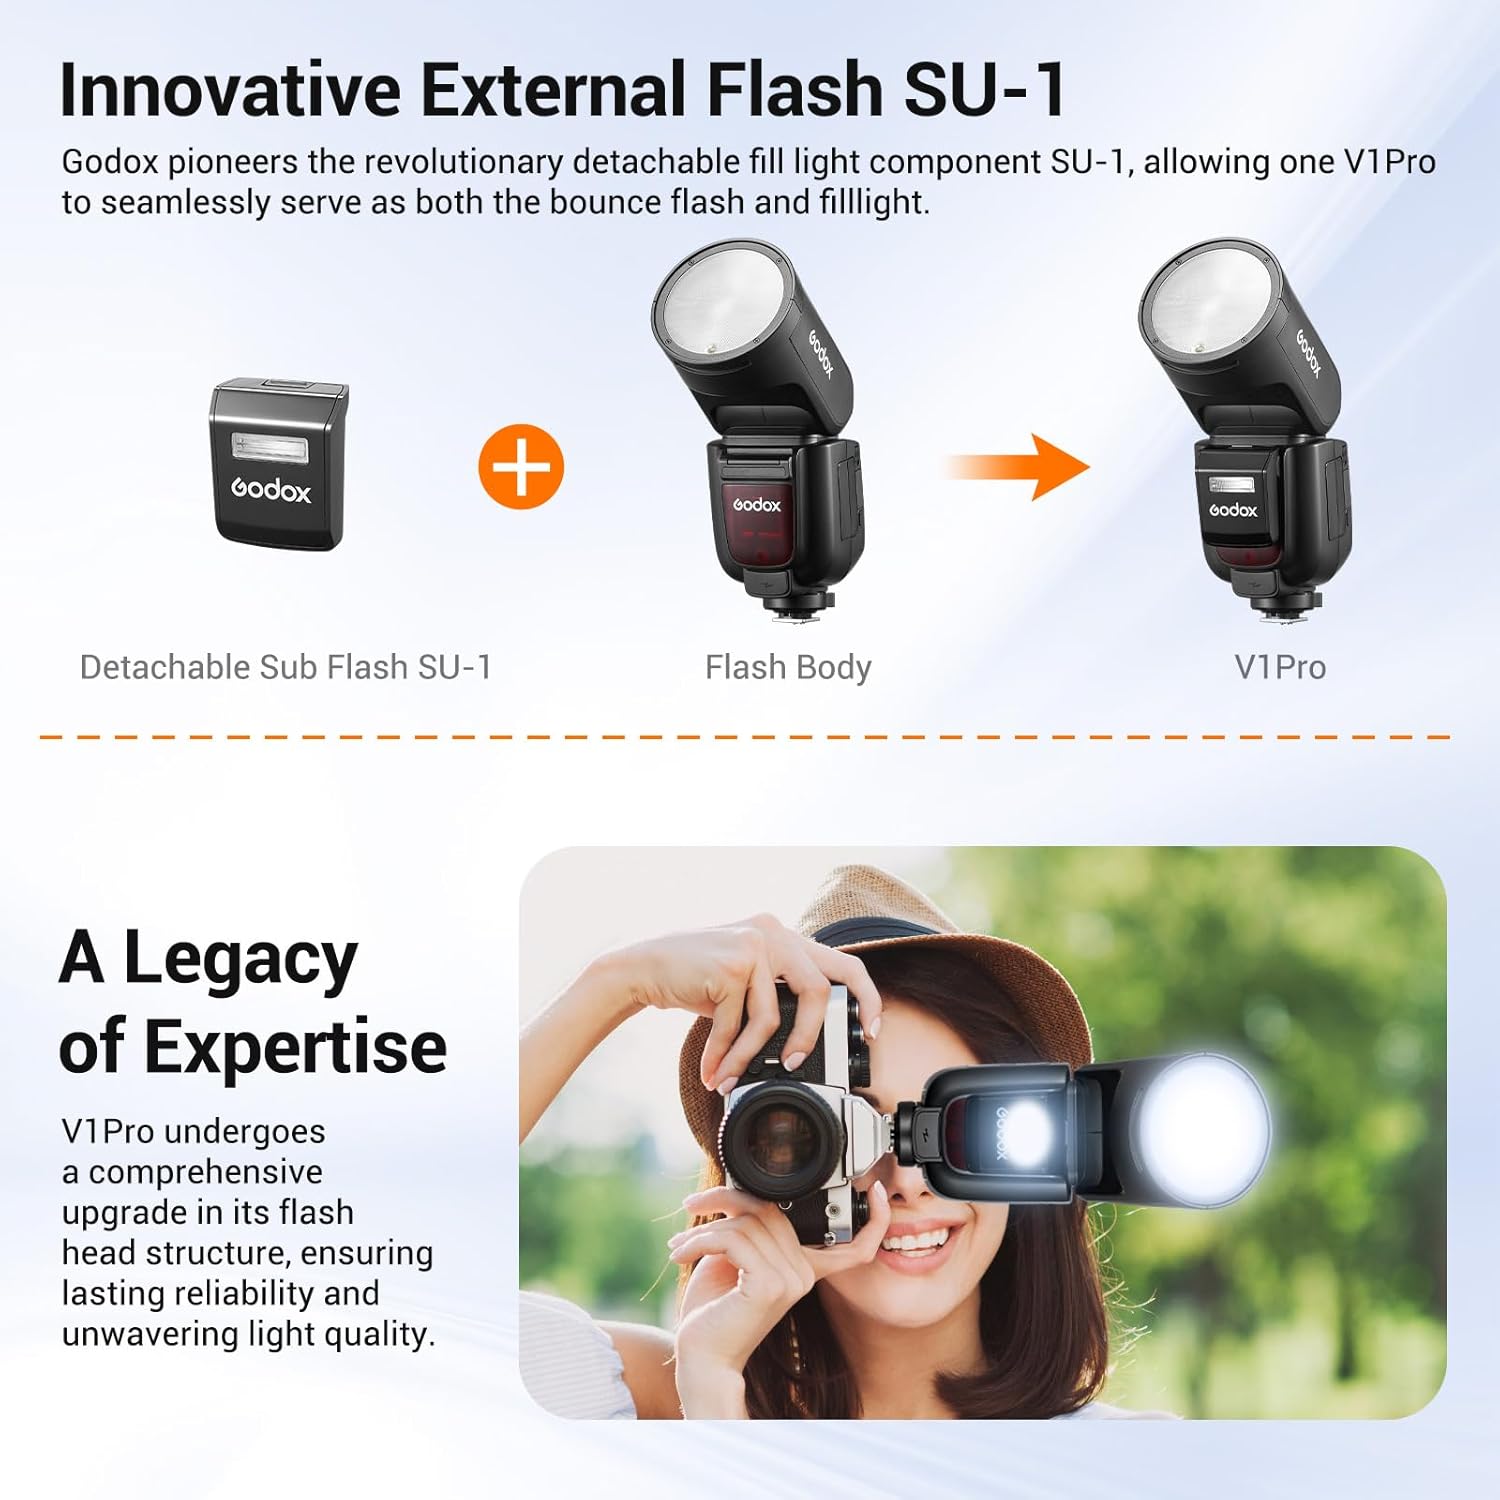
Image 3.2: Diagram illustrating the detachable SU-1 sub-flash component and its integration with the main GODOX V1 Pro F flash body.
4. Operating Instructions
4.1 Power On/Off
Press and hold the power button to turn the flash unit on or off. The LCD panel will illuminate upon power-on.
4.2 TTL/M Mode Switching
The GODOX V1 Pro F allows for quick switching between TTL (Through-The-Lens) automatic exposure and M (Manual) mode using a dedicated switch.
- TTL Mode: The flash automatically adjusts its output based on the camera's metering system.
- Manual Mode: You manually set the flash power output.

Image 4.1: Close-up of the GODOX V1 Pro F showing the one-click TTL/M switch for effortless mode transitions.
4.3 Wireless Transmission and Reception
The V1 Pro F supports 2.4G wireless transmission and reception, enabling integration with other Godox flashes and triggers. It can function as both a master unit to control other flashes or a slave unit to be controlled remotely.
- Refer to the specific instructions for your Godox wireless trigger or other flash units for detailed pairing and group settings.
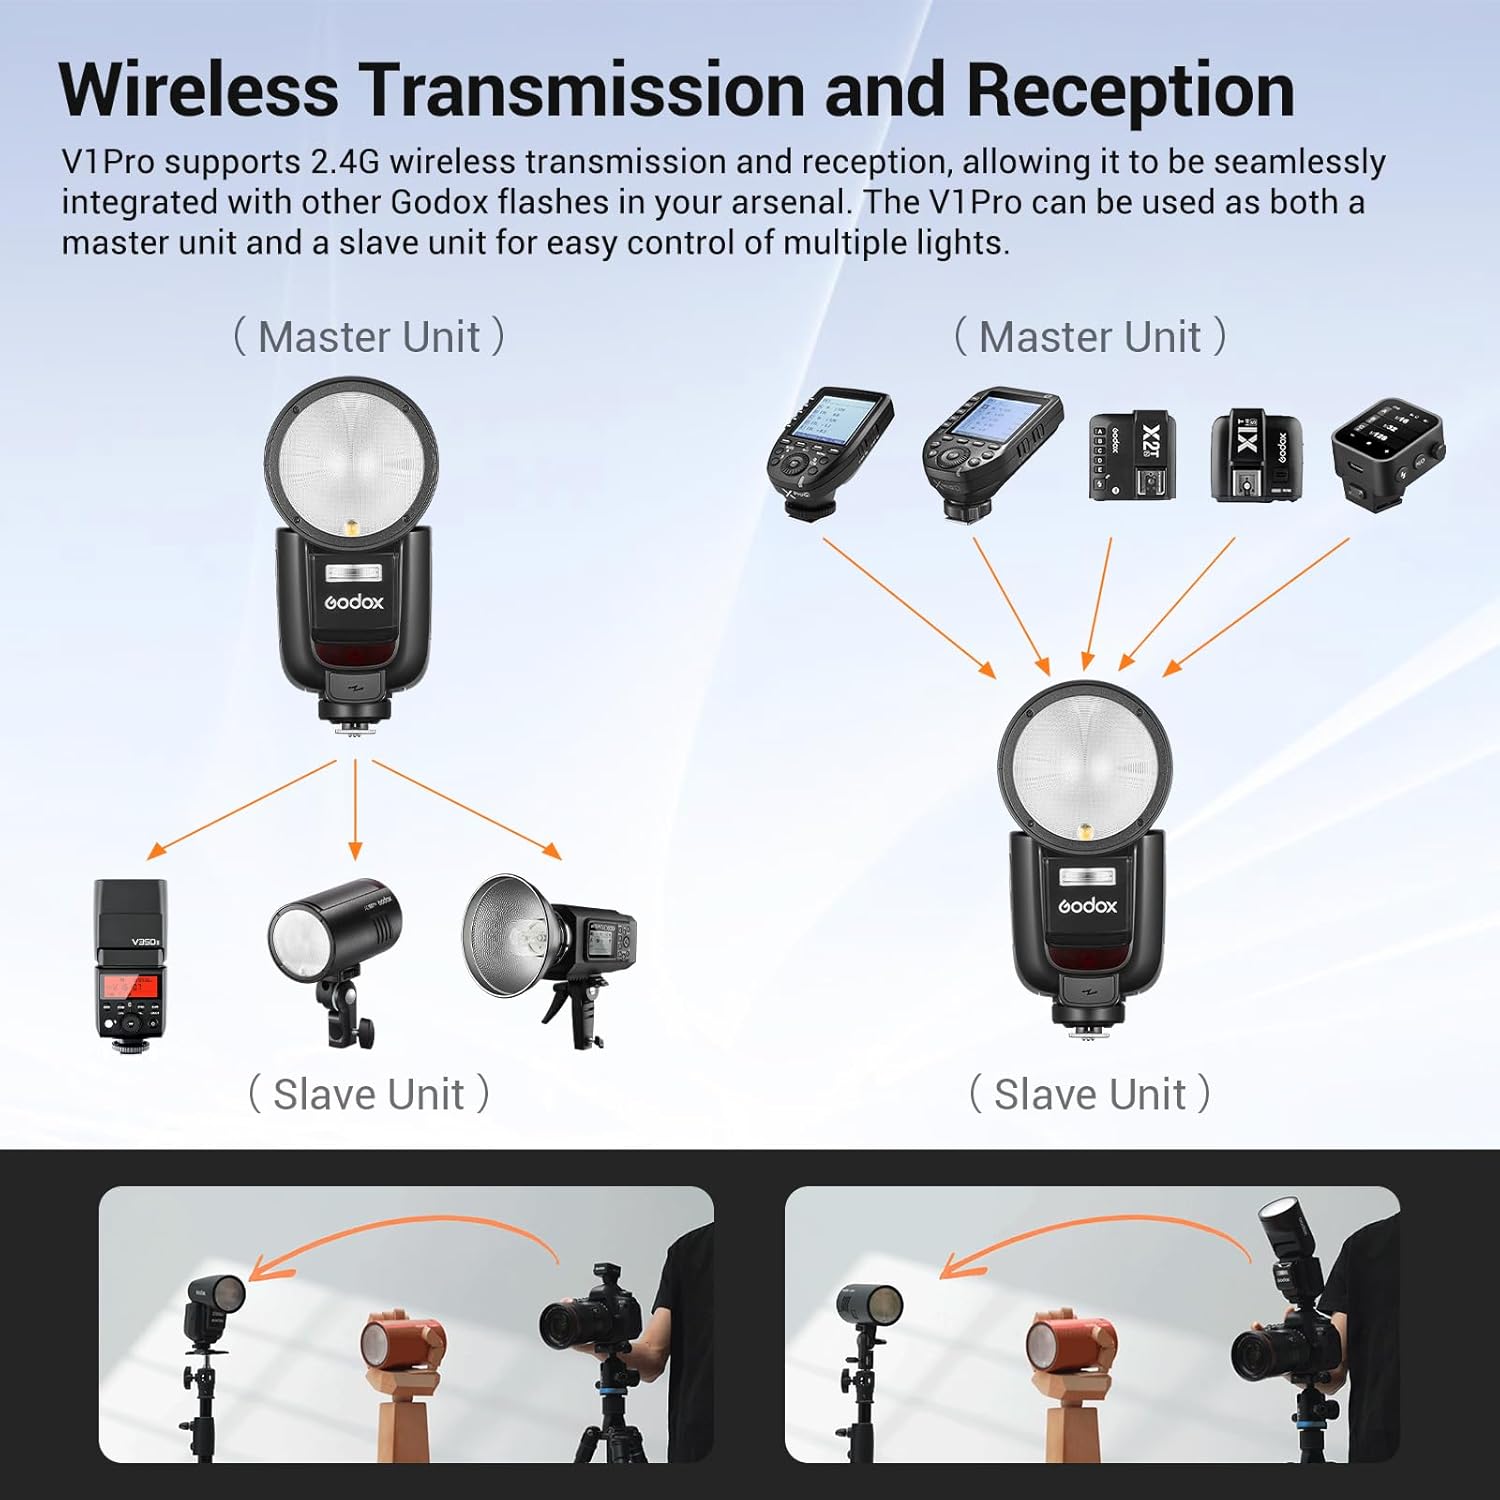
Image 4.2: Diagram illustrating the 2.4G wireless transmission and reception capabilities of the GODOX V1 Pro F, showing its use as both a master and slave unit in a multi-flash setup.
4.4 Modeling Light
The flash features a built-in 2W LED modeling light with 10 adjustable brightness levels. This allows for pre-visualization of lighting effects before taking a shot.
- Locate the modeling light control button on the flash unit.
- Press the button to turn the modeling light on/off.
- Use the adjustment dial or buttons to cycle through the 10 brightness levels.

Image 4.3: Demonstration of the GODOX V1 Pro F's 10-level adjustable LED modeling light, showing its effect on a subject's illumination.
4.5 Flash Head Swivel and Tilt
The flash head offers extensive flexibility for various lighting techniques, including direct and bounce flash.
- Horizontal Rotation: The flash head can swivel from 0° to 330°.
- Vertical Tilt: The flash head can tilt from -7° to 120°.
Adjust the flash head to direct light as needed for your desired effect.

Image 4.4: Visual representation of the GODOX V1 Pro F's flash head articulation, demonstrating its horizontal swivel (0° to 330°) and vertical tilt (-7° to 120°) capabilities.
4.6 Advanced Flash Functions
The GODOX V1 Pro F supports several advanced flash functions:
- High-Speed Sync (HSS): Allows the flash to synchronize with shutter speeds up to 1/8000s, useful for overpowering ambient light or using wide apertures in bright conditions.
- Multi-Flash (Stroboscopic Flash): Fires a series of rapid flashes during a single exposure to capture multiple movements of a subject.
- Front/Rear Curtain Sync: Synchronizes the flash with either the beginning or end of the shutter opening, useful for creative motion blur effects.
- Flash Exposure Compensation (FEC): Adjusts the flash output relative to the camera's metered exposure.
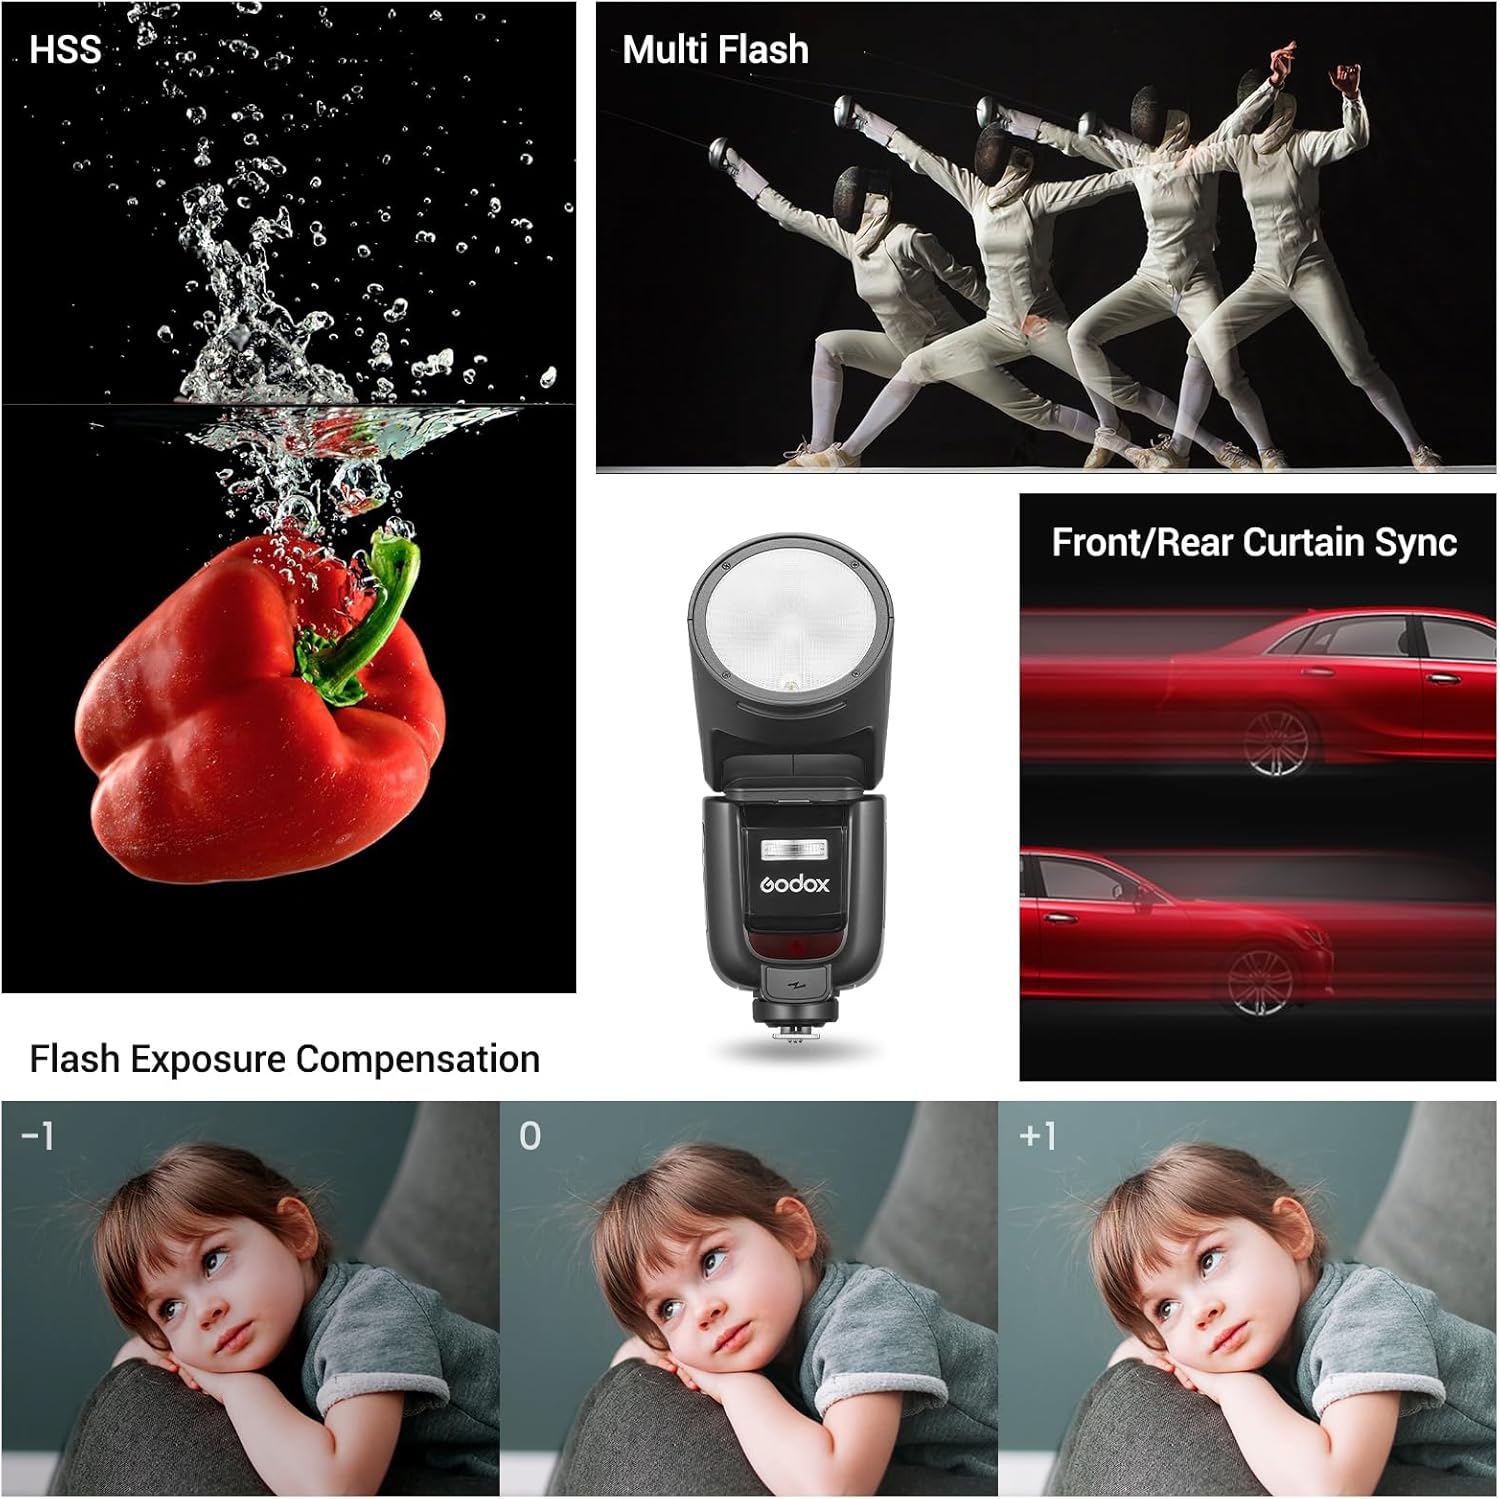
Image 4.5: Examples of advanced flash functions, including High-Speed Sync (HSS) for freezing fast motion, Multi-Flash for capturing sequential movements, Front/Rear Curtain Sync for motion trails, and Flash Exposure Compensation (FEC) for fine-tuning flash brightness.
5. Maintenance
5.1 Battery Care
- Always use the original GODOX battery and charger.
- Avoid fully discharging the battery frequently to prolong its lifespan.
- Store the battery in a cool, dry place when not in use.
- If storing for extended periods, charge the battery to approximately 50% capacity.
5.2 Cleaning
- Use the provided LETWING cleaning cloth or a soft, dry cloth to wipe the flash unit.
- Do not use solvents or abrasive cleaners.
- Keep the flash contacts clean and free from dust or debris.
5.3 Storage
- Store the flash in its storage bag when not in use to protect it from dust and scratches.
- Avoid storing the flash in extreme temperatures or high humidity.
6. Troubleshooting
If you encounter issues with your GODOX V1 Pro F flash, consider the following common solutions:
- Flash not firing:
- Ensure the flash is securely mounted on the camera's hotshoe.
- Check if the battery is sufficiently charged.
- Verify that the flash is powered on.
- Confirm that the camera's flash settings are correctly configured.
- Inconsistent flash output:
- Check battery level. Low battery can affect consistency.
- Ensure the flash head is clean and unobstructed.
- If using TTL, ensure the camera's metering mode is appropriate for the scene.
- Wireless connection issues:
- Verify that all units (master and slave) are set to the same channel and group.
- Ensure there are no significant obstructions between the master and slave units.
- Check battery levels on all wireless units.
For persistent issues, consult the official GODOX support resources or contact customer service.
7. Specifications
| Feature | Specification |
|---|---|
| Brand | GODOX |
| Model Number | V1Pro F |
| Compatible Mountings | Fuji cameras and TTL auto flash |
| Camera Flash Type | Hotshoe |
| Flash Sync Speed | 1/8000s (HSS) |
| Battery | 7.2V/2980mAh Lithium Battery (included) |
| Recycle Time | Approx. 1.5s |
| Continuous Shots (Full Power) | Up to 100 |
| Modeling Light | 2W LED, 1-10 levels adjustable |
| Wireless System | 2.4G Wireless Transmission and Reception |
| Flash Head Swivel | 0° to 330° horizontally |
| Flash Head Tilt | -7° to 120° vertically |
| Item Weight | 2.4 pounds |
| Package Dimensions | 9 x 7.5 x 3.75 inches |
8. Warranty and Support
For warranty information and technical support, please refer to the documentation included with your product or visit the official GODOX website. Keep your purchase receipt as proof of purchase for warranty claims.
For further assistance, you may contact GODOX customer service directly.