
1. Introduction
This manual provides detailed instructions for the assembly, operation, and maintenance of your Quictent Heavy Duty 12x21 FT Vertical Roof Metal Carport. Please read all instructions carefully before beginning assembly and retain this manual for future reference. Proper assembly and maintenance are crucial for the longevity and safe operation of your carport.
The Quictent carport is designed to provide robust shelter for vehicles, boats, and farm equipment. It features a vertical roof design for efficient drainage and a triple-layer rustproof metal construction for durability in various weather conditions.
2. Safety Information
- Ensure the carport is securely anchored to a stable foundation to withstand heavy snow, wind, and storms.
- Do not exceed the specified load capacity of 35 PSF (Pounds per Square Foot).
- Follow all assembly instructions carefully to prevent injury and ensure structural integrity.
- Always use appropriate safety gear, such as gloves and eye protection, during assembly.
- Assembly requires at least two people and appropriate ladders (6 ft, 8 ft, or 10 ft recommended).
- Verify all parts are present and undamaged before starting assembly. Contact customer support immediately for any missing or damaged components.
3. Setup and Assembly
The Quictent carport features a pre-drilled design to simplify assembly. Panels and beams arrive laser-cut with precision holes, significantly reducing installation time.
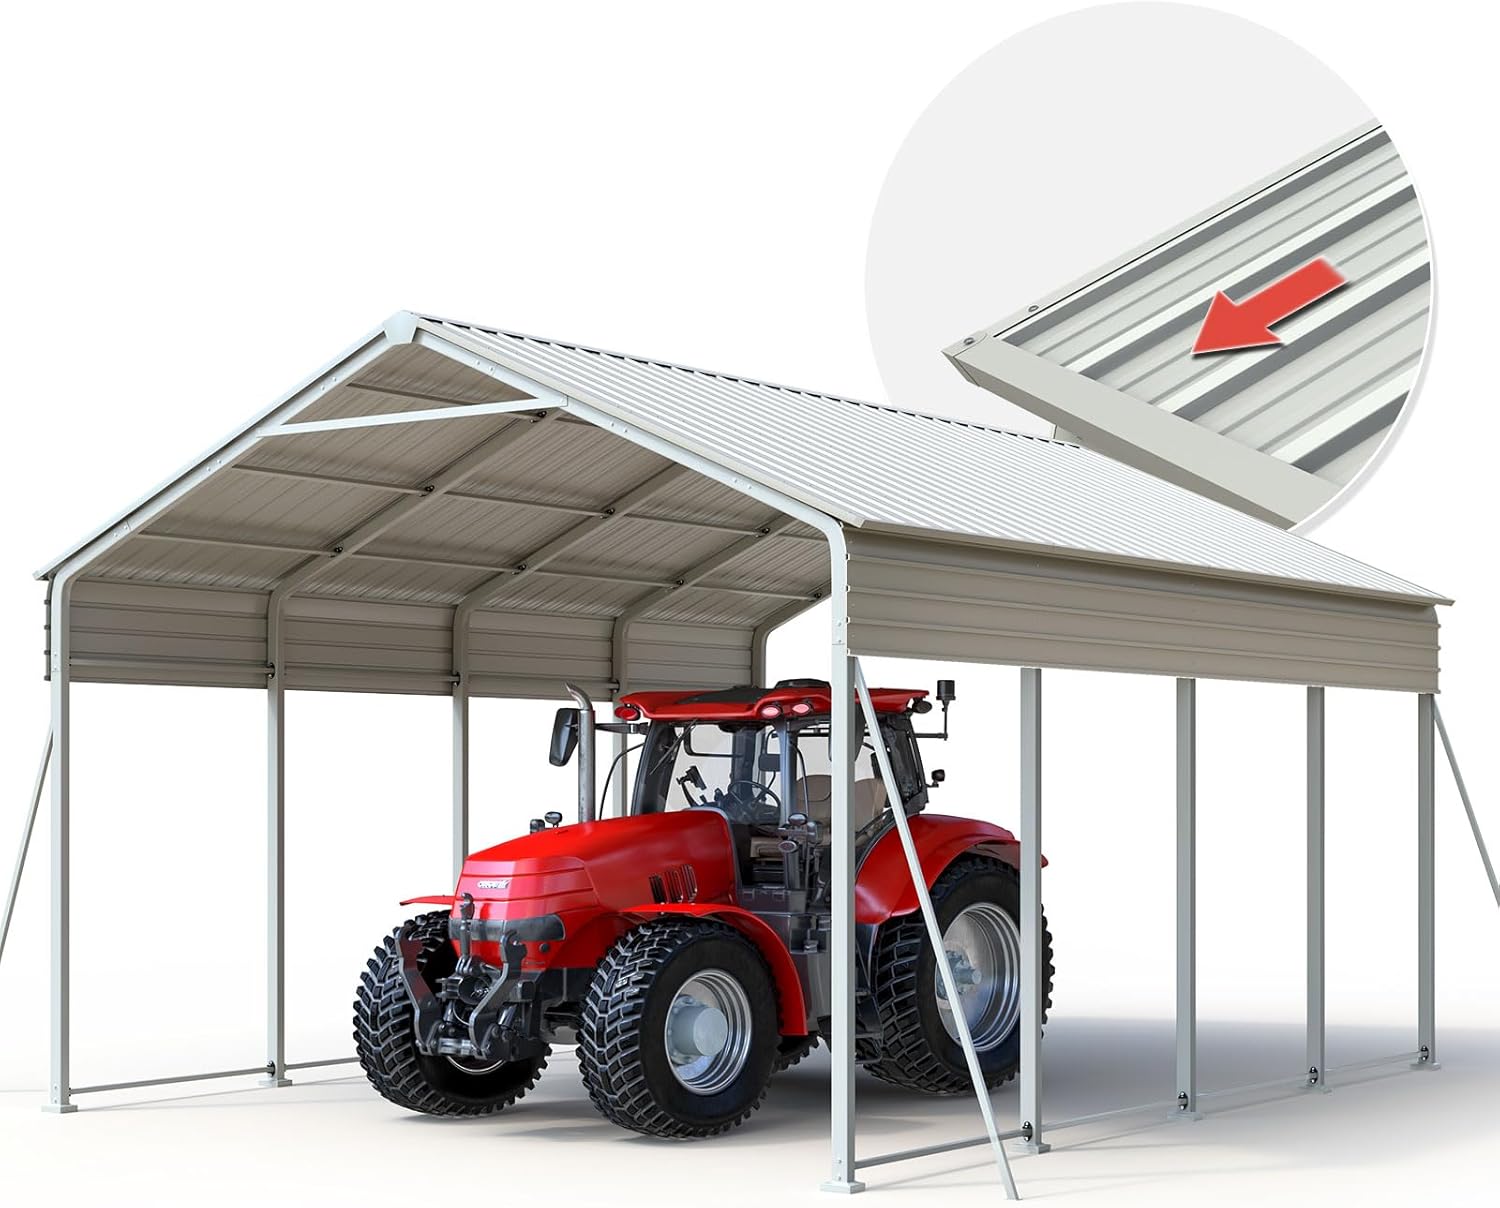
Image 3.1: Assembled Quictent 12x21 FT Carport providing shelter for a tractor.

Image 3.2: Detail of pre-drilled holes on carport components, indicating simplified screw installation.
3.1. Pre-Assembly Steps
- Site Preparation: Choose a level and stable area for installation. Ensure adequate clearance around the carport for assembly and future use.
- Unpacking: The carport typically arrives in multiple boxes (e.g., 3 boxes for the 12'x21' model). Unpack all components and verify against the parts list provided in your packaging.
- Organize Parts: Lay out all frame components, panels, and hardware. Magnetic parts bowls can be helpful for organizing fasteners.
3.2. Frame Assembly
- Begin by assembling the base frame, ensuring it is level and square before proceeding. This step is critical for proper panel alignment.
- Connect vertical support posts and horizontal beams according to the diagram in your specific assembly guide.
- Utilize the pre-drilled holes for all connections. Do not overtighten fasteners until the entire frame section is aligned.
3.3. Roof Panel Installation
- Install roof panels starting from one end, overlapping as indicated in the assembly guide.
- Secure panels using the provided anti-corrosion screws and rubber gaskets to ensure a leak-proof seal.
- Work systematically, ensuring each panel is properly seated and aligned before fastening.
3.4. Anchoring
- Once the frame and roof are assembled, securely anchor the carport to the ground using the included expansion anchor bolts.
- Proper anchoring is essential for stability, especially in areas prone to high winds or heavy snow.
Note: While pre-drilled holes significantly reduce assembly time, some users have reported minor alignment challenges. Careful attention to squaring the frame before panel installation is recommended.
4. Operating and Usage Guidelines
The Quictent carport is designed for multi-purpose use, offering protection for various items.

Image 4.1: The carport effectively shelters a boat during winter conditions.
4.1. Weather Resistance
- Vertical Roof Design: The vertical roof channels rain and snow instantly, preventing pooling and roof collapse. This design is particularly beneficial in heavy snow areas, reducing the need for manual debris cleanup.
- Load Capacity: The carport is engineered with a 35 PSF load capacity, featuring reinforced crossbars, ground bars, and leg supports to withstand heavy snow, wind, and storms.
- Triple-Layer Rustproof Roof: The roof panels consist of galvanized steel, an anti-corrosion coating, and UV-resistant paint, providing protection against rust, fading, and warping.

Image 4.2: Illustration of the vertical roof design, demonstrating effective water and snow drainage.

Image 4.3: Visual representation of the carport's heavy-duty load capacity (35 PSF) and the importance of expansion anchor bolts for secure ground installation.
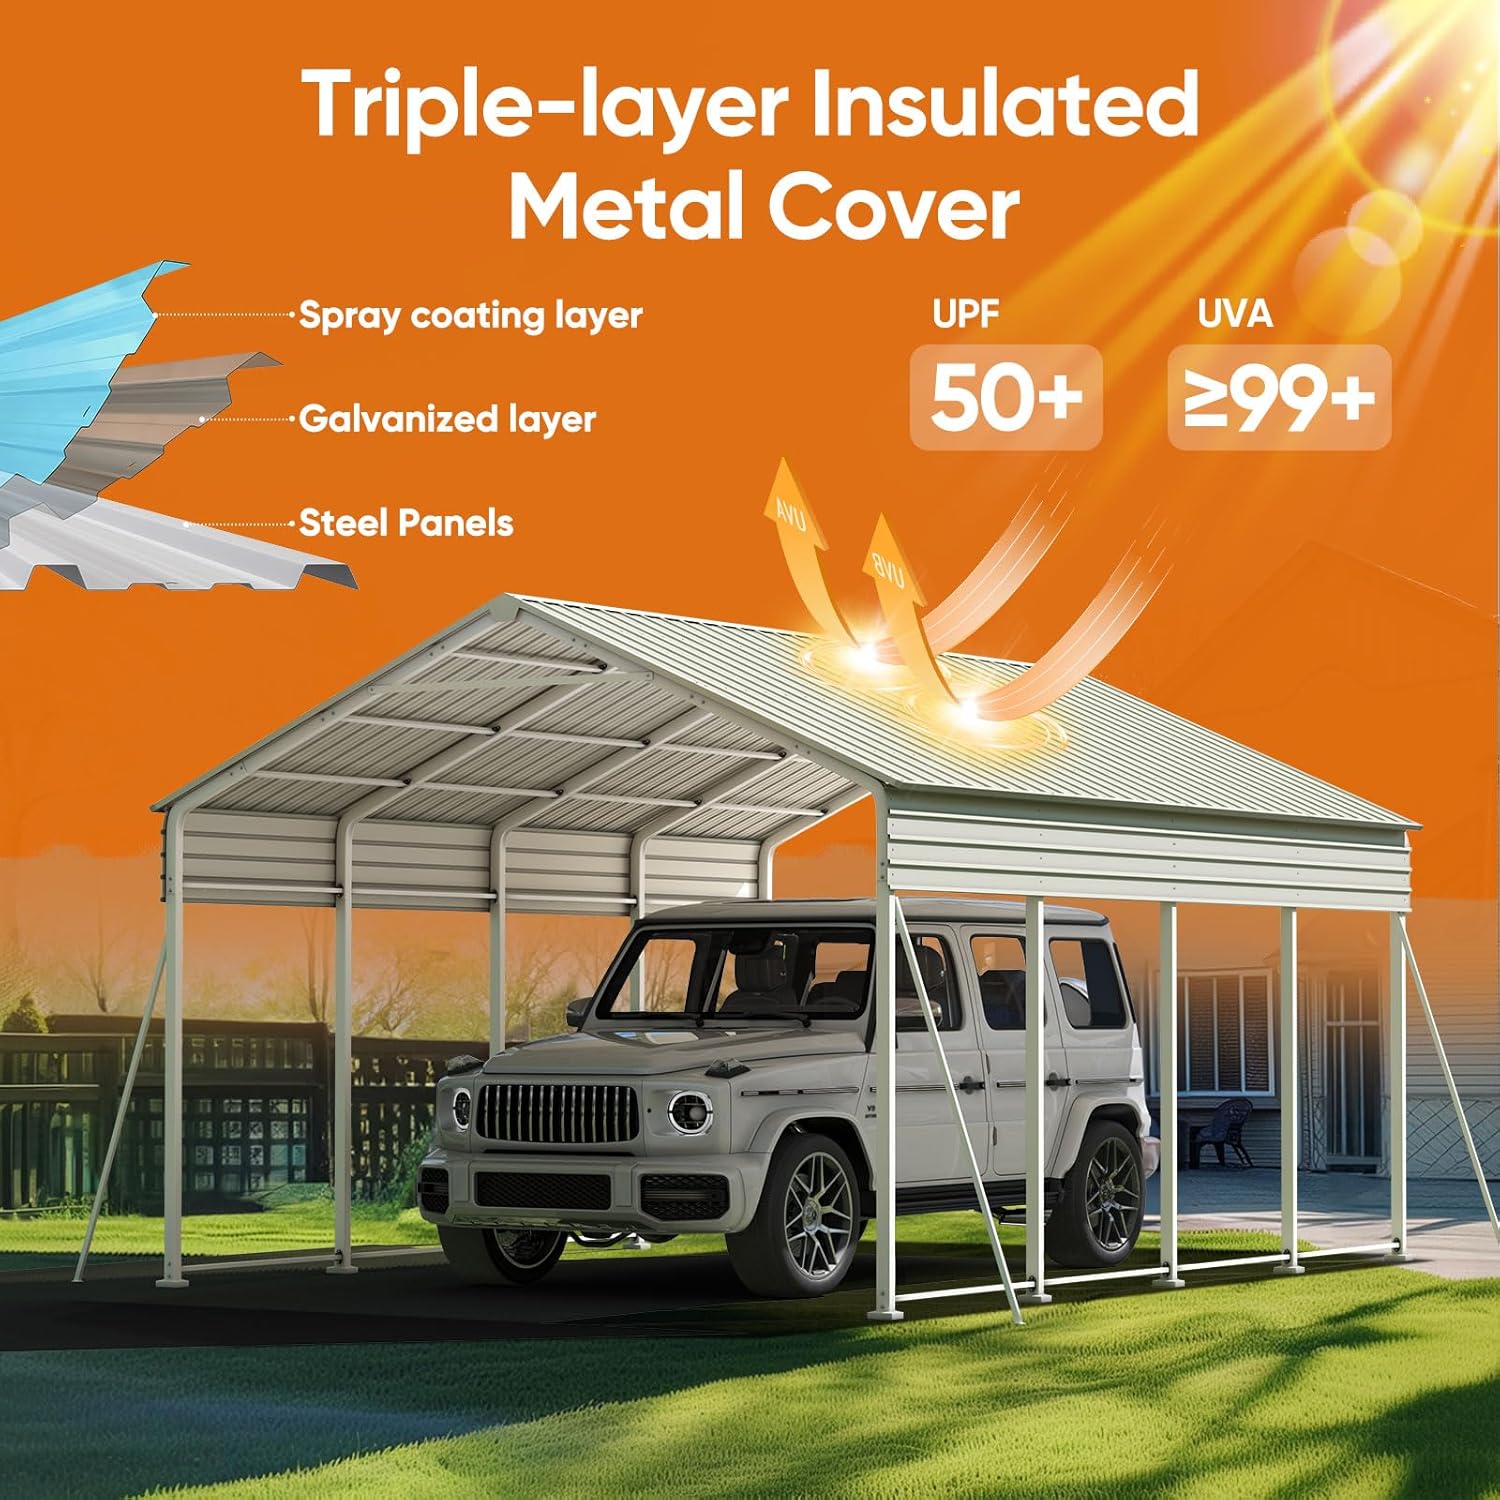
Image 4.4: Diagram detailing the triple-layer rustproof roof material, including spray coating, galvanized layer, and steel panels, offering UPF 50+ and UVA ≥99+ protection.
4.2. Versatile Applications
The carport's extended side eaves maximize coverage, making it suitable for:
- Cars and trucks
- RVs and campers
- Tractors and other farm equipment
- Outdoor storage for hay, tools, and other items
It can be installed in driveways, backyards, farms, or for commercial use.
5. Maintenance
The Quictent metal carport is designed for low maintenance, offering a durable alternative to fabric or plastic shelters.
- Cleaning: Simply rinse the metal surfaces with water to remove dirt and debris. Avoid abrasive cleaners or harsh chemicals that could damage the protective coatings.
- Inspection: Periodically inspect all fasteners and connections to ensure they remain tight. Re-tighten any loose bolts as needed.
- Anchoring Check: Regularly check the ground anchors for stability, especially after severe weather events. Ensure they remain firmly secured.
- Snow Removal: While the vertical roof design aids in snow shedding, in areas with exceptionally heavy snowfall, it is advisable to monitor snow accumulation and safely remove excessive loads if necessary to prevent structural strain, even with the 35 PSF load capacity.
6. Troubleshooting
- Missing Parts: If any parts are missing upon delivery, contact Quictent customer support immediately with your purchase details and a list of missing components.
- Difficulty with Assembly/Alignment: Ensure the base frame is perfectly level and square before attaching roof panels. Minor adjustments to bolt tightness during assembly can help align components. Refer to the detailed assembly diagrams in your product packaging.
- Roof Leaks: Verify that all roof panels are correctly overlapped and that all anti-corrosion screws are installed with their rubber gaskets, providing a tight seal. Check for any damaged panels or improperly seated gaskets.
- Structural Instability/Shaking: Confirm that all frame bolts are securely tightened and that the carport is properly anchored to the ground using the expansion anchor bolts. Ensure the ground surface is firm and level.
- Coating Issues (Bubbling/Rippling): While rare, if you observe significant defects in the spray coating, document the issue with photographs and contact customer support for assistance.
7. Specifications
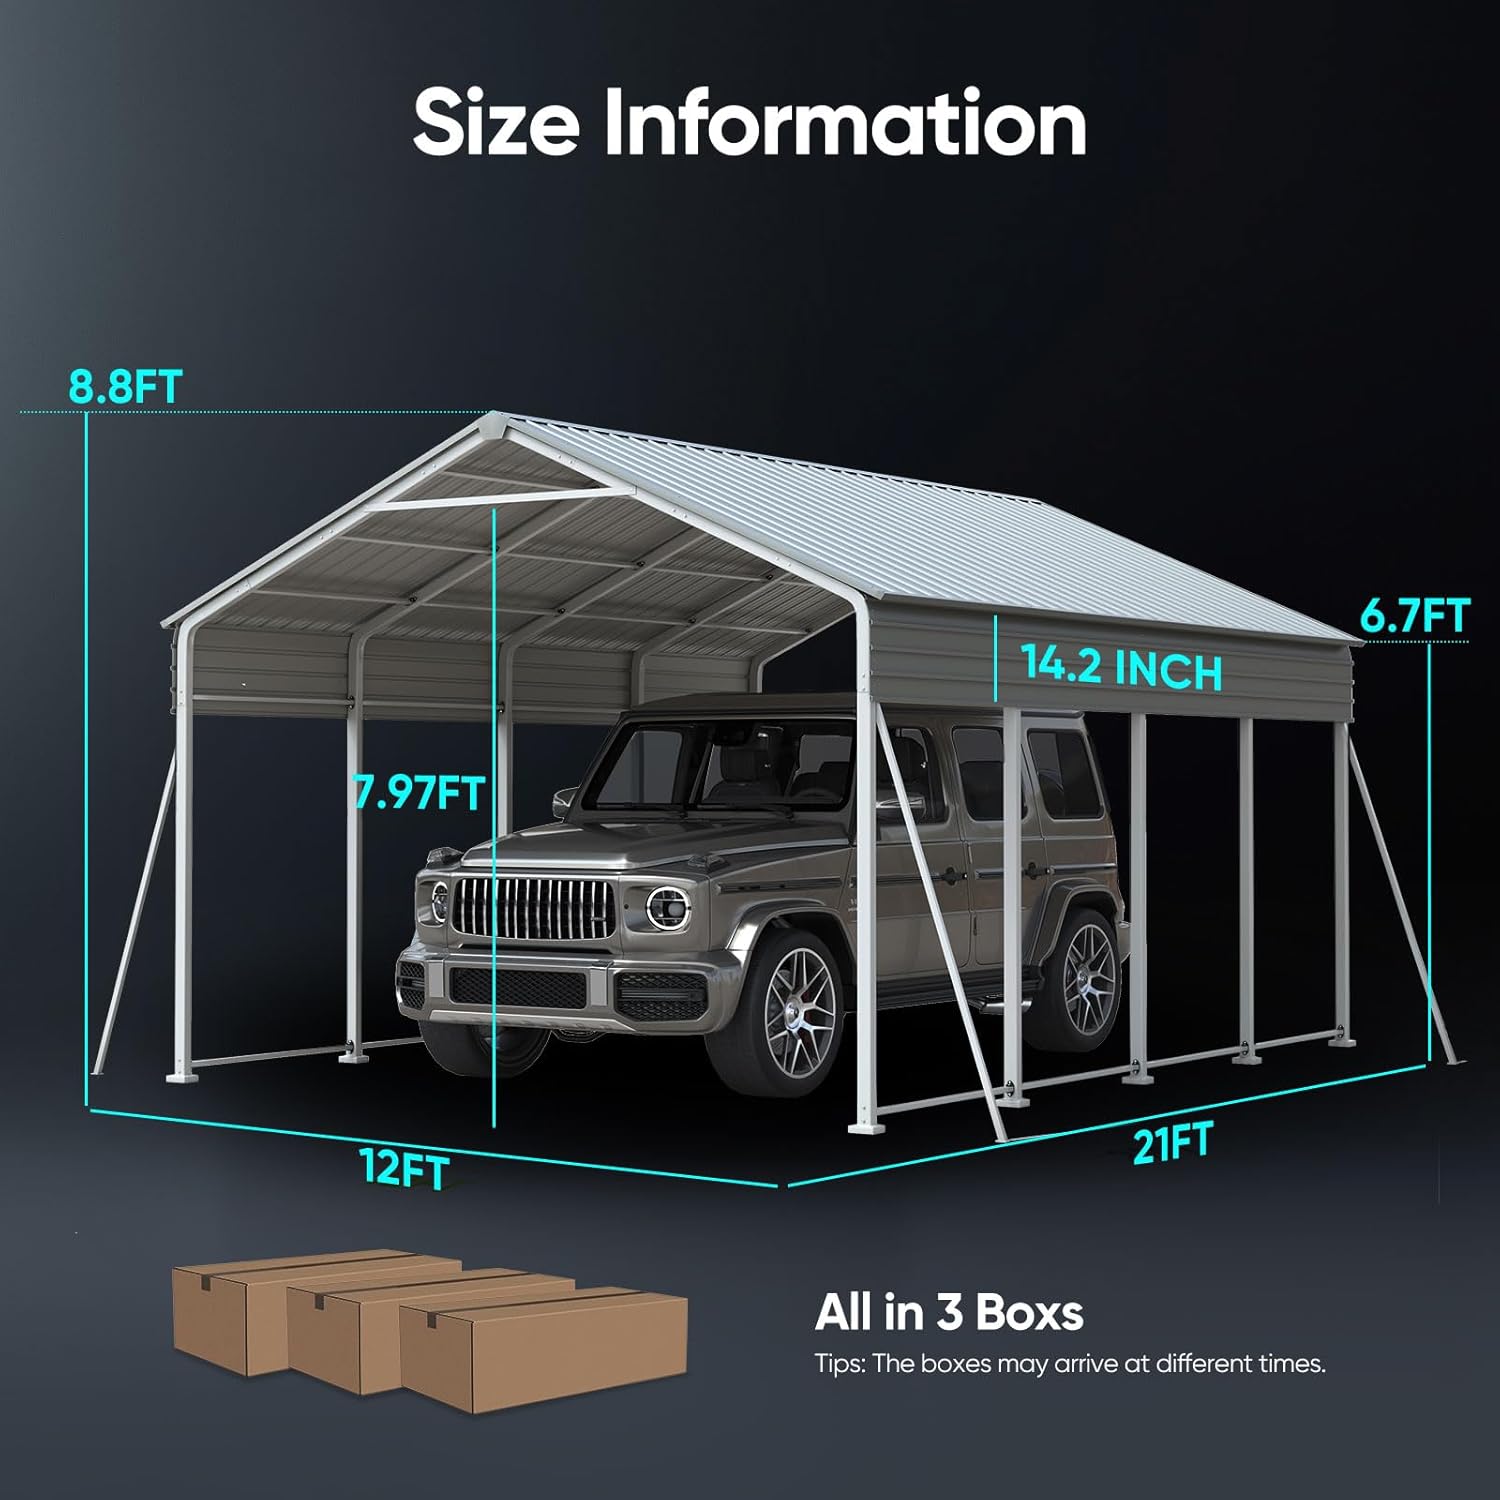
Image 7.1: Dimensional overview of the Quictent 12x21 FT Carport, showing length, width, and height.
| Feature | Detail |
|---|---|
| Brand | Quictent |
| Model Number | CP1152 |
| Product Dimensions (L x W x H) | 252"L x 144"W x 105.6"H (21'L x 12'W x 8.8'H) |
| Item Weight | 384.92 Pounds |
| Material | Metal (Alloy Steel Frame, Q195 Steel) |
| Roof Style | Vertical Roof |
| Load Capacity | 35 PSF (Pounds per Square Foot) |
| Water Resistance Level | Waterproof |
| Ultraviolet Light Protection | Yes (UPF 50+, UVA ≥99+) |
| Assembly Required | Yes |
| Color | White |
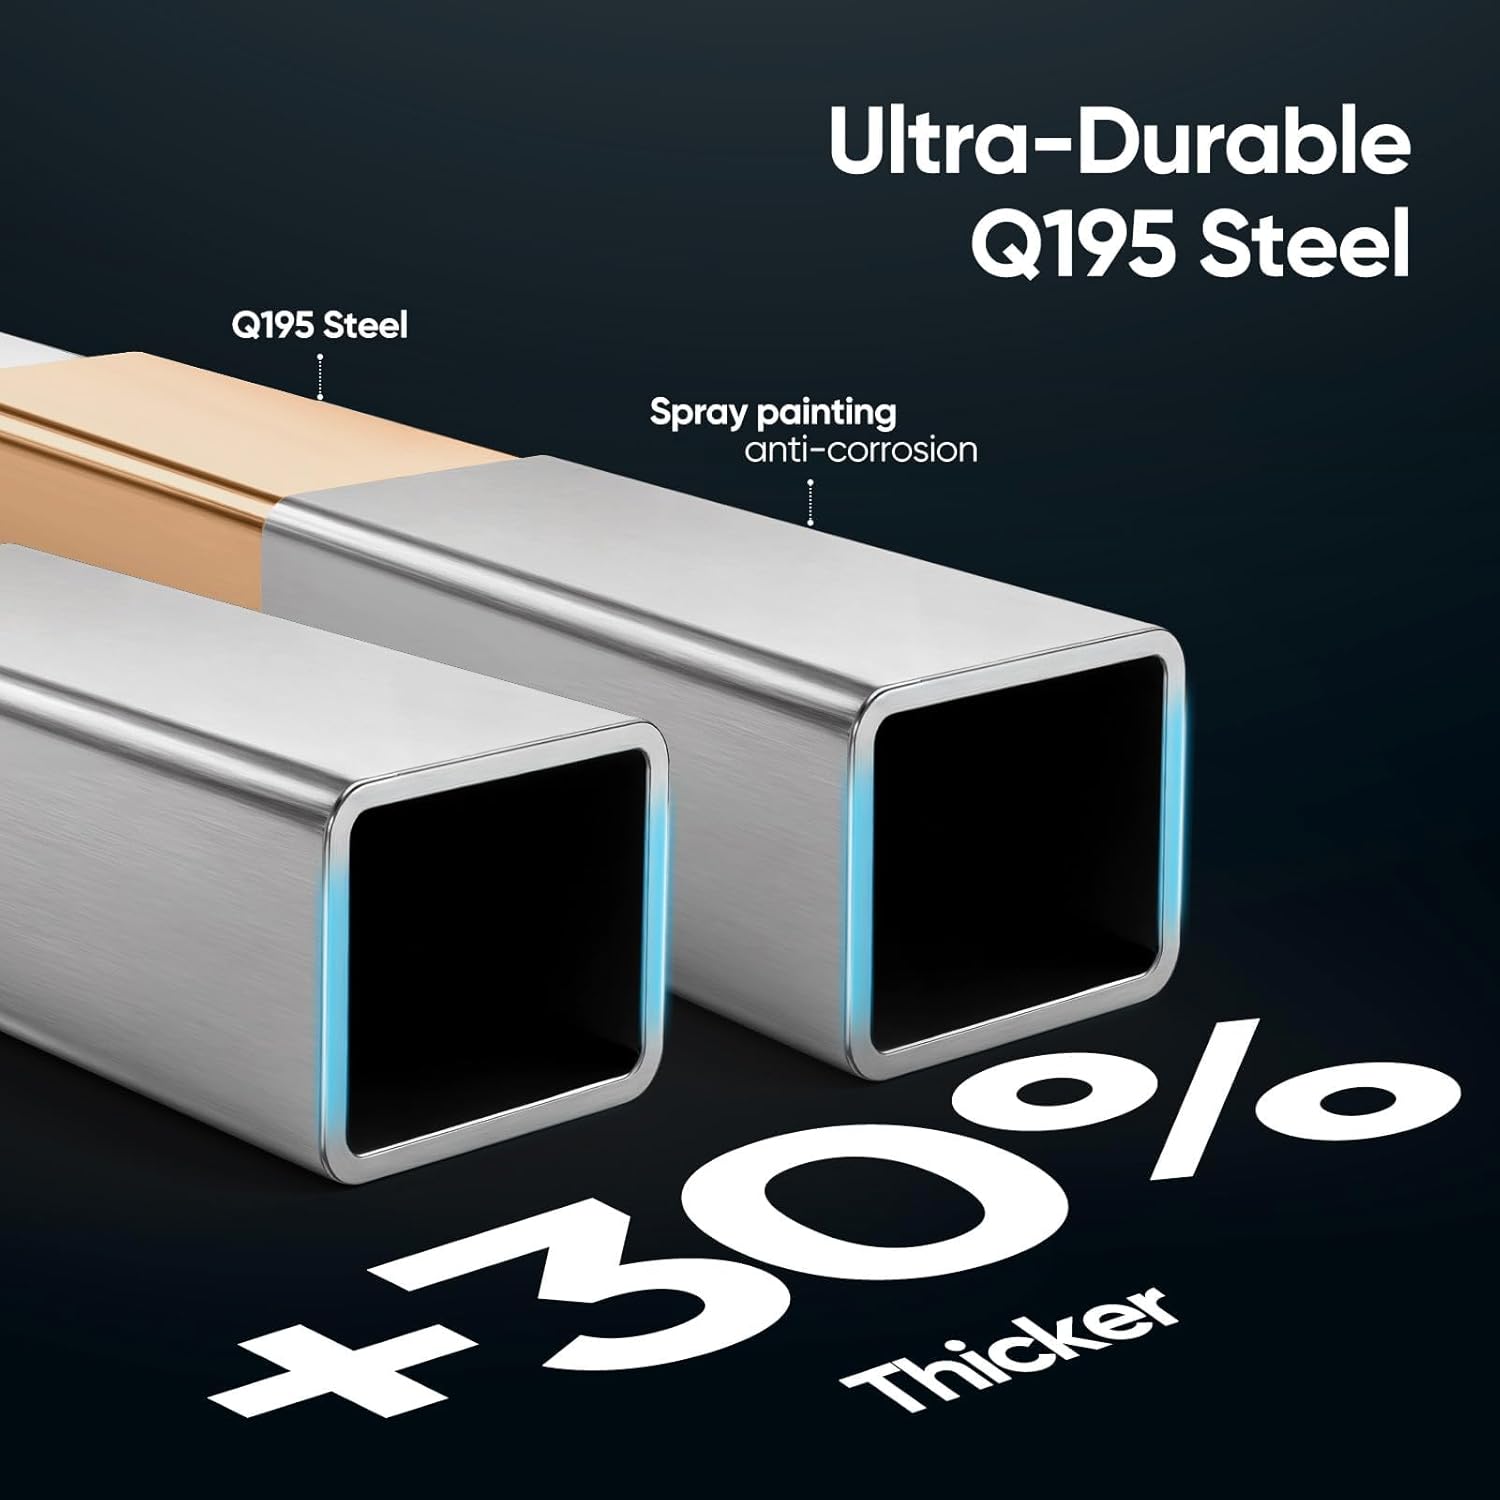
Image 7.2: Illustration highlighting the use of Ultra-Durable Q195 Steel, which is 30% thicker than standard steel, enhancing structural integrity.
8. Warranty and Support
Quictent stands behind the quality and performance of this carport with a 10-Year Coverage. This warranty ensures reliable use for years.
For any questions, missing parts, or warranty claims, please contact Quictent customer support. Refer to your purchase documentation for specific contact information or visit the official Quictent website.