
1. Introduction
This manual provides essential information for the safe and correct assembly, operation, and maintenance of your ALAULM 10'x 14' Outdoor Hardtop Wall Mounted Lean-to Gazebo. Please read all instructions carefully before beginning assembly and retain this manual for future reference.
Safety Information
- Assembly Team: This gazebo should be assembled by 3-5 people to ensure stability and safety.
- Ground Anchoring: Always secure the ground spikes properly to prevent accidents.
- Caution: Be cautious during assembly and disassembly to avoid potential hazards.
- Wind Resistance: After installing the ground stakes, the structure can withstand gusts up to 40 mph.
2. Package Contents
Your ALAULM Hardtop Gazebo is delivered in multiple boxes. Please verify all parts are present and undamaged before beginning assembly. Refer to the included parts list and diagrams for identification.

Figure 2.1: The gazebo components are typically delivered in three separate boxes.
Parts List Overview
Detailed parts lists with alphanumeric labels are provided in the assembly diagrams. Ensure all columns, beams, panels, and hardware are accounted for.
Video 2.1: An animated overview of the gazebo components and assembly steps. This video provides a visual guide to identifying parts and understanding the construction sequence.
3. Setup and Assembly Instructions
Follow these steps carefully for proper assembly. It is recommended to have 3-5 people for this process.
3.1 Frame Assembly
- Unpack Components: Carefully unpack all boxes and lay out components on a clean, flat surface. Organize parts by their labels (A1, A2, B1, etc.).
- Assemble Columns: Connect the upper and lower parts of the rear columns (A1, A2, A3) and front columns (A4, A5) using the provided column inserts (J1) and fasteners (EE, FF). Ensure all connections are secure.
- Attach Crossbars: Connect the front and rear parts of the left and right crossbars (B1, B2, B3, B4) using crossbeam inserts (J2) and fasteners (FF).
- Form the Base Structure: Connect the assembled columns and crossbars to form the rectangular base frame. Use diagonal braces (H1, H2) and fasteners (GG, KK) for enhanced stability.
Video 3.1: Visual guide for assembling the main frame structure of the gazebo.
3.2 Roof Structure Assembly
- Install Intermediate Beams: Attach the long (E1) and short (E2) intermediate beams to the main frame using side beam connectors (Y1) and fasteners (GG).
- Secure Side Beams: Connect the right long (F1), right short (F2), left long (F3), and left short (F4) side beams.
- Attach Wall Brackets: Secure the retainer plates (V) to the wall-mounted side of the frame using expansion bolts (UU) and round head nails (PP).

Figure 3.1: The fully assembled gazebo, showcasing its wall-mounted design and integrated seating area.

Figure 3.2: Detail of the sturdy and stable design, showing four screws used to connect the gazebo to the wall for improved stability.
3.3 Roof Panel Installation
- Prepare Sun Panels: Remove the protective surface film from all sun panels (Q).
- Slide in Panels: Carefully slide the sun panels (Q, Q1, Q2, Q3, Q4) into the designated grooves on the roof frame. Ensure they are properly aligned and seated.
- Secure Panels: Use sunlight panel strips (L1) and middle stoppers (L2) to secure the panels in place.
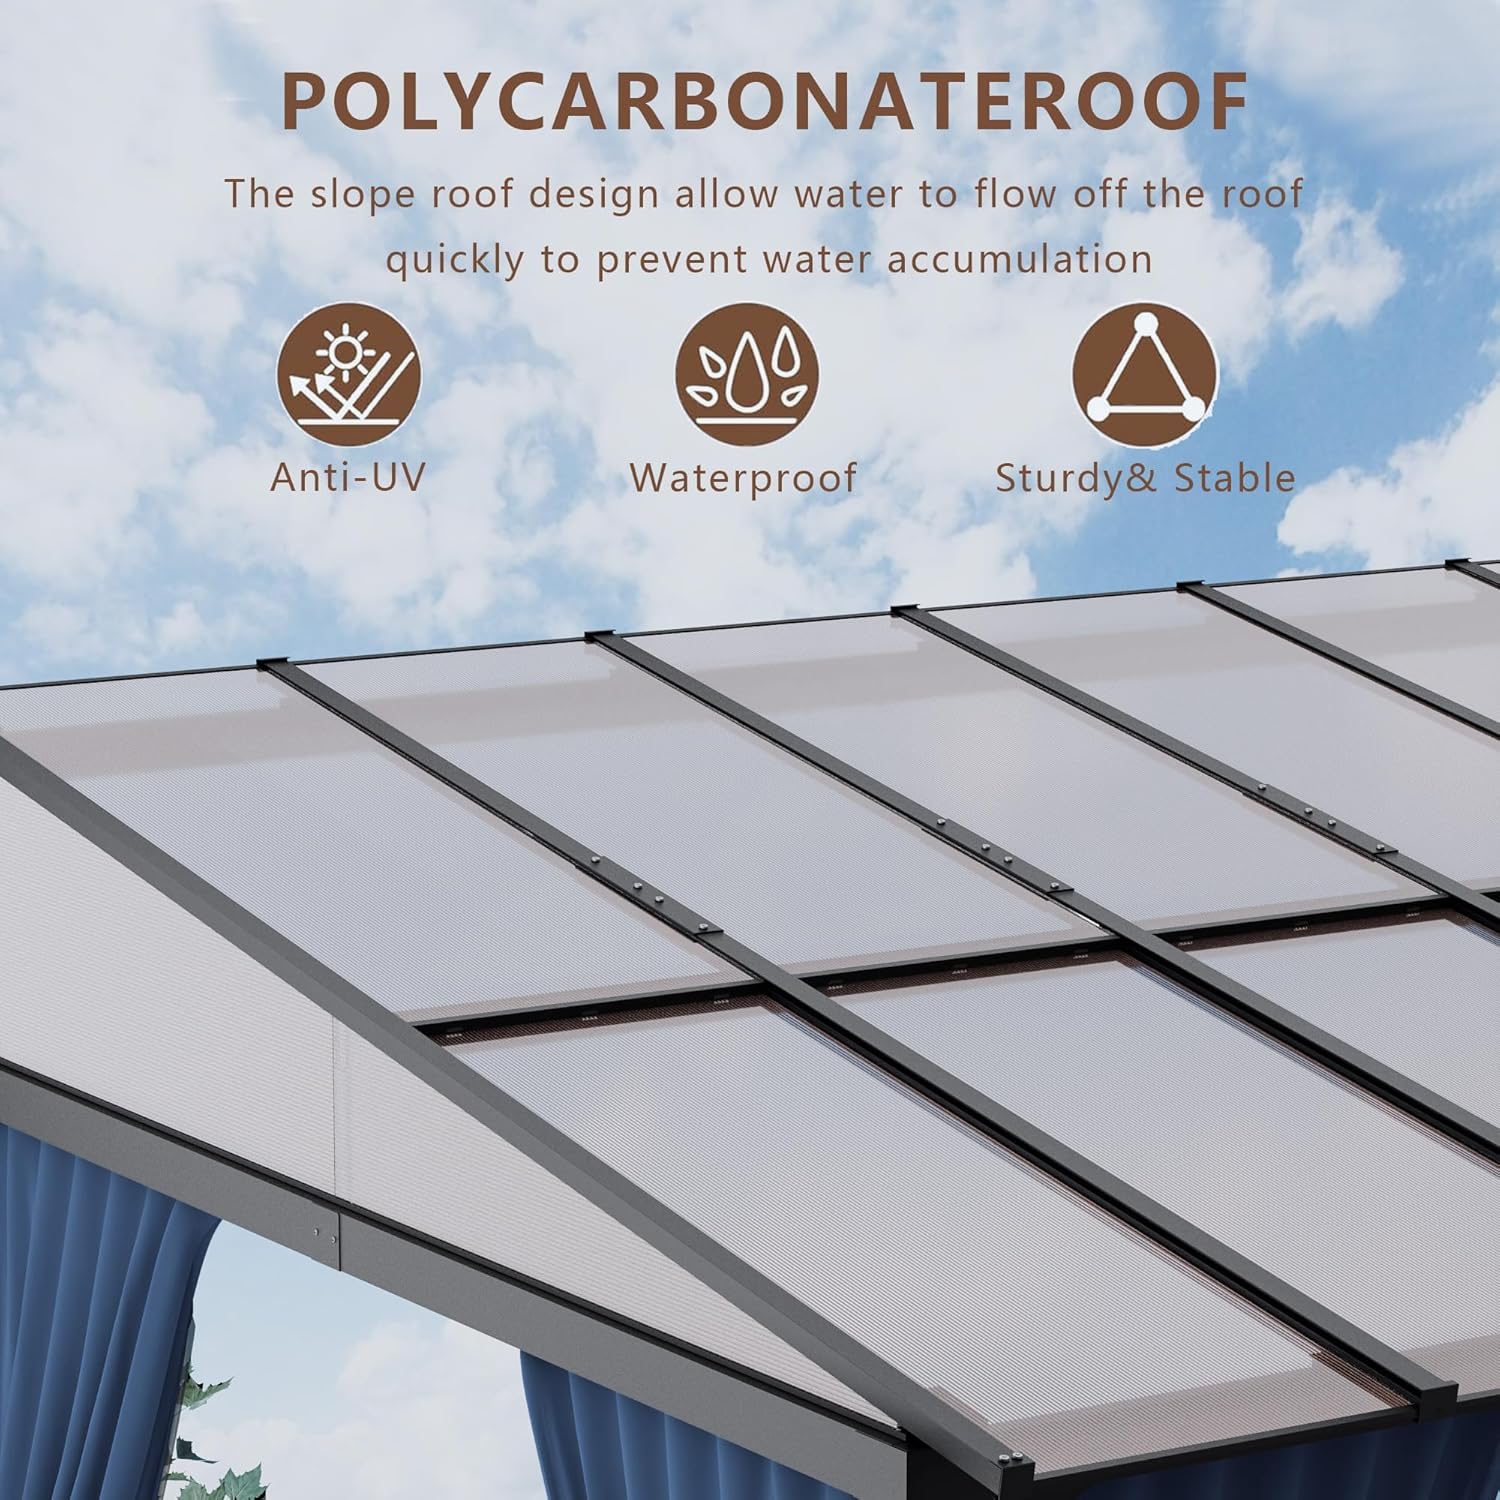
Figure 3.3: The polycarbonate roof panels are designed to be anti-UV, waterproof, and sturdy.

Figure 3.4: The sunshine panels are effective in blocking UV rays and are waterproof.
3.4 Curtains and Netting Installation
- Install Mosquito Netting Tracks: Attach the side (T1, T2) and front (T3, T4) mosquito net tubes, along with the long side (T5, T6) and long side center (T7) mosquito net tubes, using crossbeam ferrules (J6) and mosquito netting rings (HH).
- Hang Curtains and Netting: Attach the mosquito nets (V1, V2) and surrounding cloths (U1, U2) to the installed tracks using the mosquito netting rings (HH).
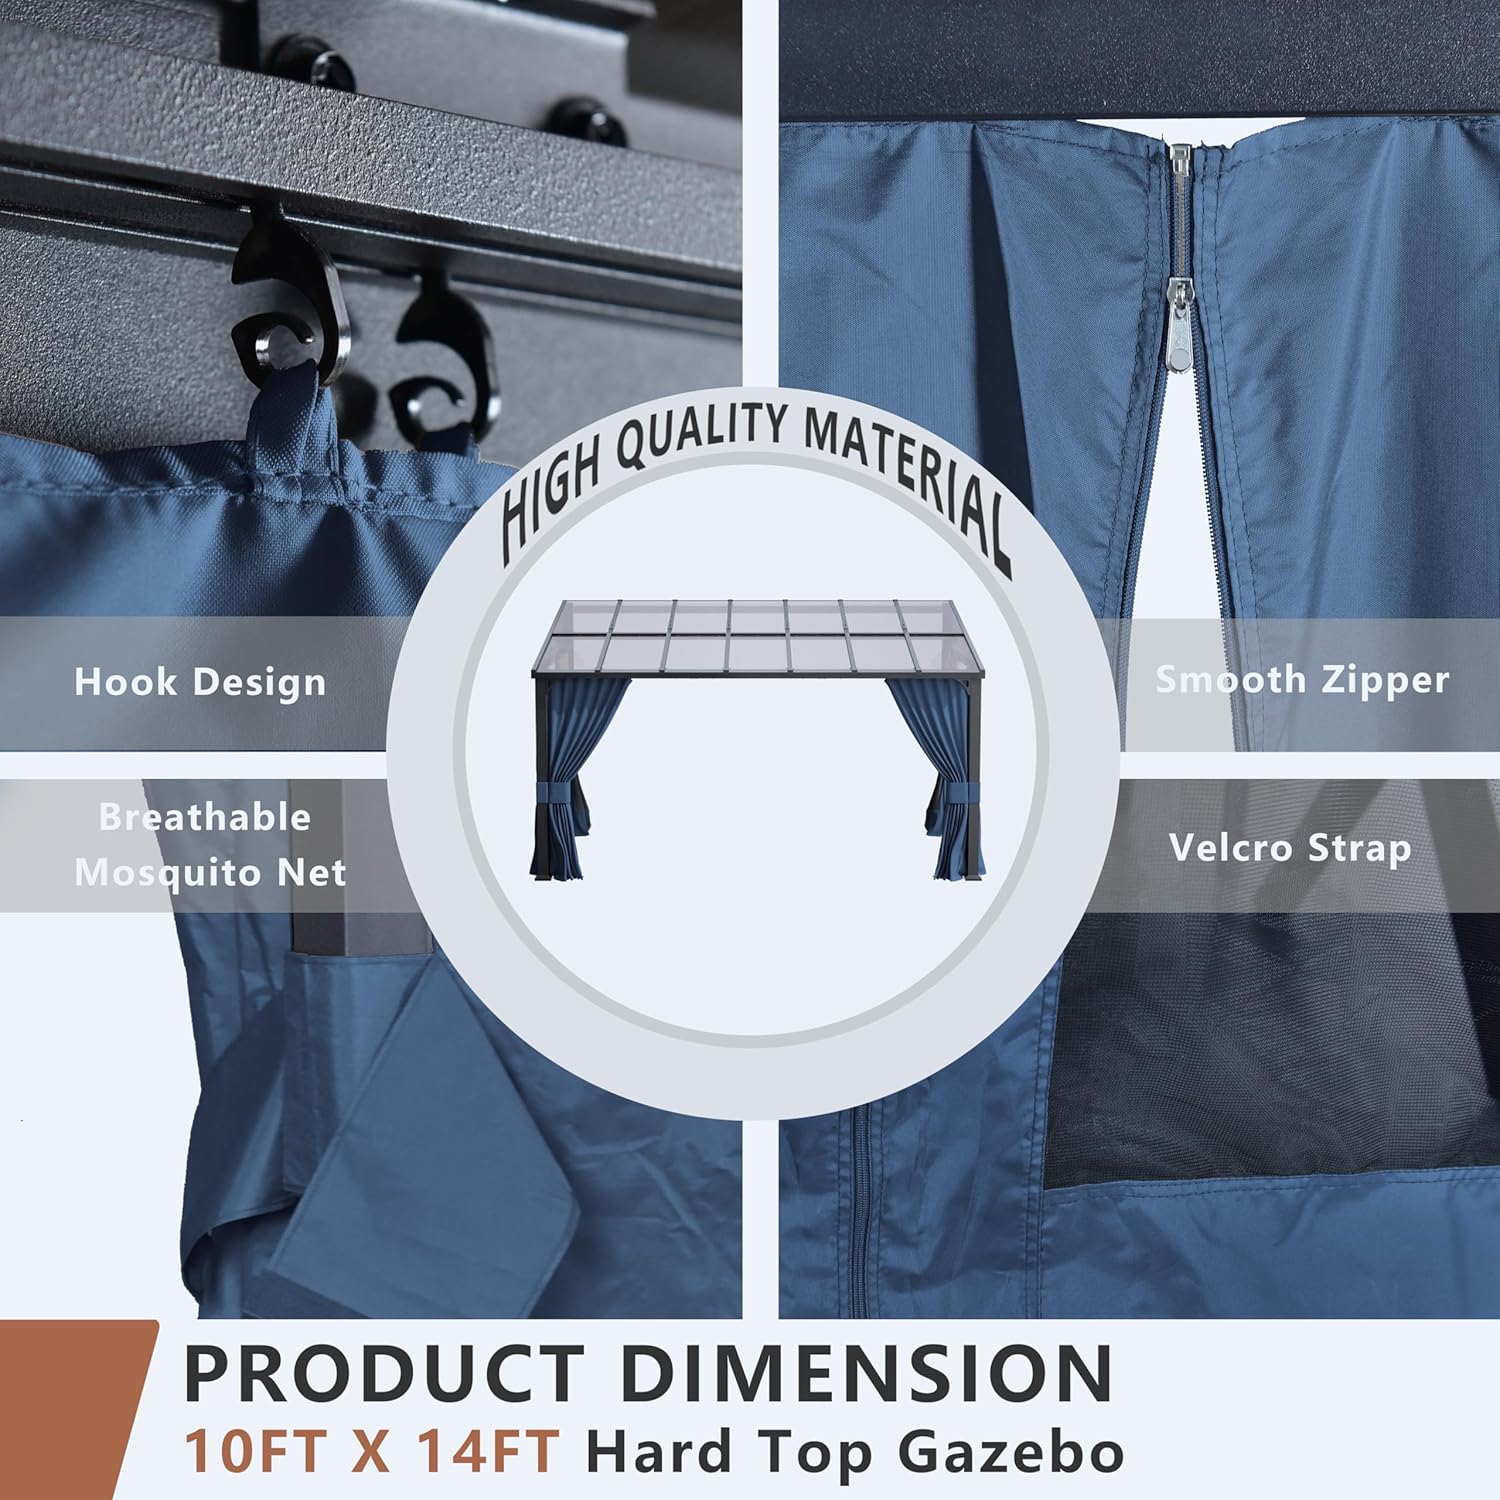
Figure 3.5: Details of the curtain and netting system, including hook design, smooth zippers, breathable mosquito net, and Velcro straps.

Figure 3.6: The removable curtains and netting offer good colorfastness, are waterproof, UV resistant, and feature a lightweight design for air circulation.
4. Operating Instructions
Your ALAULM Hardtop Gazebo is designed for versatile outdoor use, offering shade, protection, and privacy.
4.1 Adjusting Curtains and Netting
- Dual-Track System: The gazebo features a dual-track sliding system for curtains and netting, allowing them to be used independently.
- Insect Protection: Deploy the mesh netting to effectively keep out insects, creating a more comfortable and breathable environment.
- Privacy and Shade: Use the curtains for added privacy or to block direct sunlight. They can be tied back with Velcro straps when not in use.

Figure 4.1: The gazebo in a fully open configuration, allowing maximum light and air circulation.

Figure 4.2: The gazebo in a semi-open configuration, with the mesh netting providing insect protection while maintaining visibility.

Figure 4.3: The gazebo in a fully closed configuration, offering maximum privacy and protection from elements.
4.2 Roof Functionality
- UV Protection: The translucent greenish-blue polycarbonate panels provide optimal UV protection, reducing sun exposure.
- Efficient Drainage: The sloped roof design ensures efficient drainage, preventing water accumulation during rain.
Video 4.1: Demonstrates the gazebo's ability to provide shelter during rainy conditions, allowing outdoor relaxation.
5. Maintenance
Regular maintenance will extend the lifespan and preserve the appearance of your gazebo.
- Cleaning Frame: Clean the aluminum-iron frame with a mild soap solution and water. Rinse thoroughly and dry to prevent water spots. Avoid abrasive cleaners.
- Cleaning Roof Panels: Gently clean polycarbonate panels with a soft cloth, mild soap, and water. Do not use harsh chemicals or scrub aggressively to avoid scratching.
- Cleaning Fabric: Curtains and netting can be spot cleaned with mild detergent and water. For deeper cleaning, follow care instructions on the fabric tags. Ensure they are completely dry before storing or closing for extended periods to prevent mildew.
- Hardware Check: Periodically inspect all bolts, screws, and ground anchors to ensure they are tight and secure. Tighten as needed.
- Seasonal Care: In areas with heavy snow, it is recommended to clear snow from the roof to prevent excessive weight accumulation. During strong winds or severe weather, consider removing curtains and netting to prevent damage.
6. Troubleshooting
This section addresses common issues you might encounter with your gazebo.
- Water Accumulation on Roof: Ensure the sloped roof is correctly installed and free of debris that might obstruct drainage.
- Gazebo Instability: Verify that all ground anchors are securely fastened and all frame connections are tightened. The triangular stability structure should be correctly assembled.
- Curtains/Netting Not Sliding Smoothly: Check the dual-tracks for any obstructions or damage. Ensure the mosquito netting rings are properly attached and not tangled.
- Parts Missing or Damaged: If any parts are missing or damaged upon delivery, please contact customer support with your product model and a description of the issue.
7. Specifications
| Attribute | Detail |
|---|---|
| Brand | ALAULM |
| Model | 10'x 14' Outdoor Hardtop Lean-to Gazebo |
| Material | Aluminum Iron Frame, Polycarbonate Roof Panels |
| Product Dimensions | 170.04"L x 108"W x 101.4"H (10' x 14' approximate footprint) |
| Floor Area | 140 Square Feet |
| Water Resistance Level | Water Resistant |
| UV Protection | UV Resistant |
| Color | Dark Blue (for curtains/netting, frame is typically dark grey/black) |
| Assembly Required | Yes (Recommended 3-5 people) |

Figure 7.1: Detailed product dimensions for the 10'x 14' Hardtop Gazebo.
8. Warranty and Support
For warranty information or technical support, please refer to the contact details provided at the point of purchase or visit the official ALAULM website. Keep your purchase receipt as proof of purchase.