Introduction
This manual provides essential information for the proper use, maintenance, and care of your Giro Caden LED MIPS Urban Bike Helmet. Please read these instructions carefully before using your helmet to ensure optimal safety and performance.
The Giro Caden LED MIPS helmet is engineered to reduce energy during impacts, meeting and exceeding safety standards. It features an integrated MIPS (Multi-directional Impact Protection System) to help reduce rotational forces that may be transferred to the rider's brain in certain impacts. The two-piece shell design combines a tough outer hard shell with a polycarbonate lower shell, permanently fused to the liner for durability without excessive weight.

Figure 1: Front-side view of the Giro Caden LED MIPS Urban Bike Helmet.
Setup and Fitting
Proper fit is crucial for helmet safety and comfort. Follow these steps to ensure your helmet is correctly adjusted.
1. Initial Fit Adjustment
Place the helmet on your head. It should sit level and cover your forehead. The Roc Loc City MIPS fit system, located at the rear of the helmet, allows for precise adjustment. Turn the dial clockwise to tighten the fit and counter-clockwise to loosen it until the helmet feels snug but comfortable, without excessive pressure points.

Figure 2: Interior view of the helmet, highlighting the Roc Loc City MIPS fit system and straps.
2. Strap Adjustment
- Side Straps: Adjust the sliders on the side straps so that they form a "V" shape just below your ears. Ensure the straps do not cover your ears.
- Chin Strap: Fasten the chin buckle. Tighten the chin strap until it is snug under your chin. You should be able to open your mouth wide, but the helmet should not move more than an inch in any direction.
Important: Always ensure straps are securely fastened before riding.
3. Brim Attachment (Optional)
The helmet features a removable brim, attached via Velcro. If desired, align the brim with the front edge of the helmet and press firmly to secure it. The brim helps block sun and light rain.
4. LED Light Battery Installation
The integrated LED rear light requires two CR2032 3-Volt Lithium Coin Cell batteries (not always included). To install or replace batteries:
- Locate the LED light unit at the rear of the helmet.
- Carefully remove the rubber insert holding the LED unit.
- Open the battery compartment and insert two CR2032 batteries, observing polarity (+/-).
- Close the compartment and re-insert the LED unit and rubber insert securely into the helmet.
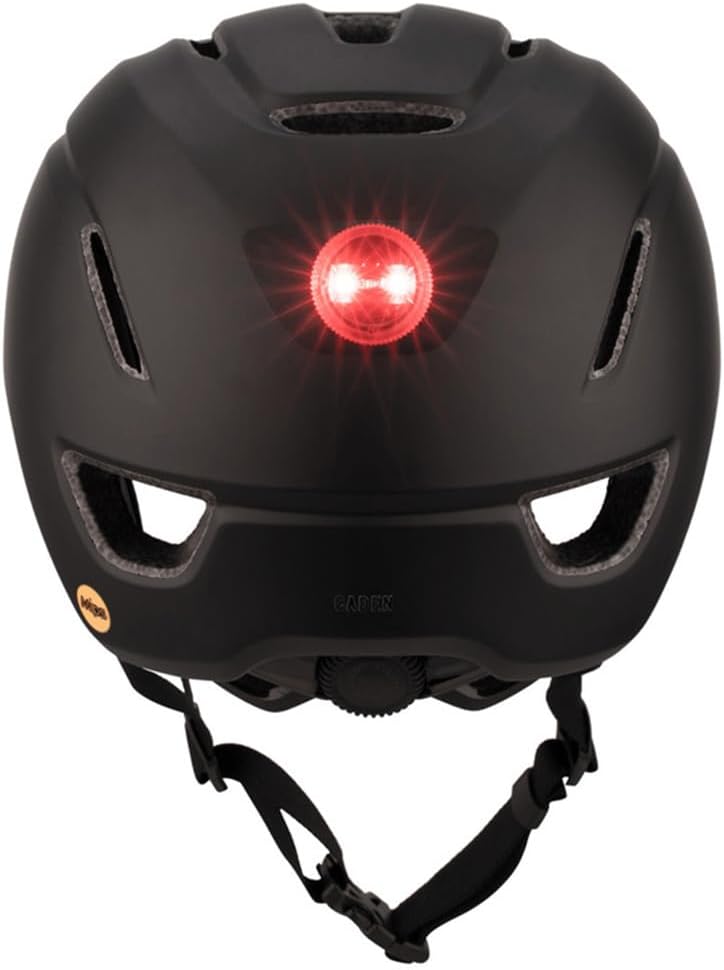
Figure 3: Rear view of the helmet with the integrated LED light. Batteries are required for operation.
Operating Instructions
Wearing the Helmet
Always wear your helmet correctly positioned on your head, level and covering your forehead. The helmet should not tilt backward, exposing your forehead, or forward, obstructing your vision. Ensure the chin strap is snug and the side straps form a "V" below your ears.
Using the Integrated LED Light
The integrated LED light enhances visibility, especially in low-light conditions. To operate:
- Press the button on the LED unit to cycle through different light modes (e.g., steady, flashing).
- Press and hold the button to turn the light off.
Note: The LED light does not provide tactile or auditory feedback when changing modes or turning on/off. It is recommended to check the light visually before riding.
MIPS Technology
The Multi-directional Impact Protection System (MIPS) is designed to add protection in certain impacts. It consists of a low-friction layer inside the helmet that allows a multi-directional movement of 10-15mm on certain angled impacts, intended to help reduce rotational force to the head.
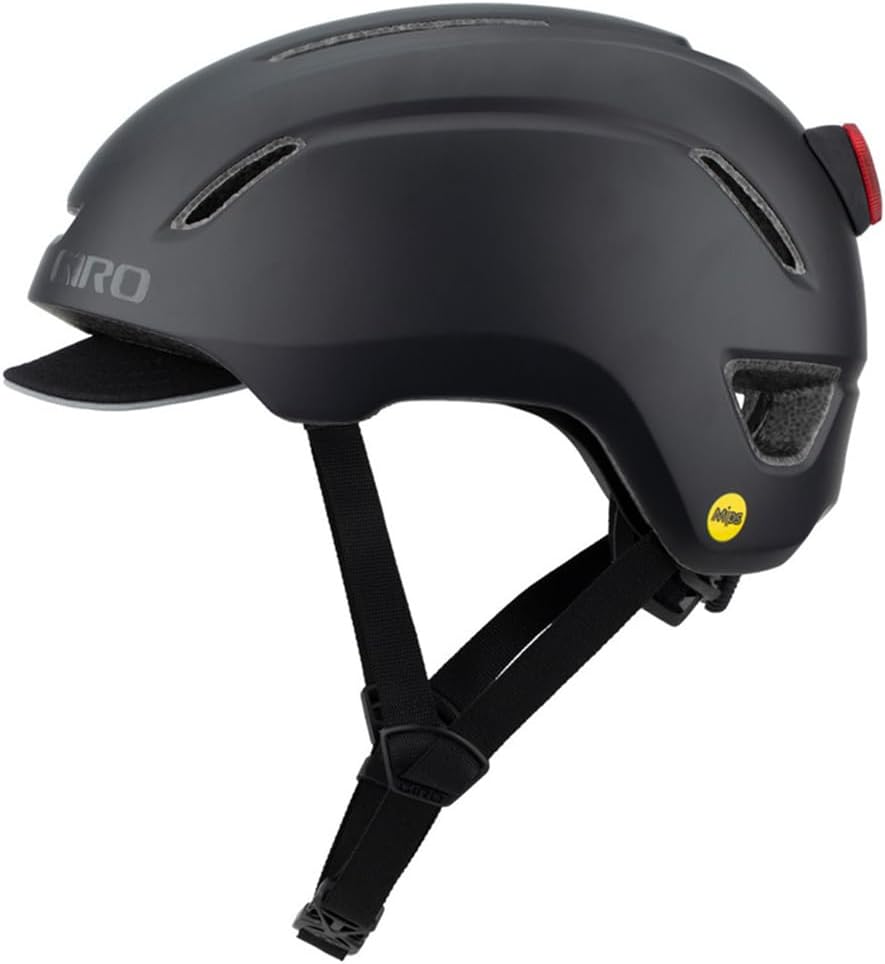
Figure 4: Side view of the helmet, featuring the MIPS logo.
Maintenance and Care
Cleaning Your Helmet
- Clean the helmet exterior with a soft cloth, mild soap, and water. Avoid harsh chemicals, abrasive cleaners, or solvents, as these can damage the helmet's materials.
- The internal padding can be removed and hand-washed with mild soap and water, then air-dried.
- Allow the helmet to air dry completely before storage or next use.
Battery Replacement for LED Light
Replace the CR2032 batteries in the LED light unit when the light dims or stops functioning. Refer to the "LED Light Battery Installation" section under Setup for detailed instructions.
Storage
Store your helmet in a cool, dry place, away from direct sunlight and extreme temperatures. Do not store the helmet near heat sources or chemicals.
Troubleshooting
- Problem: The helmet feels loose or uncomfortable.
Solution: Adjust the Roc Loc City MIPS fit system dial at the back of the helmet to tighten the fit. Ensure the chin strap and side straps are properly adjusted and snug.
- Problem: The LED rear light is not working or is dim.
Solution: Check the batteries. The LED light requires two CR2032 3-Volt Lithium Coin Cell batteries. Replace them if necessary, ensuring correct polarity. If the issue persists after battery replacement, contact Giro customer support.
- Problem: The helmet feels too hot during use.
Solution: The helmet is designed with ventilation channels. Ensure no external accessories are blocking these vents. While the helmet is airy, prolonged exposure to high temperatures or intense physical activity can still lead to warmth.
Specifications
| Brand | Giro |
| Model Name | CADEN LED MIPS HELMET |
| Color | Matte Black |
| Size | Small (other sizes available separately) |
| Age Range | Adult |
| Special Feature | Adjustable Strap, Integrated LED Light, MIPS Technology |
| Outer Material | Polycarbonate (PC) |
| Inner Material | Expanded Polystyrene |
| Item Weight | 16 ounces (approx. 0.45 kg) |
| Recommended Uses | Cycling |
| UPC | 768686297915 |
| Part Number | 7117413 |
Warranty Information
Any Giro helmet determined by Giro to be defective in materials or workmanship within one (1) year from the date of original purchase will be repaired or replaced, at Giro's option, free of charge. This warranty is valid when the helmet is received at the factory freight prepaid, together with proof of purchase.
Important: This warranty does not cover damage resulting from misuse, accidents, modifications, or normal wear and tear.
Support and Contact
For further assistance, questions, or warranty claims, please contact Giro customer support through their official website or the retailer where the helmet was purchased.
For more information about Giro products and safety, visit the official Giro website: www.giro.com


