
1. Safety Information
Please read and understand all instructions before installing or operating this product. Failure to follow these instructions may result in electric shock, fire, or other hazards that could cause property damage or personal injury.
- Always turn off power at the circuit breaker before installation or servicing.
- Consult a qualified electrician if you are unsure about the installation process.
- Ensure all electrical connections are secure and comply with local codes and ordinances.
- Do not install on a dimmer switch.
- This fixture is rated for outdoor use and is water resistant.
2. Package Contents
Verify that all components are present before beginning installation.
- LED Outdoor Flood Wall Light (1 unit)
- Mounting Hardware (screws, wire connectors)
- Gasket
- Instruction Manual

Figure 2.1: Product components and adjustable parts.
3. Product Features
The Maxxima LED Outdoor Flood Wall Light is designed for reliable outdoor security and illumination.
- Powerful Illumination: Delivers 950 lumens of 3000K warm white light with an energy-efficient 13W design.
- Advanced Motion Detection: PIR motion sensor with up to a 70 ft range.
- Adjustable Timers: Choose from 1, 5, or 10 minutes for how long the light stays on after motion detection.
- Dusk-to-Dawn Sensor: Photocell sensor automatically operates at night and conserves energy during the day.
- Adjustable Head: Easily direct the light beam with a 180° vertical tilt.
- Adjustable Arm and Sensor: 90° vertical arm tilt and 180° vertical tilt & horizontal swivel for the motion sensor, with 360° sensor rotation.
- Durable Construction: Built with aluminum, rated for 50,000 lifetime hours, ETL listed.
Video 3.1: Overview of Maxxima LED Outdoor Flood Light features and adjustability.
4. Installation
4.1 Mounting the Fixture
- Turn off power at the circuit breaker before starting installation.
- Remove the existing fixture (if any) and disconnect wiring.
- Attach the mounting plate to the junction box using the provided screws. Ensure the gasket is properly seated between the fixture and the mounting surface for a weather-tight seal.
- Feed the electrical wires from the junction box through the center hole of the mounting plate.
4.2 Wiring Connections
Connect the wires as follows:
- Connect the Black wire from the fixture to the Black (Live/Hot) wire from the junction box.
- Connect the White wire from the fixture to the White (Neutral) wire from the junction box.
- Connect the Green (Ground) wire from the fixture to the Green or bare copper (Ground) wire from the junction box.
- Secure all connections with the provided wire connectors.

Figure 4.1: Wiring connections for the flood light.
4.3 Final Assembly
- Carefully tuck all wires into the junction box.
- Align the fixture with the mounting plate and secure it with the remaining screws.
- Restore power at the circuit breaker.
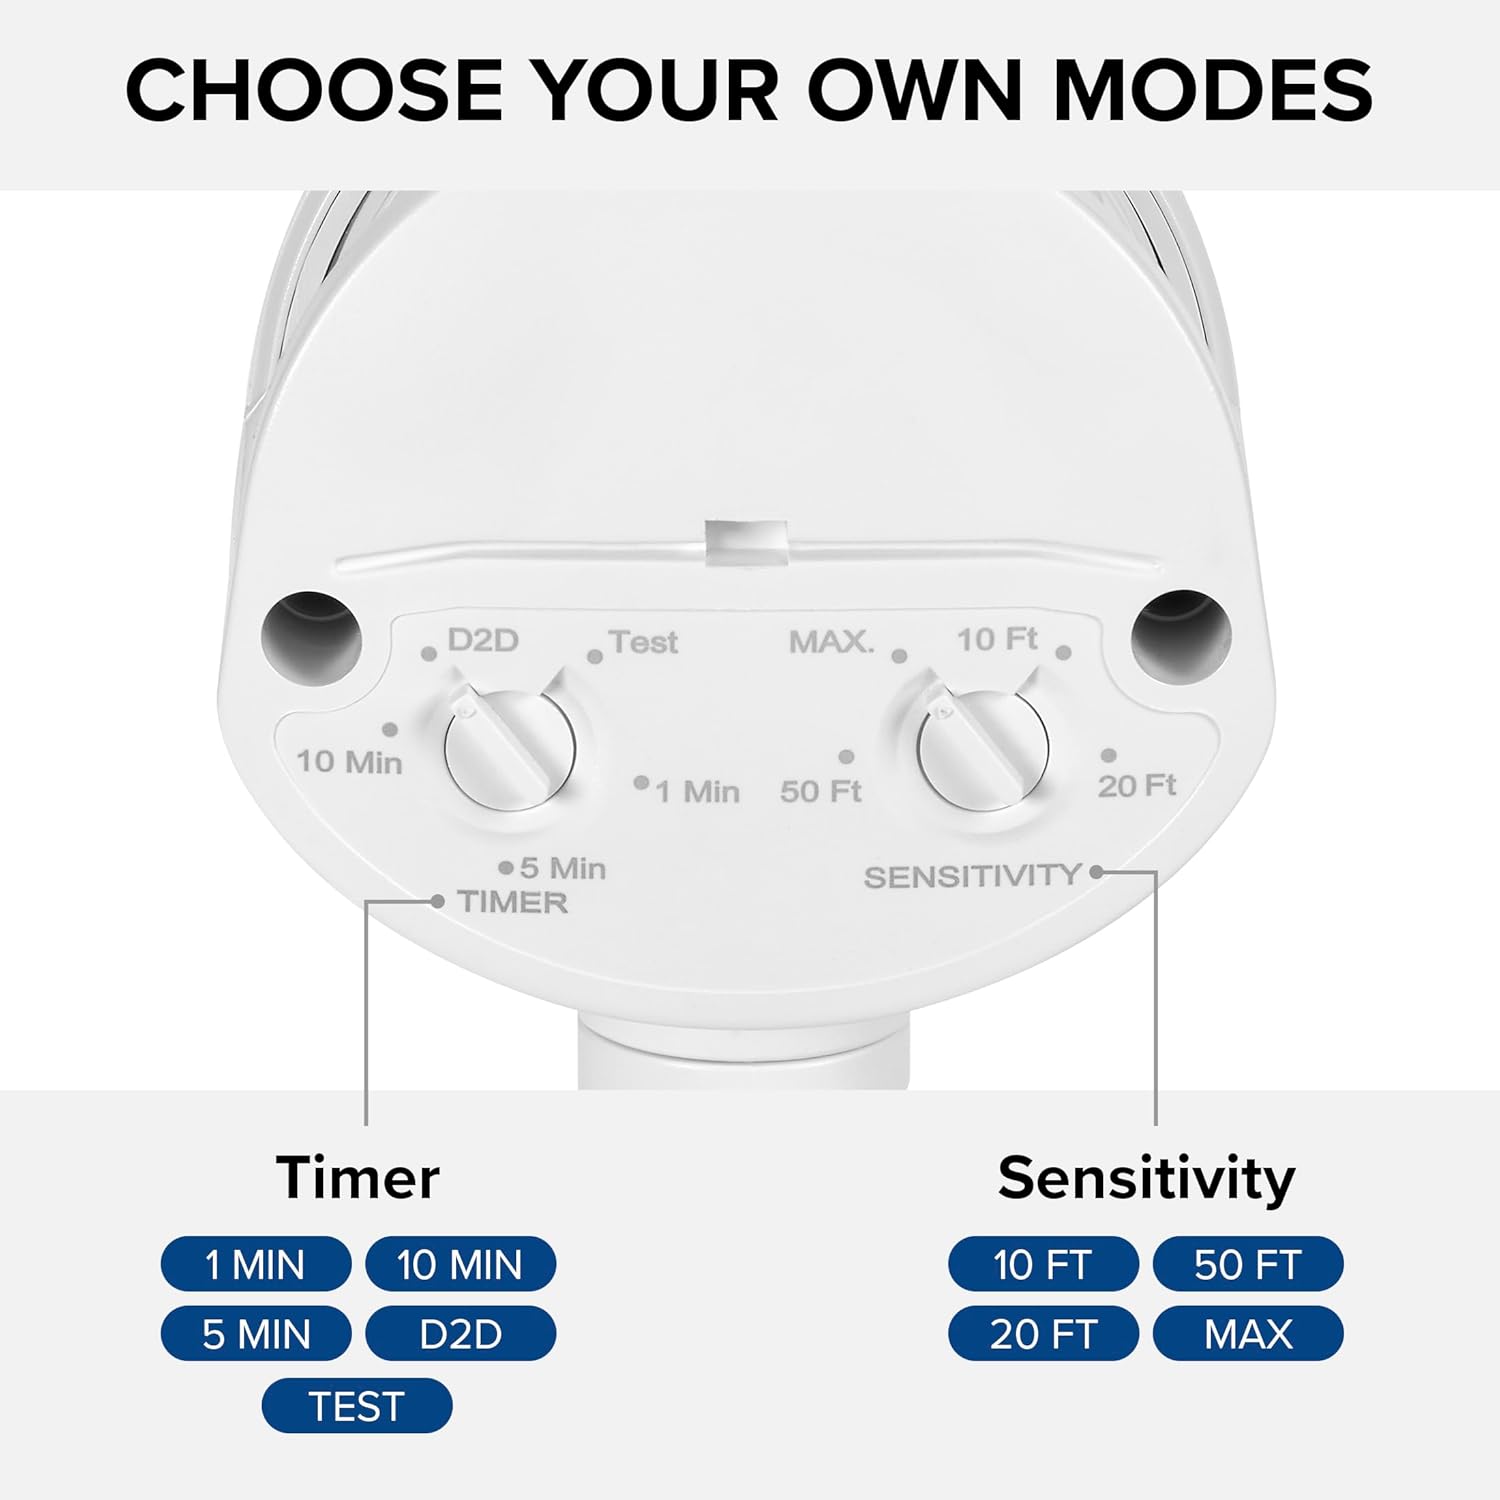
Figure 4.2: Installed flood light on an exterior wall.
5. Setup and Adjustments
The flood light features adjustable settings for the motion sensor and timer.
5.1 Adjusting the Sensor and Timer
The sensor unit has two adjustable dials located on its underside:
- TIMER Dial: Controls how long the light stays on after motion is detected. Options include 1 minute, 5 minutes, 10 minutes, or Dusk-to-Dawn (D2D).
- SENSITIVITY Dial: Adjusts the motion detection range. Options include 10 ft, 20 ft, 50 ft, or MAX (up to 70 ft).
To adjust, gently rotate the dials to your desired setting. The 'Test' mode on the TIMER dial allows for quick testing of motion detection during daylight hours.
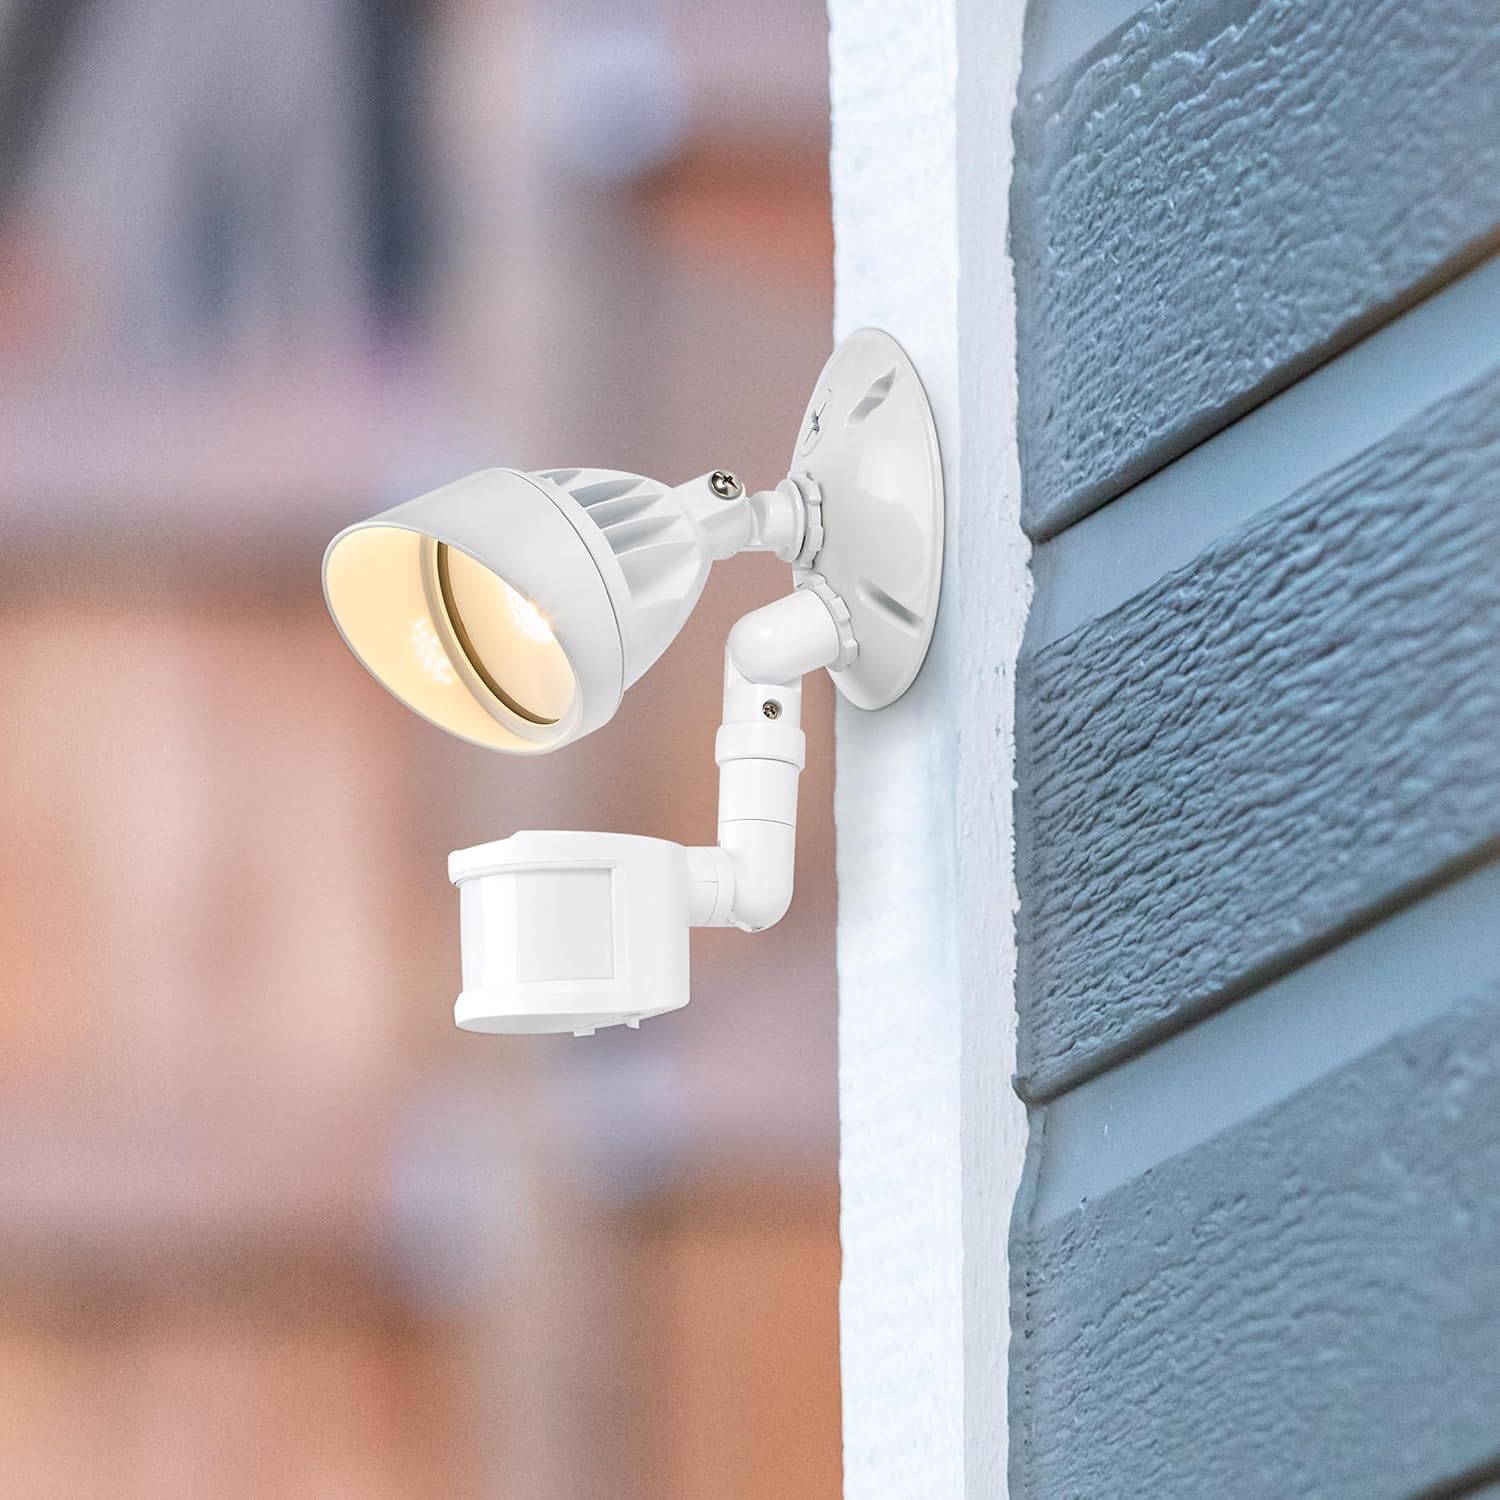
Figure 5.1: Timer and Sensitivity adjustment dials.
5.2 Adjusting Light Head and Sensor Position
The light head and motion sensor can be adjusted to cover specific areas:
- The light head can be tilted up to 180° vertically.
- The arm connecting the sensor to the base can tilt 90° vertically.
- The motion sensor itself can tilt 180° vertically and swivel 180° horizontally, with a full 360° rotation capability.

Figure 5.2: Adjustable light head and motion sensor.
6. Operating Instructions
Once installed and configured, the Maxxima LED Outdoor Flood Wall Light operates automatically based on its sensor settings.
- Dusk-to-Dawn Mode (D2D): When the TIMER dial is set to D2D, the light will automatically turn on at dusk and remain on until dawn, regardless of motion.
- Motion Sensor Mode: When the TIMER dial is set to 1, 5, or 10 minutes, the light will activate when motion is detected within the set sensitivity range and ambient light conditions (typically at night). The light will remain on for the selected duration after the last motion is detected, then turn off.
- Test Mode: Setting the TIMER dial to 'Test' allows you to verify motion detection during daylight. The light will turn on for a few seconds when motion is detected, then turn off. This mode is useful for positioning the sensor.
7. Maintenance
This LED flood light requires minimal maintenance.
- Cleaning: Periodically wipe the fixture with a soft, damp cloth to remove dirt and debris. Do not use abrasive cleaners or solvents.
- Inspection: Regularly check for any loose connections or damage to the wiring or housing.
- The integrated LED light source is not user-replaceable.
8. Troubleshooting
If you experience issues with your flood light, refer to the following table for common problems and solutions.
| Problem | Possible Cause | Solution |
|---|---|---|
| Light does not turn on. | No power; incorrect wiring; sensor settings. | Check circuit breaker. Verify wiring connections. Adjust sensor to 'Test' mode to confirm functionality. Ensure ambient light is low enough for operation (if not in D2D). |
| Light stays on continuously. | Sensor in D2D mode; constant motion detected; faulty sensor. | Check if TIMER dial is set to D2D. Ensure no objects are causing continuous motion detection. If problem persists, contact support. |
| Light turns on too frequently or not enough. | Sensitivity setting; sensor obstruction. | Adjust SENSITIVITY dial. Clear any obstructions from the sensor's field of view. |
| Light flickers. | Loose wiring; power fluctuations. | Turn off power and check all wiring connections. Consult an electrician if power fluctuations are suspected. |
9. Specifications
| Attribute | Value |
|---|---|
| Model Name | MEL-S1013100W |
| Brand | Maxxima |
| Light Output | 950 Lumens |
| Wattage | 13 Watts |
| Color Temperature | 3000 Kelvin (Warm White) |
| Voltage | 120 Volts |
| Material | Aluminum |
| Finish Type | Painted |
| Motion Sensor Range | Up to 70 ft |
| Beam Spread | 220° |
| Lifetime Rating | 50,000 hours |
| Certification | ETL Listed |
| Product Dimensions | 4.4"L x 6"W x 6"H |
| Item Weight | 11.2 ounces (0.7 Pounds) |
10. Warranty
This Maxxima LED Outdoor Flood Wall Light is backed by a 3-year warranty from the date of purchase. This warranty covers defects in materials and workmanship under normal use. Please retain your proof of purchase for warranty claims.
11. Support
For technical assistance, troubleshooting, or warranty inquiries, please contact Maxxima customer service.
Visit the Maxxima Store: MaxximaLEDLighting on Amazon
Maxxima is an American company with USA-based offices and customer service.


