
Benass 2020tp
Benass 20x20 Metal Carport Instruction Manual
Model: 2020tp
1. Product Overview
The Benass 20x20 Metal Carport is a robust, all-weather shelter designed to protect vehicles and equipment. Constructed with a powder-coated steel tube frame and a galvanized steel roof, it offers durability against various environmental conditions. This model includes removable polyethylene sidewalls for enhanced protection.
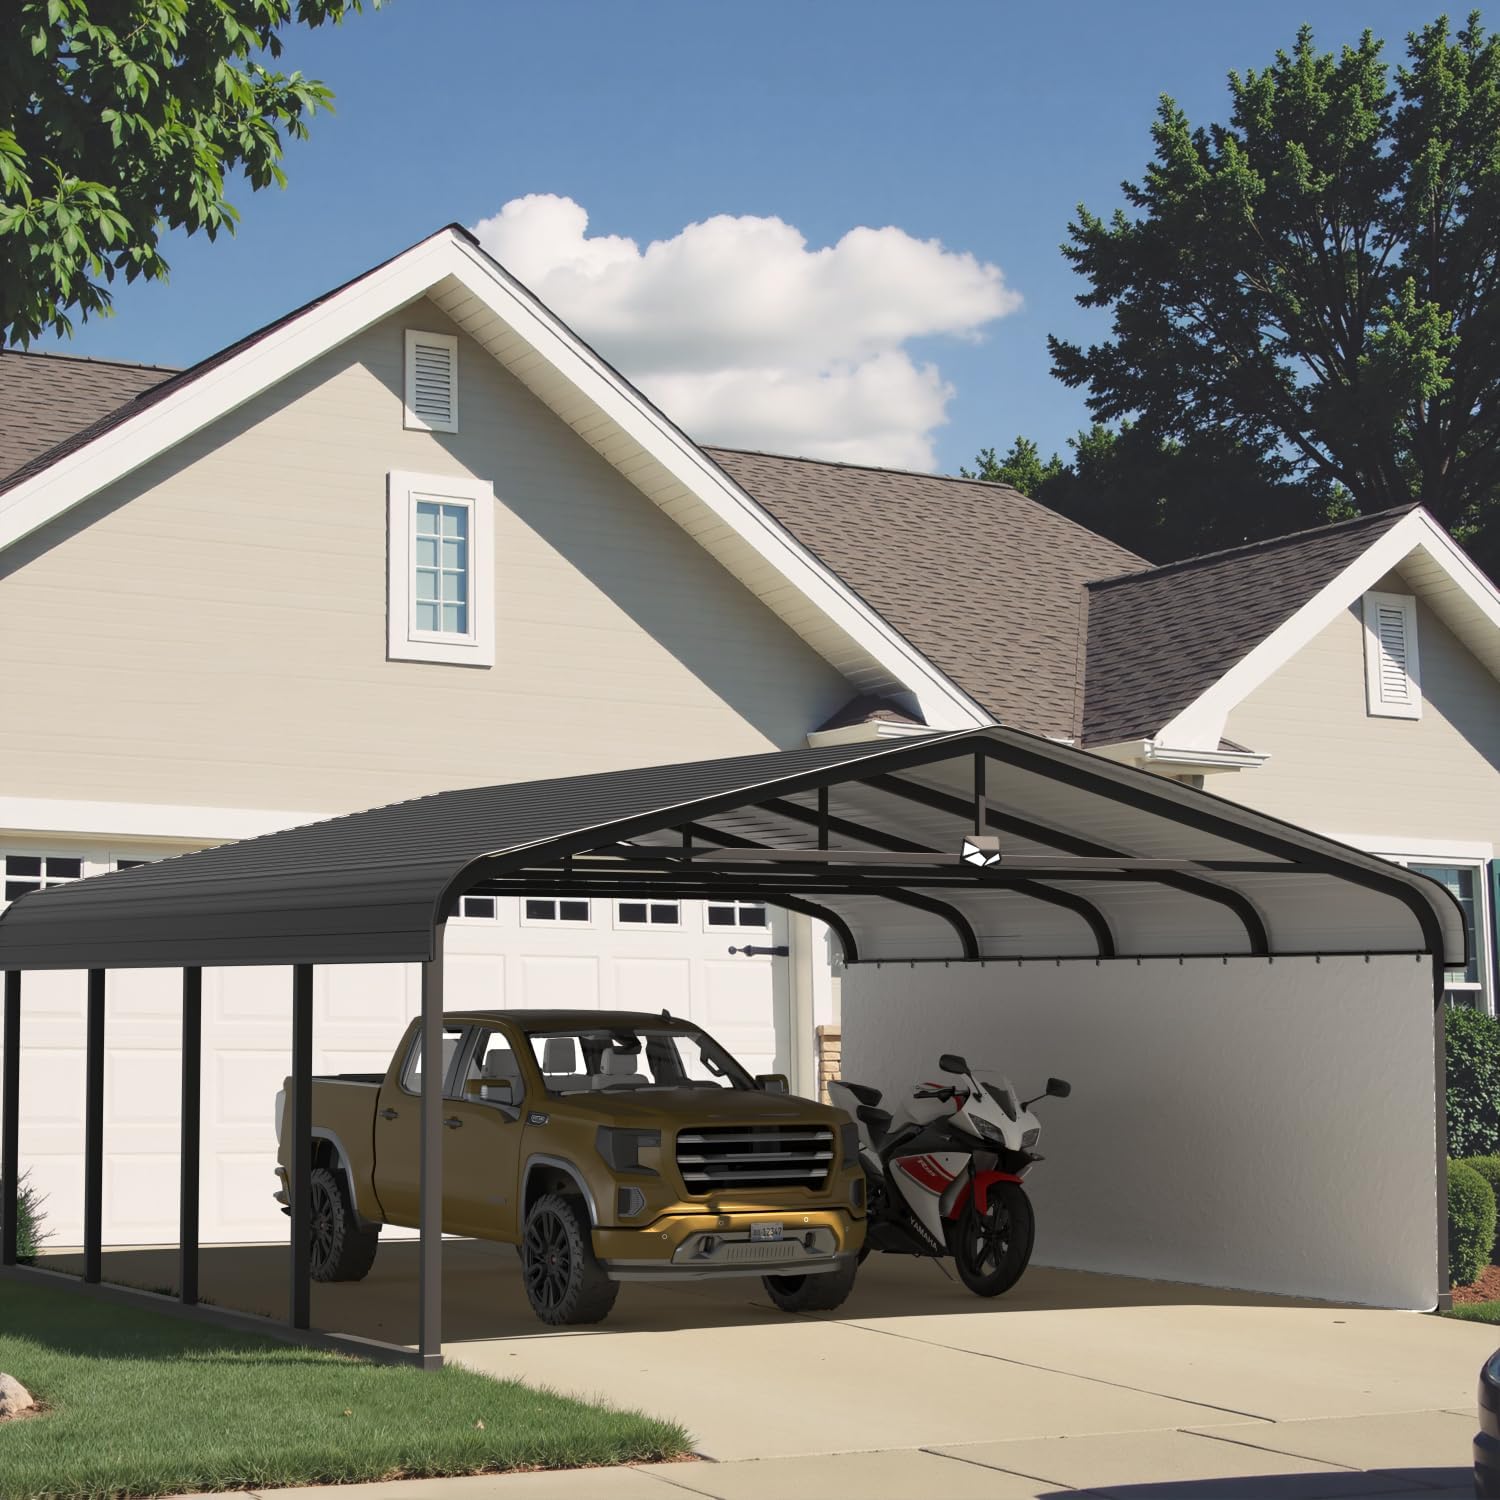
Figure 1: Benass 20x20 Metal Carport in use, providing shelter for vehicles.
2. Safety Information
- Ensure the carport is securely anchored to a stable foundation to withstand high winds and heavy snow.
- Follow the assembly instructions carefully and handle all components with care.
- Do not exceed the weight limit of 850 LBs for the structure.
- Wear appropriate safety gear, including gloves, during assembly.
- Be aware of sharp edges on roofing panels during installation.
3. Parts List
Before beginning assembly, verify all parts are present and undamaged. Refer to the included packing list for specific quantities. Key components include:
- Frame Components: Various labeled steel tubes (A, B, C, D, D1, E, F1, F2, F3, P) for the base, roof trusses, and crossbeams.
- Roof Panels: Galvanized steel panels (G, H) for the roof.
- Sidewalls: Removable polyethylene sidewalls (R) with attachment components (S).
- Hardware: Screws, nuts, washers (J), ground anchors (K), caulk, sealing tape, sealing strip, rubber edge banding.
- Accessories: Solar light, drill sleeve.

Figure 2: Included accessories and waterproofing materials.
4. Assembly Instructions
Assembly requires a minimum of 3 people. Follow the steps carefully for proper installation.
4.1. Frame Assembly Overview
Video 1: Detailed 3D animation of the carport assembly process.
4.2. Step-by-Step Assembly
- Assemble Bottom Support Rods: Connect pieces B and C using the provided screws. Ensure all connections are secure.
- Assemble Roof Trusses: Connect pieces A, D, D1, and E to form the arched roof sections. Use screws (J) and washers for secure connections.
- Assemble Crossbeams: Connect pieces F1, F2, and F3 to create the horizontal crossbeams that will support the roof panels.
- Connect Trusses to Base Frame: Attach the assembled roof trusses (A, D, D1, E) to the bottom support rods (B, C) using screws.
- Install P Braces: Secure the P braces to the frame using screws to add stability to the structure.
- Install Ground Anchors: Use the provided ground anchors (K) to firmly secure the base frame to the ground.
- Install Roof Panels (G & H):
- Apply sealing tape to the designated areas on the roof panels (G and H) as shown in the assembly video.
- Carefully place and overlap the G and H panels, ensuring proper drainage.
- Secure the panels to the frame using the self-tapping screws.

Figure 3: Carport dimensions and structure.
- Install Perimeter Guard Rails: Attach the rubber edge banding (perimeter guard rails) along the edges of the roof panels for a finished look and added protection.
- Install Sidewalls: Attach the polyethylene sidewalls (R) to the frame using the provided straps and attachment points (S).
5. Operating Instructions
The Benass Metal Carport is designed for straightforward operation and protection.
- Vehicle Parking: Drive vehicles into the carport slowly and carefully, ensuring adequate clearance on all sides.
- Sidewall Use: The polyethylene sidewalls can be easily removed or installed as needed for varying weather conditions or access requirements.
- Solar Light: The included solar light provides illumination for convenience and safety. Ensure it is positioned to receive adequate sunlight for charging.
6. Maintenance
Regular maintenance will extend the lifespan of your carport.
- Cleaning: Periodically clean the roof and frame with mild soap and water to remove dirt and debris. Avoid abrasive cleaners.
- Fastener Check: Annually inspect all screws and bolts for tightness. Tighten any loose fasteners to maintain structural integrity.
- Snow Removal: In areas with heavy snowfall, regularly remove accumulated snow from the roof to prevent excessive load. The carport is designed to withstand 10.3 PSF snow load.
- Wind Precautions: Ensure ground anchors are secure, especially in high-wind areas. The carport is designed to withstand winds of 120 MPH.
- Leakage Repair: If any installation leakage occurs, use the complimentary repair kit (caulk and tape) to seal gaps.

Figure 4: Carport demonstrating snow load capacity.
7. Troubleshooting
- Carport feels wobbly: Ensure all fasteners are tightened. Verify ground anchors are properly installed and secure.
- Water leakage from roof: Check roof panel overlaps and apply additional caulk or sealing tape from the repair kit to any gaps.
- Missing parts: Contact Benass customer service immediately if any parts are missing upon delivery.
8. Specifications
| Brand | Benass |
| Model Number | 2020tp |
| Material | Alloy Steel (Frame), Galvanized Steel (Roof), Polyethylene (Sidewalls) |
| Product Dimensions | 240"L x 240"W x 118"H (20'L x 20'W x 9.8'H) |
| Weight | 850 LBs |
| Water Resistance Level | Waterproof |
| UV Protection | 100% |
| Wind Resistance | 120 MPH |
| Snow Load Capacity | 10.3 PSF |
9. Warranty & Support
Benass offers a one-year 100% satisfactory after-sales service. If you encounter any problems with your carport upon receipt or during future use, please contact Benass customer service for assistance.
Return Policy: This product is eligible for refund/replacement within 2026 days of purchase.
Related documents2020tp

Ask a question about this manual
Ask about setup, troubleshooting, compatibility, parts, safety, or missing instructions. Manuals+ will review the question and use this page’s manual context to help answer it.