
1. Product Overview
The UYXOERA 26800 in 1 Portable Arcade Game Console (Model A 9800 DX Plus) is a compact, dual-player gaming system featuring a 17.5-inch HD screen. It offers an extensive library of classic arcade games and supports various functionalities for an enhanced gaming experience.
Key Features:
- Extensive Game Library: Access to 26,800 classic arcade games across multiple genres.
- Dual Player Support: Two integrated control panels for simultaneous two-player gameplay.
- High-Definition Display: A 17.5-inch HD screen for clear graphics.
- Customizable Settings: Adjustable game settings including timer mode, pause menu, auto exit, and gamepad configurations.
- Game Management: Intuitive menu system with search, recent games list, and category sorting.

Image 1.1: The UYXOERA portable arcade game console in use, demonstrating its portability for outdoor entertainment.
2. Package Contents
Verify that all items listed below are included in your package:
- 1x UYXOERA 26800 in 1 Portable Arcade Game Console (A 9800 DX Plus)
- 1x 12V Power Supply
- 1x Spanner
- 2x Replacement Ball Tops for joysticks
- 2x Replacement Buttons
3. Setup
3.1 Initial Power Connection
- Connect the 12V Power Supply to the DC IN port on the back of the console.
- Plug the power supply into a standard electrical outlet.
- Locate the Power Switch on the side of the console and press it to the 'ON' position. The screen will illuminate.
3.2 External Display Connection (Optional)
The console can be connected to an external display such as a television, projector, or monitor using HDMI or VGA cables (not included).
- Connect one end of an HDMI cable to the HDMI OUT port on the console.
- Connect the other end of the HDMI cable to an HDMI input on your external display.
- Alternatively, connect a VGA cable to the VGA OUT port on the console and to your external display's VGA input.
- Select the corresponding input source on your external display.

Image 3.1: Rear panel connections including Power Switch, HDMI, VGA, and USB ports.
4. Operating Instructions
4.1 Navigation
Use the joysticks and buttons on the control panel to navigate through the console's menu system.
- Joystick: Move up, down, left, and right to select menu options or control in-game characters.
- Action Buttons: Typically used for selection, confirmation, or in-game actions.
- START Button: Initiates games or confirms selections.
- COIN Button: Simulates inserting a coin in arcade games.
4.2 Game Selection and Management
The console features an intuitive game system for finding and managing games.

Image 4.1: Game selection interface showing categories and game titles.
- Search Games: Use the search function to quickly find specific titles.
- Recent Games: Access a list of recently played games.
- Favorite Game List: Mark games as favorites for easy access.
- Game Classification: Browse games by category (e.g., fighting, sports, puzzle).
- Hide Games: Option to hide selected games from the main list.
4.3 In-Game Functions
- Pause/Exit Games: Access the pause menu during gameplay to pause or exit a game.
- Save/Load Games: Save your game progress and load saved states.
- Timer Mode: Configure game time limits.
- Auto Exit: Set the console to automatically exit a game after a specified period of inactivity.

Image 4.2: Overview of key game system features.
4.4 Customizing Buttons
You can customize the button mapping for both players.
- Access the 'Game Controller Mapping' section in the system settings.
- Follow the on-screen instructions to reassign buttons. Typically, you will hold a specific button for a few seconds to enter customization mode.
- Save your custom button configuration before exiting.

Image 4.3: Button mapping interface for arcade controls and external gamepads.
5. Connectivity
5.1 External Gamepad Support
The console supports connecting external USB gamepads for up to 4 players, if the game supports it.
- Connect external USB gamepads to the USB ports on the console.
- The top USB port is for connecting additional joysticks/gamepads for 3-4 player games.
- The bottom USB port can be used to connect the console to a PC/PS3 as an external joystick.
6. Power and Battery
6.1 Power Sources
The console can be powered by four different methods:
- Indoor Socket Power Supply: Using the included 12V power adapter.
- 12V Power Bank: For portable use (power bank not included).
- Car Charging: Via a compatible car charger (not included).
- Built-in Lithium Battery: For standalone portable operation.
6.2 Battery Life and Charging
The built-in rechargeable battery provides approximately 3-4 hours of average play time. The console supports charging while playing.

Image 6.1: Battery life information and power supply options.
7. Maintenance
To ensure the longevity and optimal performance of your arcade console, follow these maintenance guidelines:
- Cleaning: Use a soft, dry cloth to clean the console's exterior. Avoid abrasive cleaners or solvents.
- Ventilation: Ensure proper ventilation during operation to prevent overheating. Do not block the ventilation openings.
- Storage: Store the console in a cool, dry place away from direct sunlight and extreme temperatures.
- Component Replacement: Use the provided spanner and replacement parts (ball tops, buttons) for minor repairs or customization.
8. Troubleshooting
If you encounter issues with your console, refer to the following common problems and solutions:
| Problem | Possible Cause | Solution |
|---|---|---|
| Console does not power on. | No power, power switch off, or battery depleted. | Ensure power supply is connected and plugged in. Check power switch. Charge the built-in battery. |
| No image on external display. | Incorrect cable connection or display input. | Verify HDMI/VGA cable connections. Select the correct input source on your TV/monitor. |
| Joystick or buttons unresponsive. | Loose connection or component issue. | Check for physical obstructions. If persistent, contact support. |
| Games are slow or lag. | System overload or software issue. | Restart the console. Ensure proper ventilation. |
9. Specifications
Detailed technical specifications for the UYXOERA 26800 in 1 Portable Arcade Game Console (A 9800 DX Plus):
| Feature | Detail |
|---|---|
| Model Number | A 9800 DX Plus (Manufacturer Part Number: 268001DYS) |
| Screen Size | 17.5 Inches HD (LED Display) |
| Number of Players | 2 (Up to 4 with external USB gamepads) |
| Controller Type | Joystick |
| Power Source | Corded Electric, Rechargeable Built-in Battery |
| Battery Average Life | 3 Hours |
| Hardware Interface | HDMI, USB, VGA |
| Memory Storage Capacity | 32 GB |
| Material Type | Metal (Full Metal Case) |
| Item Dimensions (L x W x H) | 19.5 x 10.4 x 3.1 inches |
| Item Weight | 11.3 Pounds |
| UPC | 762949756904 |
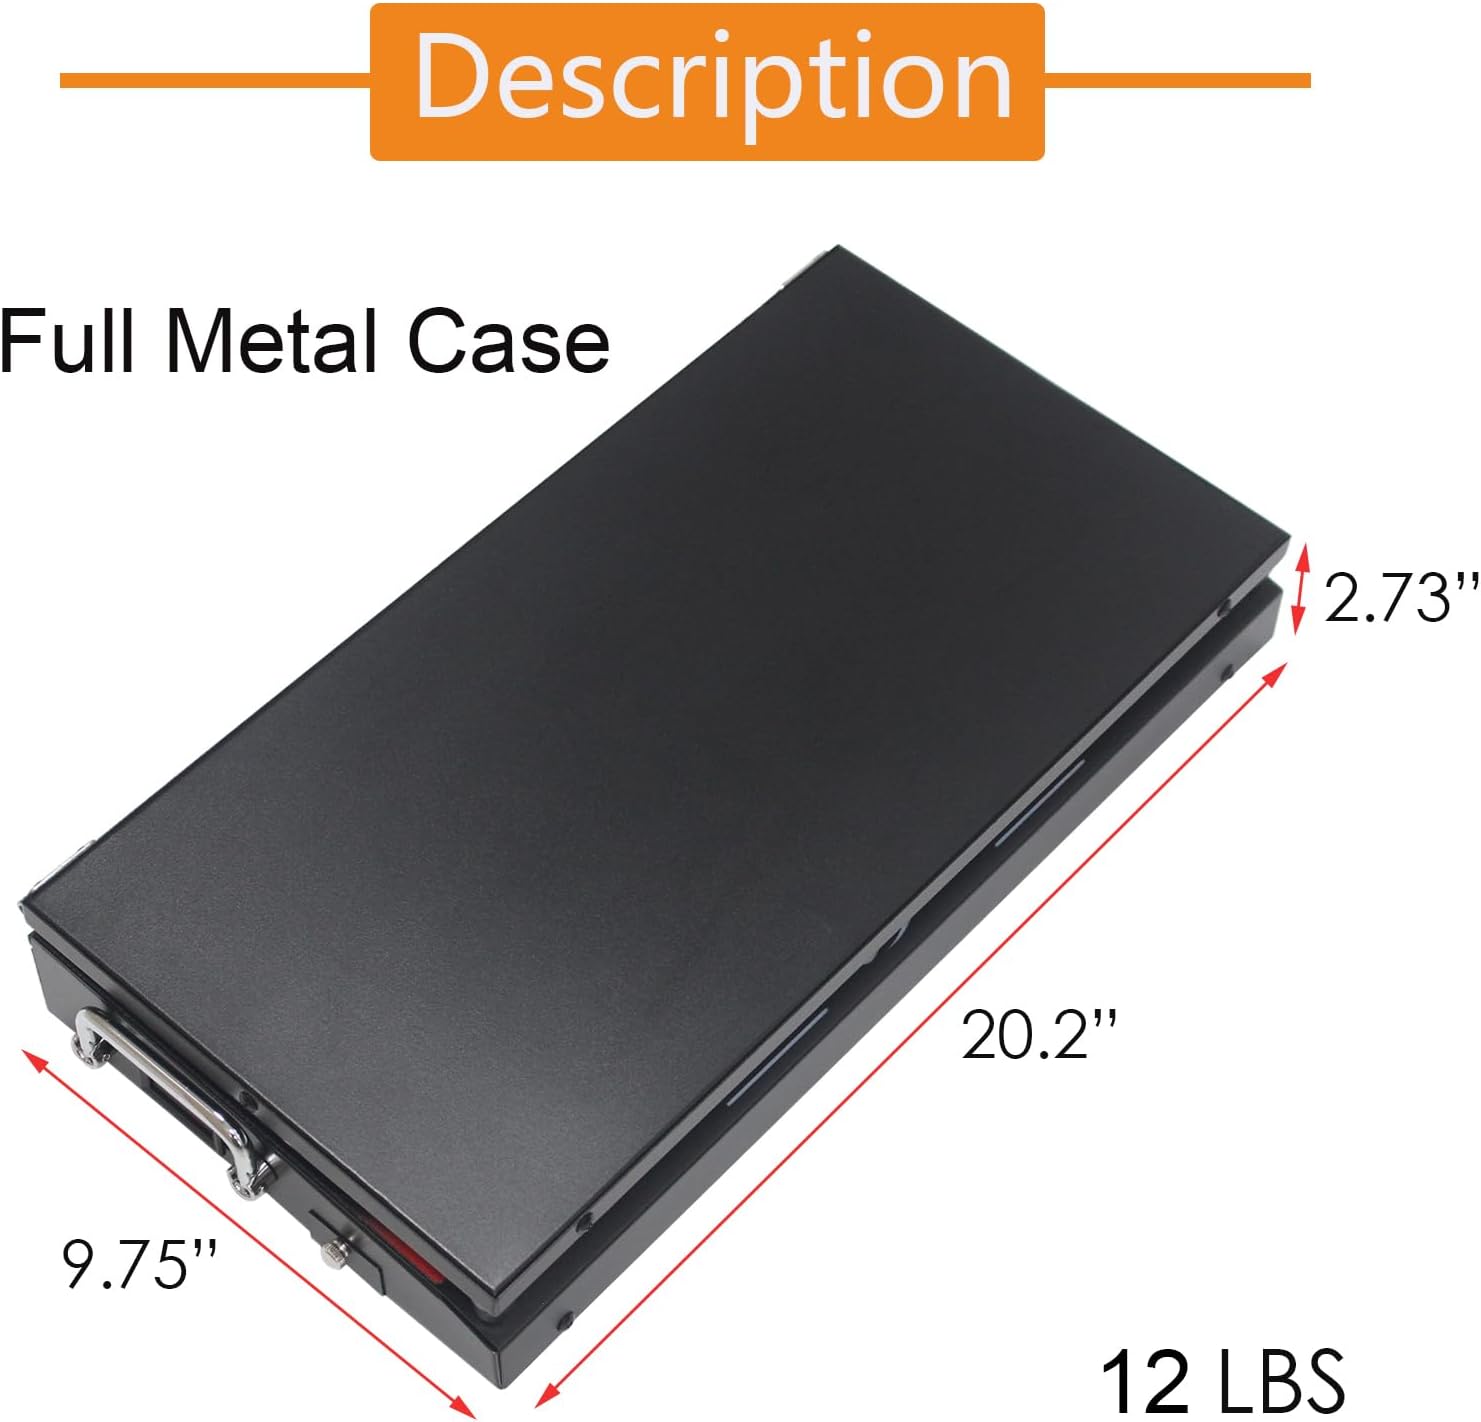
Image 9.1: Physical dimensions and weight of the console.
10. Warranty and Support
For warranty information or technical support, please refer to the documentation provided with your purchase or contact the retailer/manufacturer directly. Keep your proof of purchase for warranty claims.