1. Introduction
This manual provides essential information for the safe and effective operation of the MGZGEAEKCK HB-B3HL and HD-B3C 3-Phase Hybrid Stepper Motor Drivers. Please read this manual thoroughly before installation, operation, or maintenance to ensure proper usage and to prevent damage to the device or injury to personnel.
1.1 Product Overview
The HB-B3HL and HD-B3C are 3-phase hybrid stepper motor drivers designed for industrial applications, particularly in bag making machines. These drivers offer precise control and reliable performance for stepper motors requiring 220V AC input.
1.2 Key Features
- Compact Size: Designed for efficient space utilization in industrial setups.
- Durable Construction: Built with robust materials for long-term reliability in demanding environments.
- Simple Installation: Features a straightforward structure for easy setup and removal.
- Bag Making Machine Specific: Optimized characteristics for use in bag making machinery.
- Wide Application Range: Suitable for various industrial automation tasks requiring precise stepper motor control.
2. Safety Information
Adherence to the following safety guidelines is crucial to prevent electrical shock, fire, or damage to the equipment. Always ensure that qualified personnel perform installation and maintenance.
- Power Disconnection: Always disconnect power before performing any wiring, installation, or maintenance.
- Proper Grounding: Ensure the driver is properly grounded to prevent electrical hazards.
- Voltage Compatibility: Verify that the input voltage (AC220V) matches the driver's requirements. Incorrect voltage can cause severe damage.
- Environmental Conditions: Install the driver in an environment free from excessive dust, moisture, corrosive gases, and extreme temperatures.
- Secure Connections: Ensure all wiring connections are tight and secure to prevent loose contacts and potential arcing.
- Ventilation: Provide adequate ventilation around the driver to prevent overheating.
3. Product Components and Overview
The HB-B3HL / HD-B3C stepper motor driver unit is designed for robust industrial use. The primary unit includes terminals for power and motor connections, along with a D-sub connector for control signals.

Figure 3.1: Top view of the MGZGEAEKCK HB-B3HL 3-Phase Hybrid Stepper Motor Driver. This image shows the main unit with its power input terminals (AC 220V), motor output terminals (A, B, C), and a D-sub connector for control signals. The model number 'HB-B3HL' is clearly visible on the side.
3.1 Package Contents
Upon unpacking, verify that all components are present and undamaged. The standard package typically includes:
- HB-B3HL / HD-B3C Stepper Motor Driver Unit
- D-sub connector and associated screws for control signal wiring.

Figure 3.2: Included accessories, showing a D-sub connector and mounting screws. These components are used for connecting control signals to the stepper motor driver.
4. Specifications
The following table details the technical specifications for the HB-B3HL / HD-B3C stepper motor driver.
| Specification | Value |
|---|---|
| Model Name | HB-B3HL / HD-B3C |
| Working Voltage | AC 220V |
| Output Current | 11A |
| Dimensions (L x W x H) | 290mm x 117mm x 130mm (approx. 11.4 x 4.6 x 5.1 inches) |
| Item Weight | 1000 Grams (approx. 2.2 Pounds) |
| Manufacturer | MGZGEAEKCK |

Figure 4.1: Detailed specifications for the HB-B3HL model, including working voltage, output current, and physical dimensions.
5. Installation and Wiring
Proper installation and wiring are critical for the safe and reliable operation of the stepper motor driver.
5.1 Mounting
Mount the driver in a stable location with adequate ventilation. Ensure there is sufficient space around the unit for heat dissipation, especially around the cooling fins. Use appropriate fasteners to secure the driver to a panel or enclosure.
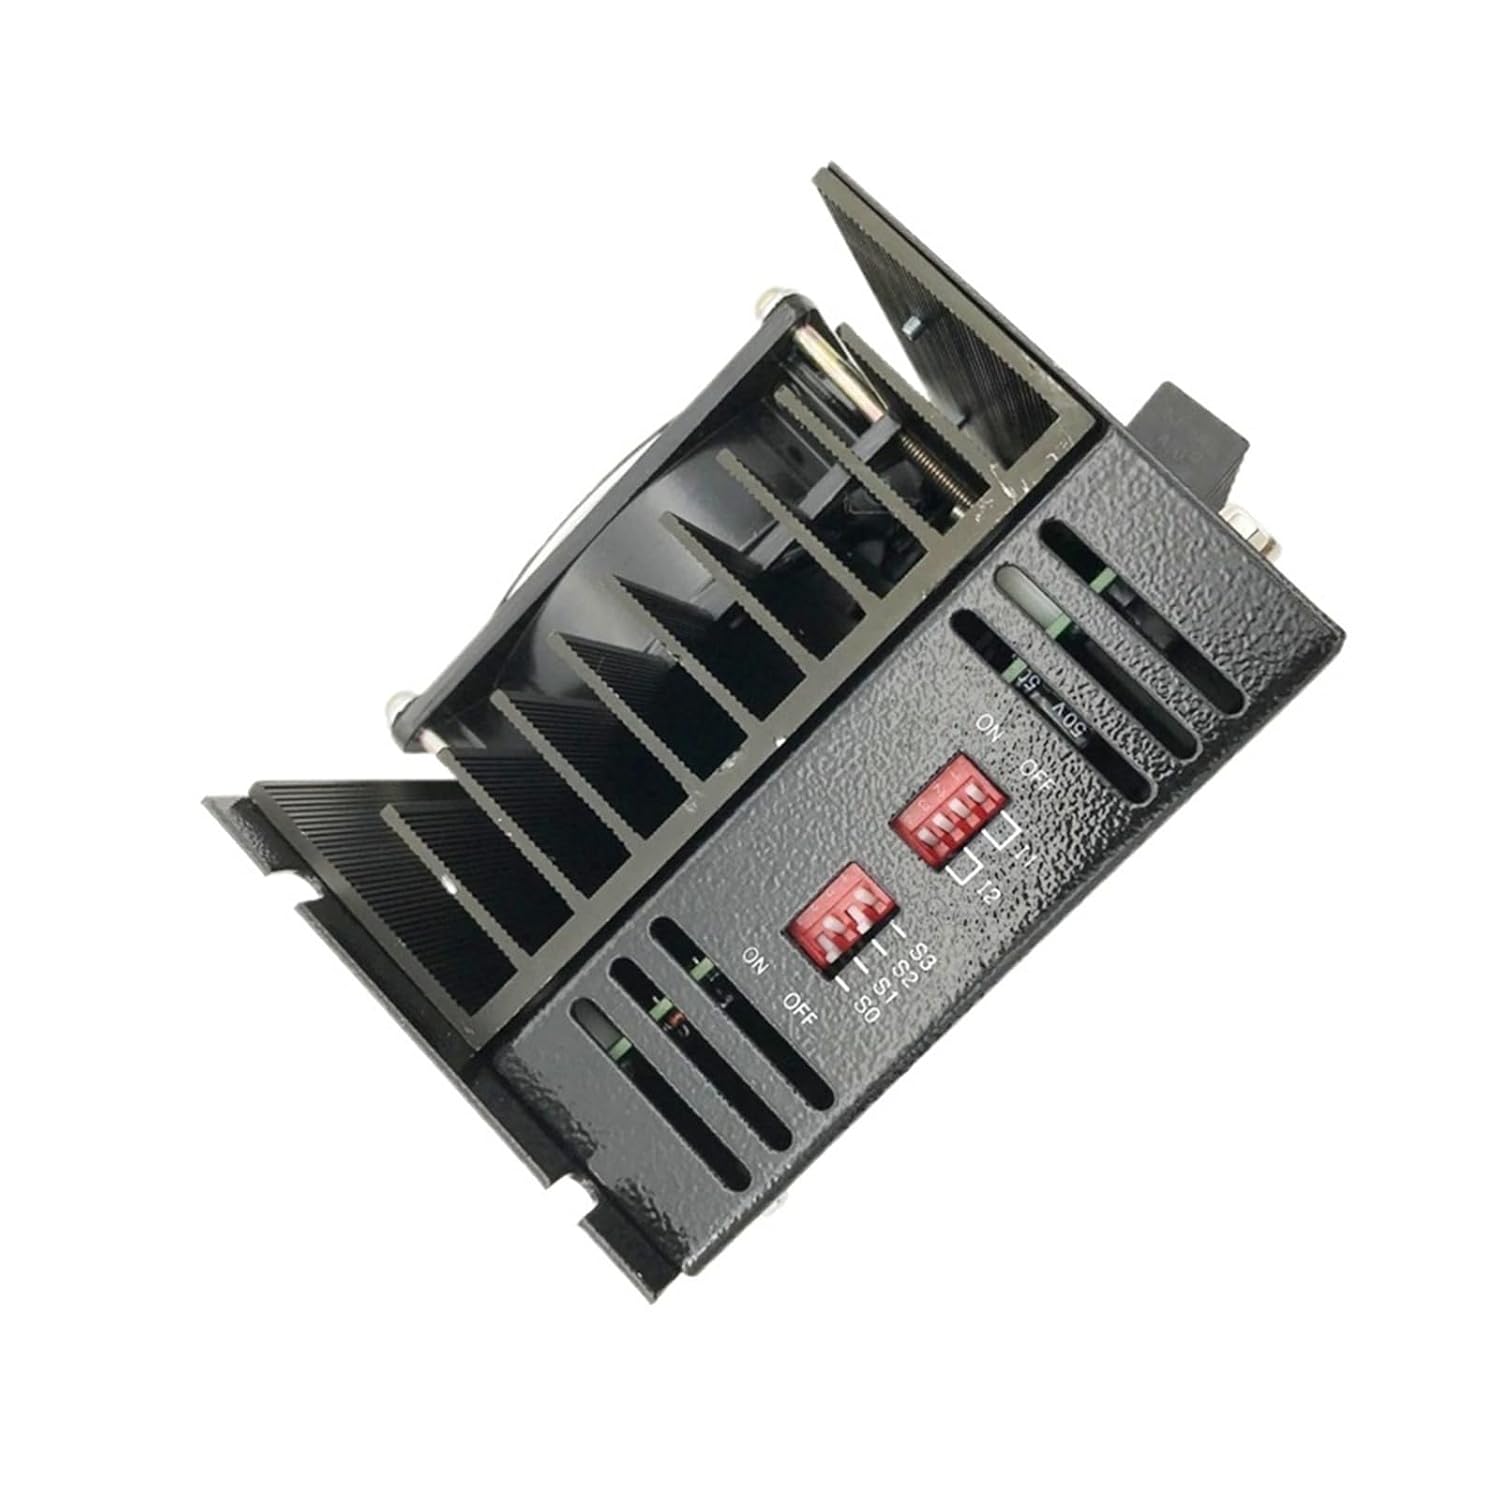
Figure 5.1: Side view of the HB-B3HL driver, highlighting the cooling fins for heat dissipation and the DIP switches used for configuration. Ensure these fins are not obstructed during mounting.
5.2 Wiring Connections
Refer to the terminal labels on the driver for correct connections. All wiring should be performed with the power supply disconnected.
- Power Input (AC 220V): Connect the AC 220V power supply to the terminals labeled 'AC H' and 'AC L'. Ensure proper phase connection.
- Motor Output: Connect the 3-phase stepper motor to the terminals labeled 'A', 'B', and 'C'. Refer to your motor's documentation for correct phase sequence.
- Control Signals (D-sub Connector): Use the provided D-sub connector to wire control signals from your controller. Typical signals include Pulse (PUL), Direction (DIR), and Enable (ENA). Consult the driver's specific pinout diagram (if available) for detailed connections.
- Grounding: Connect the protective earth ground to the designated ground terminal on the driver.
Figure 5.2: Detailed view of the connection terminals. From left to right: AC 220V power input, motor phase outputs (A, B, C), and the D-sub connector for control signals. The 'POWER' indicator LED is also visible.
6. Operating Instructions
After successful installation and wiring, the driver can be configured and operated.
6.1 Initial Power-Up
Once all connections are secure, apply power to the driver. The 'POWER' indicator LED on the unit should illuminate, indicating that the driver is receiving power.
6.2 Microstep and Current Settings
The driver features DIP switches for setting microstep resolution and output current. Refer to the label on the driver or the specific product datasheet for the correct switch configurations for your application. Adjust these settings according to your motor's requirements and desired motion precision.
Figure 6.1: The side panel of the driver showing the DIP switches. These switches are used to configure the microstep resolution and the output current to the stepper motor. Consult the driver's technical documentation for specific switch settings.
6.3 Control Signal Input
The driver responds to pulse (PUL), direction (DIR), and enable (ENA) signals from your motion controller. Ensure these signals are correctly configured and timed according to the driver's specifications for smooth and accurate motor movement.
7. Maintenance
Regular maintenance helps ensure the longevity and optimal performance of your stepper motor driver.
- Keep Clean: Periodically clean the driver unit, especially the cooling fins, to prevent dust accumulation that can hinder heat dissipation. Use a soft, dry cloth or compressed air.
- Inspect Connections: Regularly check all wiring connections for tightness and signs of wear or corrosion. Re-tighten as necessary.
- Environmental Check: Ensure the operating environment remains within specified temperature and humidity ranges.
- Ventilation: Confirm that airflow around the unit is unobstructed.
8. Troubleshooting
This section provides guidance for common issues encountered during operation.
- No Power Indicator:
- Check the AC 220V power supply connection.
- Verify the power source is active.
- Inspect the power cable for damage.
- Motor Not Moving or Irregular Movement:
- Confirm motor wiring (A, B, C) is correct and secure.
- Check control signal connections (PUL, DIR, ENA) from the controller.
- Verify microstep and current settings on the DIP switches match the motor and application requirements.
- Ensure the motor is not overloaded.
- Driver Overheating:
- Check for proper ventilation and clear any obstructions from the cooling fins.
- Ensure the ambient temperature is within the specified operating range.
- Verify the output current setting is not excessively high for the motor.
- Motor Vibrates but Does Not Rotate:
- Recheck motor phase wiring. Incorrect phase sequence can cause vibration without rotation.
- Ensure the motor is correctly matched to the driver's current capabilities.
9. Warranty and Support
Specific warranty information for the MGZGEAEKCK HB-B3HL / HD-B3C stepper motor driver is not provided in this document. Please refer to your purchase documentation or contact your vendor for details regarding warranty coverage and technical support.
For technical assistance or inquiries, please reach out to the manufacturer or your authorized distributor. When contacting support, please have your product model number (HB-B3HL or HD-B3C) and purchase date readily available.


