
Introduction
This manual provides essential information for the installation, operation, and maintenance of your Aramox Digital Car Amplifier DAP3.0. Please read it thoroughly before use to ensure proper functionality and safety. Adhering to these instructions will help you achieve optimal audio performance and extend the lifespan of your device.
Important Safety Information
- Professional Installation Recommended: It is strongly recommended to have the installation done by a professional mechanic to prevent damage to the amplifier or your vehicle.
- Power Source: Ensure the amplifier is connected only to a DC12V power source. Connecting to an incorrect voltage can cause severe damage.
- Ventilation: Ensure adequate ventilation around the amplifier. Do not obstruct cooling vents, as this can lead to overheating and potential malfunction.
- Wiring: Double-check all wiring connections for correct polarity and secure fit before powering on the device to avoid short circuits or damage.
- Moisture: Keep the amplifier away from water and excessive moisture. Exposure to liquids can cause electrical hazards and damage.
Package Contents
Verify that all items are present in the package:
- 1 x Car DSP Amplifier (Aramox DAP3.0)
- 1 x Wiring Harness
- 1 x Instruction Manual (this document)

Product Features
- Precise Sound Adjustments: Offers a bass adjustment range of 50Hz to 300Hz, a treble adjustment range of 1kHz to 20kHz, and a volume adjustment range of -12dB to 12dB for fine-tuning your audio output.
- Powerful Sound Output: Delivers powerful and clear sound with 4 channels of 50W rated power and 60W maximum power, providing an immersive listening experience.
- Highly Stable Sound Output: The DSP power amplifier supports 2/4 ohm stable operation, ensuring consistent and clear sound at various volume levels and speaker configurations.
- Pure Sound Quality: Utilizes Class A/B amplification technology with a 96dB signal-to-noise ratio, effectively reducing noise interference and restoring music to its original, pure form.
- Compact and Versatile Design: Its compact size and robust metal construction make it easy to install in various car sound systems, suitable for both DIY enthusiasts and professional setups.
- Efficient Heat Dissipation: The metal casing is designed for effective heat management, ensuring stable performance even under demanding conditions.
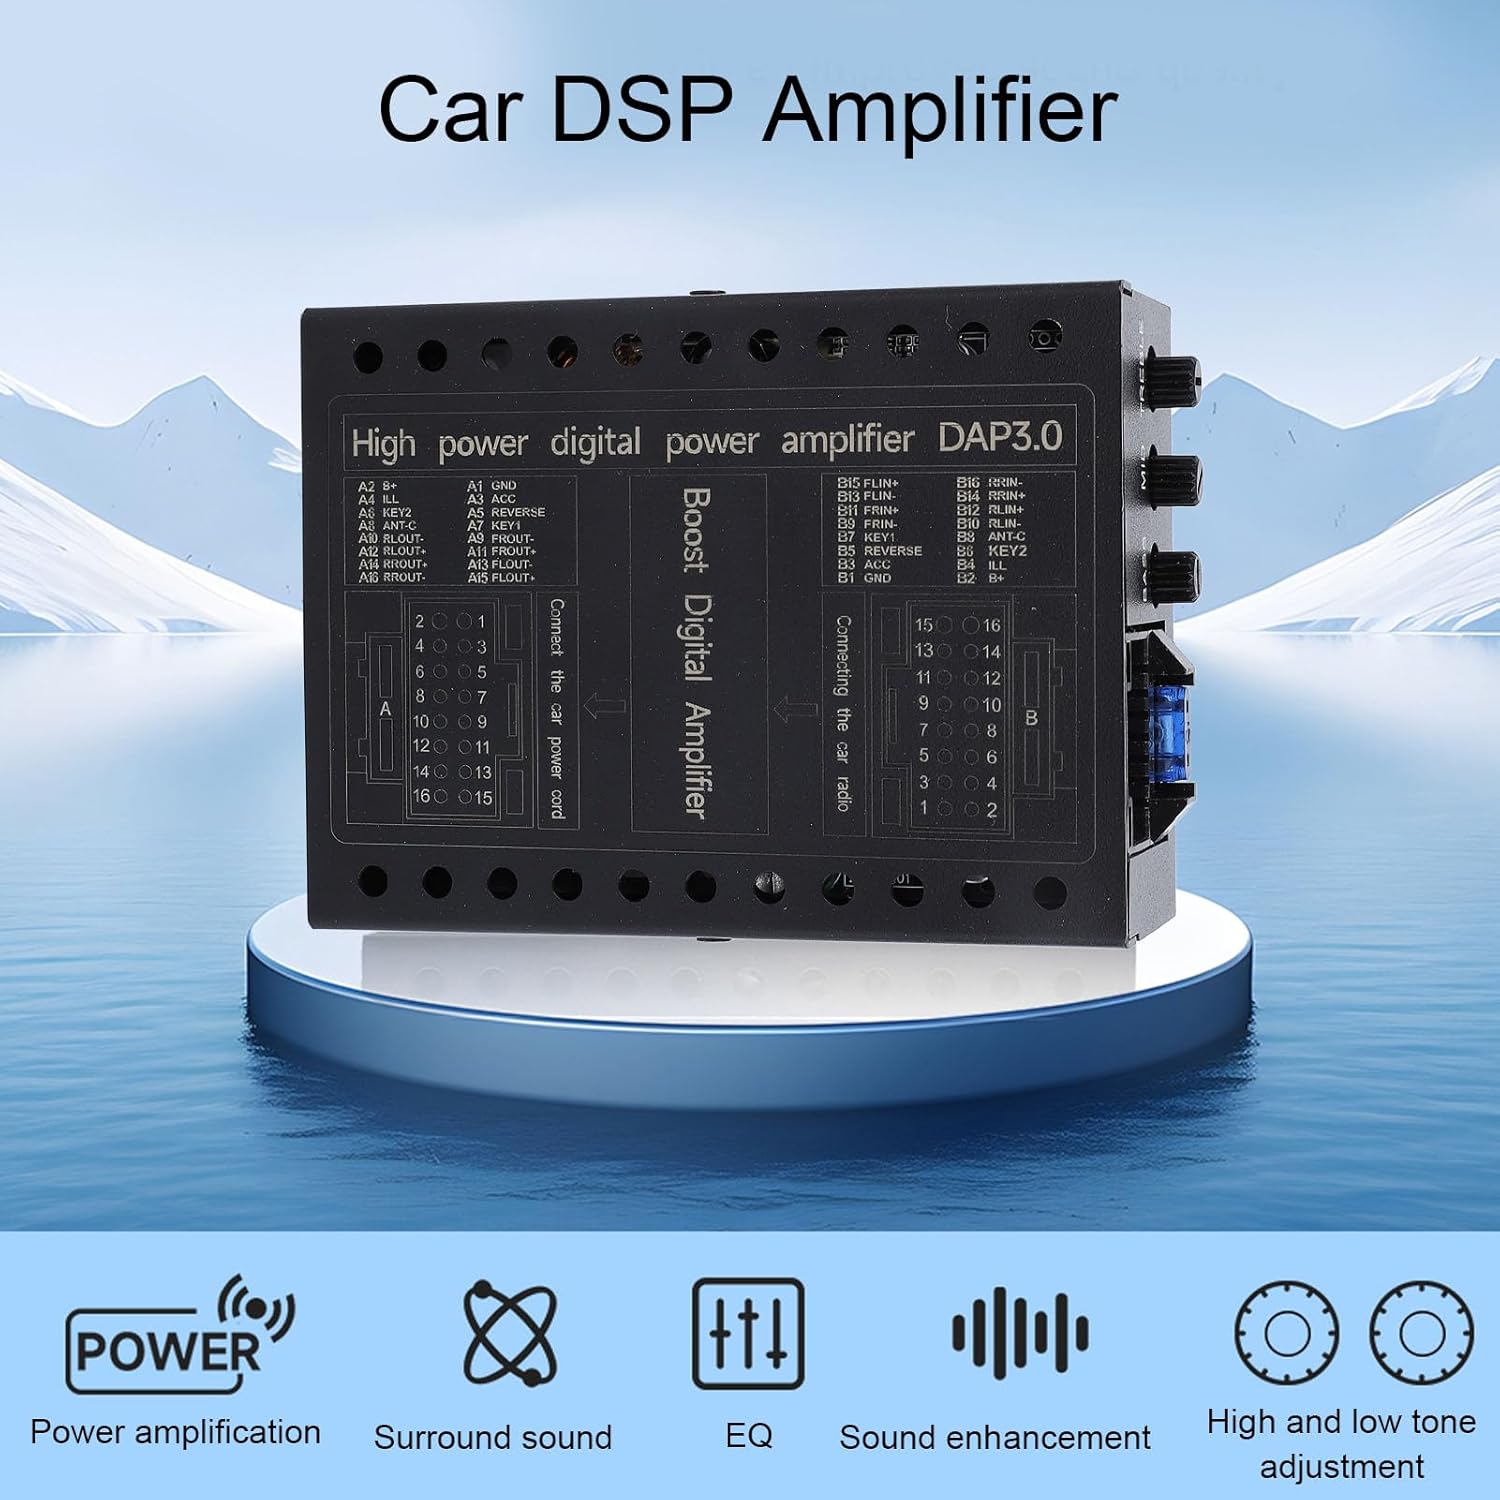

Technical Specifications
| Parameter | Value |
|---|---|
| Working Voltage | DC12V |
| Standby Current | ≤1mA |
| Standby Power Consumption | ≤0.1W |
| Signal to Noise Ratio | 96dB |
| Separation | 90dB |
| Total Harmonic Distortion | ≤0.01% |
| Input Voltage | 14VPP |
| Output Voltage | 25VPP |
| Sampling Frequency | 48K-192K |
| Frequency Response Range | 20Hz - 20kHz |
| Bass Adjustment Range | 50Hz - 300Hz |
| Treble Adjustment Range | 1kHz - 20kHz |
| Volume Adjustment Range | -12dB to 12dB |
| Rated Power | 4CH x 50W |
| Maximum Power | 4CH x 60W |
| Input Impedance | VS-ON 4Ω |
| Output Impedance | 4Ω |
| Dimensions (L x W x H) | 97mm x 73mm x 36mm (3.8in x 2.9in x 1.4in) |
| Weight | Approximately 13.23 ounces |
| Fitment | Replacement for Car Sound Systems |

Setup and Installation
Important: Professional installation is highly recommended to ensure correct wiring and optimal performance. Incorrect installation can damage the amplifier, your vehicle's electrical system, or void your warranty.
Wiring Connections
Refer to the diagram below for proper wiring connections. Ensure all connections are secure, insulated, and correctly polarized.

- Power Connection: Connect the amplifier to a stable DC12V power source. Ensure the ground wire is securely connected to a clean, unpainted metal part of the vehicle's chassis.
- Input Connection: Connect the audio input from your car radio or head unit to the amplifier's input terminals using the provided wiring harness. Match the channels (e.g., front left, front right, rear left, rear right).
- Output Connection: Connect your car speakers to the amplifier's output terminals. Carefully observe positive (+) and negative (-) polarities for each channel to ensure correct sound reproduction.
- Remote Turn-On: Connect the remote turn-on wire from your head unit to the amplifier. This ensures the amplifier powers on and off automatically with your car's audio system.
- Secure Mounting: Mount the amplifier securely in a location that allows for adequate ventilation and is protected from moisture, direct sunlight, and excessive heat. Avoid mounting it near heat-generating components.
Operating Instructions
Once properly installed, the amplifier will power on automatically with your car's audio system. You can fine-tune the sound output using the adjustment knobs located on the unit.
Sound Adjustments

- Bass: Use the BASS knob to adjust the low-frequency output (50Hz - 300Hz). Turn clockwise to increase bass intensity, and counter-clockwise to decrease it.
- Mid: Use the MID knob to adjust the mid-range frequency output. This controls the clarity and presence of vocals and instruments.
- Treble: Use the TREBLE knob to adjust the high-frequency output (1kHz - 20kHz). Turn clockwise to increase treble brightness, and counter-clockwise to decrease it.
- Volume: The overall system volume should primarily be controlled via your car's head unit. The amplifier's internal volume adjustment range (-12dB to 12dB) is typically set during initial setup for optimal gain matching with your head unit.
Maintenance
Proper maintenance ensures the longevity and optimal performance of your amplifier.
- Cleaning: Use a soft, dry cloth to clean the amplifier's exterior. Do not use liquid cleaners, abrasive materials, or solvents, as these can damage the finish or internal components.
- Ventilation: Periodically check that the ventilation grilles are free from dust, debris, and obstructions. Clear airflow is crucial for efficient heat dissipation.
- Connections: Regularly inspect all wiring connections to ensure they remain secure and free from corrosion. Loose connections can lead to poor performance or damage.
- Environment: Avoid exposing the amplifier to extreme temperatures, direct sunlight, or high humidity.

Troubleshooting
If you encounter issues with your amplifier, refer to the table below for common problems and their solutions. If the problem persists, contact customer support or a professional installer.
| Problem | Possible Cause | Solution |
|---|---|---|
| No Sound Output | No power to amplifier, incorrect wiring, amplifier in protection mode, faulty head unit. | Check power connections (DC12V), ground, and remote turn-on wire. Verify audio input/output wiring. Check for blown fuses in the amplifier or vehicle. Ensure head unit is functioning. |
| Distorted Sound | Gain set too high, improper speaker impedance, faulty speaker, poor signal quality. | Adjust gain settings on the amplifier and head unit. Ensure speaker impedance matches amplifier output specifications. Test with different speakers if possible. Check audio cables for damage. |
| Amplifier Overheating | Insufficient ventilation, prolonged high volume use, improper speaker impedance, internal fault. | Ensure amplifier is in a well-ventilated area and vents are clear. Reduce volume. Verify speaker impedance. If problem persists, seek professional inspection. |
| Noise/Humming/Whining | Ground loop, poor signal cable shielding, power interference, faulty components. | Check all ground connections for cleanliness and security. Use high-quality shielded RCA cables. Consider a ground loop isolator. Ensure power cables are routed away from signal cables. |
| Uneven Sound Across Channels | Incorrect balance/fader settings, faulty speaker, wiring issue. | Check balance and fader settings on your head unit. Inspect speaker wiring for correct connections. Test individual speakers. |
Warranty and Support
For warranty information or technical support regarding your Aramox Digital Car Amplifier DAP3.0, please refer to the documentation provided at the time of purchase. You may also contact Aramox customer service directly for assistance.
Additional resources and product information can be found by visiting the Aramox Store on Amazon.
Protection plans are available for purchase separately to extend coverage for your device beyond the standard warranty. Please refer to the product page where you purchased the amplifier for details on available protection plans and their terms.