1. Introduction
This manual provides detailed instructions for the Ayybboo Digital Alarm Clock. Please read carefully to ensure proper use, setup, and maintenance of your device. This alarm clock is designed for precision and convenience, featuring multiple alarms, a clear LCD display, temperature monitoring, and a night light function.
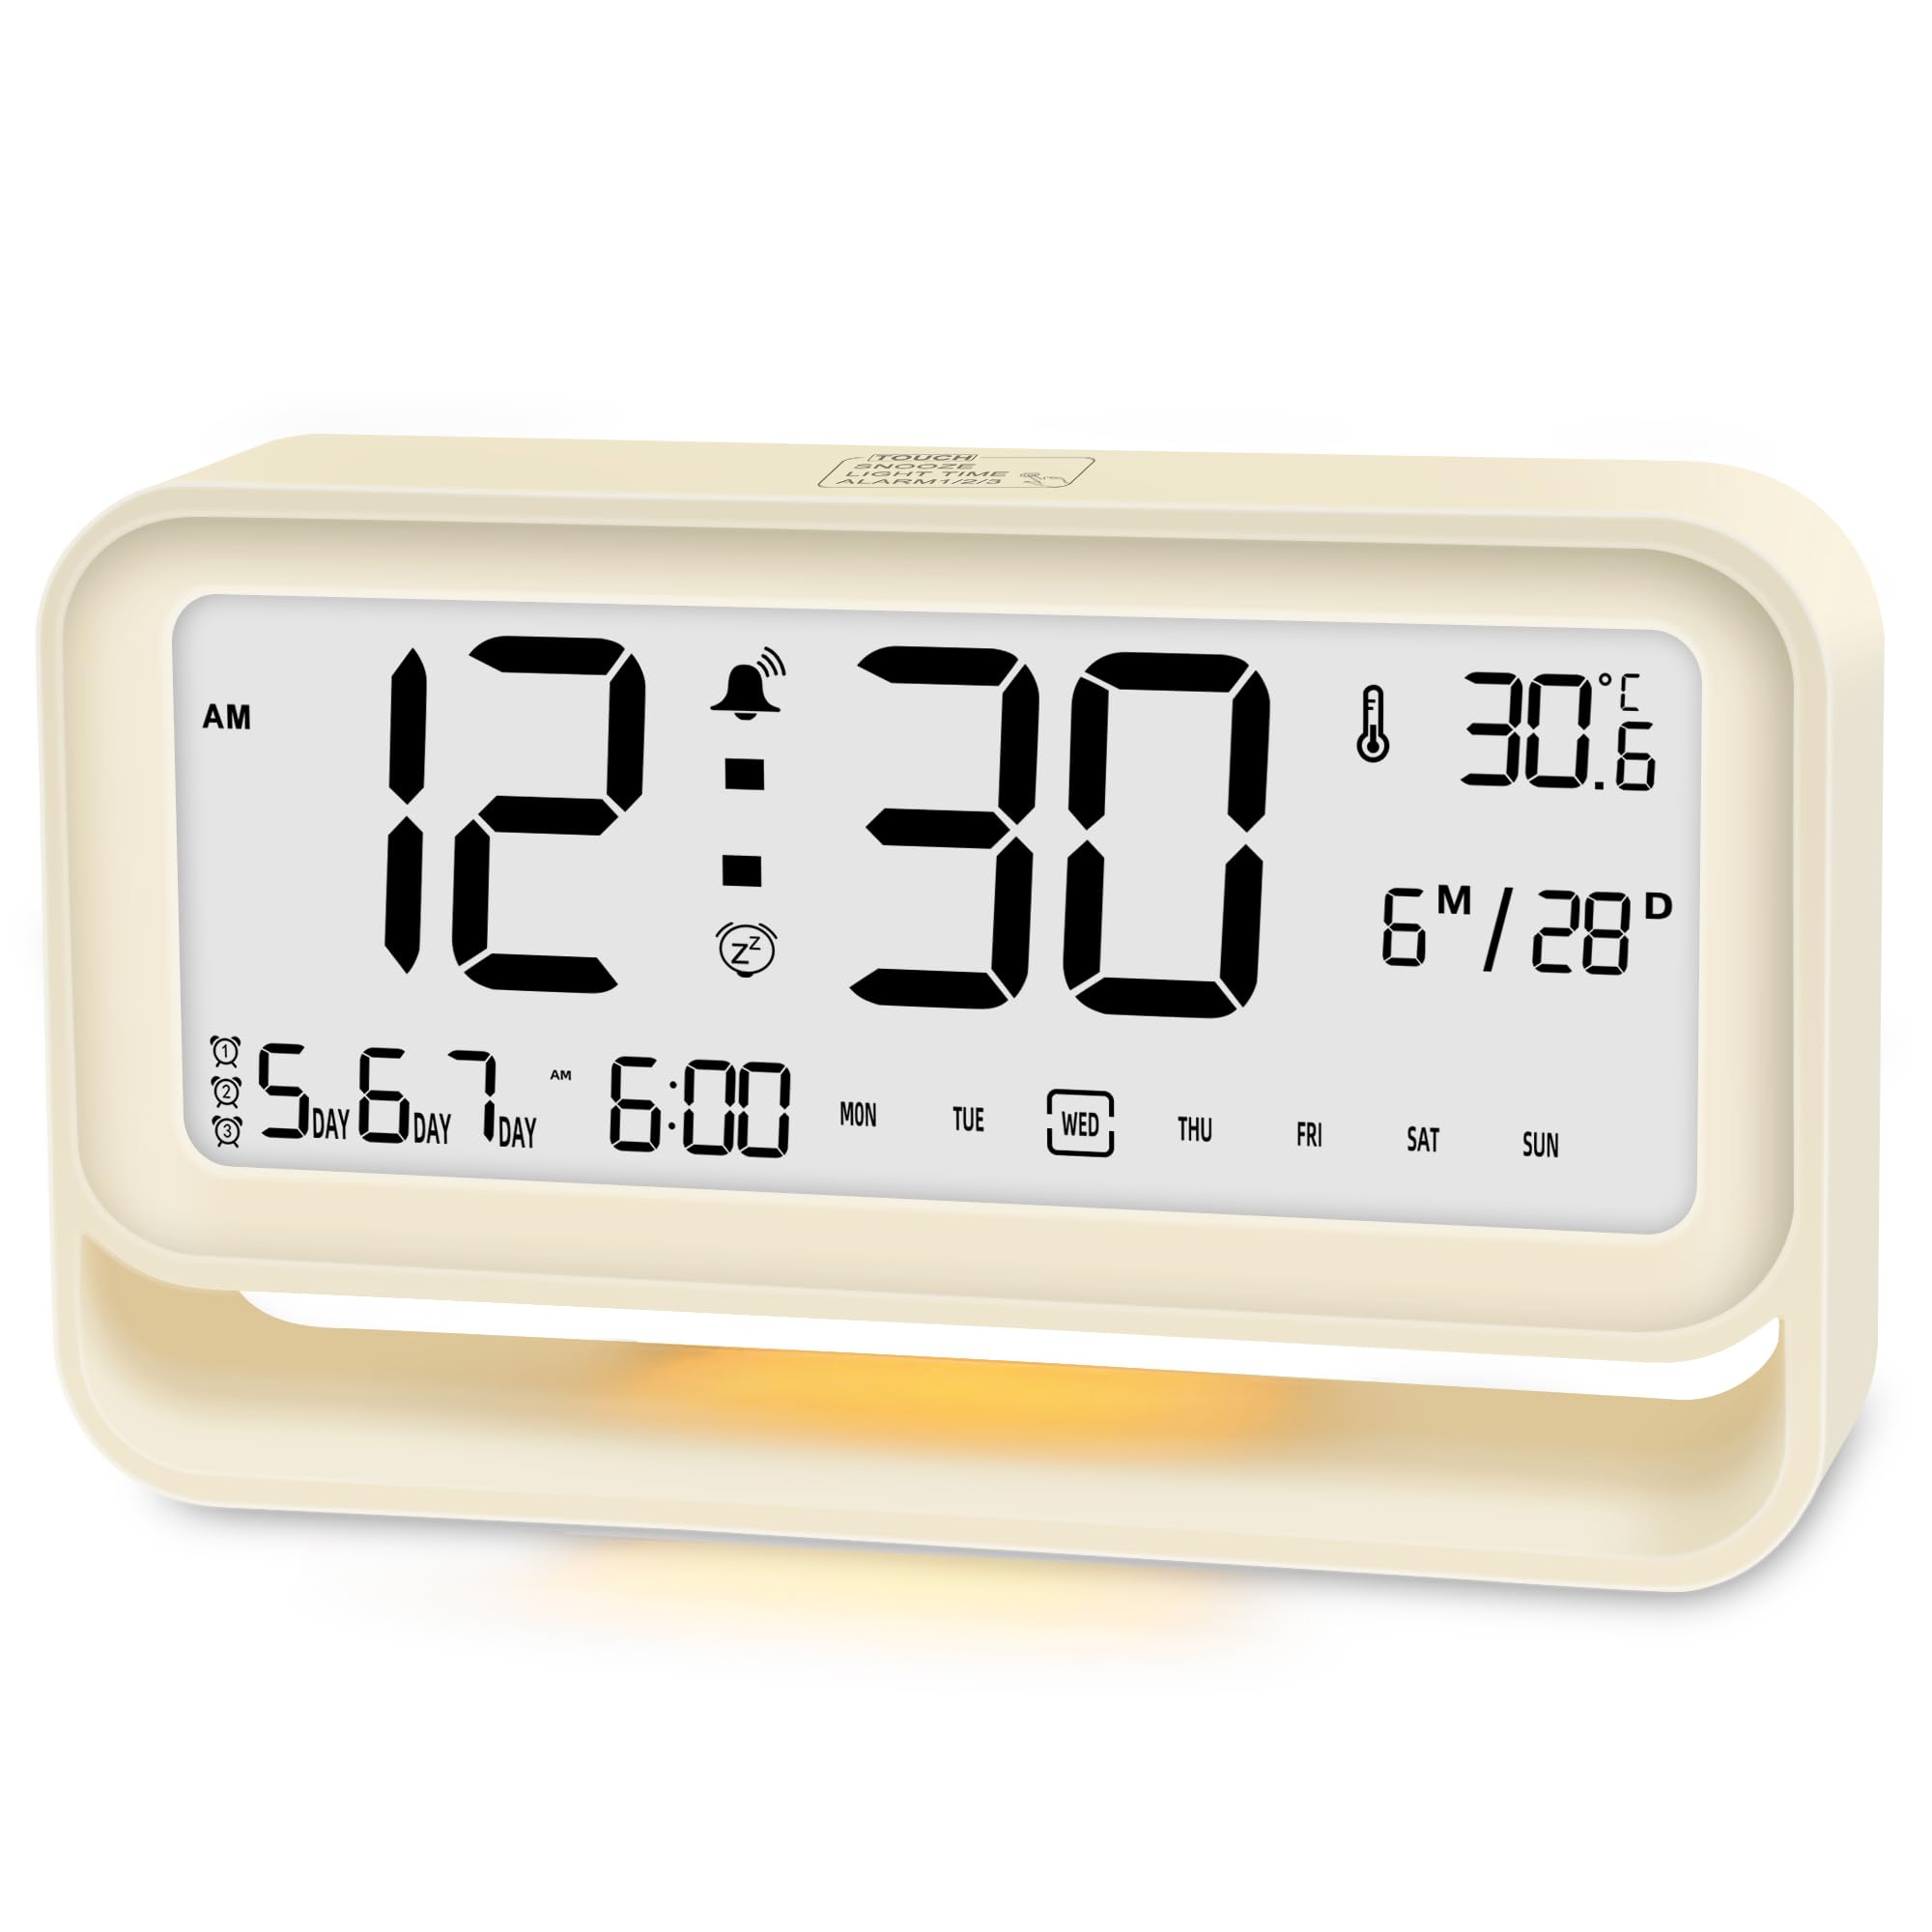
Image 1.1: Ayybboo Digital Alarm Clock with key features highlighted.
2. Safety Information
- Keep the device away from water and high humidity to prevent electrical shock or damage.
- Do not expose the clock to extreme temperatures (hot or cold) or direct sunlight.
- Use only 3 AAA alkaline batteries. Do not mix old and new batteries or different battery types.
- Do not attempt to disassemble or repair the device yourself. Contact qualified personnel for service.
- Keep out of reach of children to prevent accidental ingestion of small parts or batteries.
3. Package Contents
Please check the package for the following items:
- 1 x Ayybboo Digital Alarm Clock
- 1 x User Manual
Note: 3 AAA batteries are required and are not included in the package.
4. Product Overview
4.1 Front Display
The large LCD screen displays the following information:
- Current Time (12-hour or 24-hour format)
- Date and Day of the Week
- Indoor Temperature (°C/°F)
- Alarm Indicators (AL1, AL2, AL3)
- Snooze Indicator
4.2 Rear Buttons and Top Touch Button
The clock features several buttons for setting and control:
- TIME Button: Used to enter time setting mode and confirm settings.
- ALARM Button: Used to enter alarm setting mode, select alarms, and confirm settings.
- + Button: Used to increase values during setting.
- - Button: Used to decrease values during setting.
- SNOOZE/LIGHT (Top Touch Button): Activates snooze during an alarm or turns on the night light.

Image 4.1: Overview of the clock's display and control buttons.
5. Setup
5.1 Battery Installation
- Locate the battery compartment cover on the back of the alarm clock.
- Slide or gently pull the cover to open the compartment.
- Insert 3 new AAA alkaline batteries (not included) into the compartment, ensuring the correct polarity (+ and -) as indicated inside.
- Replace the battery compartment cover securely.
The clock will power on automatically and display a default time. If the display is blank or dim, check battery installation or replace with fresh batteries.
Image 5.1: Battery compartment for 3 AAA batteries.
6. Operating Instructions
6.1 Setting Time and Date
- Press and hold the TIME button for 3 seconds to enter time setting mode. The hour digits will flash.
- Use the + or - buttons to adjust the hour.
- Press TIME again to move to minute setting. Use + or - to adjust minutes.
- Continue pressing TIME to cycle through and set the Year, Month, and Day using the + or - buttons.
- After setting the day, press TIME one last time to exit time setting mode.
6.2 12/24-Hour Format Selection
While in normal time display mode, press the TIME button briefly to switch between 12-hour (with AM/PM indicator) and 24-hour formats.
6.3 Setting Alarms (AL1, AL2, AL3)
The clock allows you to set three independent alarms.
- Press and hold the ALARM button for 3 seconds to enter alarm setting mode. AL1 will flash.
- Use the + or - buttons to adjust the alarm hour.
- Press ALARM again to move to minute setting. Use + or - to adjust minutes.
- Press ALARM again to select the alarm repeat mode:
- MON-FRI: Alarm sounds on weekdays only.
- MON-SAT: Alarm sounds Monday through Saturday.
- MON-SUN: Alarm sounds every day.
- Use the + or - buttons to select the desired repeat mode.
- Press ALARM again to confirm AL1 settings and move to AL2 setting. Repeat steps for AL2 and AL3.
- After setting AL3, press ALARM one last time to exit alarm setting mode.
To activate or deactivate an alarm, briefly press the ALARM button repeatedly in normal time display mode until the desired alarm icon (AL1, AL2, or AL3) appears or disappears on the display.

Image 6.1: Examples of setting three alarms with different day modes.
6.4 Snooze Function
When an alarm sounds, tap the SNOOZE/LIGHT touch button on the top of the clock. The alarm will pause for 5 minutes, and the snooze indicator will flash. After 5 minutes, the alarm will sound again. To turn off the alarm completely, press any button on the back of the clock (TIME, ALARM, +, or -).

Image 6.2: Activating the 5-minute snooze function.
6.5 Night Light Function
Tap the SNOOZE/LIGHT touch button on the top of the clock to activate the gentle backlight. The night light will remain on for approximately 1 minute. Tap the button again to turn it off earlier.
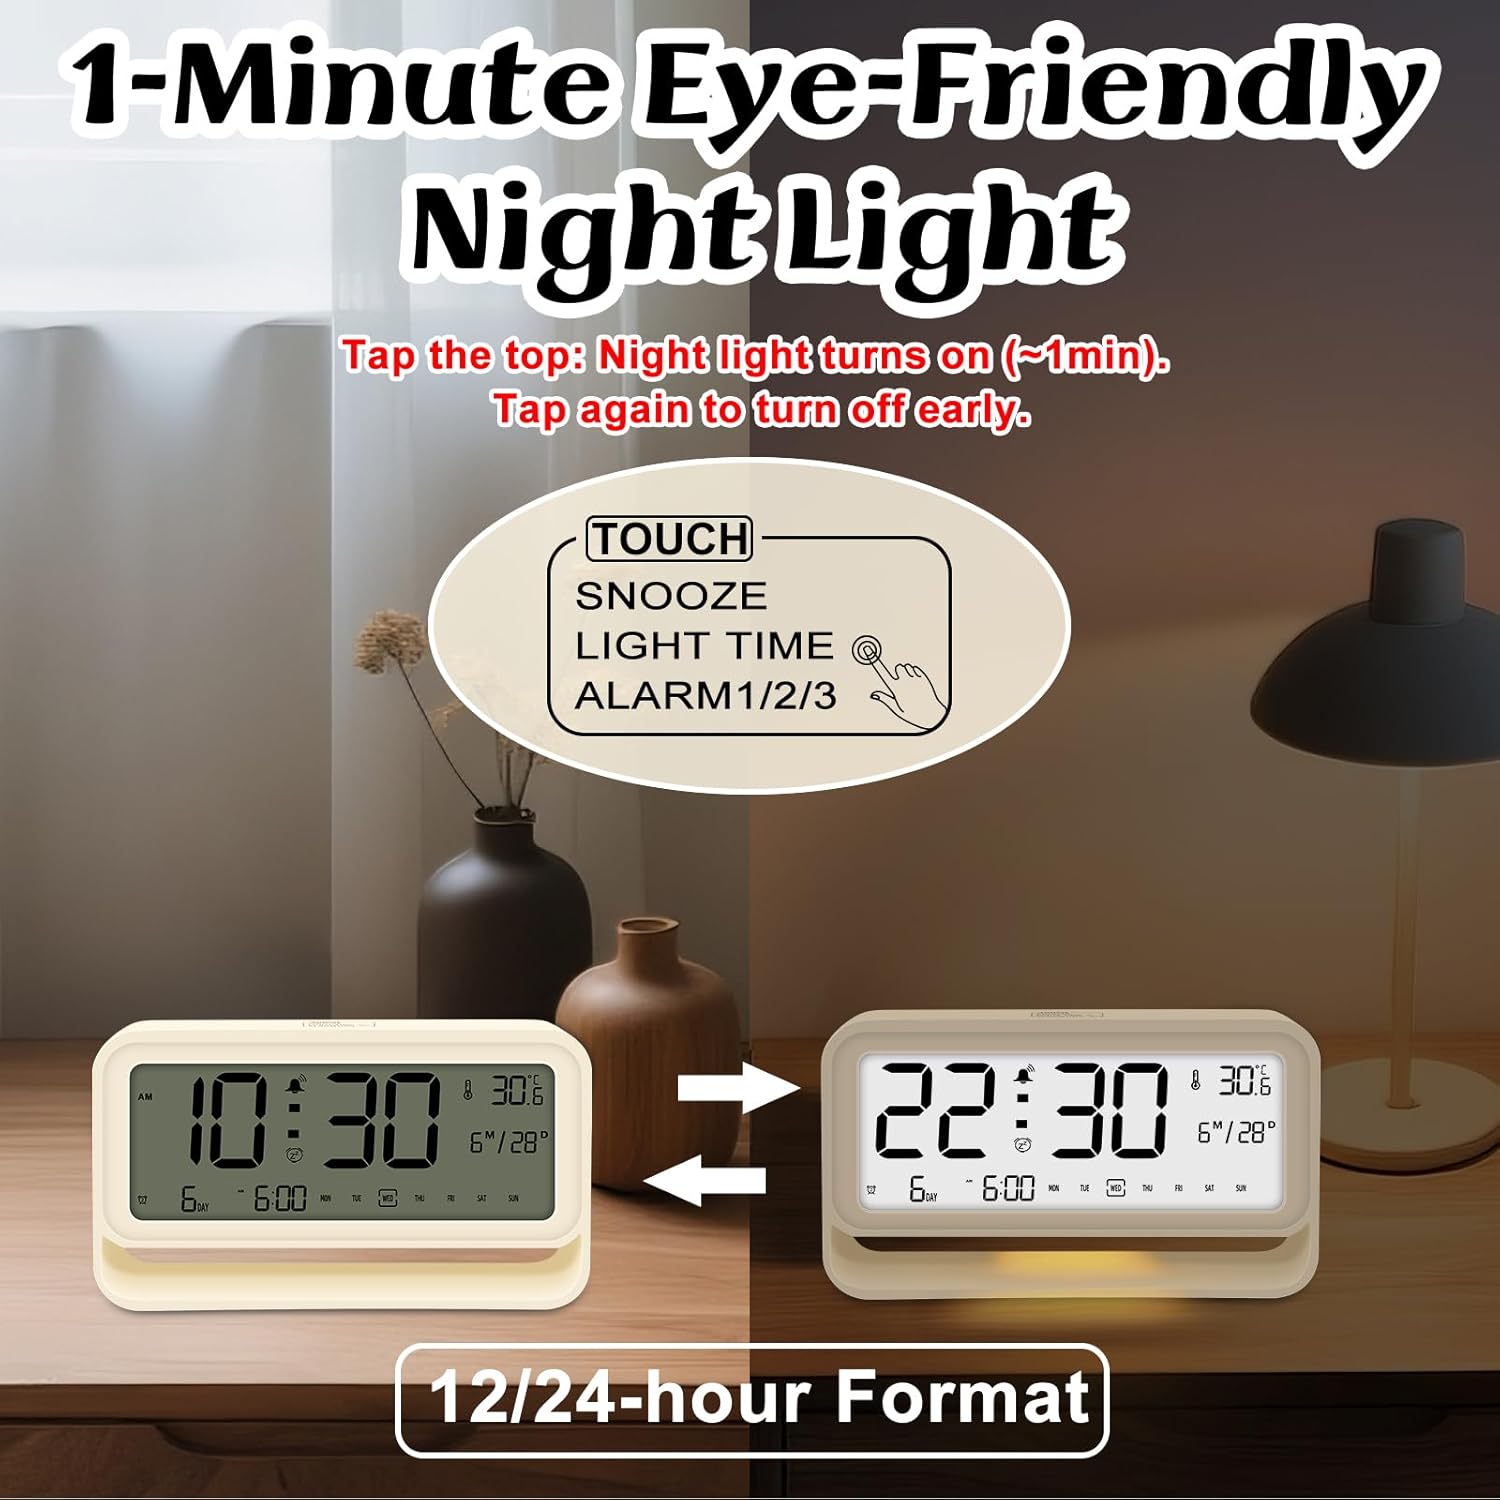
Image 6.3: Activating the 1-minute eye-friendly night light.
6.6 Temperature Display
The clock automatically displays the current indoor temperature in either Celsius (°C) or Fahrenheit (°F). To switch between temperature units, briefly press the - button in normal time display mode.
7. Maintenance
- Cleaning: Wipe the clock with a soft, dry cloth. Do not use liquid cleaners, aerosols, or abrasive materials, as these may damage the surface or internal components.
- Battery Replacement: When the display becomes dim or the clock functions irregularly, it is time to replace the batteries. Follow the battery installation steps in Section 5.1. Remove depleted batteries promptly to prevent leakage.
- Storage: If the clock will not be used for an extended period, remove the batteries to prevent potential damage from battery leakage. Store in a cool, dry place.
8. Troubleshooting
If you encounter any issues with your Ayybboo Digital Alarm Clock, please refer to the following common problems and solutions:
- Display is blank or dim:
- Check if batteries are installed correctly with the right polarity.
- Replace with fresh AAA alkaline batteries.
- Alarm does not sound:
- Ensure the desired alarm (AL1, AL2, or AL3) is activated (its icon should be visible on the display).
- Verify that the alarm time is set correctly.
- Check the alarm day settings (e.g., if set for Mon-Fri, it won't sound on weekends).
- Incorrect time or date:
- Re-enter the time and date settings following the instructions in Section 6.1.
- Night light not working:
- Ensure batteries have sufficient power.
- Tap the SNOOZE/LIGHT button firmly.
- Difficulty understanding settings:
- Carefully re-read the relevant sections of the 'Operating Instructions'.
- Ensure you are pressing and holding buttons for the specified duration (e.g., 3 seconds for setting modes).
9. Specifications
| Brand | Ayybboo |
| Model | Digital Alarm Clock |
| Color | Beige |
| Material | Acrylonitrile Butadiene Styrene (ABS) |
| Product Dimensions | 18 x 3.81 x 8.5 cm (7.09 x 1.5 x 3.35 inches) |
| Item Weight | 194 grams (0.43 lbs) |
| Power Source | 3 x AAA Batteries (not included) |
| Display Type | Digital LCD |
| Special Features | Alarm, Auto-dimmable, Snooze, Temperature Display |
| Room Type | Bedroom, Kitchen, Dining Room, Living Room, Study |
10. Warranty and Support
For warranty information, product support, or to inquire about replacement parts, please refer to the retailer's policy where you purchased this product or visit the official Ayybboo website. Please have your purchase receipt and product model number available when contacting support.


