1. Introduction
Thank you for choosing the VTOMAN X5 Jump Starter with Air Compressor and the VTOMAN V3 Pro Jump Starter. These devices are designed to provide reliable and portable power solutions for your vehicle and other electronic devices. The X5 model combines a powerful jump starter with a digital tire inflator, while the V3 Pro offers a compact and efficient jump-starting solution. Please read this manual thoroughly before using the products to ensure safe and optimal operation.
2. Safety Information
Always observe the following safety precautions when operating the jump starters and air compressor:
- Do not expose the unit to rain or wet conditions.
- Do not operate the unit if it has been dropped or damaged.
- Keep out of reach of children.
- Ensure proper ventilation during use and charging.
- Do not short-circuit the clamps.
- Always connect the positive (+) clamp to the positive (+) terminal and the negative (-) clamp to the negative (-) terminal or a suitable ground point on the vehicle chassis.
- Disconnect the clamps from the vehicle battery immediately after jump-starting.
- Avoid prolonged operation of the air compressor to prevent overheating. Allow it to cool down between uses.
- Wear eye protection when operating the jump starter.
3. Package Contents
Verify that all items are present in your package:
- VTOMAN X5 Jump Starter with Air Compressor
- VTOMAN V3 Pro Jump Starter
- Heavy-duty Smart Jumper Cables (for X5)
- Heavy-duty Smart Jumper Cables (for V3 Pro)
- Air Hose Extension
- Various Nozzles (for air inflation)
- USB-C Charging Cable
- User Manual

Image: VTOMAN X5 and V3 Pro Jump Starters shown with their respective jumper cables and air inflation accessories. The X5 is black with a digital display, and the V3 Pro is black and orange.
4. Product Features
4.1 VTOMAN X5 Jump Starter & Air Compressor
- Powerful 3500A Peak Current: Capable of jump-starting 12V vehicles with up to 9L gas or 8L diesel engines.
- 160PSI Digital Air Compressor: Inflates car tires to 20 PSI in approximately 2 minutes. Features real-time tire pressure detection and auto shut-off.
- 5.1-Inch Smart Screen: Displays battery level, inflator mode, inflate volume, and tire pressure in PSI, BAR, and KPA.
- "BOOST" Function: For completely dead or low-voltage batteries, allowing immediate restart.
- Multi-purpose Inflation: Includes nozzles for cars, bikes, balls, mattresses, and pool floats.

Image: The VTOMAN X5 Jump Starter connected to a car battery, highlighting its 3500A peak current and compatibility with 12V, 9.0L gas, and 8.0L diesel engines, capable of 60+ starts.

Image: The VTOMAN X5 functioning as a 160 PSI cordless tire inflator, demonstrating its use for bicycles, balls, inflatable boats, cars, and motorcycles, with a claim of 0 to 20 PSI in 2 minutes.

Image: A close-up of the VTOMAN X5's large 5.1-inch smart screen, showing digital readouts for battery level, inflator mode, and real-time tire pressure.
4.2 VTOMAN V3 Pro Jump Starter
- 2000A Peak Current: Capable of jump-starting 12V vehicles with up to 6L gasoline or 4L diesel engines.
- Extreme Temperature Operation: Functions reliably in temperatures from -4°F to 140°F (-20°C to 60°C).
- Portable and Compact: Weighs less than 0.7 pounds and measures 5.9 x 3.2 x 1.2 inches, designed for easy carrying.
- Power Bank Functionality: Equipped with USB-A (5V/2.1A) and USB-C (5V/2A) ports for charging mobile devices.

Image: The VTOMAN V3 Pro Jump Starter connected to a car battery, indicating its 2000A peak current and compatibility with 12V, 6.0L gas, and 4.0L diesel engines, also featuring a Boost function.
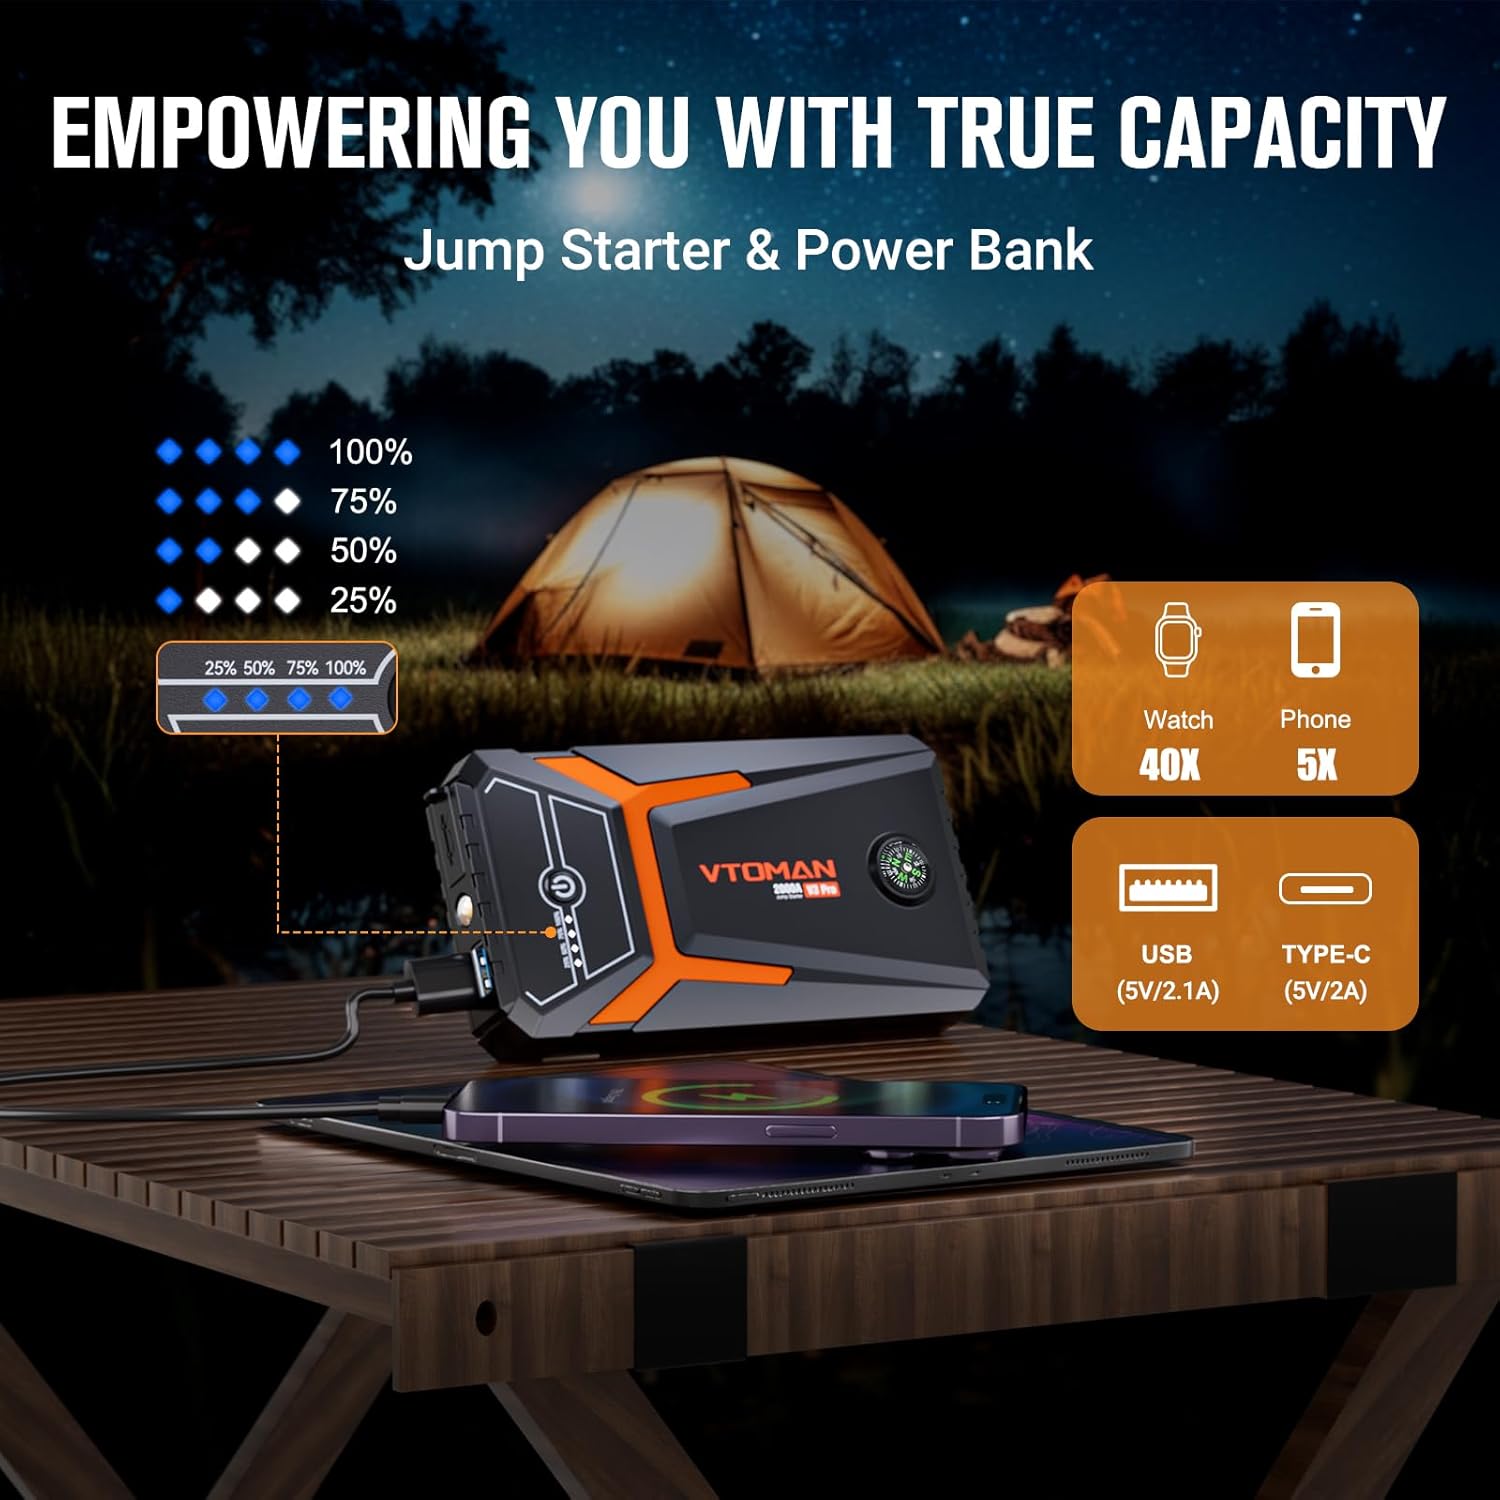
Image: The VTOMAN V3 Pro Jump Starter being used as a power bank, charging a smartphone and a smartwatch, with indicators for battery capacity (100%, 75%, 50%, 25%).

Image: A hand holding the VTOMAN V3 Pro Jump Starter, illustrating its pocket-sized and compact design, with dimensions of 5.95 x 3.15 x 1.15 inches and a weight of 0.61 lbs.
5. Setup
5.1 Charging the Jump Starter
Before first use, fully charge your VTOMAN jump starter. It is recommended to charge the unit every 3-6 months to maintain battery health, even if not in use.
- Connect the provided USB-C charging cable to the Type-C input port on the jump starter.
- Connect the other end of the USB-C cable to a USB wall adapter (not included) or a powered USB port.
- The display (X5) or indicator lights (V3 Pro) will show the charging progress. The unit is fully charged when the battery indicator shows full.
- Charging time for the V3 Pro is approximately 2.6 hours for a full charge.

Image: The VTOMAN X5 Jump Starter being charged via its Type-C port, with an arrow pointing to the correct charging input. A note clarifies that the DC port is for output, not charging.

Image: The VTOMAN V3 Pro Jump Starter connected to a wall charger, indicating it can be fully charged in 2.6 hours and has a 24-month standby time.
6. Operating Instructions
6.1 Jump Starting a Vehicle
- Ensure the jump starter is sufficiently charged (at least 50% recommended).
- Turn off the vehicle's ignition and all accessories.
- Connect the smart jumper cable's blue plug firmly into the jump starter's port.
- Connect the red (+) clamp to the vehicle's positive (+) battery terminal.
- Connect the black (-) clamp to the vehicle's negative (-) battery terminal or a solid, unpainted metal part of the engine block/chassis.
- Once connected correctly, the indicator on the smart cable will show a solid green light (or similar indication). If the battery is completely dead, press the "BOOST" button on the jump starter (X5) or the smart cable (V3 Pro) if available, and wait for the indicator to turn green.
- Start the vehicle. If it doesn't start, wait 30 seconds and try again. Do not attempt more than 3 consecutive starts.
- Once the vehicle starts, immediately disconnect the black (-) clamp first, then the red (+) clamp.
- Disconnect the smart cable from the jump starter.
6.2 Using the Air Compressor (X5 Only)
- Connect the air hose to the air output port on the X5 jump starter.
- Attach the appropriate nozzle to the air hose and connect it to the item you wish to inflate (e.g., tire valve).
- Turn on the X5 unit. The 5.1-inch screen will display the current pressure.
- Use the '+' and '-' buttons to set the desired pressure.
- Press the inflation button to start the compressor. The compressor will automatically stop once the preset pressure is reached.
- Disconnect the air hose from the item and the X5 unit.
6.3 Using as a Power Bank
Both the X5 and V3 Pro can be used to charge portable electronic devices.
- Connect your device's USB charging cable to the appropriate USB output port on the jump starter (USB-A or USB-C).
- The jump starter will automatically begin charging your device.
- Monitor your device's charging status.
7. Maintenance
- Cleaning: Wipe the unit with a soft, dry cloth. Do not use harsh chemicals or abrasive cleaners.
- Storage: Store the jump starter in a cool, dry place away from direct sunlight and extreme temperatures. Ensure it is fully charged before long-term storage.
- Battery Care: Recharge the unit at least once every 3-6 months to prolong battery life, even if not in use.
- Cable Inspection: Regularly inspect the jumper cables and clamps for any signs of damage, corrosion, or wear. Replace if necessary.
8. Troubleshooting
| Problem | Possible Cause | Solution |
|---|---|---|
| Unit does not turn on. | Battery is depleted. | Charge the unit fully. |
| Vehicle does not jump start. | Incorrect cable connection; Battery too dead; Vehicle issue. | Ensure correct polarity (+ to +, - to -). Use "BOOST" function if battery is completely dead. Check vehicle's battery and starter system. |
| Air compressor not inflating. | Hose not connected properly; Desired pressure already reached; Unit overheated. | Check hose connection. Verify target pressure. Allow unit to cool down if used continuously. |
| Smart cable indicator shows red/error. | Reverse polarity; Short circuit; Battery voltage too low. | Disconnect and reconnect with correct polarity. Ensure clamps are not touching each other. Use "BOOST" function. |
9. Specifications
VTOMAN X5
- Peak Current: 3500A
- Engine Compatibility: Up to 9.0L Gas / 8.0L Diesel (12V vehicles)
- Air Compressor Pressure: 160 PSI (Max)
- Display: 5.1-inch Smart Screen
- Input: USB-C
- Output: Jump Start Port, USB-A, USB-C, DC 15V/10A
VTOMAN V3 Pro
- Peak Current: 2000A
- Engine Compatibility: Up to 6.0L Gas / 4.0L Diesel (12V vehicles)
- Operating Temperature: -4°F to 140°F (-20°C to 60°C)
- Dimensions: 5.9 x 3.2 x 1.2 inches (approx.)
- Weight: Less than 0.7 lbs (approx.)
- Input: USB-C
- Output: Jump Start Port, USB-A (5V/2.1A), USB-C (5V/2A)
- Charging Time: Approx. 2.6 hours (0-100%)
10. Warranty and Support
VTOMAN products are designed for reliability and performance. For specific warranty details, product registration, or technical support, please refer to the warranty card included with your product or visit the official VTOMAN website. Keep your purchase receipt as proof of purchase for warranty claims.
Official VTOMAN Store: Visit the VTOMAN Store on Amazon


