
1. Introduction
This manual provides detailed instructions for the installation, operation, and maintenance of your ANNKE Wireless Security Camera System. This system offers comprehensive surveillance with high-definition cameras, advanced recording features, and remote access capabilities. Please read this manual thoroughly before using the product to ensure proper setup and functionality.
2. What's in the Box
Verify that all items listed below are included in your package:
- 1 x 16CH 8MP/4K NVR & 8TB Hard Drive
- 14 x 3MP Camera & 14 x Antenna & 14 x Surveillance Sign
- 15 x Power Adapter & 14 x Mounting Screws Bag
- 1 x HDMI Cable & 1 x Network Cable
- 1 x USB Mouse & 1 x Quick Start Guide

Image: A visual representation of all components included in the ANNKE Wireless Security Camera System package, including the NVR, cameras, hard drive, cables, power adapters, and accessories.
3. System Setup
3.1 NVR Connection
- Connect the Hard Drive: Ensure the 8TB HDD is securely installed in the NVR.
- Connect to a Monitor: Use the provided HDMI cable to connect the NVR to a monitor or TV.
- Connect Network: Connect the NVR to your router using the Ethernet cable for internet access and remote viewing.
- Connect Power: Plug the NVR power adapter into the NVR and then into a power outlet. The NVR will power on automatically.
3.2 Camera Installation
- Attach Antennas: Screw the antennas onto each camera.
- Mount Cameras: Choose suitable locations for your cameras, ensuring good Wi-Fi signal strength and optimal viewing angles. Use the mounting screws to secure the cameras.
- Connect Power: Plug each camera's power adapter into the camera and then into a power outlet.
- Pairing: The cameras are pre-paired with the NVR. If a camera does not connect automatically, refer to the troubleshooting section for manual pairing instructions.
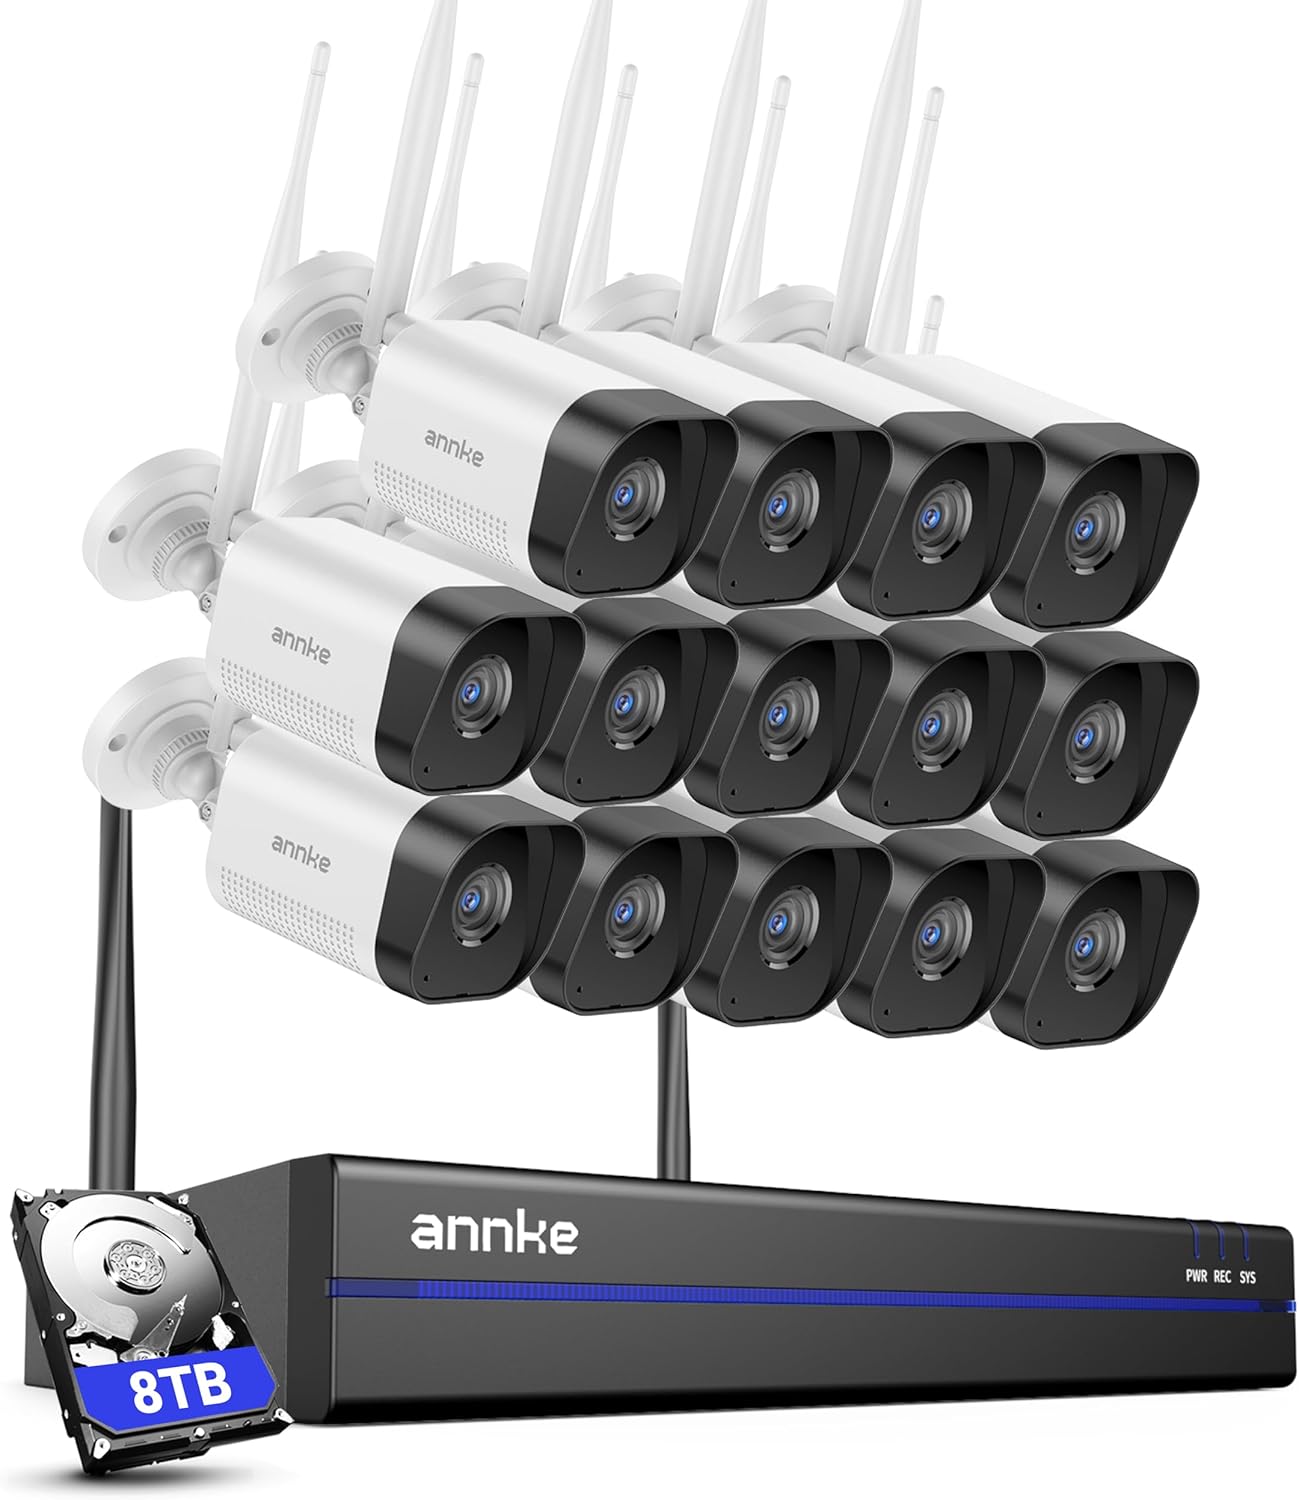
Image: The ANNKE Wireless Security Camera System, showing the NVR unit and several wireless cameras, illustrating the components of the system.
4. Operating Instructions
4.1 Live View and Recording
Once the system is set up, the NVR will automatically display the live feed from all connected cameras. Recordings will begin automatically to the installed 8TB HDD.
4.2 Remote Access and Mobile App
Download the ANNKE mobile application from your device's app store. Follow the in-app instructions to add your NVR system for remote viewing, playback, and system configuration from anywhere.

Image: A person using a smartphone to view live camera feeds, with a tablet and laptop in the background also displaying surveillance footage, demonstrating remote access capabilities.
4.3 Two-Way Audio
Each camera features a built-in microphone and speaker, enabling two-way communication. Use the mobile app to listen to audio from the camera's location and speak through the camera's speaker.

Image: A split image showing a person speaking into a phone with a message bubble "Hello, your package has arrived!" and a delivery person responding "Okay, wait a moment, pls." through the camera, illustrating the two-way audio function.
4.4 Human Detection and Alerts
The system utilizes AI human detection to minimize false alarms. When human motion is detected, the system can send instant alerts via the mobile app or email. Customizable monitoring zones can be set to focus on specific areas.

Image: An overhead view of a person walking on a path, highlighted by a blue detection box, with icons for Siren, APP, and Email alerts, and a notification from "Annke Sight" indicating a motion detection alert.
4.5 Smart Playback
Access recorded footage through the NVR interface or mobile app. The H.264+ video compression ensures efficient storage while maintaining video quality. Smart playback features allow for quick review of important events.
4.6 Voice Assistant Integration
The system supports integration with voice assistants like Alexa. You can use voice commands to view camera feeds on compatible smart displays.

Image: A smart display showing a live feed of a backyard with a pool, accompanied by the text "Work with Alexa" and a speech bubble saying "Alexa, show me the backyard."
5. Maintenance
- Regular Cleaning: Periodically clean camera lenses and housings to ensure clear image quality. Use a soft, damp cloth.
- Firmware Updates: Check for and install firmware updates for the NVR and cameras to ensure optimal performance and security. These are typically available through the mobile app or ANNKE website.
- Hard Drive Health: Monitor the health of the 8TB HDD through the NVR settings. Replace if any issues are detected.
- Cable Inspection: Regularly inspect all power and network cables for any signs of wear or damage.
6. Troubleshooting
6.1 No Image on Monitor
- Ensure the NVR is powered on and the power adapter is securely connected.
- Check the HDMI/VGA cable connection between the NVR and the monitor.
- Verify the monitor input source is correctly selected.
6.2 Cameras Not Connecting
- Ensure cameras are powered on and within range of the NVR's Wi-Fi signal.
- Check for obstructions that might interfere with the wireless signal.
- If cameras were not pre-paired or lost connection, refer to the NVR's user interface for manual pairing instructions. Typically, this involves resetting the camera and initiating a search on the NVR.
6.3 Remote Access Issues
- Verify the NVR is connected to the internet via the Ethernet cable.
- Ensure your mobile device has a stable internet connection.
- Check firewall settings on your router that might be blocking the connection.
- Confirm the ANNKE app is updated to the latest version.
6.4 Poor Night Vision
- Ensure the camera lens is clean and free from dust or cobwebs.
- Check for any reflective surfaces close to the camera that might be causing IR glare.
7. Specifications
NVR Specifications:
| Feature | Detail |
|---|---|
| Video Format | H.264+ |
| IP Video Input | 16CH Wireless |
| Video Output | HDMI Up to 4K |
| Audio Output | Support |
| Max Recording Resolution | Up to 8M |
| Max Playback Resolution | Up to 8M |
| Max Playback Channel | 4CH |
| Max Playback Capacity | 4CH 5MP/2CH 8MP |
| HDD | 1 SATA interface, Up to 8TB capacity (2.5 & 3.5 inches) |
| Network Interface | RJ45x1 (10/100M) |
IP Camera Specifications:
| Feature | Detail |
|---|---|
| Video Resolution | 3MP (3840 x 2160) |
| Image Sensor | 1/2.7" Progressive Scan CMOS |
| Video Compression | H.264+ |
| Audio Compression | G.711A |
| Lens | 3.6mm |
| Angle of View | 70° |
| Number of Infra-Red LEDs | 18 |
| Night Vision Distance | Up to 100ft/30m |
| IR-Cut Filter | Yes |
| Ethernet | RJ45x1 (10M/100M) |
| Wireless | 2.4G & 5.8G dual-band, IEEE802.11b/g/n/ac |
| Weatherproof Rating | IP66 |

Image: A monitor displaying multiple camera feeds, highlighting the 16-channel 8MP wireless NVR with dual-band 2.4GHz and 5.8GHz WiFi Pro technology for wider coverage and faster speed.

Image: An ANNKE camera mounted outdoors, with rain visible, indicating its IP66 weatherproof rating and resistance to cold (-4°F / -20°C) and hot (140°F / 60°C) temperatures.

Image: A comparison of a scene captured by an ANNKE camera during the day (2K Day) and at night (2K Night), demonstrating crystal-clear 2K image quality and 100ft night vision.
Image: A graphic of a hard drive labeled "ANNKE Professional Security Grade Hard Drive," emphasizing its design for 24/7 surveillance.
8. Warranty and Support
ANNKE is committed to providing reliable security solutions and excellent customer service. Your product is backed by comprehensive support.
- After-Sale Support: Assistance is available for any issues encountered after purchase.
- Quick Response: Expect timely responses to your inquiries.
- Lifetime Technical Help: Access to technical support for the lifespan of your product.
For further assistance, please visit the official ANNKE website or contact their customer support team.

Image: A graphic illustrating ANNKE's "Customer First" approach, detailing services like After-Sale Support, Quick Response, starting with customer needs, and Lifetime Technical Help.