1. Introduction
Thank you for choosing the Hisense HMMG3010SMG Microwave Oven. This manual provides essential information for the safe and efficient operation, maintenance, and troubleshooting of your new appliance. Please read it thoroughly before use and keep it for future reference.
2. Important Safety Instructions
WARNING: To reduce the risk of fire, electric shock, injury to persons, or exposure to excessive microwave energy, observe the following basic precautions:
- Read all instructions before using the appliance.
- Do not attempt to operate this oven with the door open as this can result in harmful exposure to microwave energy.
- Do not heat liquids or other foods in closed containers since they are liable to explode.
- Do not use corrosive chemicals or vapors in this appliance.
- Close supervision is necessary when the appliance is used by or near children.
- Only use utensils that are suitable for use in microwave ovens.
- Do not use this appliance for commercial purposes.
- Ensure the appliance is properly grounded.
3. Product Overview
Familiarize yourself with the components and control panel of your Hisense HMMG3010SMG microwave oven.
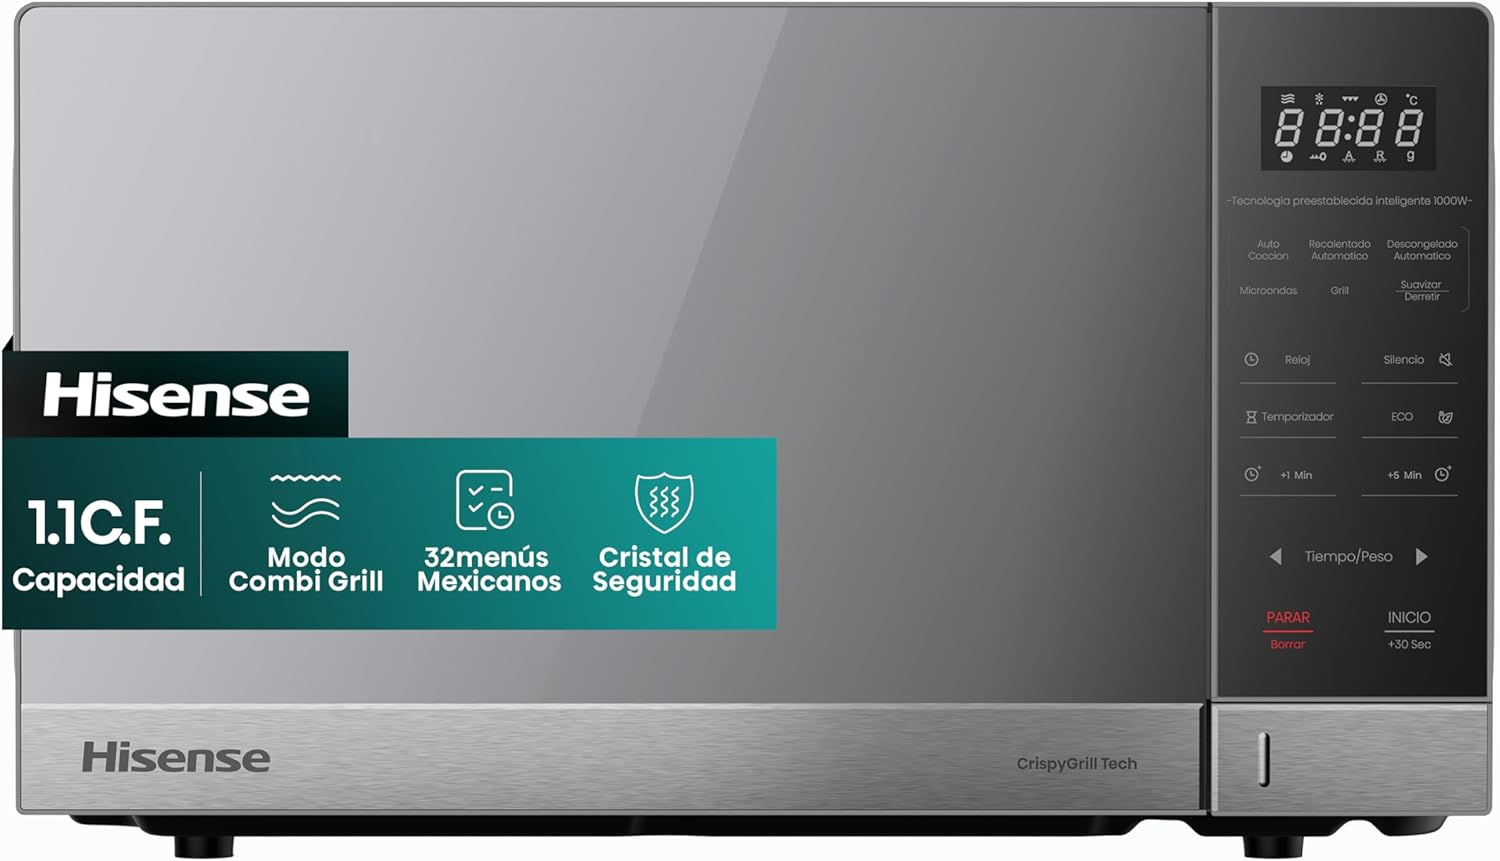
Image 3.1: Front view of the Hisense HMMG3010SMG Microwave Oven, showcasing its sleek design and control panel.

Image 3.2: Diagram illustrating the external dimensions of the Hisense HMMG3010SMG Microwave Oven (51.0cm width, 38.25cm depth, 30.45cm height).

Image 3.3: Close-up view of the microwave's control panel and interior, highlighting the digital display and function buttons.
Control Panel Features:
- Digital Display: Shows time, power level, and cooking status.
- Function Buttons: Microwave, Grill, Auto Cook, Auto Reheat, Auto Defrost, Soften/Melt.
- Time/Weight Adjustment: Buttons for setting cooking time or weight for defrosting.
- Start/Stop Buttons: Initiate or cancel cooking.
- Special Features: Clock, Silence, Timer, ECO, +1 Min, +5 Min.
4. Setup and Installation
- Unpacking: Carefully remove the microwave oven and all packing materials. Check for any damage. Do not operate if damaged.
- Placement: Place the oven on a flat, stable surface strong enough to hold its weight. Ensure adequate ventilation space around the oven (at least 10 cm at the back, 20 cm at the top, and 5 cm on the sides). Do not block air vents.
- Power Connection: Plug the power cord into a properly grounded electrical outlet. Ensure the voltage matches the specifications of the oven.
- Turntable Installation: Place the turntable ring inside the oven cavity, then place the glass turntable plate on top of the ring, ensuring it sits securely on the center hub.

Image 4.1: Interior view of the microwave oven, showing the ceramic coating and the glass turntable with its support ring. The turntable diameter is 31.5 cm.
5. Operating Instructions
5.1. Setting the Clock
To set the current time:
- Press the "Clock" button.
- Use the time/weight adjustment buttons to set the hour.
- Press "Clock" again.
- Use the time/weight adjustment buttons to set the minutes.
- Press "Clock" one more time to confirm.
5.2. Microwave Cooking
To cook with microwave power:
- Place food in a microwave-safe container on the turntable.
- Press the "Microwave" button.
- Use the time/weight adjustment buttons to set the desired cooking time.
- Select the power level (10 levels available) by pressing the "Power" button repeatedly or using the adjustment buttons.
- Press "Start" to begin cooking.
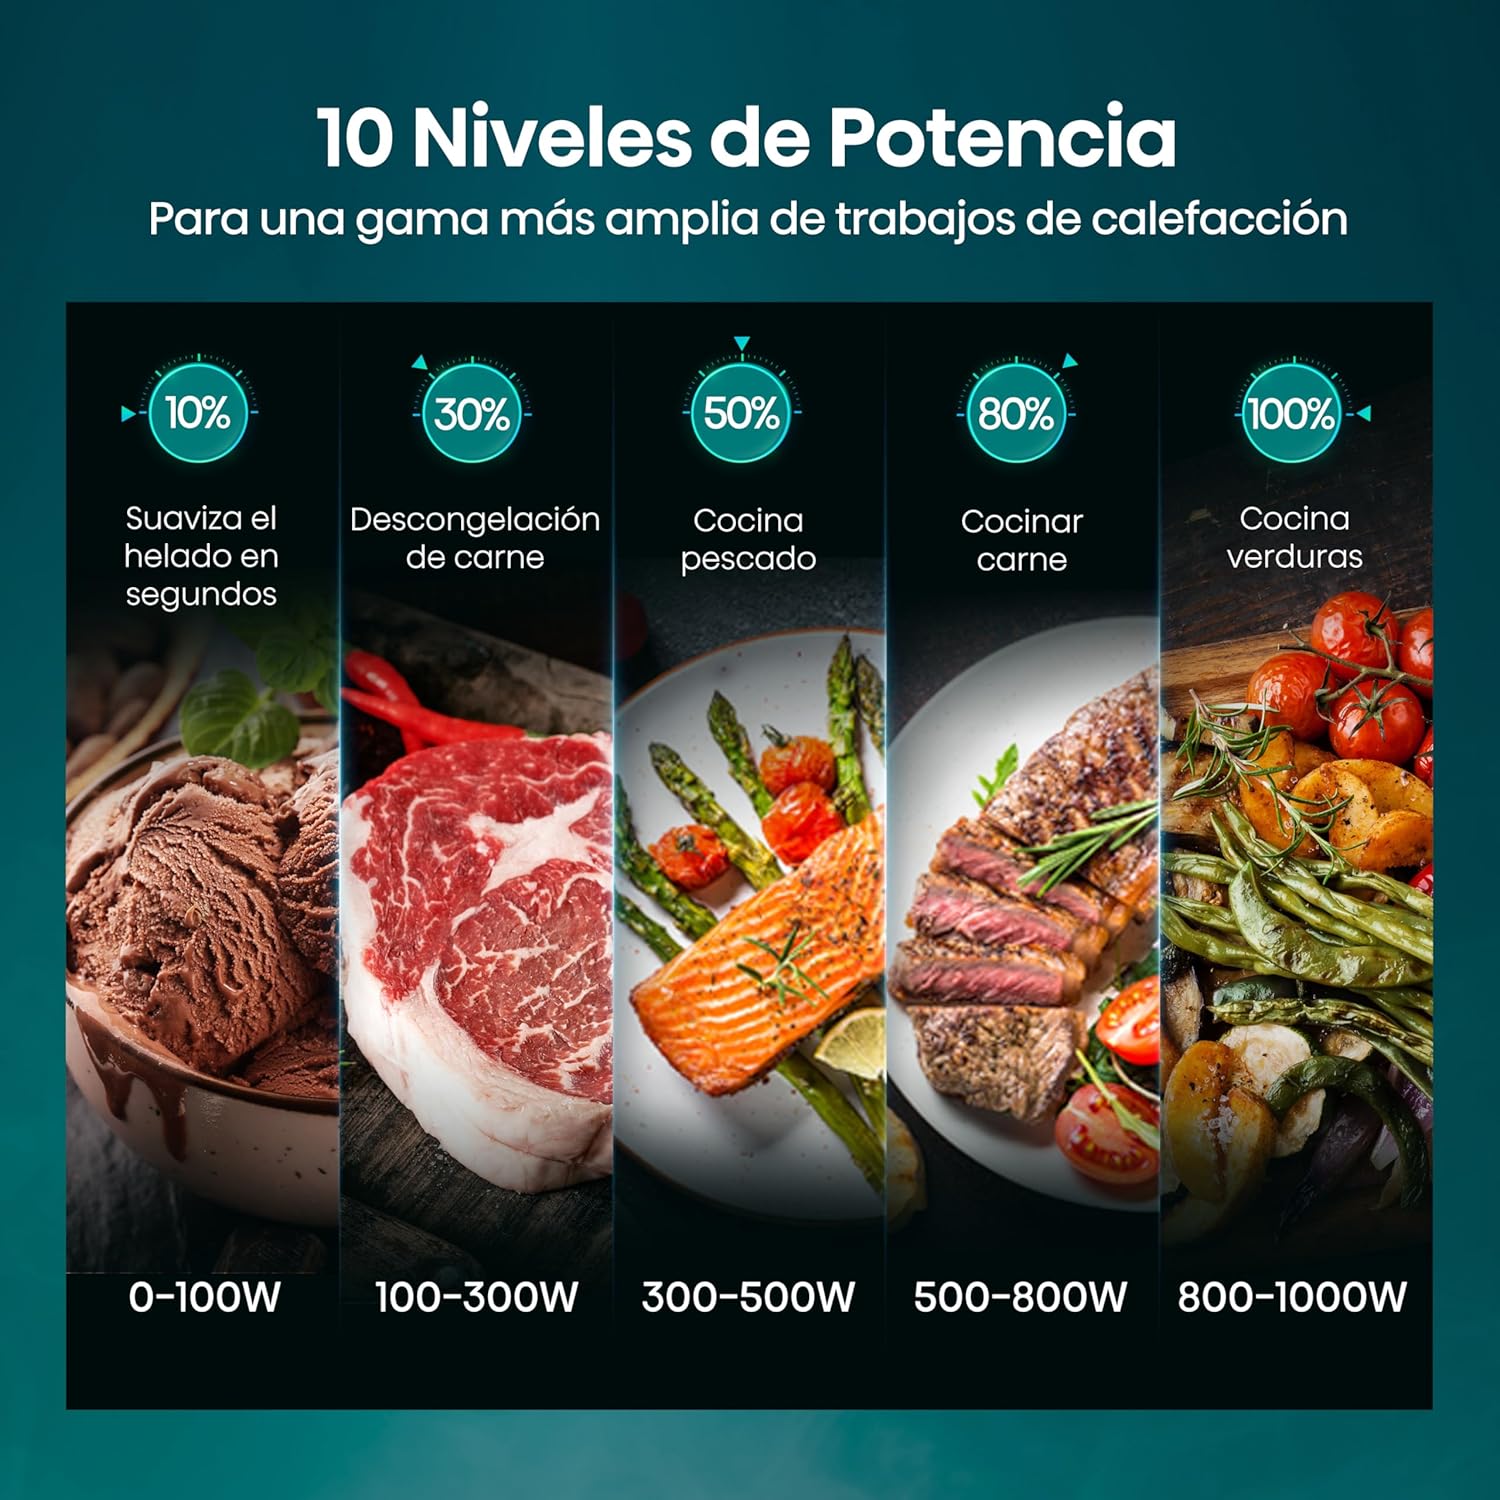
Image 5.1: Visual guide to the 10 power levels, ranging from 10% (0-100W) for softening ice cream to 100% (800-1000W) for cooking vegetables.
5.3. Grill Function (Crispy Grill)
The Crispy Grill function provides a golden and crispy finish to your dishes.
- Place food on the grill rack (if provided) or a suitable heat-resistant dish.
- Press the "Grill" button.
- Set the desired grilling time using the time/weight adjustment buttons.
- Press "Start" to begin grilling.

Image 5.2: Illustration of the Combi Grill mode, showing a pizza (microwave + grill) and grilled chicken (pure grill) for comparison.
5.4. Combi Grill Mode
This mode combines microwave and grill functions for faster cooking and crispy results.
- Place food in a suitable container.
- Press the "Combi Grill" button (refer to your specific model's control panel for exact button).
- Select the desired combination level and cooking time.
- Press "Start".
5.5. Automatic Defrost Function
The automatic defrost function allows for quick and even defrosting without manual adjustments.
- Place the frozen food in the oven.
- Press the "Auto Defrost" button.
- Use the time/weight adjustment buttons to select the food type and weight.
- Press "Start". The oven may prompt you to turn the food halfway through the defrosting cycle.
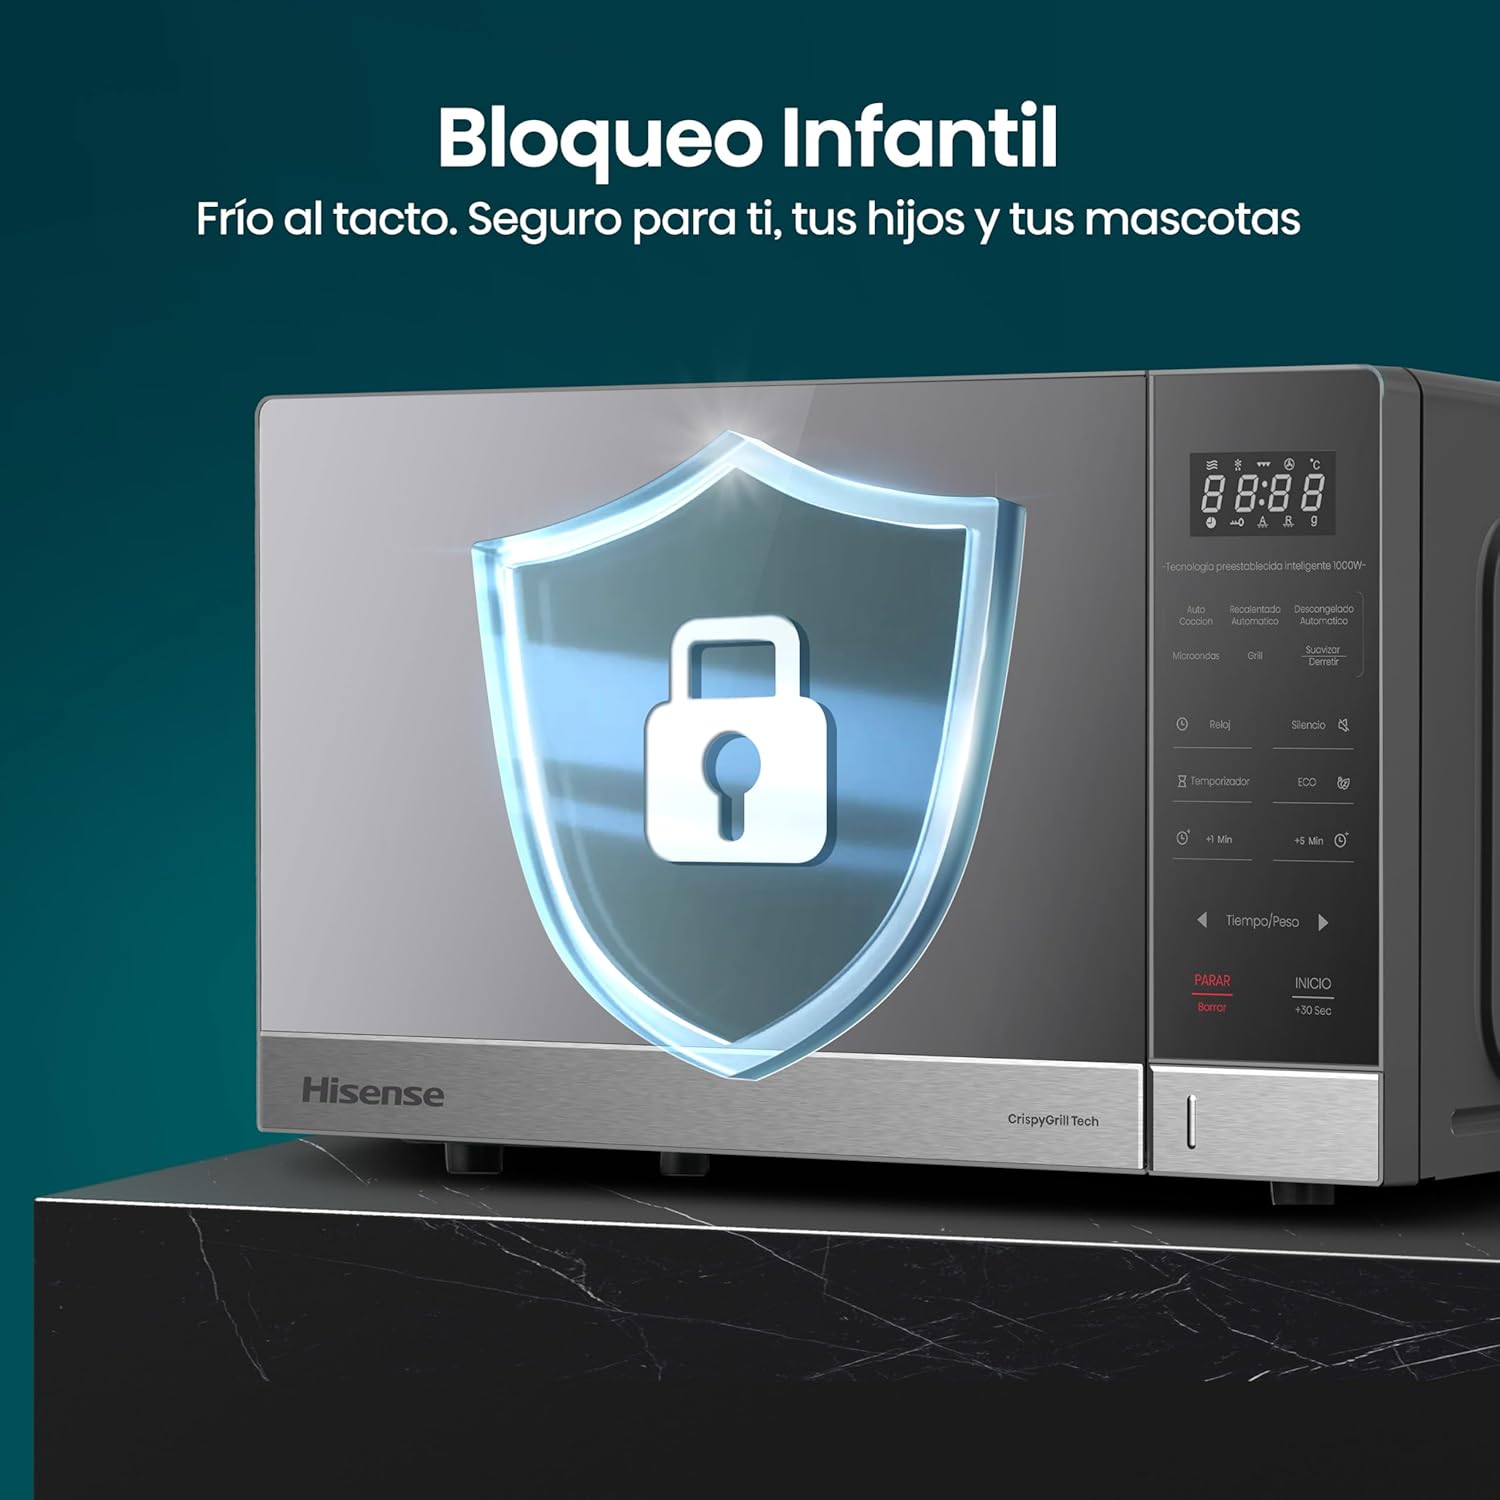
Image 5.3: Visual representation of the defrost function, showing frozen raspberries on one side and defrosted raspberries on the other, with icons for various food types like meat, poultry, vegetables, fish, and bread.
5.6. Pre-set Menus (32 Mexican Menus)
This microwave includes 32 pre-set Mexican menus for convenient cooking of traditional dishes.
- Place the food in the oven according to the recipe or menu instructions.
- Press the "Auto Cook" or "Pre-set Menu" button (refer to your specific model's control panel).
- Use the adjustment buttons to select the desired menu number.
- Press "Start". The microwave will automatically set the cooking time and power level.

Image 5.4: The control panel displaying various food items like popcorn, steak, vegetables, coffee, potatoes, pizza, and pasta, representing the 32 pre-set Mexican menus.
5.7. Timer Function
Use the timer to track cooking time or as a general kitchen timer.
- Press the "Timer" button.
- Use the time/weight adjustment buttons to set the desired time.
- Press "Start". The timer will count down without activating the microwave function.

Image 5.5: The microwave display showing a countdown timer, indicating the remaining cooking time.
5.8. ECO and Mute Functions
The ECO mode helps save energy, and the Mute function silences operational beeps.
- ECO Mode: Press the "ECO" button to activate energy-saving mode. The display may dim or turn off after a period of inactivity.
- Mute Function: Press the "Silence" button to turn off the sound of button presses and completion beeps.

Image 5.6: The control panel highlighting the "Silence" and "ECO" buttons, with icons indicating their functions.
5.9. Child Lock
The child lock feature prevents accidental operation by children.
- To activate: Press and hold the "Stop/Clear" button for 3 seconds until a lock indicator appears on the display.
- To deactivate: Press and hold the "Stop/Clear" button again for 3 seconds until the lock indicator disappears.
Image 5.7: The microwave oven with a shield icon overlay, representing the child lock feature, ensuring safety for families.
6. Maintenance and Cleaning
Regular cleaning and maintenance will ensure the longevity and optimal performance of your microwave oven.
6.1. Ceramic Interior
The ceramic coating inside the oven is designed for easy cleaning and durability.

Image 6.1: Close-up of the microwave's interior, highlighting the hygienic, easy-to-clean, and durable ceramic coating with antibacterial properties.
- Always unplug the oven before cleaning.
- Wipe the interior cavity with a damp cloth after each use to prevent food buildup.
- For stubborn stains, use a mild detergent and a soft sponge. Avoid abrasive cleaners or scouring pads.
- The ceramic coating is antibacterial and scratch-resistant, making it easy to maintain.
6.2. Exterior Cleaning
- Wipe the exterior surfaces with a soft, damp cloth.
- Clean the control panel with a soft, damp cloth. Do not use excessive water or spray cleaners directly onto the panel.
- The safety glass door is designed to be elegantly strong and resistant to heat and scratches. Clean it with a soft cloth and glass cleaner if necessary.

Image 6.2: Close-up of the microwave door, illustrating the durable and scratch-resistant safety glass.
7. Troubleshooting
If you encounter any issues with your microwave oven, please refer to the following table before contacting customer service.
| Problem | Possible Cause | Solution |
|---|---|---|
| Oven does not start | Power cord not plugged in; Door not closed properly; Fuse blown or circuit breaker tripped. | Ensure plug is securely in outlet; Close door firmly; Check household fuse or reset circuit breaker. |
| Food not heating | Incorrect cooking time or power level set; Food not suitable for microwave. | Adjust time/power; Ensure food is microwave-safe. |
| Turntable not rotating | Turntable not properly placed; Debris under turntable. | Re-position turntable correctly; Clean under the turntable. |
| Unusual noises | Loose parts; Food container touching oven walls. | Check for loose parts; Ensure containers are not touching walls. |
| Child lock activated | Child lock is on. | Deactivate child lock by pressing and holding "Stop/Clear" for 3 seconds. |
8. Specifications
| Feature | Detail |
|---|---|
| Brand | Hisense |
| Model Number | HMMG3010SMG |
| Color | Gray |
| Capacity | 1.1 Cubic Feet |
| Power Output | 1500 Watts (Max) |
| Voltage | 120 Volts |
| Material | Glass, Sheet Metal, Plastic (Ceramic interior coating) |
| Special Features | Turntable, Crispy Grill Function, 10 Power Levels, 32 Pre-set Mexican Menus, Ceramic Coating, Child Lock, ECO Mode, Mute Function |
| Product Dimensions (L x W x H) | 58 x 44 x 34 cm (approx. 22.8 x 17.3 x 13.4 inches) |
| Product Weight | 16 kg (approx. 35.3 lbs) |
9. Warranty and Support
Hisense products are manufactured to high-quality standards. For warranty information, please refer to the warranty card included with your product or visit the official Hisense website.
Customer Support:
If you have questions, require assistance, or need technical support, please contact Hisense customer service:
- Option 1 (Phone): Call 800 0088 880
- Option 2 (Online): Visit hisense.com.mx, click on "Technical Support Chat" in the bottom left corner, or call +55 41 53 1200.
Service Hours:
- Monday - Friday: 9:00 am - 9:00 pm
- Saturday: 9:00 am - 3:00 pm

Image 9.1: Hisense customer support details, including phone numbers and website information.
10. Additional Resources
Unboxing Video:
Video 10.1: An unboxing video for a similar Panasonic microwave oven (NN-GT67KSRPH). While not the exact Hisense model, it provides a general overview of the unboxing process and initial setup steps for a microwave with grill functionality. This video is provided by Amazon Mexico.