
1. Introduction
This manual provides essential information for the safe and effective use of your ANDELI MONERDB-LED Welding Helmet. This helmet is designed to protect your eyes and face from sparks, spatter, and harmful radiation under normal welding conditions. It features an auto-darkening filter, a panoramic viewing area, integrated LED lights, and a rechargeable battery for enhanced performance and convenience during welding, cutting, and grinding operations.
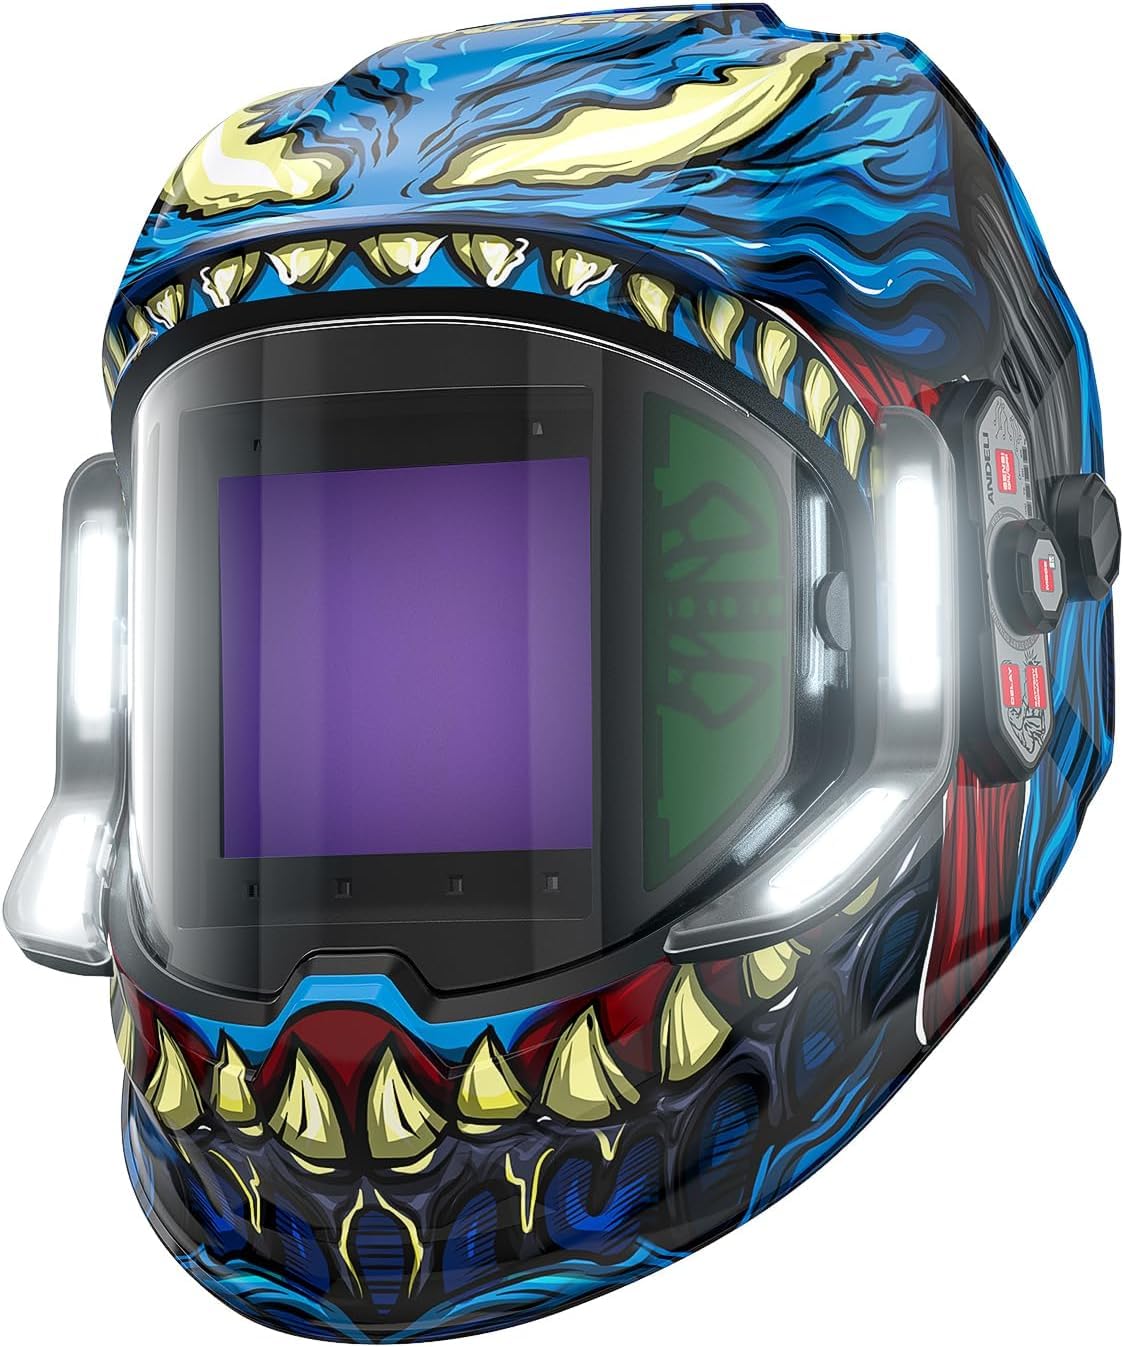
Figure 1: ANDELI MONERDB-LED Welding Helmet
2. Safety Information
Always read and understand all safety warnings and instructions before using this welding helmet. Failure to follow these instructions may result in serious personal injury.
- Eye and Face Protection: This helmet is designed to protect against harmful UV/IR radiation, sparks, and spatter. It is not suitable for laser welding or overhead welding applications.
- Impact Protection: This helmet provides limited impact protection. Always wear appropriate primary eye protection (safety glasses) underneath the helmet.
- Electrical Hazards: Ensure all welding equipment is properly grounded and maintained. Avoid contact with live electrical parts.
- Ventilation: Always work in a well-ventilated area to avoid inhaling welding fumes, which can be hazardous to your health.
- Inspection: Before each use, inspect the helmet for any damage, cracks, or loose parts. Replace damaged components immediately. Ensure the protective lenses are clean and free from scratches.
- Temperature Limits: Do not expose the helmet to extreme temperatures outside the recommended operating and storage ranges.
- Battery Safety: Use only the specified Type-C charging cable. Do not attempt to open or modify the rechargeable battery.
3. Package Contents
Verify that all items are present in the package:
- Welding Helmet (1)
- External Replacement Lens (2)
- Internal Replacement Lens (2)
- Type-C USB Cable (1)
- Storage Bag (1)
4. Product Features
- Enhanced Visibility with 4 LED Lights: The helmet is equipped with four LED lights, offering up to 400 lumens of illumination. An intelligent motion sensor mode allows for hands-free operation, enabling users to turn lights on/off and adjust brightness with a simple hand wave. Two brightness levels ensure optimal visibility in various welding conditions.
- 180° Panoramic Large Viewing Area: Features a main lens measuring 3.94 x 3.74 inches, complemented by two 3.72 x 1.76 inch side lenses (DIN5, non-auto-darkening). All lenses provide 1/1/1/1 optical clarity and True Color technology for a clear, natural view.
- 2100mAh Rechargeable Battery with Type-C Charging: Powered by a 2100mAh rechargeable battery, offering extended runtime compared to traditional coin cell batteries. It features a Type-C charging port for fast and convenient recharging. A built-in battery indicator allows for easy monitoring of remaining power.
- Fully Digital Operation: The auto-darkening filter supports direct viewing and adjustment of Shade, Sensitivity, and Delay via an internal control panel. A high-speed microprocessor ensures precise arc detection and shade control, offering customizable settings and rapid response.
- 6 Arc Sensors for Auto Darkening: Equipped with six arc sensors for reliable arc detection and an ultra-fast switching speed of 1/30000 seconds. The digital control allows for precise sensitivity and delay adjustments.
- True Color Technology: Provides natural color accuracy with 1/1/1/1 optical clarity, enhancing visibility and reducing eye strain. Offers UV/IR protection up to shade DIN16 at all times.
- Comfortable and Lightweight Headgear: The pivot-style headgear features six separate contact points to evenly distribute weight and eliminate pressure. Combined with breathable padding, it ensures a lightweight, adjustable fit for comfortable all-day wear without spinal compression.

Figure 2: Gesture Control for LED Lights

Figure 3: Panoramic View and Digital Lens Controls

Figure 4: Rechargeable Battery and Type-C Charging

Figure 5: Digital Lens Control Panel
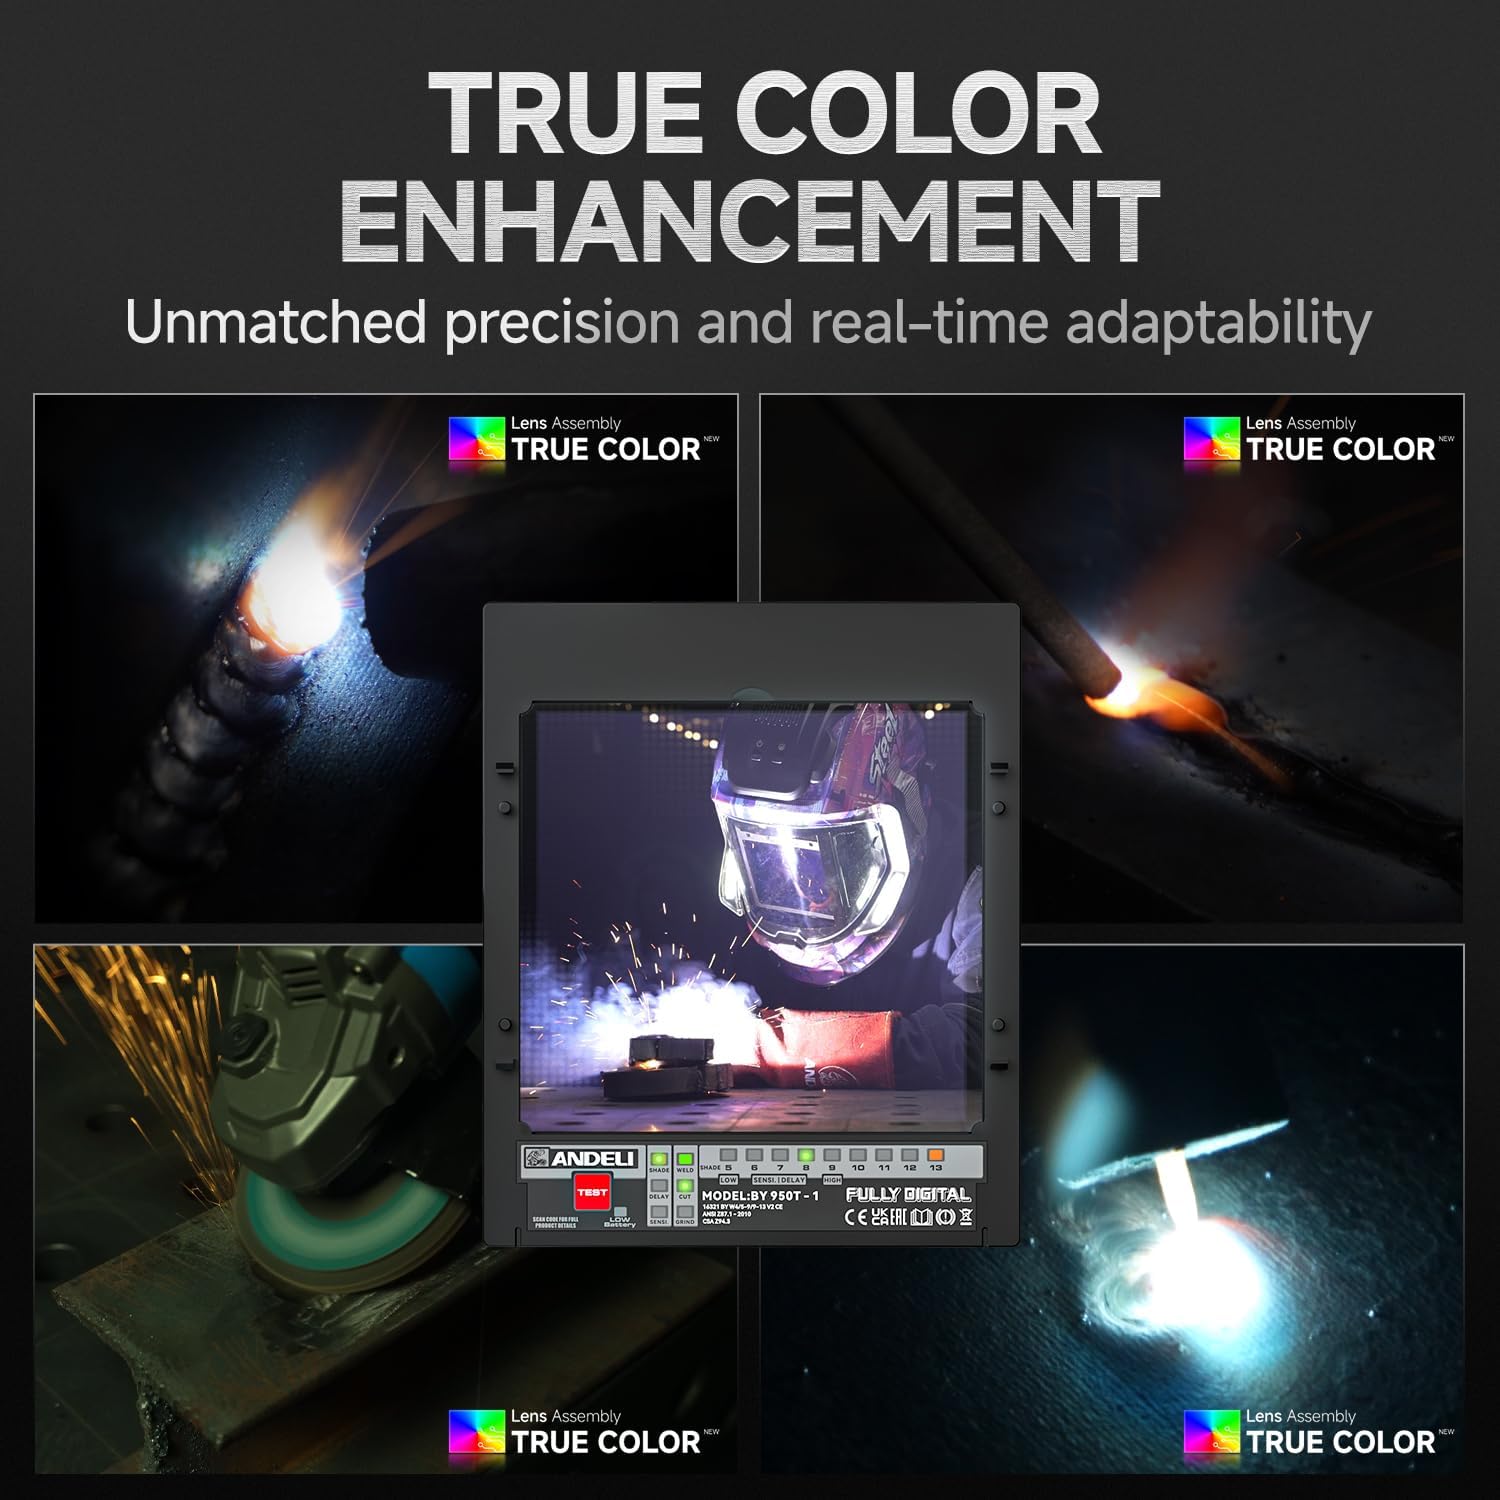
Figure 6: True Color Enhancement in Welding
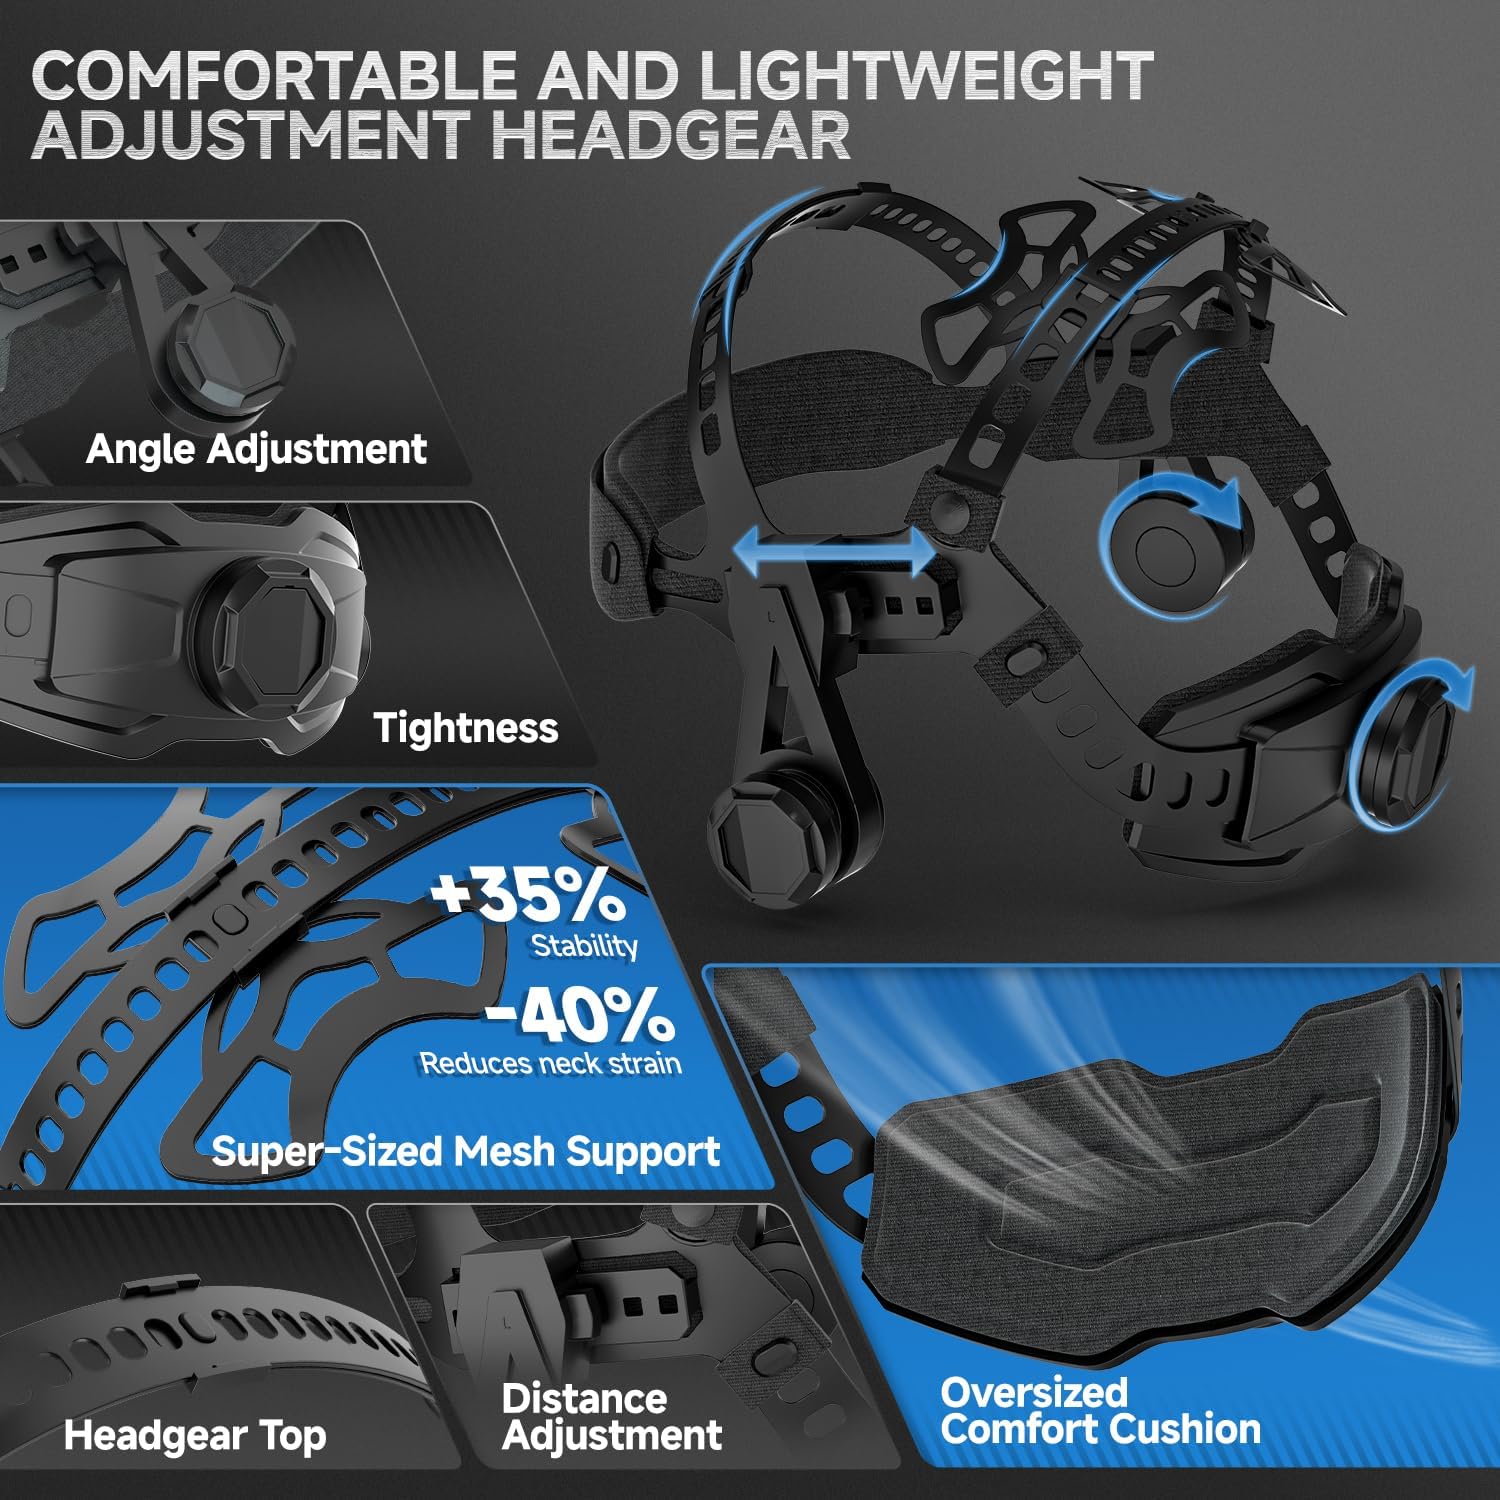
Figure 7: Headgear Adjustment Points
5. Setup
5.1 Initial Charging
Before first use, fully charge the helmet's internal battery using the provided Type-C USB cable. Connect the cable to the helmet's charging port and a compatible USB power source (e.g., wall adapter, computer USB port). The battery indicator will show charging status.
5.2 Headgear Adjustment
- Fit Adjustment: Place the helmet on your head. Adjust the top strap and rear knob until the helmet fits snugly and comfortably without excessive pressure.
- Distance Adjustment: Adjust the distance between your face and the auto-darkening filter. Ensure there is enough space for comfortable breathing and to prevent fogging, but not so much that light can enter from the sides.
- Angle Adjustment: Adjust the tilt angle of the helmet to ensure a clear and unobstructed view of your work area when the helmet is in the down position.
5.3 Removing Protective Films
Remove any protective films from both the inner and outer surfaces of the auto-darkening filter and the side lenses before use. These films are for shipping protection only.
6. Operating Instructions
6.1 Power On/Off
The helmet typically powers on automatically when exposed to light or when the TEST button is pressed. It will enter sleep mode after a period of inactivity to conserve battery.
6.2 Mode Selection
Use the internal control panel to select the appropriate mode for your task:
- WELD Mode: For welding operations. Adjustable shade range DIN 9-13.
- CUT Mode: For cutting operations. Adjustable shade range DIN 5-9.
- GRIND Mode: For grinding operations. Fixed shade DIN 4. The auto-darkening function is deactivated in this mode.
6.3 Shade, Sensitivity, and Delay Adjustment
The digital control panel allows for precise adjustments:
- Shade: Adjust the darkness level according to your welding process and amperage. Refer to welding safety standards for recommended shade levels.
- Sensitivity: Adjust how easily the filter reacts to the welding arc. Higher sensitivity is suitable for low amperage TIG welding or when the arc is partially obscured.
- Delay: Adjust the time the filter remains dark after the arc extinguishes. A longer delay is useful for high amperage welding to prevent eye fatigue from residual glow.
6.4 LED Light Operation (Gesture Control)
- Ensure the helmet is powered on.
- To activate the motion sensor for the LED lights, slowly wave your hand over the sensor area (typically located on the side of the helmet, within 5cm distance).
- Wave your hand again to cycle through brightness levels (High, Low) or to turn the lights off.
6.5 Test Function
Press the "TEST" button on the internal control panel to verify the auto-darkening function. The lens should momentarily darken and then return to its light state. This confirms the filter is working correctly before you begin welding.
7. Maintenance
7.1 Cleaning
- Helmet Shell: Clean the helmet shell with mild soap and water. Avoid harsh solvents or abrasive cleaners.
- Lenses: Gently wipe the auto-darkening filter and protective lenses with a soft, clean cloth. Do not use abrasive materials or cleaning solutions that could scratch or damage the lens coatings.
7.2 Lens Replacement
Regularly inspect and replace scratched or damaged outer and inner protective lenses to maintain optimal visibility and protection. Refer to the included replacement lenses for proper fit.
7.3 Battery Care
- Recharge the battery when the low battery indicator illuminates.
- Store the helmet in a cool, dry place when not in use. For long-term storage, ensure the battery is partially charged (around 50%) to prolong its lifespan.
8. Troubleshooting
| Problem | Possible Cause | Solution |
|---|---|---|
| Helmet does not darken when arc is struck. | Low battery; Sensitivity too low; Sensors blocked; Helmet in GRIND mode; Damaged filter. | Charge battery; Increase sensitivity; Clean sensors; Switch to WELD/CUT mode; Perform TEST function, if still fails, replace filter. |
| Poor visibility through the lens. | Protective films not removed; Lenses dirty or scratched; Incorrect shade setting. | Remove protective films; Clean or replace lenses; Adjust shade setting. |
| LED lights not working. | Low battery; Motion sensor not activated; Lights turned off. | Charge battery; Wave hand over sensor to activate; Cycle through brightness levels. |
| Helmet feels uncomfortable or unstable. | Headgear not properly adjusted. | Re-adjust top strap, rear knob, distance, and angle for a secure and comfortable fit. |
9. Specifications
| Optical Class | 1/1/1/2 |
| LCD Viewing Area | 3.94" x 3.74" (100mm x 95mm) |
| UV/IR Protection | DIN16 |
| ARC Sensors | 6 |
| Operating Modes & Shades | WELD: Shade No. 9-13 CUT: Shade No. 5-9 GRIND: Shade No. 4 LIGHT STATE: Shade No. 4 |
| TIG Rating | AC/DC >5Amps |
| Sensitivity Control | 5 Levels |
| Delay Control (Dark to Light) | 5 Levels |
| Power Supply | Rechargeable Battery Powered |
| Charge Mode | Via Type-C Port (DC 5V) |
| Switching Speed (Light to Dark) | 1/30,000 sec |
| Recommended Operating Temp | 23°F ~ 131°F (-5°C ~ 55°C) |
| Storage Temperature | -4°F ~ 158°F (-20°C ~ 70°C) |
| Total Weight | 1.32 lbs (600g) |
10. Warranty and Support
For warranty information or technical support, please contact ANDELI directly. The manufacturer contact information is ANDELI.
Please retain your purchase receipt for warranty claims.