
1. Introduction
Thank you for choosing the ZZA 24-inch Curved Gaming Monitor. This manual provides essential information for the safe and efficient use of your monitor, including setup, operation, maintenance, and troubleshooting. Please read this manual thoroughly before using the product and retain it for future reference.
The ZZA 24-inch Curved Gaming Monitor (Model Z24A1K100HZ) features a 23.8-inch VA panel with a 100Hz refresh rate and FHD 1920x1080 resolution. It offers a 16:9 aspect ratio, 120% sRGB color gamut, and eye care technologies like a blue light filter and flicker-free display. Its ultra-thin bezels and curved design enhance the viewing experience for various applications.

Image 1.1: Front view of the ZZA 24-inch Curved Gaming Monitor. The monitor displays a futuristic warrior image, highlighting its gaming capabilities, and shows "24"", "100Hz", and "FHD MONITOR 1920x1080" on the screen.
2. Safety Information
- Power Source: Use only the power adapter supplied with the monitor. Ensure the power outlet is properly grounded.
- Ventilation: Do not block ventilation openings. Allow adequate space around the monitor for proper airflow to prevent overheating.
- Liquid Exposure: Keep the monitor away from water and other liquids. Do not operate the monitor in high humidity environments.
- Cleaning: Disconnect the power cord before cleaning. Use a soft, dry cloth. Avoid using liquid cleaners or aerosol sprays.
- Placement: Place the monitor on a stable, flat surface. Avoid placing it in direct sunlight or near heat sources.
- Eye Comfort: Take regular breaks during prolonged use. Adjust screen brightness and contrast to a comfortable level. Utilize the built-in blue light filter and flicker-free technology for reduced eye strain.
- Servicing: Do not attempt to service the monitor yourself. Refer all servicing to qualified service personnel.
3. Package Contents
Please check the contents of your package. If any items are missing or damaged, contact your retailer.
- ZZA 24-inch Curved Gaming Monitor
- Monitor Stand (Base and Neck)
- Power Adapter and Power Cable
- HDMI Cable
- User Manual (this document)
- Screws for Stand Assembly
4. Monitor Overview
4.1 Front View
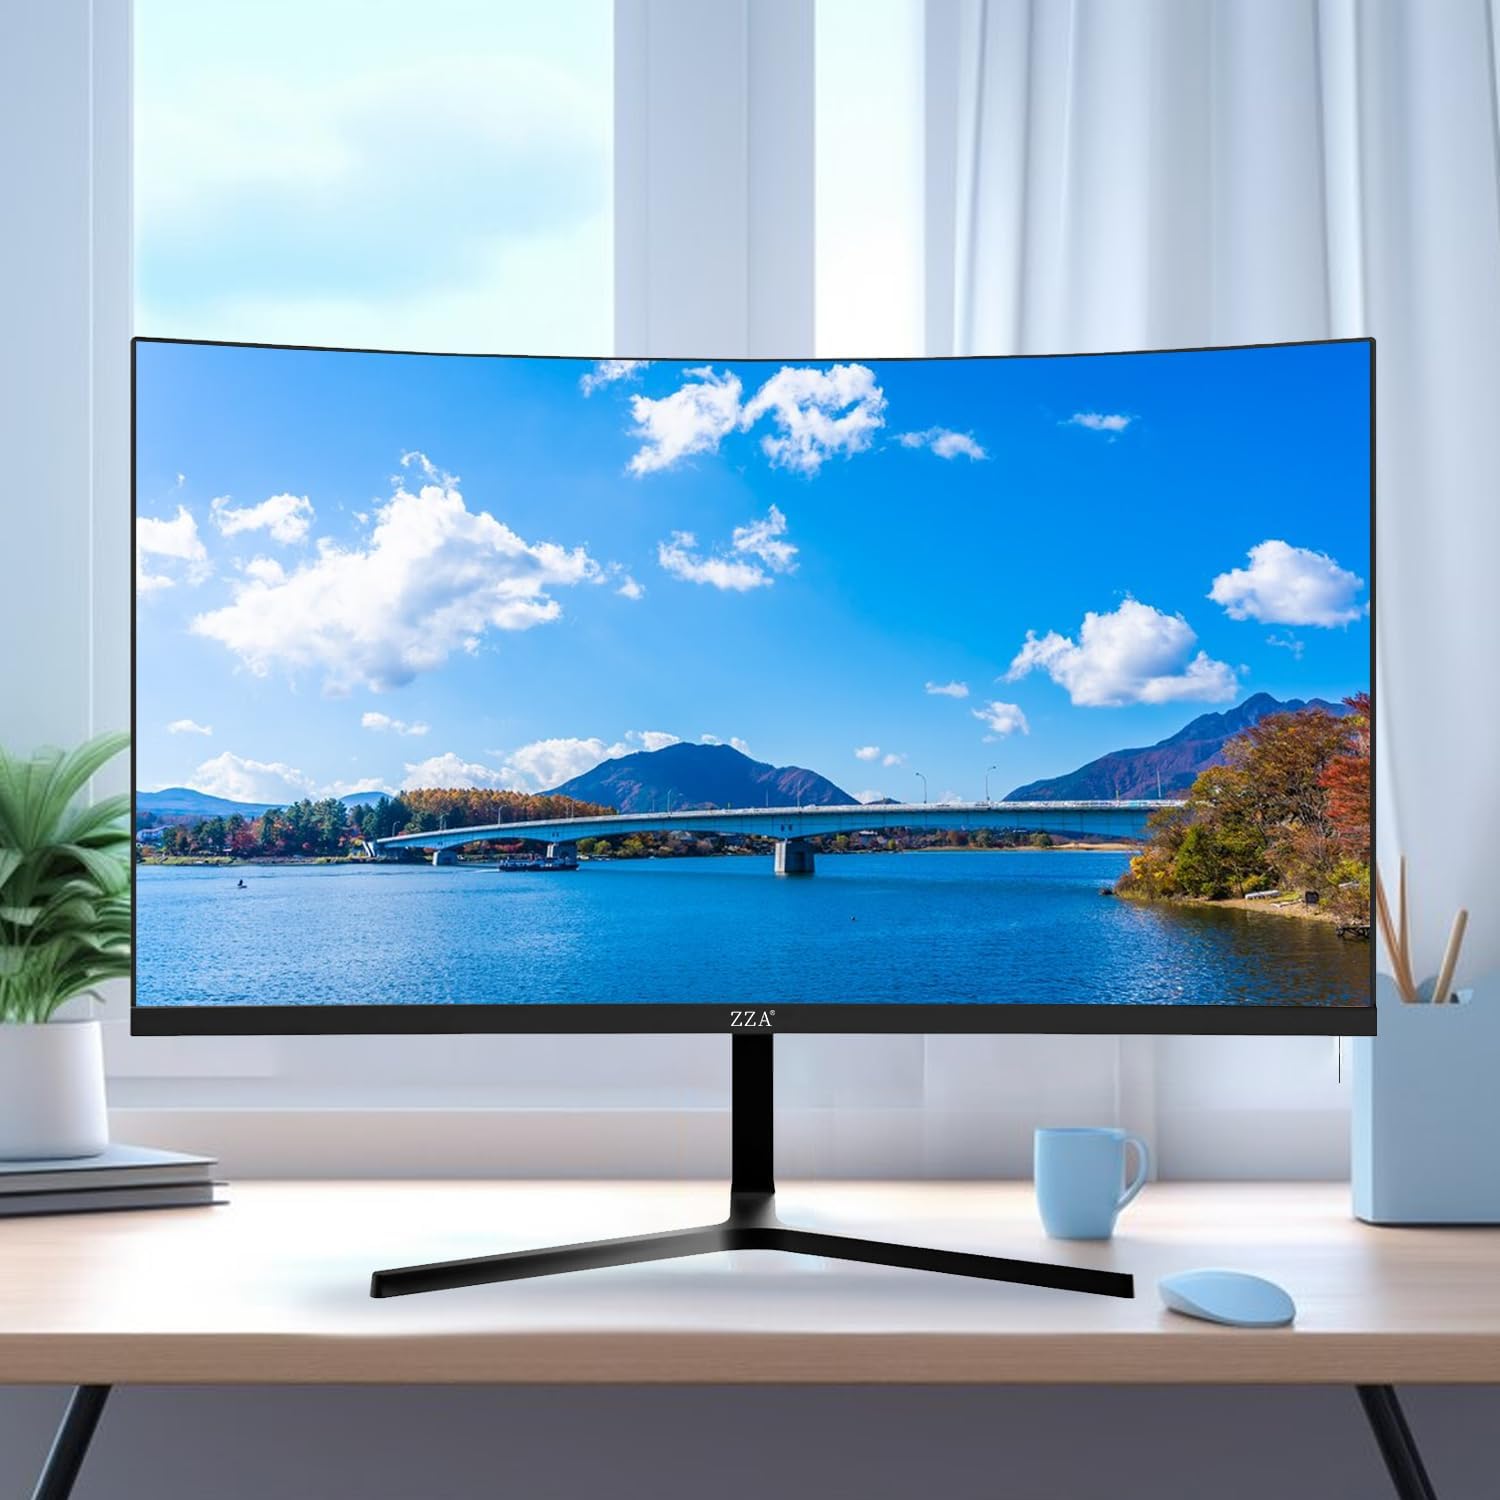
Image 4.1: Front view of the ZZA 24-inch Curved Gaming Monitor on a desk, showcasing its curved screen and thin bezels. The screen displays a scenic landscape with a bridge and mountains.
The front of the monitor features the 23.8-inch curved display with ultra-thin bezels on three sides. The ZZA logo is located at the bottom center of the bezel.
4.2 Rear View and Ports
Image 4.2: Rear view of the ZZA monitor, illustrating the VESA wall bracket compatibility (75mm x 75mm) and the adjustable tilt range (-5° to 15°).
The rear of the monitor includes the power input, HDMI port, and VGA port. It also features a 75mm x 75mm VESA mounting pattern for alternative mounting solutions and supports tilt adjustment from -5° to 15°.
- Power Input: Connects to the power adapter.
- HDMI Port: Connects to devices via an HDMI cable for digital video and audio.
- VGA Port: Connects to devices via a VGA cable for analog video.
- Control Buttons: Typically located on the back or bottom right for OSD navigation.
5. Setup Instructions
5.1 Assembling the Stand
- Carefully remove the monitor and stand components from the packaging.
- Attach the stand neck to the monitor panel using the provided screws.
- Secure the stand base to the stand neck.
- Place the assembled monitor on a stable, flat surface.
Note: If using a VESA mount, refer to the VESA mount instructions and ensure the mount is compatible with 75mm x 75mm VESA standards.
5.2 Connecting Cables
- Power Connection: Connect the power adapter to the monitor's power input, then plug the power cable into a grounded electrical outlet.
- Video Connection:
- For optimal performance, connect your computer or device to the monitor using the provided HDMI cable.
- Alternatively, use a VGA cable to connect to the VGA port.
- Ensure all connections are secure.
6. Operating Instructions
6.1 Power On/Off
Press the power button (usually located on the back or bottom right of the monitor) to turn the monitor on or off. The power indicator light will illuminate when the monitor is on.
6.2 On-Screen Display (OSD) Menu
The OSD menu allows you to adjust various monitor settings. Use the control buttons (joystick or individual buttons) on the monitor to navigate the menu.
- Input Source: Select between HDMI and VGA inputs.
- Brightness/Contrast: Adjust the overall luminance and contrast of the display.
- Color Settings: Modify color temperature, hue, and saturation.
- Picture Mode: Choose from preset display modes (e.g., Standard, Game, Movie, Text).
- Refresh Rate: Ensure your device is set to output 100Hz for the smoothest experience. The monitor supports up to 100Hz.
- Eye Care Features: Activate or adjust the blue light filter and flicker-free settings to reduce eye strain.
- FreeSync: If your graphics card supports AMD FreeSync, enable it in the OSD menu and your graphics card settings for tear-free gaming.
Image 6.1: Visual comparison demonstrating the smoother motion of a 100Hz refresh rate compared to 60Hz, illustrating the benefit for fast-paced content.
Image 6.2: A visual representation of the difference between FreeSync ON and FreeSync OFF, showing how FreeSync eliminates screen tearing for a smoother visual experience.
7. Maintenance
7.1 Cleaning the Monitor
- Always unplug the monitor from the power outlet before cleaning.
- Use a soft, lint-free cloth to gently wipe the screen and exterior surfaces.
- For stubborn marks, lightly dampen the cloth with water or a mild, non-abrasive screen cleaner. Do not spray cleaner directly onto the screen.
- Avoid using benzene, thinner, ammonia-based cleaners, or abrasive materials, as these can damage the monitor.
7.2 Storage
If storing the monitor for an extended period, disconnect all cables and pack it in its original packaging or a suitable protective box. Store in a cool, dry place away from extreme temperatures and direct sunlight.
8. Troubleshooting
| Problem | Possible Cause | Solution |
|---|---|---|
| No power | Power cable not connected; Power outlet not working | Ensure power cable is securely connected to the monitor and a working power outlet. Check the power adapter. |
| No signal | Video cable not connected; Incorrect input source selected | Verify the HDMI or VGA cable is securely connected to both the monitor and the source device. Use the OSD menu to select the correct input source. |
| Image is blurry or distorted | Incorrect resolution; Cable issue | Set the display resolution to 1920x1080. Ensure the video cable is not damaged and is properly connected. |
| Screen flickering | Refresh rate mismatch; Cable issue | Ensure the refresh rate is set to 100Hz in your device's display settings. Check the video cable for damage. |
| No sound (if external speakers are connected) | External speakers not connected or configured correctly | This monitor does not have built-in speakers. Ensure external speakers are properly connected and selected as the audio output device on your computer. |
9. Specifications
| Feature | Detail |
|---|---|
| Model Number | Z24A1K100HZ |
| Screen Size | 24 Inches (23.8-inch viewable) |
| Panel Type | VA |
| Curvature | 2800R |
| Resolution | FHD 1920 x 1080 |
| Aspect Ratio | 16:9 |
| Refresh Rate | 100Hz |
| Brightness | 250 cd/m² |
| Contrast Ratio | 3000:1 |
| Color Support | 8-bit (16.7 Million Colors), 120% sRGB |
| Viewing Angle | 178° (Horizontal/Vertical) |
| Connectivity | 1x HDMI, 1x VGA |
| Tilt Adjustment | -5° to 15° |
| VESA Mount Compatibility | 75mm x 75mm |
| Product Dimensions (with stand) | 23.4 x 4.64 x 15.4 inches |
| Item Weight (with stand) | 7.48 pounds |
| Eye Care Features | Blue Light Filter, Flicker-Free Technology |

Image 9.1: Diagram illustrating the physical dimensions of the ZZA 24-inch monitor, including screen size and overall width/height with stand.
10. Warranty and Support
ZZA products are designed for reliability and performance. For information regarding warranty coverage, please refer to the warranty card included with your purchase or visit the official ZZA website.
If you encounter any issues or have questions not covered in this manual, please contact ZZA customer support for assistance.
- Customer Support: Refer to your product packaging or the ZZA official website for contact details.
- Online Resources: Additional support and FAQs may be available on the ZZA brand website.