
1. Introduction
This manual provides detailed instructions for the installation, operation, and maintenance of your lemonlovely 100FT Permanent Outdoor Lights, Model 2323. These smart RGB LED eaves lights are designed for year-round outdoor decoration, offering various lighting modes and smart control options.
2. Package Contents
Please verify that all components are present in the package:
- 100FT Permanent Outdoor Light String (Model 2323)
- Power Adapter (24V)
- Remote Control
- Mounting Clips with VBN Tape
- Mounting Screws
- User Manual
3. Safety Information
- Ensure the power supply is disconnected before installation or maintenance.
- Use only the provided power adapter.
- Do not attempt to modify or repair the product. Contact customer support for assistance.
- Keep the product away from open flames or extreme heat sources.
- Ensure all connections are secure and waterproof where applicable.
- The product is rated IP67 waterproof for outdoor use, but the power adapter should be protected from direct water exposure.
- Low-voltage (24V) operation ensures safety for households with children or pets.
4. Setup and Installation
The lemonlovely Permanent Outdoor Lights are designed for easy installation on various surfaces.
4.1 Installation Steps
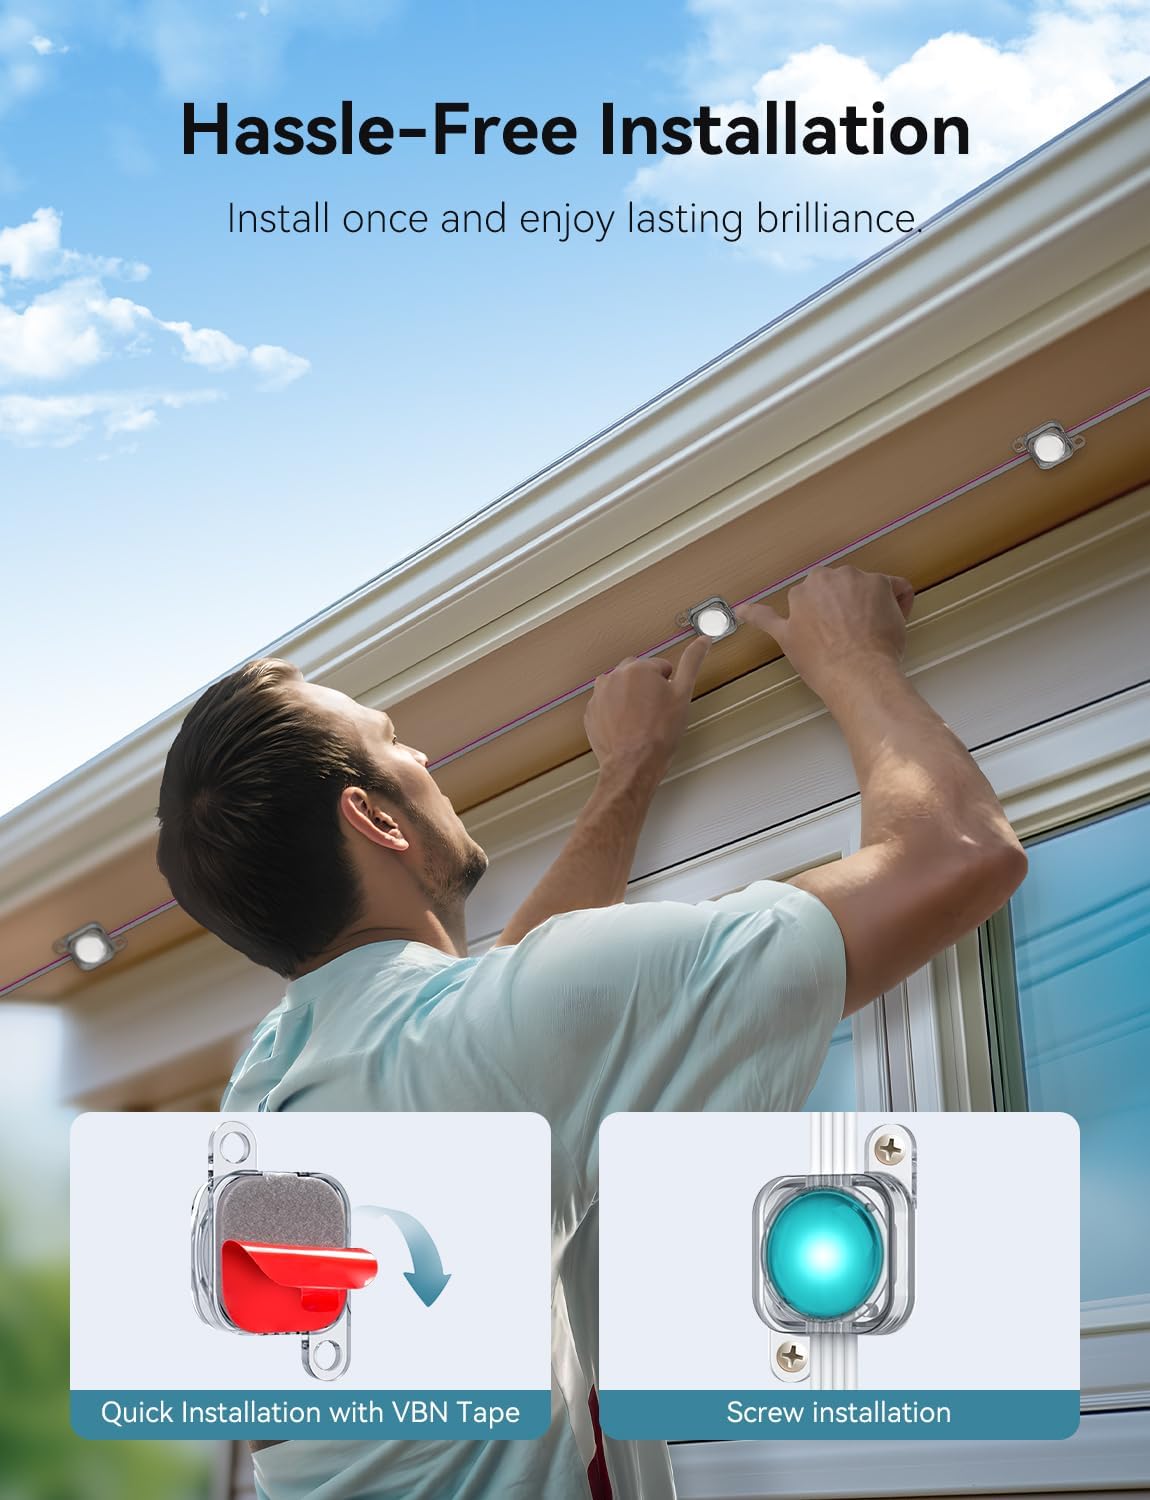
- Plan Placement: Determine the desired path for your lights. Install the string lights 5-10cm (2-4 inches) away from the wall surface for optimal light distribution.
- Prepare Surface: Clean the installation surface thoroughly to ensure proper adhesion of the VBN tape.
- Attach Lights: Remove the VHB gum backing from the lights. Press the lights firmly against the surface for at least 5 seconds. For added security, use the provided screws to fix each string light.
- Connect Strings (if applicable): If connecting multiple light strings, use the waterproof connector and screw them in place securely.

4.2 Power Connection
Connect the light string to the provided 24V power adapter. Ensure the adapter is plugged into a suitable outdoor-rated power outlet.

4.3 Adapter Selection Guide
To ensure safe and optimal performance, use the correct adapter according to the number of lamps connected:
| Adapter | Supported Lamps |
|---|---|
| 24V 1A | Up to 75 lamps |
| 24V 2A | Up to 175 lamps |
| 24V 3A | Up to 200 lamps |
Note: Always match your adapter with the lamp quantity to prevent malfunction or damage.

5. Operating Instructions
5.1 Remote Control
The included remote control allows for convenient operation of your lights within a 20-meter range. It supports basic functions such as power on/off, color selection, brightness adjustment, and scene switching.

5.2 Smart App Integration
For advanced control and customization, download the dedicated smart application to your smartphone. The app allows for timer switches, precise color adjustment, and extensive scene switching.
- Pairing: Turn on Bluetooth on your smartphone. Press and hold the power button on the light controller for 8 seconds until the light string flashes red. This indicates it has entered network configuration (pairing) state.
- Add Device: Open the smart app and follow the on-screen instructions to add a new device. The app will search for nearby devices.
- Connection: Once the device is found and added, the connection is successful. You can now control your lights via the app.
Video: Mobile APP, one-click switch lighting effect. This video demonstrates the process of connecting the lights to the mobile app, adjusting brightness, and switching between various lighting scenes and colors.
5.3 Light Themes and Customization
The lights come with preset themes for various occasions. You can also fully customize dynamic modes, colors, and brightness levels through the smart app to match your mood or event.
5.4 Music Synchronization
The color-changing eaves lights can synchronize with the rhythm of music played. Activate the music mode via the app to create a dynamic light show that responds to audio.

5.5 Timer Function
Utilize the timer function in the smart app to schedule when your lights turn on and off automatically. This feature allows for energy efficiency and convenience, setting lights to operate at specific times, such as dusk to dawn.

6. Maintenance
- Regularly inspect the light string and connections for any signs of damage or wear.
- Clean the light beads periodically with a soft, damp cloth to remove dirt and debris, ensuring optimal brightness.
- Ensure the power adapter is kept in a dry, protected area.
- Do not use harsh chemicals or abrasive cleaners on the lights.
7. Troubleshooting
| Problem | Possible Cause | Solution |
|---|---|---|
| Lights do not turn on | No power, loose connection, faulty adapter | Check power outlet, ensure all connections are secure, test with another outlet. |
| Remote control not working | Battery depleted, remote out of range, obstruction | Replace remote battery, ensure remote is within 20m, remove obstructions. |
| App cannot connect to lights | Bluetooth off, lights not in pairing mode, app error | Ensure Bluetooth is on, put lights into pairing mode (hold controller button for 8s), restart app. |
| Lights flicker or display incorrect colors | Loose connection, power fluctuation, internal fault | Check connections, try a different power source, contact customer support if issue persists. |
8. Specifications
- Brand: lemonlovely
- Model: 2323
- Length: 100FT
- Light Source Type: LED
- Light Color: Multicolor (RGB)
- Indoor/Outdoor Usage: Outdoor
- Waterproof Rating: IP67
- Power Source: AC/DC (24V)
- Operating Temperature: -4°F to 140°F (-20°C to 60°C)
- Lifespan: Up to 50,000 hours
- Control: Smart App & Remote Control
- Material: Plastic
- Item Weight: 2.72 pounds
- Package Dimensions: 12.32 x 8.62 x 2.24 inches
- UPC: 619165571968
9. Warranty and Support
For warranty information, returns, or technical support, please refer to the purchase platform or contact lemonlovely customer service directly. Keep your purchase receipt for warranty claims.