1. Introduction
Thank you for choosing the Kuvings AUTO6 Hands-Free Juicer. This innovative appliance is designed to simplify your juicing experience with its automatic cutting function and large capacity. Enjoy fresh, nutritious juices, plant-based milks, and sorbets with ease. This manual provides essential information for the safe and efficient operation of your new juicer.

Image 1: The Kuvings AUTO6 Hands-Free Juicer, showcasing its sleek design and large feeding chute.
2. Important Safety Instructions
To reduce the risk of fire, electric shock, or injury, always follow these basic safety precautions:
- Read all instructions before using the appliance.
- Do not immerse the motor base in water or other liquids.
- Ensure the appliance is properly assembled before operation.
- Keep hands and utensils away from moving parts during operation to prevent injury.
- Always unplug the juicer from the power outlet when not in use, before assembling or disassembling parts, and before cleaning.
- Do not operate any appliance with a damaged cord or plug, or after the appliance malfunctions or has been damaged in any manner.
- Use only attachments recommended or sold by the manufacturer.
- This appliance is for household use only. Do not use outdoors.
- Ensure the lid is securely locked in place before operating the juicer.
3. Product Components
Familiarize yourself with the main parts of your Kuvings AUTO6 juicer:
- Motor Base: Contains the powerful 200W motor and control dial.
- Juicing Bowl: The main chamber where juicing occurs, with measurement markings.
- Auger (Pressing Screw): Slowly presses ingredients to extract juice.
- Juicing Filter: Separates pulp from juice. Different filters may be used for specific functions (e.g., sorbet).
- Smart Cap: Controls juice flow and prevents drips.
- Feeding Chute & Lid: Features an automatic cutting mechanism and a 1.7L capacity basket for whole ingredients.
- Pulp Outlet & Juice Outlet: Separate openings for pulp and juice discharge.
- Pulp Container & Juice Container: Collects the extracted pulp and juice.
- Cleaning Brushes: Specialized brushes for easy cleaning.

Image 2: Exploded view of the juicer components, illustrating the main parts for assembly and cleaning.
4. Setup and Assembly
Follow these steps to correctly assemble your Kuvings AUTO6 juicer:
- Place the motor base on a stable, flat surface.
- Align the juicing bowl with the motor base and rotate it clockwise until it locks securely into place.
- Insert the juicing filter into the juicing bowl, ensuring it sits flush.
- Place the auger (pressing screw) into the center of the filter, pushing it down firmly until it clicks into position.
- Attach the feeding chute and lid assembly onto the juicing bowl, aligning the arrows and rotating clockwise until it locks. Ensure the safety lock is engaged.
- Position the pulp container under the pulp outlet and the juice container under the smart cap.
- Plug the power cord into a grounded electrical outlet.
5. Operating Instructions
General Operation
The Kuvings AUTO6 features a simple control dial:
- ON: Turns the juicer on for continuous operation.
- OFF: Turns the juicer off.
- REV (Reverse): Briefly rotates the auger in reverse to clear any clogs. Use this function if ingredients get stuck.
Juicing Fruits and Vegetables
The AUTO6's automatic cutting system allows for minimal pre-cutting. Simply load your ingredients into the 1.7L basket.
- Wash all fruits and vegetables thoroughly. For most ingredients, pre-cutting is not necessary due to the automatic dual blade system.
- Place the prepared ingredients into the 1.7L feeding basket.
- Ensure the smart cap is closed (if you want to mix juices inside the bowl) or open (to allow juice to flow directly into the container).
- Turn the control dial to 'ON'. The juicer will automatically feed and process the ingredients.
- Collect the fresh juice from the juice outlet and the pulp from the pulp outlet.
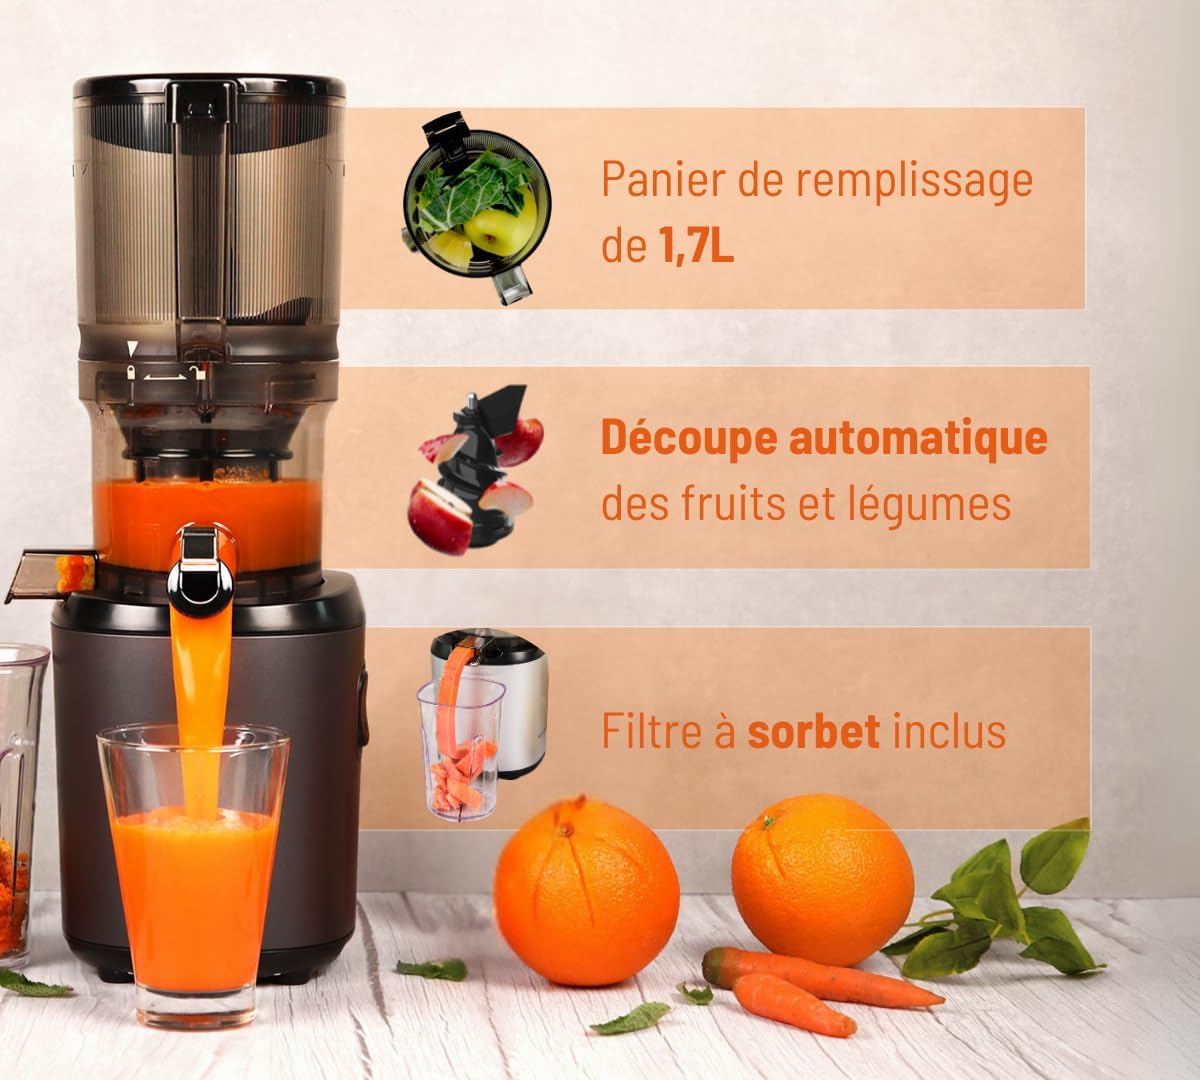
Image 3: The Kuvings AUTO6 juicer in action, demonstrating the extraction of carrot juice with pulp separation.

Image 4: Close-up view of the automatic cutting mechanism, which eliminates the need for extensive pre-chopping.
Making Plant-Based Milks and Sorbets
Your Kuvings AUTO6 is versatile enough to create more than just juices:
- Plant-Based Milks: For plant-based milks (e.g., almond milk, soy milk), soak nuts/grains as required, then process them with water using the standard juicing filter.
- Sorbets: Use the dedicated sorbet filter (if included) and frozen fruits. Ensure fruits are slightly thawed for optimal processing.

Image 5: Examples of the juicer's versatility, showing freshly made fruit juice, plant-based milk, and sorbet.
Official Product Videos
Video 1: Demonstrates the operation of a Kuvings EVO820 juicer, including juicing various fruits and vegetables, making plant-based milk, and sorbet. This video also shows the cleaning process.
Video 2: Showcases the Kuvings CS600 professional juicer in a commercial setting, highlighting its efficiency and ability to process large quantities of ingredients. Features include juicing various produce and the benefits of cold-press technology.
6. Maintenance and Cleaning
Regular cleaning ensures optimal performance and hygiene. The Kuvings AUTO6 is designed for easy cleaning:
- Disassembly: Turn the juicer off and unplug it. Disassemble the parts in reverse order of assembly (lid, auger, filter, juicing bowl).
- Rinsing: Rinse all detachable parts under running water immediately after use to prevent pulp from drying and sticking.
- Brushing: Use the provided special cleaning brushes to remove any stubborn pulp from the filter mesh and other components.
- Drying: Allow all parts to air dry completely before reassembling or storing.
- Motor Base: Wipe the motor base with a damp cloth. Never immerse the motor base in water.

Image 6: A specialized cleaning brush, designed to effectively remove pulp from the juicer's filter and other intricate parts.
7. Troubleshooting
If you encounter issues with your juicer, refer to the following common problems and solutions:
- Juicer does not turn on: Ensure the power cord is securely plugged in and the appliance is correctly assembled with all safety locks engaged. Check your power outlet.
- Ingredients are stuck or not processing: Turn the dial to 'REV' (Reverse) for a few seconds to dislodge ingredients, then switch back to 'ON'. Ensure you are not overloading the juicer with excessively hard or fibrous ingredients at once.
- Excessive pulp in juice: Ensure the correct juicing filter is installed properly. Some soft fruits may naturally produce more pulp.
- Leaking: Check that all parts are correctly assembled and securely locked. Ensure the smart cap is fully closed if you intend to hold juice in the bowl.
- Unusual noise: This may indicate ingredients are stuck. Use the 'REV' function. If the noise persists, disassemble and reassemble the juicer.
If problems persist, please contact Kuvings customer support.
8. Specifications
| Brand | Kuvings |
| Model Number | AUTO6 (795) |
| Color | Anthracite Grey |
| Capacity | 1700 Milliliters (1.7L) |
| Voltage | 230 Volts (AC) |
| Maximum Power | 200 Watt |
| Item Weight | 7.3 Kilograms |
| Product Dimensions | 22.4D x 44.7W x 18.5H centimeters |
| Blade Material | Polypropylene |
| Special Feature | Easy to Clean |
9. Warranty and Support
For warranty information, product registration, or technical support, please refer to the warranty card included with your purchase or visit the official Kuvings website. Keep your proof of purchase for any warranty claims.


