Introduction
This manual provides detailed instructions for the PYY Cash Register, Model Cash Register for Small Business. It covers essential information for setting up, operating, maintaining, and troubleshooting your device to ensure efficient and reliable performance in various business environments such as small supermarkets, convenience stores, and restaurants.
Package Contents
Upon unpacking, please verify that all items listed below are present and in good condition:
- Electronic Cash Register
- 2-1/4 Inches Thermal Paper (10 rolls)
- Cash Box Keys (6 keys)
- Power Cable
- USB Cable
- User Manual (this document)

Image: PYY Cash Register and its accessories, including power cable, USB cable, six cash box keys, and ten rolls of thermal paper.
Setup
1. Physical Placement
Place the cash register on a stable, flat surface. Ensure adequate space for the cash drawer to open fully and for proper ventilation.
2. Connecting Peripherals
The PYY Cash Register supports various external devices to enhance functionality. Connect peripherals to the appropriate ports as shown below:
- RS232 Ports (x2): For connecting external devices such as barcode scanners or scales.
- USB Port: For connecting to a computer for data management or programming.
- PS2 Port: For connecting an external keyboard, which can be useful for programming or data entry.

Image: Overview of the cash register's universal interface, detailing connections for scales, scanners, computers, and keyboards.
3. Power Connection
Connect the provided power cable to the cash register's power input and then to a standard AC 100-240V/50-60Hz electrical outlet. The device operates on DC 12V/3A.
4. Thermal Paper Installation
Open the printer cover located on top of the cash register. Insert a roll of 2 1/4" thermal paper, ensuring the paper feeds correctly through the mechanism. Close the cover securely.
5. Initial Power On
Once all connections are secure, turn on the cash register using the power switch. The system will initiate, and the displays will activate.
Operating Instructions
1. Keypad Overview
The cash register features a 48-key keypad with color-coded keys for easy identification and operation. The keys are designed with waterproof caps for durability.
- Blue Keys: Department functions (DEPT).
- Red Keys: Cash transaction functions (CASH).
- Green Keys: Numeric input.
- Yellow Keys: Various function keys.

Image: Detailed view of the cash register's keypad, highlighting the color-coded key divisions for different operational categories.
2. Dual Display Functionality
The cash register is equipped with dual displays for clear communication during transactions:
- 2.8-inch TFT LCD (Cashier Display): Provides detailed information for the cashier, including system menus, sales data, and programming options.
- 8-digit LED Display (Customer Display): Shows transaction totals and changes to the customer, ensuring transparency.
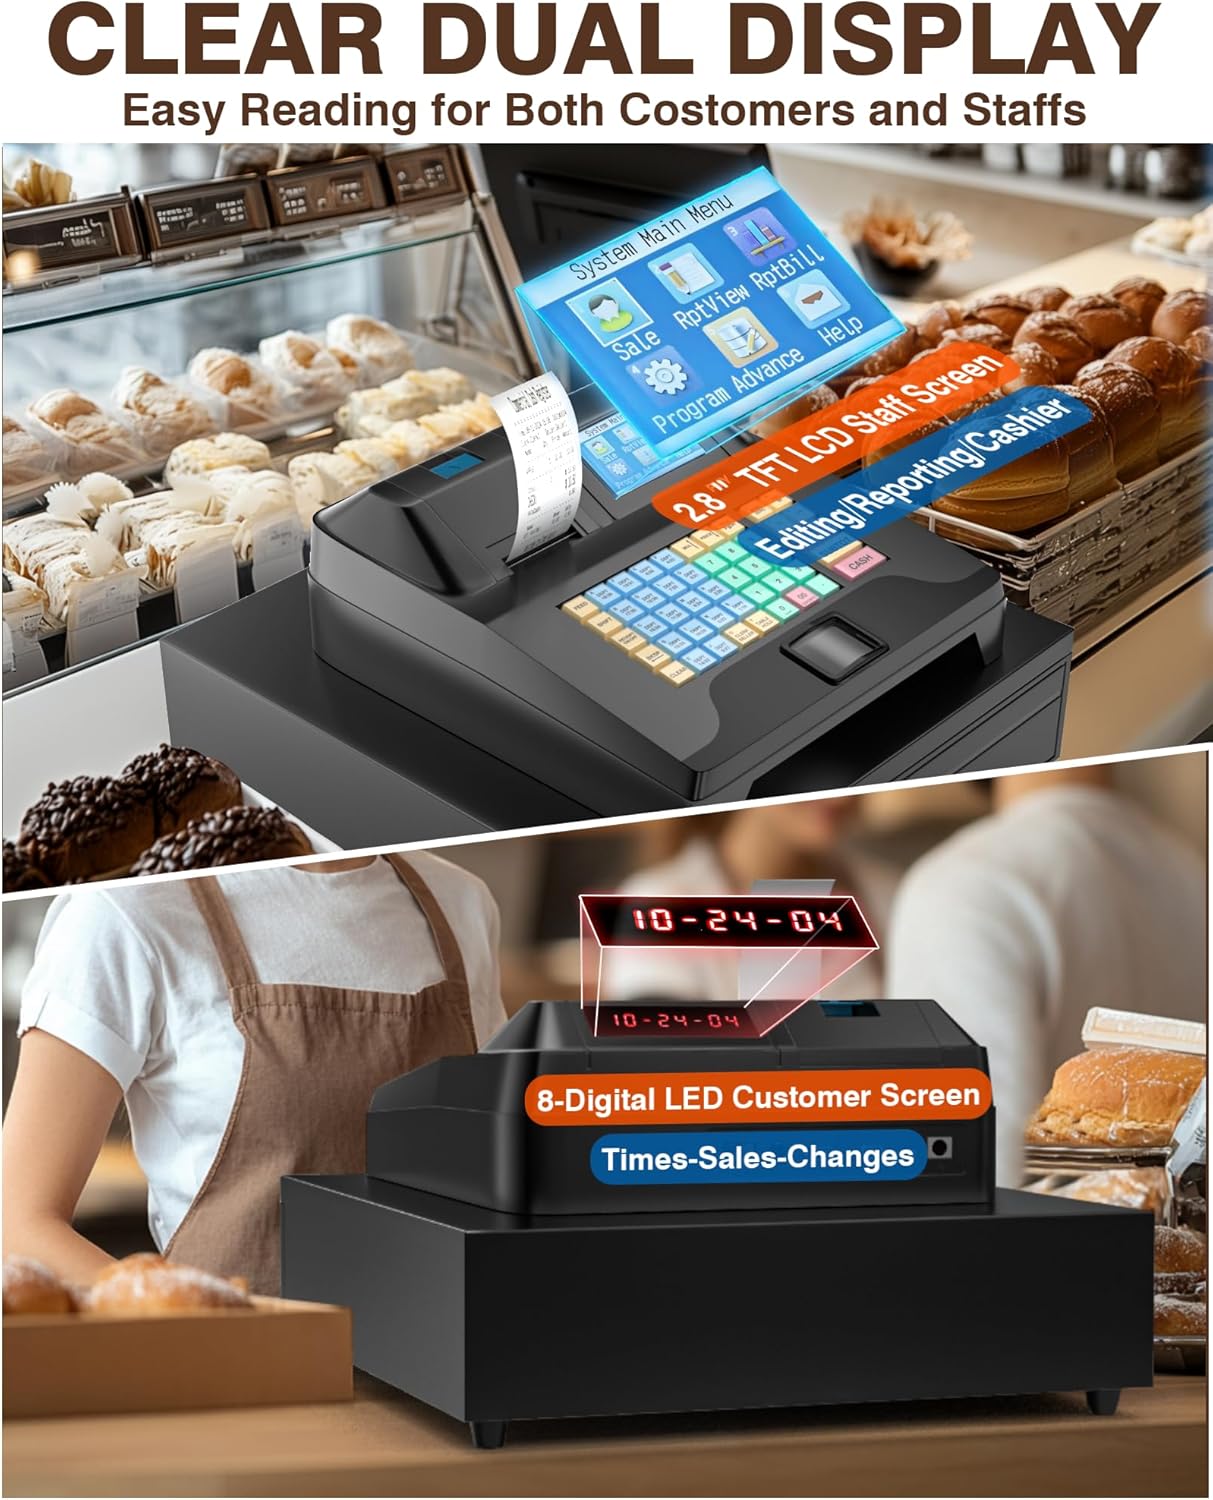
Image: The cash register's dual display system, designed for easy reading by both staff and customers.
3. Basic Sales Transaction
To perform a basic sales transaction:
- Enter the item price using the numeric keys.
- Press the corresponding Department (DEPT) key.
- Repeat for additional items.
- Press the SUBTOT key to view the subtotal.
- Enter the amount received from the customer.
- Press the CASH key to complete the transaction. The cash drawer will open, and a receipt will print.
The system supports one-click checkout after item recognition in sales mode.
4. Printing Receipts
The built-in thermal printer offers a print speed of up to 90mm/s. Receipts can be customized to include:
- Customized Header and Footer
- Time & Order ID
- Clerk & Seller Information
- Sale Details
- Settlement Details
- Tax Details (up to 9 tax rate settings)

Image: Example of a customized receipt printed by the cash register, illustrating various data fields.
5. Cash Drawer Operation
The integrated cash drawer automatically opens upon completion of a cash transaction. It features:
- 5 Bill Slots
- 5 Coin Slots
- A removable tray for organizing coins and other small items.
For security, the cash drawer comes with 6 keys, allowing for dual security measures. Always ensure the drawer is locked when unattended.
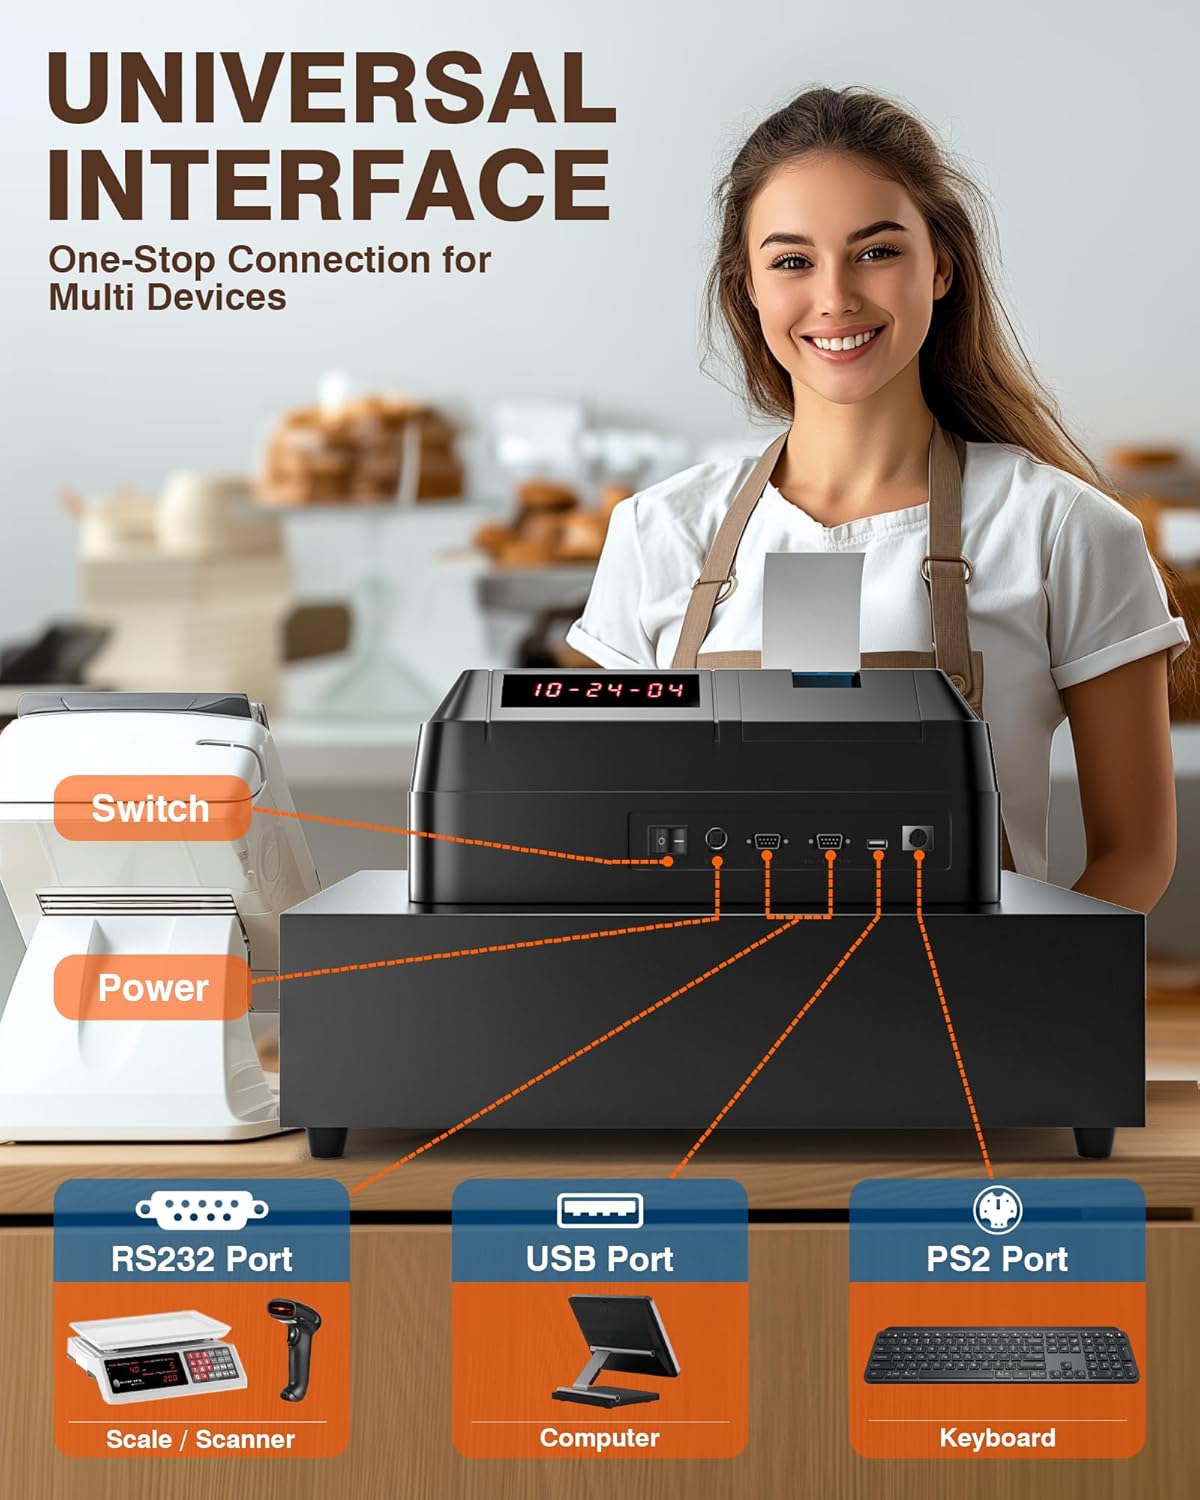
Image: The cash drawer with its organized compartments for bills and coins, including a removable tray.
6. Programming and Reporting
The cash register is configurable with extensive settings:
- Up to 200 Departments
- Up to 10,000 Items
- Up to 1,000 Members
- Up to 200 Sessions
- Up to 50 Cashiers with individual passwords
The system provides comprehensive sales data reports, including reports per hour, per cashier, per item, per department, refunds, and cash drawer openings. Detailed programming instructions are typically found in the dedicated programming section of the full user manual or software interface. For complex configurations, consulting with an IT professional may be beneficial.
Maintenance
1. Cleaning the Unit
The PYY Cash Register features an ABS material casing that is waterproof and oil-resistant. To clean the unit:
- Ensure the device is powered off and unplugged before cleaning.
- Use a soft, damp cloth with a mild, non-abrasive cleaner to wipe down the exterior surfaces.
- Avoid spraying liquids directly onto the unit or into any openings.
- For the keypad, gently wipe the waterproof caps.
2. Thermal Printer Maintenance
Regularly check the thermal printer for dust or paper residue. Use a soft brush or compressed air to clean the print head area. Replace thermal paper rolls promptly when empty to avoid interruptions in service.
Troubleshooting
This section addresses common issues you might encounter with your PYY Cash Register. For more complex problems, please refer to the support section.
| Problem | Possible Cause | Solution |
|---|---|---|
| Cash Register does not power on. | Power cable not connected, power outlet malfunction, power switch off. | Ensure power cable is securely connected. Check if the power outlet is functional. Verify the power switch is in the 'On' position. |
| Receipts are not printing or are blank. | Thermal paper is empty, incorrectly installed, or printer head is dirty. | Replace the thermal paper roll, ensuring it is installed correctly. Clean the printer head as described in the Maintenance section. |
| Cash drawer does not open. | Transaction not completed, drawer mechanism jammed, or key not used correctly. | Ensure a transaction is fully completed. Check for any obstructions in the drawer. Use the provided key to manually open if necessary. |
| Difficulty with programming items or departments. | Complex programming steps, incorrect input. | Refer to the detailed programming guide (if available separately) or contact technical support. For intricate setups, an IT professional may be required. |
Specifications
| Feature | Detail |
|---|---|
| Model Number | Cash Register for Small Business |
| Product Dimensions | 16.5 x 15.9 x 9 inches (42 x 40.5 x 23 cm) |
| Item Weight | 18.18 pounds |
| Power | 36W |
| Voltage | AC 100-240V/50-60Hz; DC 12V/3A |
| Printer Speed | Up to 90mm/s |
| Cashier Capacity | Up to 50 cashiers with individual passwords |
| Department Capacity | 200 departments |
| Item Capacity | 10,000 items |
| Member Capacity | 1,000 members |
| Session Capacity | 200 sessions |
| Tax Rate Settings | 9 tax rate settings |
| Material | ABS (waterproof and oil-resistant casing) |
| Certifications | RoHS, FCC |
Warranty and Support
1. Warranty Information
The PYY Cash Register comes with a one-year coverage from the date of purchase. This warranty covers manufacturing defects and malfunctions under normal use. Please retain your proof of purchase for warranty claims.
2. Technical Support
For any technical issues, questions, or assistance with programming, PYY offers professional one-on-one technical support. Please reach out to our customer service team if you encounter any issues. Contact information can typically be found on the product packaging or the official PYY website.


