
1. Introduction
This manual provides instructions for the safe and effective operation of the RuoShui 890H+ and 890G+ Digital Multimeters. These devices are designed for measuring DC/AC voltage, DC/AC current, resistance, capacitance, diode, NCV, Live, and frequency. The 890H+ model also includes temperature measurement and features an auto-ranging function, while the 890G+ is a manual-ranging model.
Please read this manual thoroughly before use and retain it for future reference. Adherence to all safety warnings and operating instructions is crucial for preventing electric shock, injury, or damage to the meter.
2. Safety Information
Always observe basic safety precautions when using this multimeter to reduce the risk of fire, electric shock, and personal injury. This device is rated for CAT III 1000V and CAT IV 600V environments.
- Do not exceed the maximum input values specified for each measurement range.
- Exercise extreme caution when working with voltages above 30V AC RMS, 42V peak, or 60V DC. These voltages pose a shock hazard.
- Ensure the test leads are in good condition, without any damage to the insulation.
- Do not operate the meter if it appears damaged or if the case is open.
- Replace the battery immediately when the low battery indicator appears to ensure accurate readings.
- Always disconnect the test leads from the circuit before changing functions or ranges.
- Use the correct terminals, function, and range for all measurements.
3. Product Overview
The RuoShui 890H+ and 890G+ multimeters are robust tools designed for various electrical measurements. They feature a large LCD display, overload protection, and an automatic power-off function to conserve battery life.
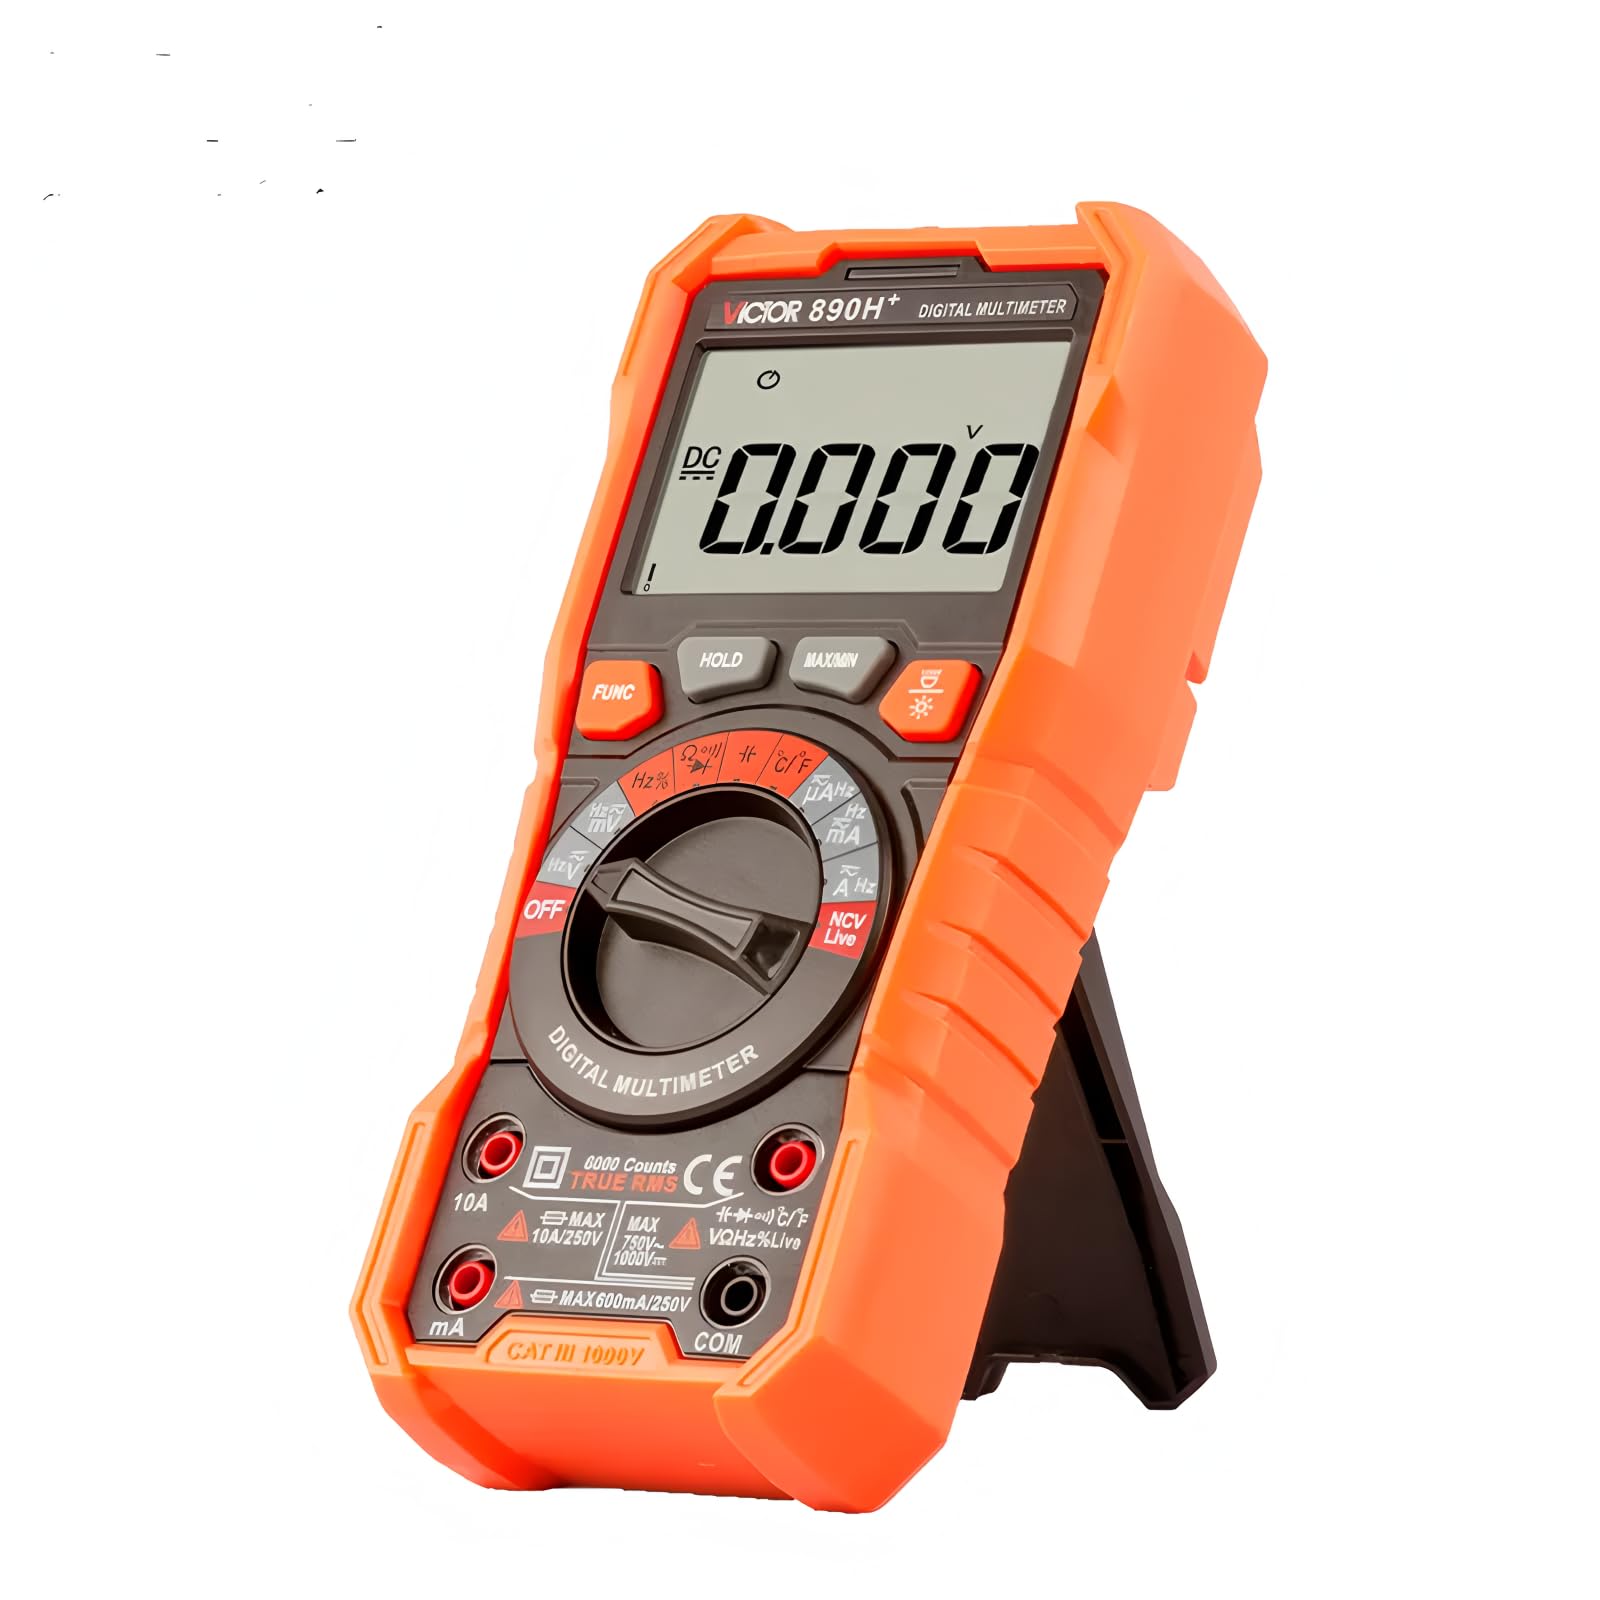
Figure 3.1: RuoShui 890H+ Digital Multimeter with test leads connected. This image shows the overall design of the multimeter, including the display, rotary switch, function buttons, and input jacks.

Figure 3.2: Rear view of the multimeter, highlighting the integrated test lead storage design for convenience and protection, along with the built-in flashlight for illuminating work areas.
4. Setup
4.1 Unpacking
Carefully remove the multimeter and all accessories from the packaging. Verify that all items listed in the package contents are present:
- Digital Multimeter (890H+ or 890G+)
- Pair of Test Leads
- User Manual (English)
4.2 Battery Installation
The multimeter is powered by batteries. To install or replace batteries:
- Ensure the multimeter is turned OFF and test leads are disconnected.
- Locate the battery compartment cover on the back of the meter.
- Use a screwdriver to open the battery compartment.
- Insert new batteries, observing the correct polarity (+ and -).
- Replace the battery compartment cover and secure it with the screw.
5. Operating Instructions
This section details the various measurement functions and features of the RuoShui 890H+ and 890G+ multimeters.
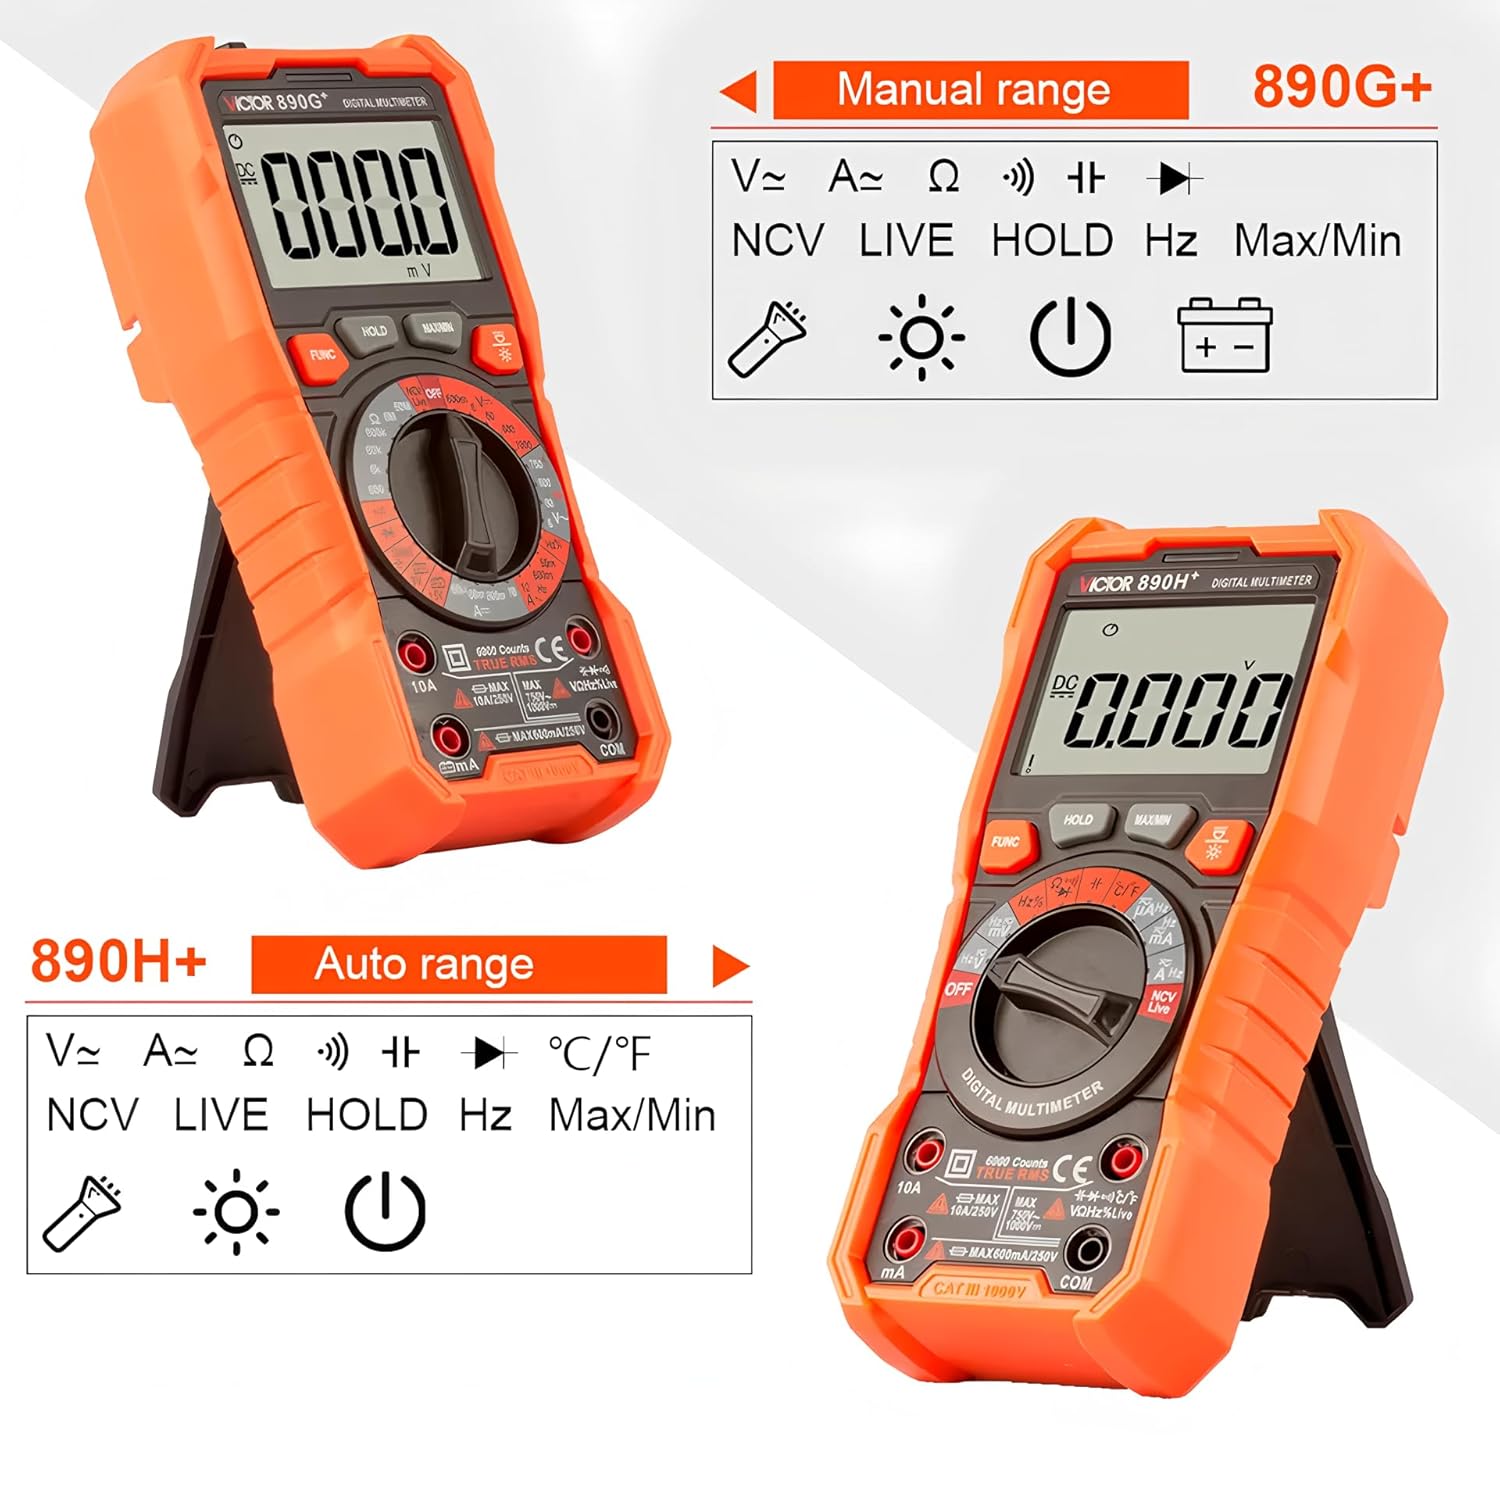
Figure 5.1: Visual comparison between the 890G+ (Manual Range) and 890H+ (Auto Range) models. Note the different markings on the rotary switch for range selection.
5.1 Power On/Off
Turn the rotary switch from the 'OFF' position to any desired measurement function to power on the meter. To power off, turn the rotary switch back to 'OFF'. The meter features an automatic shutdown after 15 minutes of inactivity to save battery life.
5.2 Function Selection
The rotary switch is used to select the primary measurement function (e.g., Voltage, Current, Resistance). For functions with multiple modes (e.g., AC/DC Voltage), press the 'FUNC' button to toggle between modes.

Figure 5.2: Close-up of the intuitive range knob design, showing various measurement gears and their color distinctions. Note that the 890H+ model features automatic ranging, simplifying operation.
5.3 Basic Measurements
Voltage Measurement (DCV/ACV):
- Set the rotary switch to the V~ (AC Voltage) or V- (DC Voltage) position.
- Insert the red test lead into the 'VΩHz' jack and the black test lead into the 'COM' jack.
- Connect the test leads in parallel to the circuit or component under test.
- Read the voltage value on the display.
Current Measurement (DCA/ACA):
- Set the rotary switch to the A~ (AC Current) or A- (DC Current) position.
- For currents up to 600mA, insert the red test lead into the 'mA' jack. For currents up to 10A, insert the red test lead into the '10A' jack. Insert the black test lead into the 'COM' jack.
- Connect the test leads in series with the circuit.
- Read the current value on the display.
Resistance Measurement (Ω):
- Set the rotary switch to the 'Ω' position.
- Insert the red test lead into the 'VΩHz' jack and the black test lead into the 'COM' jack.
- Connect the test leads across the component to measure resistance. Ensure the circuit is de-energized.
- Read the resistance value on the display.
Capacitance Measurement (F):
- Set the rotary switch to the 'F' position.
- Insert the red test lead into the 'VΩHz' jack and the black test lead into the 'COM' jack.
- Connect the test leads across the capacitor. Ensure the capacitor is discharged before measurement.
- Read the capacitance value on the display.
Diode Test:
- Set the rotary switch to the 'Diode' position.
- Insert the red test lead into the 'VΩHz' jack and the black test lead into the 'COM' jack.
- Connect the red lead to the anode and the black lead to the cathode of the diode.
- Read the forward voltage drop. Reverse the leads to check for open circuit (OL).
NCV (Non-Contact Voltage) Test:
- Set the rotary switch to the 'NCV' position.
- Move the top end of the multimeter near the conductor.
- The meter will beep and the NCV indicator will light up if AC voltage is detected.
Live Test:
- Set the rotary switch to the 'Live' position.
- Insert the red test lead into the 'VΩHz' jack. The black lead is not used for this test.
- Touch the red test lead to the live wire. The display will show 'LIVE' and an audible alarm will sound if a live wire is detected.
Frequency Measurement (Hz):
- Set the rotary switch to the 'Hz' position.
- Insert the red test lead into the 'VΩHz' jack and the black test lead into the 'COM' jack.
- Connect the test leads in parallel to the circuit.
- Read the frequency value on the display.
Temperature Measurement (890H+ only):
- Set the rotary switch to the '°C/°F' position.
- Insert the temperature probe into the 'VΩHz' and 'COM' jacks, observing polarity.
- Place the probe tip on the object or in the environment to be measured.
- Read the temperature value on the display. Press 'FUNC' to switch between Celsius and Fahrenheit.
5.4 Special Features
Data Hold (HOLD): Press the 'HOLD' button to freeze the current reading on the display. Press again to release.
Max/Min Hold (MAX/MIN): Press the 'MAX/MIN' button to enter Max/Min recording mode. The meter will display the maximum or minimum value measured since entering this mode. Press again to cycle through Max, Min, and current readings. Hold the button to exit.
Backlight: Press the backlight button (often combined with flashlight) to turn on the display backlight for better visibility in low-light conditions. Press again to turn off.
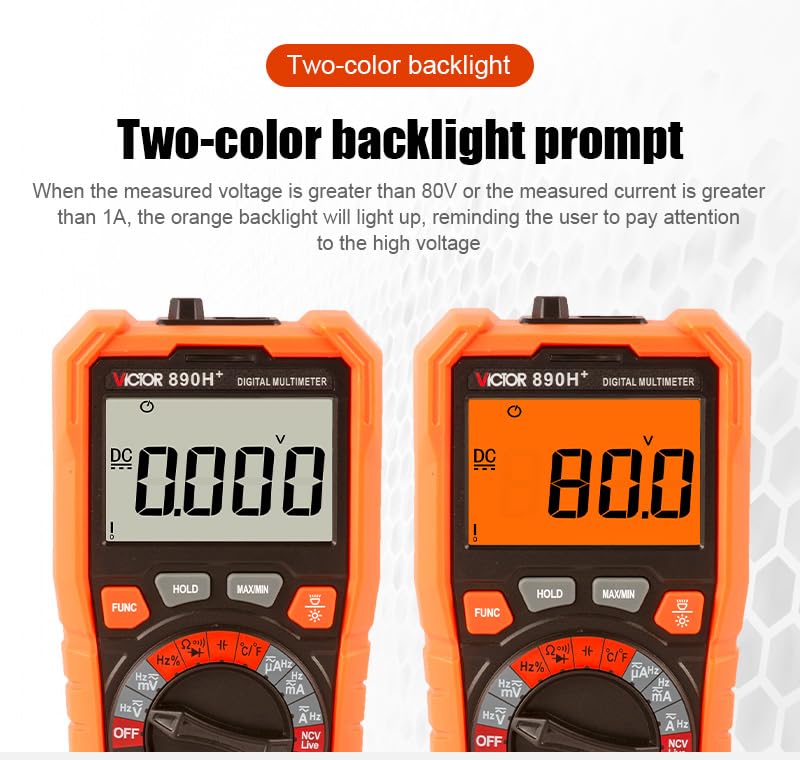
Figure 5.3: The two-color backlight feature. When measured voltage exceeds 80V or current exceeds 1A, the orange backlight illuminates to warn the user of high voltage/current conditions.
Flashlight: Press the flashlight button (often combined with backlight) to activate the built-in flashlight, useful for illuminating dark work areas.

Figure 5.4: The multimeter's flashlight function in use, providing illumination for working in dimly lit environments. The flashlight can be activated with a dedicated button.
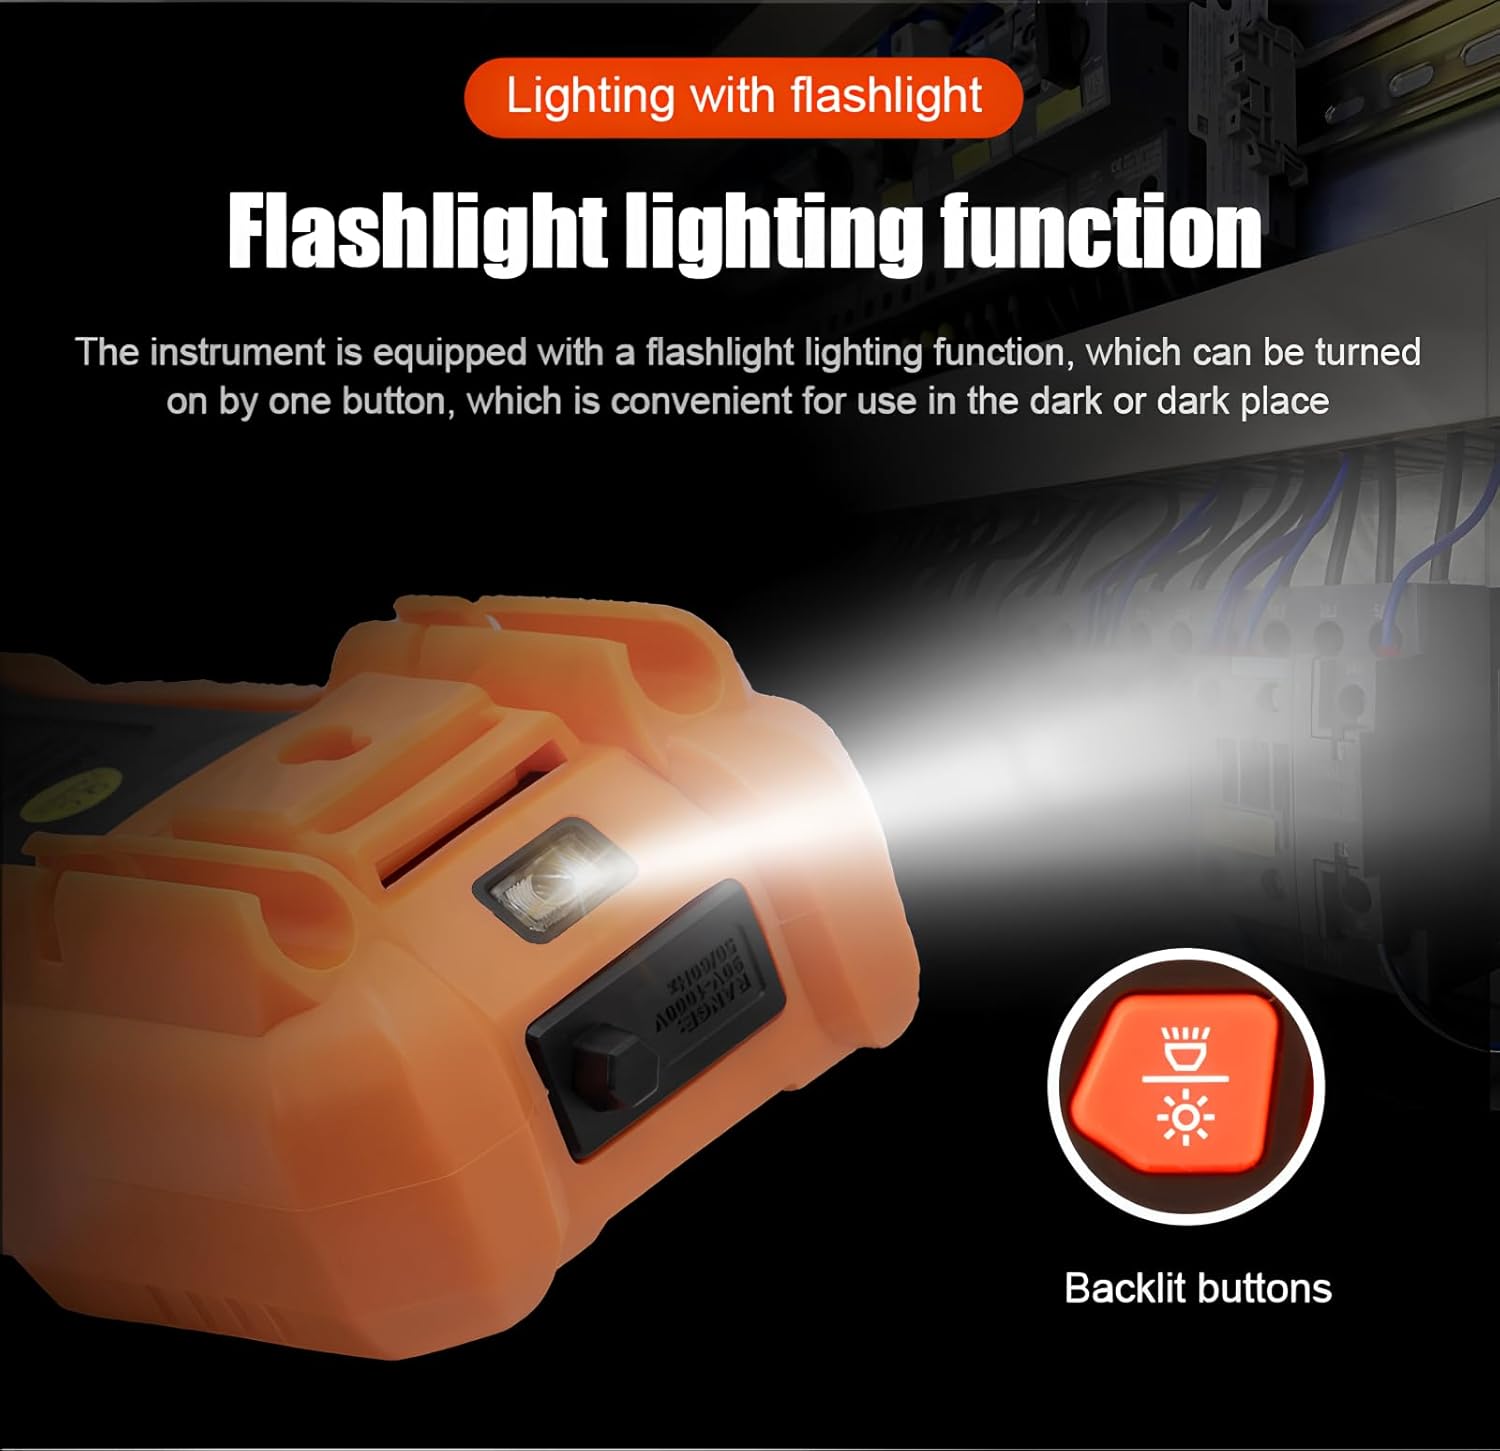
Figure 5.5: A visual summary of the multi-function capabilities, including AC/DC current, data retention, temperature, overload prompt, live detection, NCV, AC/DC voltage, capacitance, Max/Min, battery detection, resistance, flashlight, auto shut-down, on-off beep, diode, True RMS, 6000 digits display, and two-color backlight.
6. Maintenance
6.1 Cleaning
Wipe the case with a damp cloth and mild detergent. Do not use abrasives or solvents. Keep the input terminals free of dirt and moisture.
6.2 Battery Replacement
Refer to Section 4.2 for instructions on battery replacement. Always use the specified battery type.
6.3 Fuse Replacement
The multimeter is equipped with internal fuses for overload protection. If the current measurement function fails, the fuse may need replacement. Fuse replacement should only be performed by qualified personnel. Use only fuses of the specified type and rating.
6.4 Storage
If the meter is not to be used for an extended period, remove the batteries to prevent leakage. Store the meter in a cool, dry place, away from direct sunlight and extreme temperatures.
7. Troubleshooting
- Meter does not power on: Check battery installation and ensure batteries are not depleted.
- 'OL' (Overload) displayed: The measured value exceeds the selected range. For manual range meters (890G+), select a higher range. For auto-range meters (890H+), this indicates the measurement is beyond the meter's maximum capability.
- Inaccurate readings: Check battery level, ensure test leads are properly connected, and verify the correct function and range are selected. Clean the input terminals if necessary.
- No current measurement: Check if the fuse for current measurement is blown. Refer to Section 6.3 for fuse replacement.
8. Specifications
The following table outlines the key specifications for the RuoShui 890G+ and 890H+ Digital Multimeters.

Figure 8.1: Detailed specification comparison between the VC890G+ and VC890H+ models, including measurement ranges, display method, and additional features.
| Feature | Specification |
|---|---|
| Display | 6000 Counts LCD |
| Bandwidth | 1kHz |
| Safety Rating | EN61010-1, -2-030 EN61010-2-033, EN61326-1 CAT III 1000V, CATIV 600V |
| Auto Power-off | Approx. 15 minutes |
| Material | ABS |
| Item Weight | 1 kg |
| Item Dimensions | 7.87 x 5.91 x 7.09 inches |
| Upper Temperature Rating | 60 °C |
| Function | 890G+ Range | 890H+ Range |
|---|---|---|
| DC Voltage (DCV) | 600mV/6V/60V/600V/1000V | 600mV/6V/60V/600V/1000V |
| AC Voltage (ACV) | 6V/60V/600V/750V | 600mV/6V/60V/600V/750V |
| DC Current (DCA) | 60uA/60mA/600mA/10A | 60uA/60mA/600mA/10A |
| AC Current (ACA) | 60mA/600mA/10A | 60mA/600mA/10A |
| Resistance (Ω) | 600Ω/6kΩ/60kΩ/600kΩ/6MΩ/60MΩ | 600Ω/6kΩ/60kΩ/600kΩ/6MΩ/60MΩ |
| Capacitance (F) | 10nF/100nF/1000nF/10uF/100uF/1000uF/10mF/100mF | 10nF/100nF/1000nF/10uF/100uF/1000uF/10mF/100mF |
| Frequency (Hz) | 10Hz/100Hz/1000Hz/10kHz/100kHz/1000kHz | 10Hz/100Hz/1000Hz/10kHz/100kHz/1000kHz |
| Duty Cycle | 1%~99% | 1%~99% |
| Temperature | N/A | (-20~1000) °C / (-4~1832) °F |
9. Warranty and Support
RuoShui products are designed for reliability and performance. For warranty information, please refer to the warranty card included with your product or contact your point of purchase. Typically, a 1-year spare part availability duration is provided.
For technical support, troubleshooting assistance, or service inquiries, please contact RuoShui customer support through the official website or your retailer. When contacting support, please have your model number (890H+ or 890G+) and purchase information readily available.


