1. Introduction
This manual provides essential information regarding the Cloud Nine C9 - M1.2 Straightener Heater Back Plate. This genuine replacement part is designed to restore the functionality and integrity of your Cloud Nine straightener. Please read this manual carefully before attempting any installation or repair to ensure proper handling and safety.
2. Product Overview
The Cloud Nine C9 - M1.2 Straightener Heater Back Plate is a crucial component for your hair straightener, designed to provide structural support and facilitate optimal heat distribution. It is manufactured from high-quality, heat-resistant materials to withstand continuous exposure to high temperatures, ensuring reliable performance and durability.
- Original Part: Authentic Cloud Nine C9 - M1.2 straightener backing plate designed for genuine replacement and optimal performance.
- Heat Resistant: Manufactured with high-quality heat-resistant materials to withstand continuous exposure to high temperatures.
- Compatibility: Perfect fit for Cloud Nine straighteners, ensuring secure attachment and proper heat distribution.
- Durable Design: Robust construction with precise mounting points for stable and long-lasting performance.
- Easy Installation: Features pre-aligned mounting holes and ergonomic design for a straightforward replacement process.

This image displays the Cloud Nine C9 - M1.2 Straightener Heater Back Plate from a top-down perspective. It highlights the matte black finish and the precisely engineered openings designed for heat dissipation and component integration within the straightener.
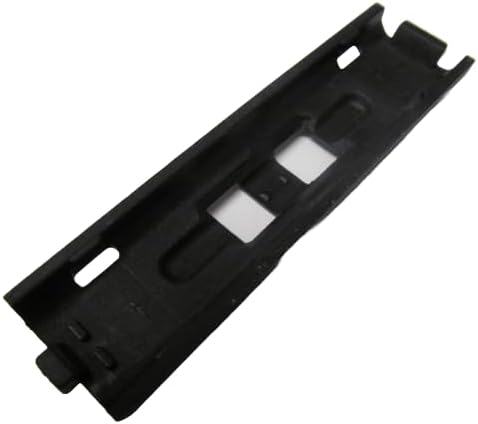
An angled view of the heater back plate, revealing its internal contours and the various mounting points and slots that ensure a secure and accurate fit within the Cloud Nine straightener assembly.
A closer top view of the back plate, highlighting the fine details of its surface texture and the precise cutouts, which are essential for its function in heat management and structural support.

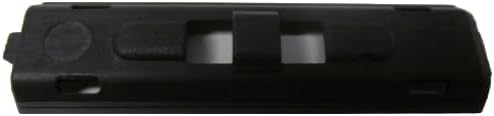
This image provides an alternative angled perspective of the heater back plate, showcasing its overall profile and the specific connection points designed for seamless integration into the straightener's heating mechanism.
3. Setup and Installation
This heater back plate is a replacement component for Cloud Nine straighteners. Installation requires careful handling and basic technical understanding. It is highly recommended that installation be performed by a qualified technician or an individual with experience in repairing small electronics to ensure safety and proper function.
3.1. Important Considerations Before Installation
- Ensure the straightener is completely unplugged from the power source and has cooled down before beginning any work.
- Gather necessary tools, which may include small screwdrivers and prying tools.
- Work in a clean, well-lit area to prevent loss of small components.
- Familiarize yourself with the internal structure of your specific Cloud Nine straightener model.
3.2. General Installation Steps (Consult a professional if unsure)
- Carefully disassemble the straightener casing to access the internal components, paying attention to any screws or clips.
- Locate the existing heater back plate. Note its orientation and how it connects to other parts.
- Gently disconnect and remove the old back plate.
- Align the new Cloud Nine C9 - M1.2 Heater Back Plate with the mounting points. The design features pre-aligned mounting holes for ease of installation.
- Secure the new back plate in place, ensuring all connections are firm and correctly seated.
- Carefully reassemble the straightener casing, ensuring all screws are tightened and clips are secured.
- Before plugging in, visually inspect the straightener to ensure all parts are correctly reassembled and there are no loose components.
4. Operating the Straightener After Part Replacement
Once the Cloud Nine C9 - M1.2 Straightener Heater Back Plate has been correctly installed, the straightener should function as intended. This component is integral to the heating mechanism and structural integrity of the device.
- Plug the straightener into a suitable power outlet.
- Turn on the straightener using its power button.
- Allow the straightener to reach its operating temperature.
- Observe for any unusual noises, smells, or malfunctions during the first few uses. If any issues arise, immediately unplug the device and refer to the troubleshooting section or seek professional assistance.
5. Maintenance
Proper maintenance of your Cloud Nine straightener, especially after replacing internal components, will extend its lifespan and ensure continued optimal performance.
- Cleaning: Ensure the straightener is unplugged and completely cool before cleaning. Wipe the exterior with a soft, damp cloth. Do not use harsh chemicals or abrasive cleaners.
- Storage: Store the straightener in a cool, dry place, away from direct sunlight and moisture. Ensure the cord is not tightly wrapped around the device, which can cause damage over time.
- Regular Inspection: Periodically inspect the straightener for any signs of wear, damage, or loose components. If any issues are observed, discontinue use and seek professional repair.
6. Troubleshooting
If you encounter issues after replacing the heater back plate, consider the following troubleshooting steps:
| Problem | Possible Cause | Solution |
|---|---|---|
| Straightener does not heat up after replacement. | Incorrect installation of the back plate or other internal components. Loose connections. Faulty heating element (unrelated to back plate). |
|
| Unusual noises or smells after replacement. | Component not seated correctly. Foreign object inside. Electrical short. |
|
| Casing does not close properly after reassembly. | Component misalignment. Wires or other parts are obstructing the casing. |
|
Note: Attempting repairs on electrical appliances carries inherent risks. If you are unsure about any step, it is always best to consult a qualified technician.
7. Specifications
| Attribute | Detail |
|---|---|
| Product Dimensions | 9 x 2.4 x 2.4 cm |
| Item Weight | 5 g |
| Manufacturer | Cloud Nine® |
| Model Number | C9BACKPLATE |
| Model Name | Cloud Nine Heater Backing Plate |
| Product Benefits | Temperature Protection |
| Shape | Rectangular |
| Material | Plastic |
| Color | Black |
| Size | One Size |
| Compatible Hair Type | All |
8. Safety Information
WARNING: Please read and understand the following safety information before attempting any maintenance or repair on your straightener.
You understand that a straightener, like any equipment, consists of a multitude of complex components, each of which can fail without warning, and that any attempt to maintain and/or repair the same inherently involves risk. Repairs are not always straightforward, and even if carefully performed, repair and/or service work may introduce imperfections that cause the straightener to not function as intended. Such malfunctions can lead to burns, straightener failure, damage, etc. You acknowledge that SIRIUSHAIR, by committing to purchase SIRIUSHAIR parts to maintain and/or repair your equipment, accepts no responsibility for such risks. You agree that all such risks are your own (and/or your company's), and you agree to indemnify and hold harmless SIRIUSHAIR Ltd, its Owner, Contractors, and employees from liability. By purchasing a repair component to repair your straightener, you explicitly waive the right to a counterclaim.
Always prioritize safety. If you are not confident in your ability to perform the repair safely, seek assistance from a certified professional.
9. Warranty and Support
Specific warranty information for this replacement part is not provided in the product details. For any warranty claims, technical support, or further assistance regarding the Cloud Nine C9 - M1.2 Straightener Heater Back Plate, please contact the original manufacturer, Cloud Nine®, or the seller, SIRIUSHAIR Ltd, directly.
Please retain your proof of purchase for any support inquiries.


