Introduction
This manual provides comprehensive instructions for the installation, operation, maintenance, and troubleshooting of your AINAVI 10-inch Car Stereo Radio. Please read this manual thoroughly before using the product to ensure proper function and to maximize your user experience. Keep this manual for future reference.
Compatible Vehicle Models
This AINAVI car stereo is specifically designed for a customized fit in the following vehicles:
- Dodge Ram 1500 (2013-2018)
- Dodge Ram 2500 (2013-2018)
- Dodge Ram 3500 (2013-2018)
- Dodge Ram 1500 Classic (2019-2024)
- Dodge Ram 2500 Classic (2019-2024)
- Dodge Ram 3500 Classic (2019-2024)
It supports both manual and automatic AC climate control versions of these models. The package includes the necessary in-dash head unit, wiring harness cables, CANbus decoder, and frame panel, eliminating the need for vehicle cable modifications.

Image: Comparison of vehicle dashboards before and after installation, showing compatibility with both manual and automatic air conditioning systems.
Package Contents
The following items are included in your AINAVI Car Stereo Radio package:
- 1x Android Car Stereo Head Unit
- 2x Plastic Frame (for different AC types)
- 1x Wiring Harness Power Cable
- 1x CANbus Decoder
- 1x Radio Antenna Adapter
- 1x GPS Antenna
- 2x USB Cables
- 1x Audio Cables
- 1x User Manual
- 1x AHD 1080P Backup Camera
- 1x External Microphone
- 1x RCA Cable Set
- 1x Reversing Control Cable
- 1x Frame Removal Tool
Note: The specific cables included may vary slightly by model. Please refer to the actual contents received.

Image: Visual representation of all components included in the product package.
Technical Specifications
| Operating System | Android 13 |
| Processor | ARM Cortex A75 8-Core |
| RAM | 6GB |
| Internal Storage (ROM) | 128GB |
| Display Size | 10 Inches |
| Display Type | QLED IPS Touch Screen (G+G full lamination) |
| Resolution | 1280x720 |
| Viewing Angle | 178° Full-Viewing Angle |
| Audio Output | 4*45W Max. Output (RMS 4x24W), Built-in DSP with 48-band EQ |
| Connectivity | Wireless CarPlay, USB Android Auto, 5G WiFi (2.4Ghz & 5Ghz), Bluetooth 5.0, GPS |
| Special Features | Split Screen Function, Steering Wheel Control (SWC), RDS, Panel Light, RCA Output, Rear View Camera Input (AHD 1080P), Microphone Input |
| Item Weight | 4.4 pounds (approx. 2 kg) |
| Package Dimensions | 14.02 x 9.96 x 5.2 inches (approx. 35.6 x 25.3 x 13.2 cm) |

Image: Details of the high-definition QLED touch screen, emphasizing its visual quality.
Installation and Setup
Professional installation is recommended for this car stereo. Ensure the vehicle's battery is disconnected before beginning installation to prevent electrical damage.
1. Pre-Installation Check
- Verify all components listed in the "Package Contents" section are present.
- Identify your vehicle's AC climate control type (manual or automatic) to select the correct plastic frame.
- Familiarize yourself with your vehicle's dashboard removal process.
2. Dashboard Disassembly
Carefully remove the existing car stereo and dashboard trim using the provided frame removal tool or appropriate automotive tools. Refer to your vehicle's service manual for specific instructions on dashboard disassembly.
3. Wiring Connections
Connect the wiring harness power cable and CANbus decoder to the vehicle's existing wiring. The CANbus decoder ensures compatibility with original vehicle functions such as steering wheel controls and reverse signals. Connect the GPS antenna, radio antenna adapter, USB cables, and external microphone to the corresponding ports on the head unit.
- Power Cable & CANbus: Connect to the vehicle's main power and data harness.
- GPS Antenna: Mount in a location with a clear view of the sky, typically on the dashboard or under the windshield.
- Radio Antenna: Connect the adapter to the vehicle's radio antenna cable.
- USB Cables: Route to an accessible location for connecting external devices.
- External Microphone: Mount near the driver's position for optimal call quality.
4. Rearview Camera Installation (Optional)
If installing the AHD 1080P backup camera, connect its video cable to the "CAM IN" or "REVERSE CAMERA" input on the head unit. Connect the camera's power cable to the vehicle's reverse light circuit for automatic activation when shifting into reverse. Ensure the reversing control cable from the head unit is also connected to the reverse signal wire.

Image: Illustration of the rearview camera and its functionality when connected to the stereo.
5. Head Unit Mounting
Secure the AINAVI head unit into the dashboard opening. Attach the appropriate plastic frame for your vehicle's AC type. Reassemble the dashboard trim panels.
6. Initial Power-On and Testing
Reconnect the vehicle's battery. Power on the car stereo. Perform initial tests:
- Verify the unit powers on and the display functions correctly.
- Test steering wheel controls.
- Check radio reception.
- Test Bluetooth connectivity with a mobile device.
- If installed, test the rearview camera by engaging reverse gear.
Operating Instructions
Your AINAVI car stereo runs on Android 13, offering a user-friendly interface similar to a tablet. Navigate using the 10-inch QLED touchscreen.
1. Basic Navigation
The home screen displays frequently used applications and widgets. Swipe left or right to access additional app pages. Tap icons to launch applications. Use the back button or swipe gestures (if enabled) to navigate within apps.
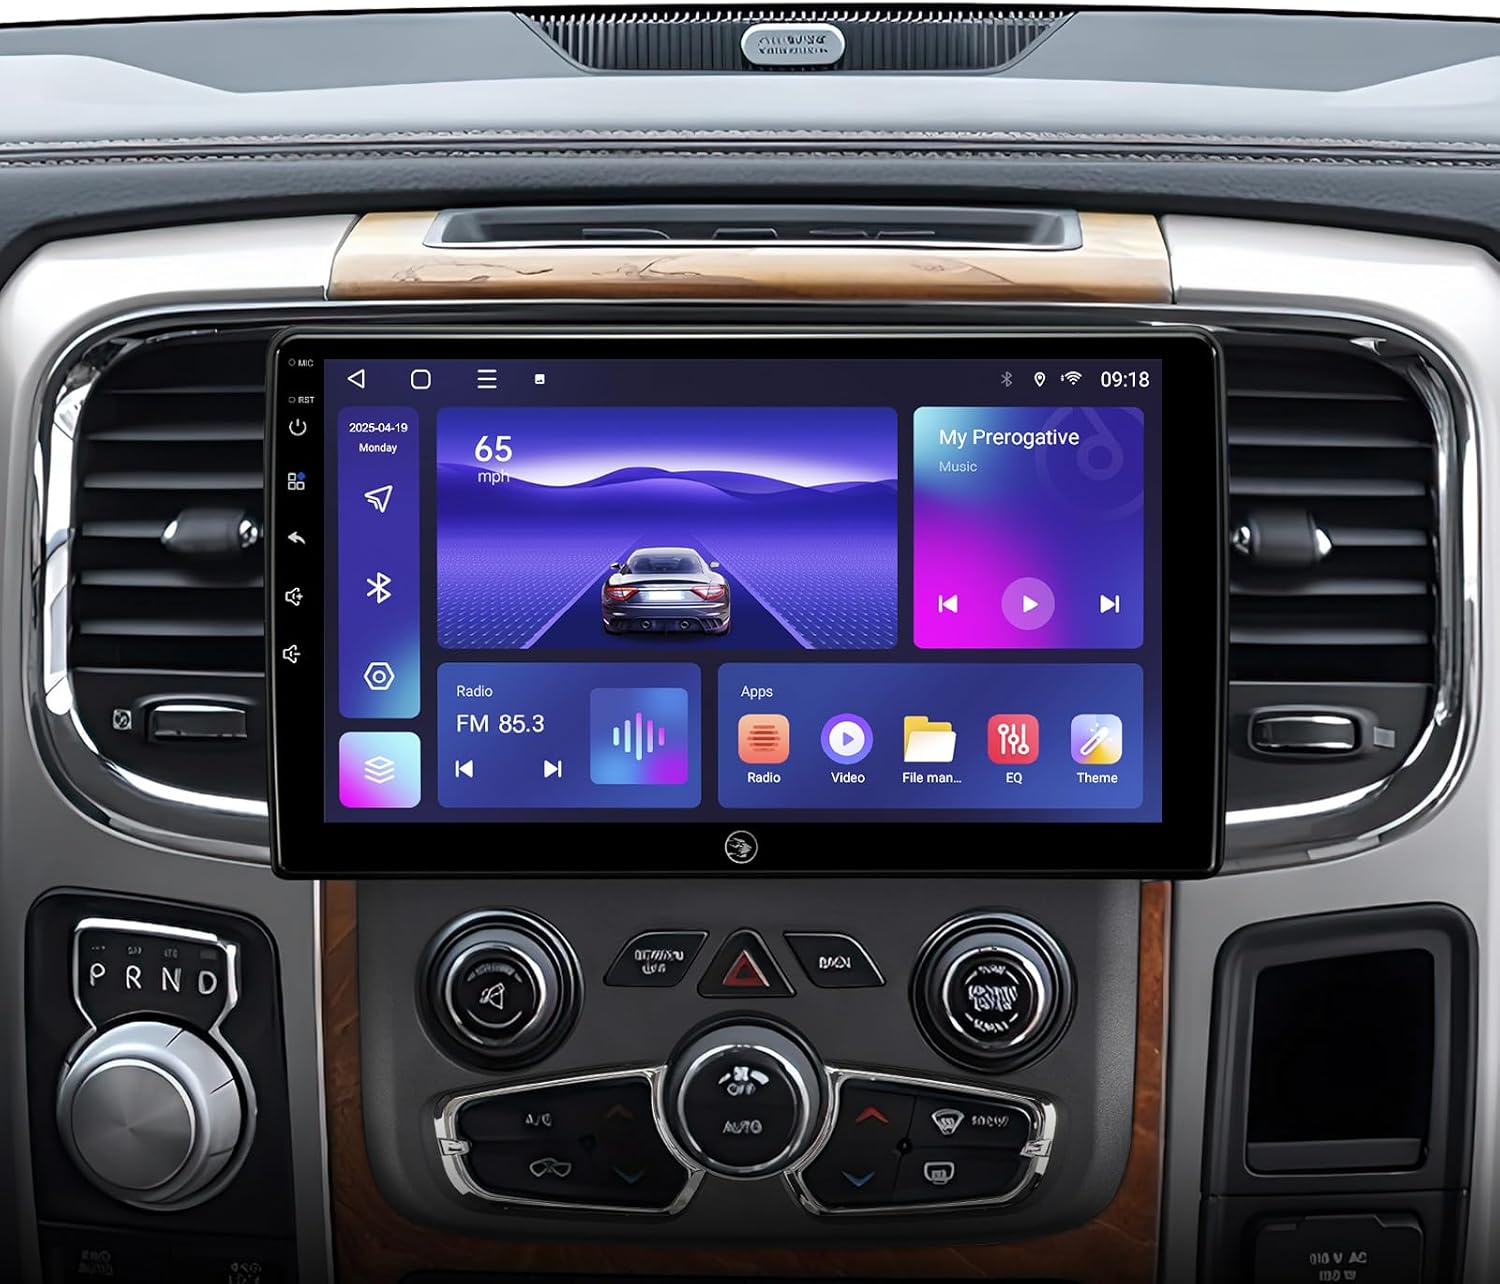
Image: Main user interface of the car stereo, showing various functions and applications.
2. Wireless CarPlay & Android Auto
Connect your smartphone wirelessly via Bluetooth and Wi-Fi for CarPlay (iOS) or Android Auto (Android). This allows seamless integration of your phone's navigation, communication, and entertainment features onto the stereo display.
- Activation: Ensure Bluetooth is enabled on your phone and the stereo. Pair your phone with the stereo. Follow on-screen prompts to activate CarPlay or Android Auto.
- Voice Commands: Use "Hey Siri" or "Hey Google" to activate voice assistants for hands-free control.

Image: Visual guide to connecting and using Apple CarPlay and Android Auto.
3. GPS Navigation
The built-in GPS module supports various navigation applications available on the Google Play Store. You can use online maps with a Wi-Fi connection or download offline maps for navigation without internet access.
- Online Maps: Connect to a Wi-Fi hotspot for real-time traffic information and map updates.
- Offline Maps: Download maps for your region to the stereo's internal storage for use without an internet connection.
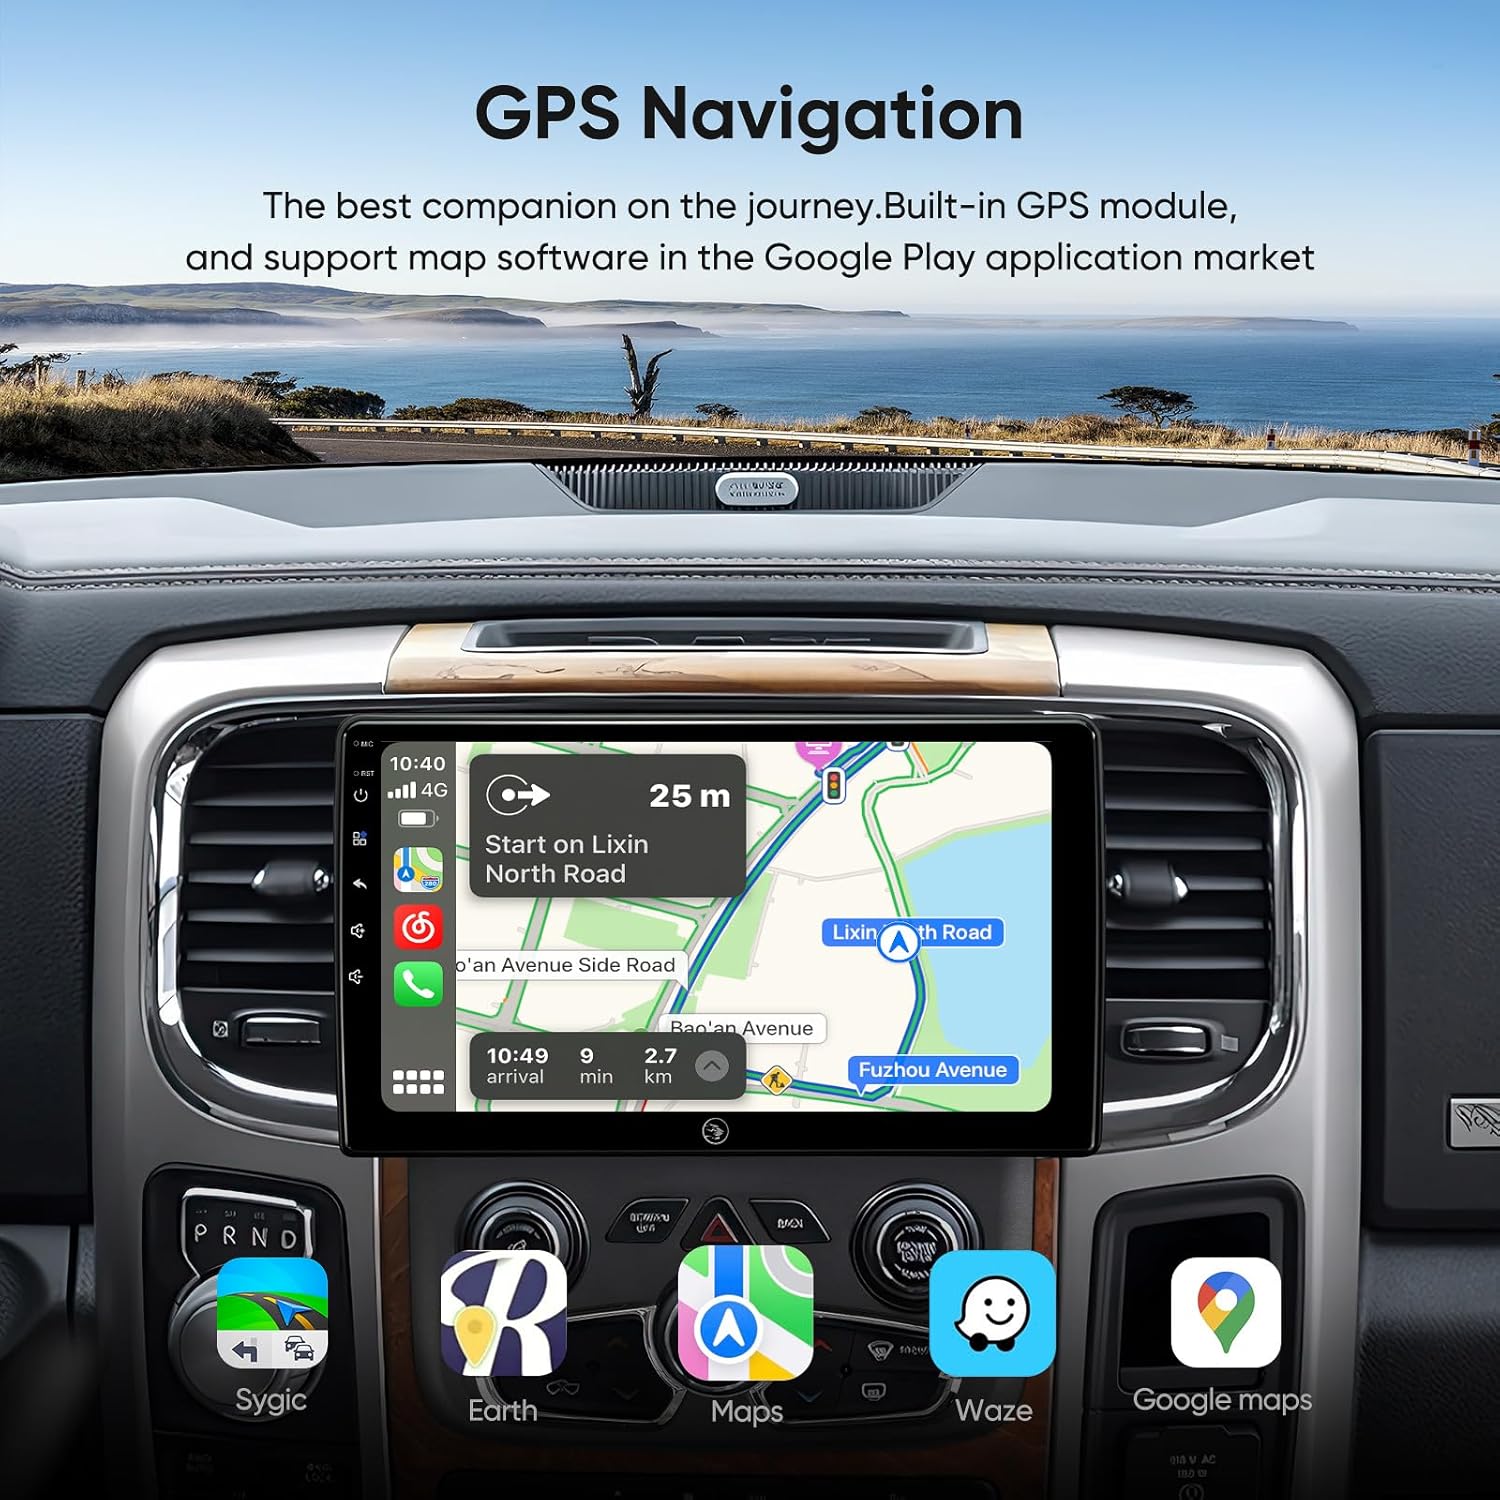
Image: GPS navigation interface showing a route and available map applications.
4. Wi-Fi and Bluetooth Connectivity
- Wi-Fi (2.4Ghz & 5Ghz): Connect to a mobile hotspot or home Wi-Fi network to access online content, download apps, and receive updates.
- Bluetooth 5.0: Pair your phone for hands-free calling, music streaming, and phonebook synchronization.
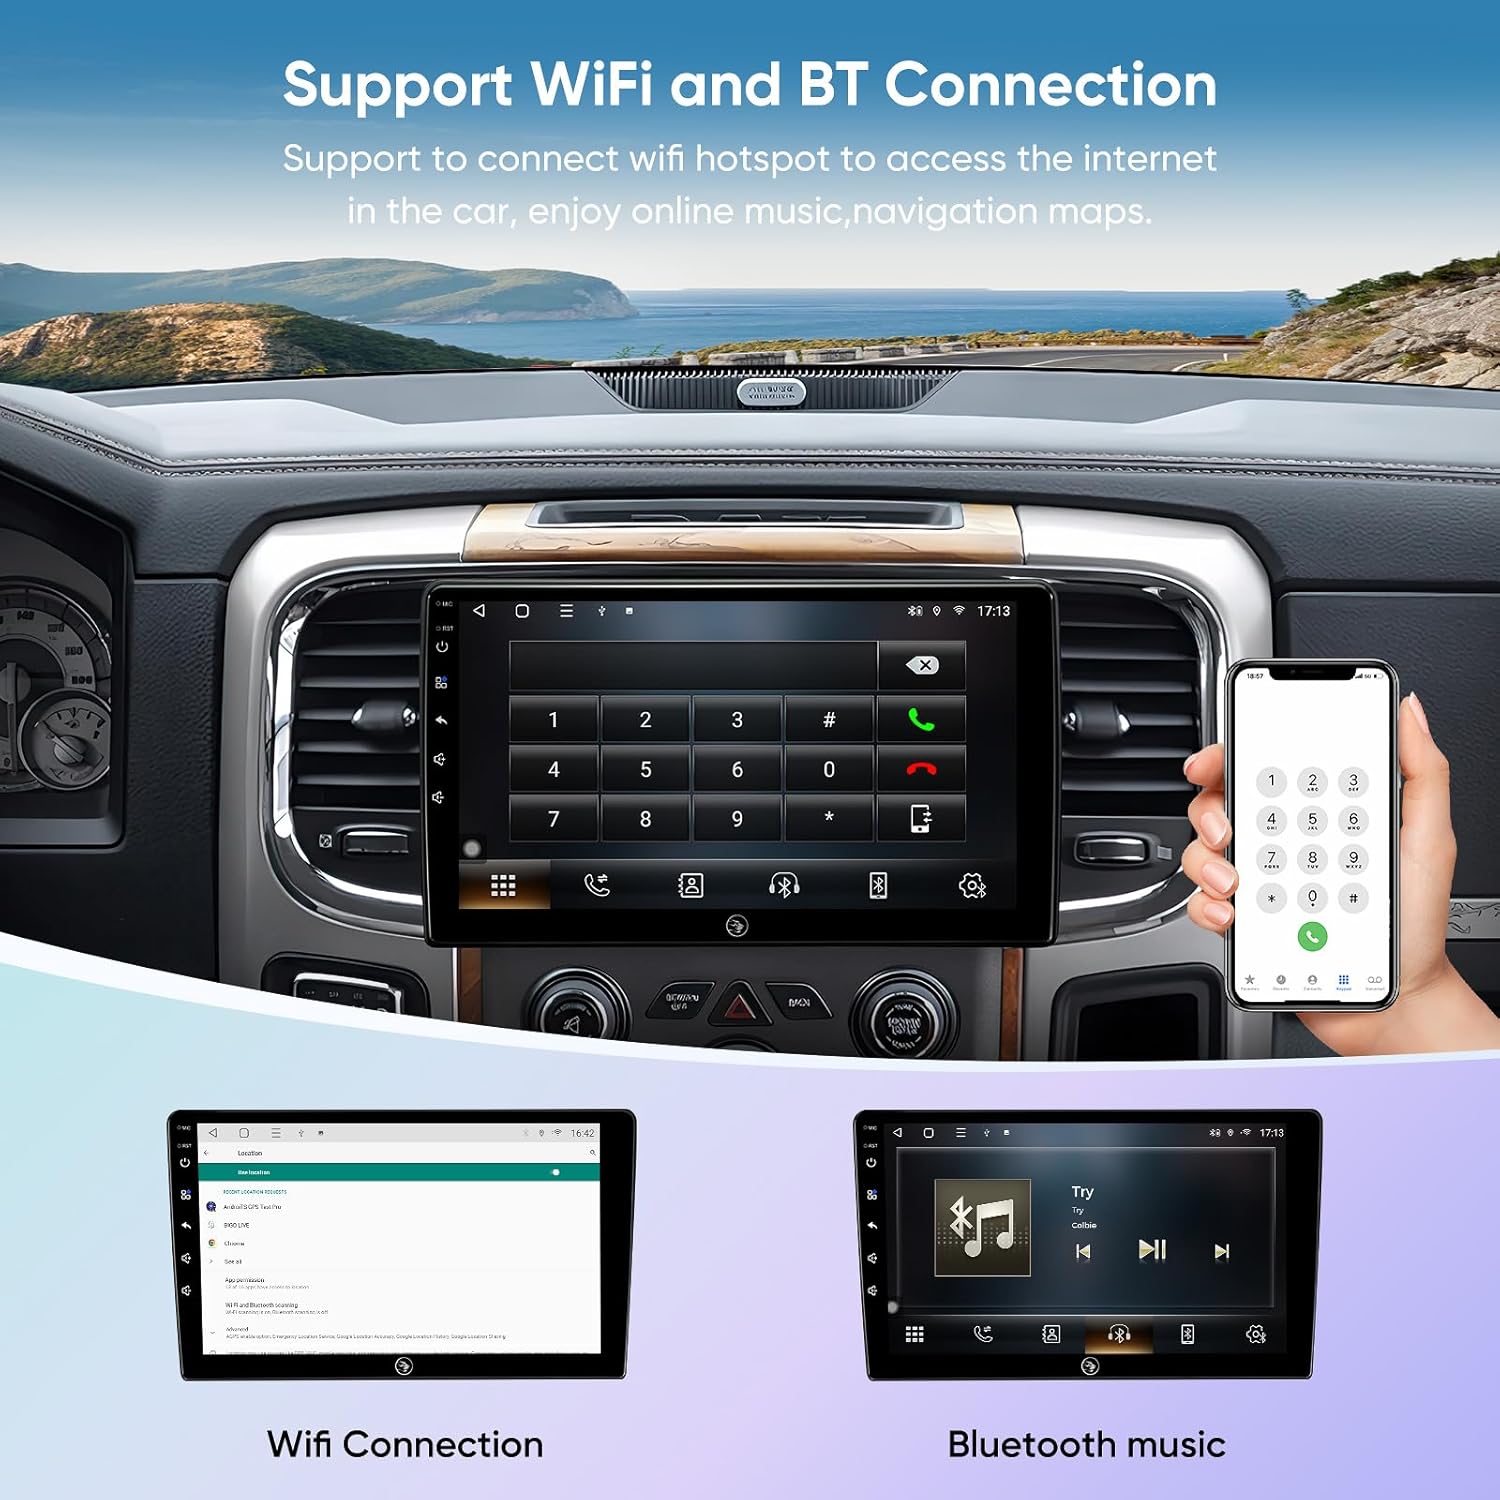
Image: Demonstrates Wi-Fi connection and Bluetooth music streaming features.
5. Audio Settings (DSP & EQ)
Utilize the built-in Digital Sound Processor (DSP) and 48-band Equalizer (EQ) to customize your audio experience. Adjust sound field position with Time Correction and fine-tune frequencies to match your preferences.
6. Split Screen Mode
The split-screen function allows you to run two applications simultaneously, such as navigation on one side and music playback on the other. To activate, long-press the recent apps button or drag an app to one side of the screen.

Image: Split-screen functionality and integration with steering wheel controls.

Image: Advanced split-screen and screen mirroring capabilities.
7. Steering Wheel Control (SWC)
The CANbus decoder ensures that your vehicle's original steering wheel controls are compatible with the AINAVI stereo. You can map functions like volume, track skip, and mode selection directly from your steering wheel.
8. Full RCA Output
The unit provides full RCA output, allowing connection to external amplifiers, subwoofers, or additional monitors (e.g., headrest screens) for an enhanced audio-visual experience for passengers.

Image: Demonstration of full RCA output, showing content mirrored on external displays.
Maintenance
1. Screen Cleaning
To clean the QLED touchscreen, gently wipe it with a soft, lint-free cloth. For stubborn smudges, slightly dampen the cloth with water or a screen-safe cleaning solution. Avoid harsh chemicals, abrasive materials, or excessive moisture.
2. Software Updates
Periodically check for software updates to ensure optimal performance and access to new features. Connect the stereo to a Wi-Fi network and navigate to the system settings to check for available updates. Follow on-screen instructions for installation.
3. General Care
- Avoid exposing the unit to extreme temperatures or direct sunlight for prolonged periods.
- Do not block ventilation openings on the unit.
- Keep liquids away from the stereo to prevent damage.
Troubleshooting
If you encounter issues with your AINAVI car stereo, refer to the following common problems and solutions:
| Problem | Possible Cause / Solution |
|---|---|
| Unit does not power on. |
|
| No sound output. |
|
| Steering wheel controls not working. |
|
| GPS signal is weak or inaccurate. |
|
| CarPlay/Android Auto not connecting. |
|
| Rearview camera not displaying. |
|
If these solutions do not resolve the issue, please contact customer support.
Warranty and Customer Support
AINAVI provides a one-year product warranty for this car stereo radio. For technical assistance, warranty claims, or any questions regarding your product, please contact our customer support team.
You can reach us via Amazon email. We are committed to providing professional technical support and will respond as soon as possible.
For additional support, you may also refer to the seller's contact information on the product page.

Image: Guide on how to contact customer support through the Amazon platform.


