1. Introduction
The Sandberg Survivor DAB Radio All-in-1 4500, Model 421-17, is a versatile and robust portable radio designed for various environments. It features DAB, FM, and AM radio reception, a built-in flashlight, and multiple power options including solar charging. This manual provides detailed instructions for setup, operation, maintenance, and troubleshooting to ensure optimal performance of your device.
2. Product Overview
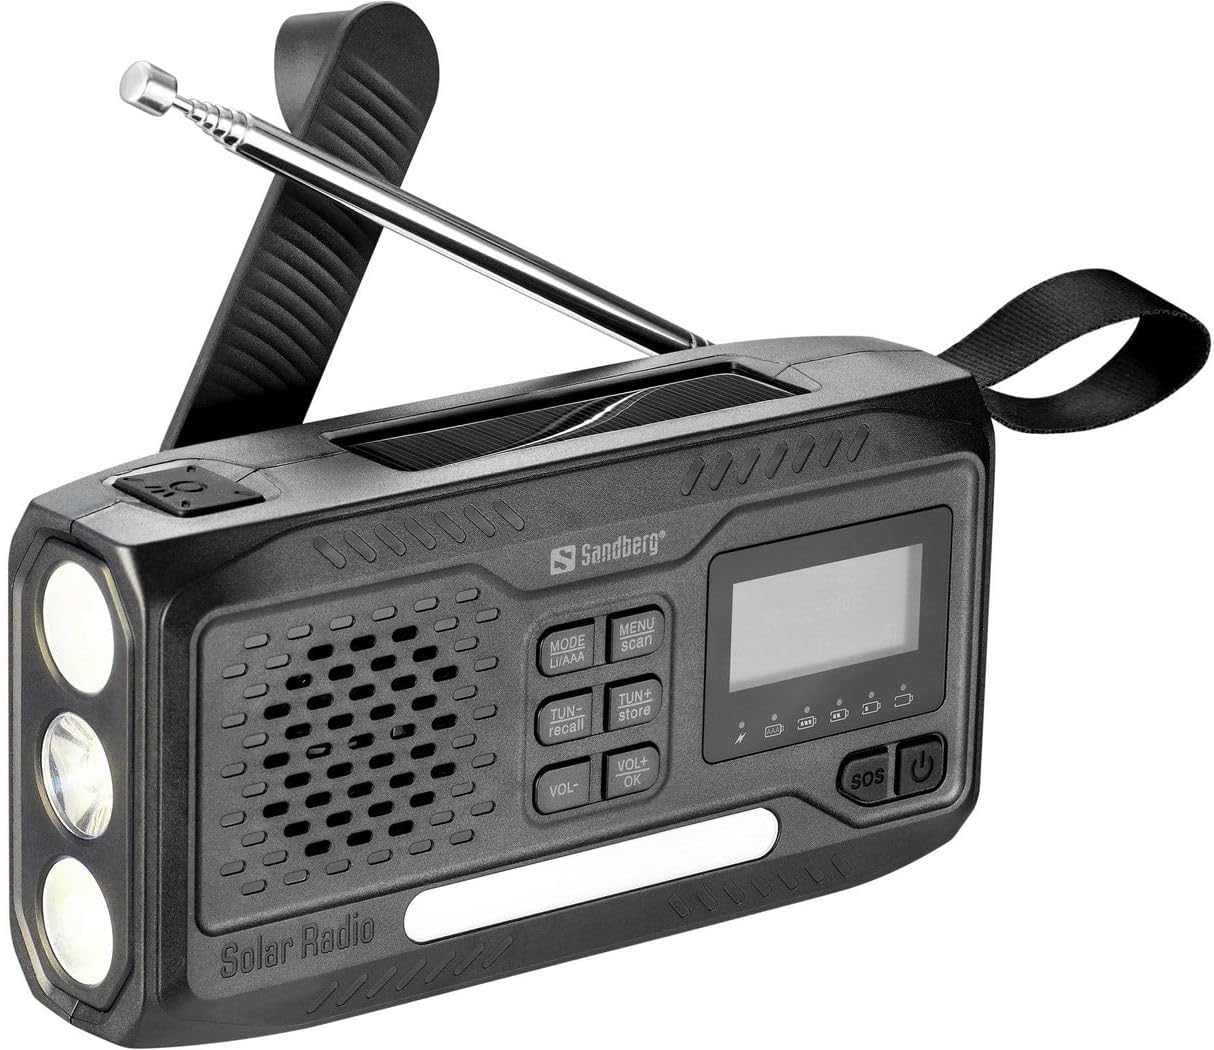
Figure 1: Front view of the Sandberg Survivor DAB Radio All-in-1 4500.
The Sandberg Survivor DAB Radio All-in-1 4500 is a multi-functional device. The front panel (as shown in Figure 1) features a speaker grille, a digital display, and an array of control buttons. On the left side, three LED bulbs serve as a flashlight. An extendable telescopic antenna is located at the top for enhanced radio reception. A durable carrying strap is attached to the right side for portability.
Key Components:
- Digital Display: Shows radio frequency, mode, battery status, and other relevant information.
- Control Buttons:
- MODE (LI/AAA): Switches between radio bands (DAB, FM, AM) and potentially battery types.
- MENU (scan): Accesses menu options and initiates station scanning.
- TUN- (recall): Tunes down frequency or navigates menu; recalls stored stations.
- TUN+ (store): Tunes up frequency or navigates menu; stores stations.
- VOL- / VOL+: Adjusts volume levels.
- OK: Confirms selections in the menu.
- SOS: Activates emergency alarm/light function.
- Power Button: Turns the device on or off.
- Speaker: For audio output.
- Flashlight: Three LED lights for illumination.
- Telescopic Antenna: For improved radio signal reception.
- Solar Panel: (Located on top, not visible in this specific image but indicated by 'Solar Radio' text) For solar charging.
- Auxiliary Port: For connecting external audio devices (e.g., headphones, smartphones, MP3 players).
3. Setup
3.1 Initial Charging
Before first use, fully charge the internal rechargeable battery. Connect the radio to a USB power source using a compatible cable (not specified if included, assume standard USB). The charging indicator on the display will show progress. Alternatively, place the radio with its solar panel facing direct sunlight for solar charging.
3.2 Antenna Extension
For optimal radio reception, fully extend the telescopic antenna when listening to FM or DAB radio. For AM reception, the internal antenna is typically sufficient, but adjusting the radio's orientation may improve signal.
4. Operating Instructions
4.1 Power On/Off
Press and hold the Power button (⏻) located on the right side of the control panel to turn the radio on or off.
4.2 Radio Functions (DAB/FM/AM)
- Select Mode: Press the MODE button repeatedly to cycle through DAB, FM, and AM radio bands. The selected mode will be displayed on the screen.
- Scan for Stations: In DAB or FM mode, press the MENU button, then select 'Scan' (if available) or press and hold the MENU/scan button to automatically scan and store available stations.
- Manual Tuning: Use the TUN- and TUN+ buttons to manually tune to specific frequencies.
- Store Presets: To store a station, tune to the desired frequency, then press and hold the TUN+ (store) button. Follow the on-screen prompts to select a preset number and confirm with OK.
- Recall Presets: To recall a stored station, press the TUN- (recall) button and use TUN- or TUN+ to navigate through your presets. Confirm with OK.
4.3 Volume Control
Adjust the audio output level using the VOL- and VOL+ buttons.
4.4 Flashlight Function
The radio is equipped with a flashlight. The activation method is typically a dedicated button or a long press of the power button when the radio is off. Refer to the quick start guide for the exact flashlight activation sequence.
4.5 SOS Function
In an emergency, press the SOS button. This will typically activate a loud siren and a flashing light to attract attention. Press the SOS button again to deactivate.
4.6 Auxiliary Input
Connect headphones, a smartphone, or an MP3 player to the auxiliary port (usually a 3.5mm jack) to listen to audio privately or from an external source. When an auxiliary device is connected, the radio's internal speaker may be muted.
5. Maintenance
- Cleaning: Use a soft, dry cloth to clean the radio's exterior. Avoid abrasive cleaners or solvents.
- Battery Care: To prolong battery life, avoid fully discharging the battery frequently. If storing the radio for an extended period, charge it to approximately 50% and recharge every few months.
- Storage: Store the radio in a cool, dry place away from direct sunlight and extreme temperatures.
6. Troubleshooting
| Problem | Possible Cause | Solution |
|---|---|---|
| Radio does not power on. | Battery is depleted. | Charge the radio using a USB power source or solar panel. |
| Poor radio reception. | Antenna not extended, weak signal, interference. | Fully extend the telescopic antenna. Reposition the radio to a location with better signal. Avoid sources of electronic interference. |
| No sound from speaker. | Volume too low, headphones connected. | Increase volume using VOL+. Disconnect any headphones from the auxiliary port. |
| Buttons are unresponsive. | Temporary software glitch. | Try turning the radio off and on again. If possible, perform a factory reset (refer to specific product documentation if available). |
7. Specifications
- Brand: Sandberg
- Model Number: 421-17
- Connectivity Technology: Auxiliary
- Tuning Technology: DAB
- Supported Radio Bands: AM/FM
- Compatible Devices: Headphones, smartphone, MP3 player
- Rechargeable Battery: Yes
- Color: Black
8. Warranty and Support
For warranty information and technical support, please refer to the documentation provided with your purchase or visit the official Sandberg website. Keep your proof of purchase for any warranty claims.


