
CAMBOFOTO TM265
CAMBOFOTO 68" Horizontal Overhead Camera Tripod (Model TM265) - Instruction Manual
Comprehensive guide for setup, operation, and maintenance.
1. Introduction
The CAMBOFOTO 68" Horizontal Overhead Camera Tripod (Model TM265) is a versatile and robust aluminum alloy tripod designed for photographers and videographers requiring flexible camera positioning. Its unique horizontal center column, detachable monopod, and high load capacity make it suitable for a wide range of applications, including macro photography, overhead shooting, and multi-angle setups.

Figure 1: CAMBOFOTO TM265 Tripod highlighting its horizontal center column and ball head.
2. Package Contents
Please verify that all items listed below are included in your package:
- Camera Tripod (with pre-assembled center column & ball head) x 1
- 1/4" Arca-Type Quick Release Plate x 1
- 360° Rotatable Phone Holder x 1
- Carry Bag x 1
- Steel Ground Spikes x 3
- Rubber Pads (pre-installed on legs) x 3
- Allen Wrenches x 2

Figure 2: Visual representation of all items included in the package.
3. Setup
3.1 Attaching Ball Head & Quick Release Plate
The aluminum ball head comes pre-attached to the tripod. The 1/4" Arca-Type Quick Release Plate is compatible with most cameras, camcorders, studio lights, projectors, and telescopes. It features dual anti-slip screws to prevent accidental drops. To attach your device:
- Ensure the quick release plate is securely fastened to your camera's 1/4" tripod socket.
- Open the quick release clamp on the ball head.
- Slide the plate with your camera into the clamp until it clicks into place.
- Tighten the clamp knob to secure the camera.

Figure 3: Close-up of the ball head and quick release plate, showing its omni-directional adjustment and bubble levels.
3.2 Adjusting Leg Angles & Height
The tripod features three-section legs with flip locks for quick height adjustments. Each leg can be independently adjusted to multiple angles for stability on uneven terrain or for low-angle shots.
- To extend a leg section, flip open the lock lever and pull the leg to the desired length, then close the lever to secure.
- To adjust the leg angle, press the red button at the top of each leg near the tripod's base and move the leg to one of the predefined angle positions.
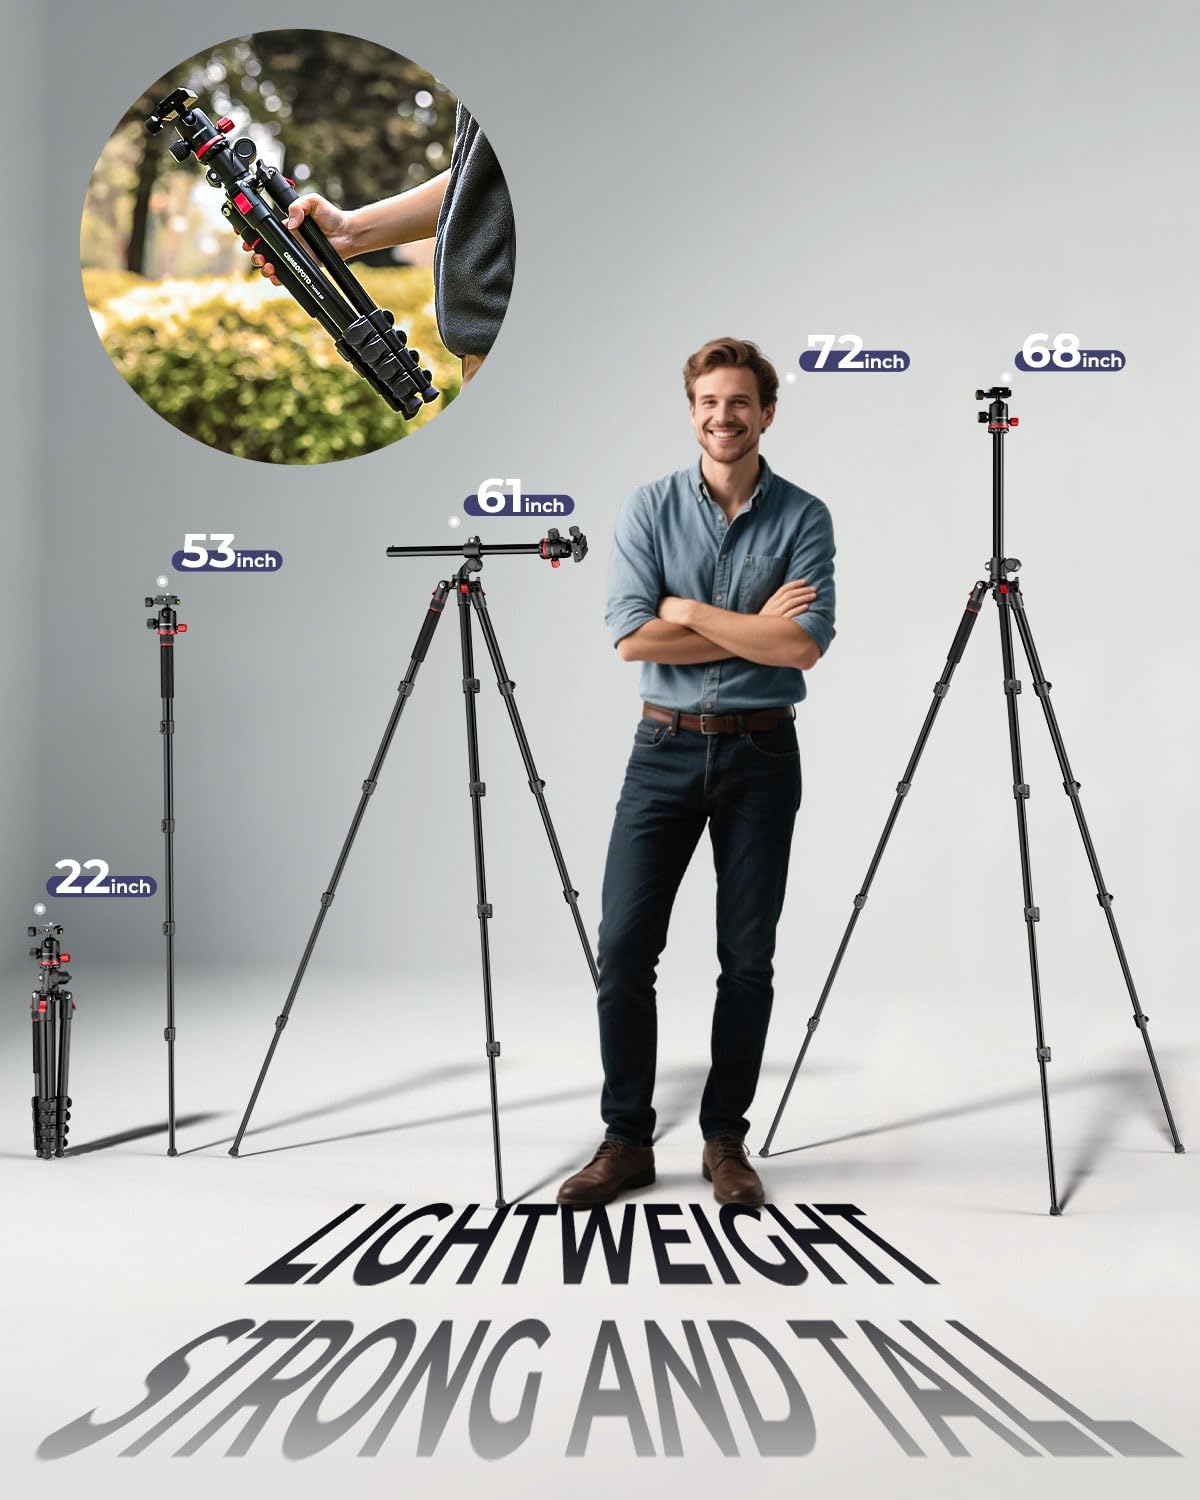
Figure 4: The tripod demonstrating its adjustable height and compact folded size.
3.3 Interchangeable Feet (Rubber/Spikes)
The tripod comes with rubber pads pre-installed, suitable for indoor use or smooth surfaces. For outdoor use or uneven terrain, you can replace the rubber pads with the included steel ground spikes.
- Unscrew the rubber pads from the bottom of the tripod legs.
- Screw in the steel ground spikes until secure.

Figure 5: All-terrain adaptability with interchangeable spike feet and rubber pads.
4. Operating Features
4.1 Horizontal Center Column (Rotation, Tilt, Extension)
The unique horizontal center column allows for versatile shooting angles, ideal for overhead shots, product photography, or creative compositions.
- To convert the center column to horizontal mode, press the triangular button at the base of the center column to release it.
- Pull the column up and then pivot it 90 degrees to the horizontal position.
- Tighten the horizontal extension control knob to secure the column.
- Use the horizontal rotation control knob for 360° panning and the tilt angle control knob for vertical adjustments from +90° to -90°.

Figure 6: Steps for converting the center column from vertical to horizontal position.

Figure 7: Control knobs for horizontal rotation, extension, and tilt angle adjustments.
4.2 Inverted Center Column for Macro Photography
For ultra-low-angle macro photography, the center column can be inverted.
- Remove the center column as described in section 4.1.
- Reinsert the center column upside down into the tripod base.
- Secure the column using the locking mechanism.
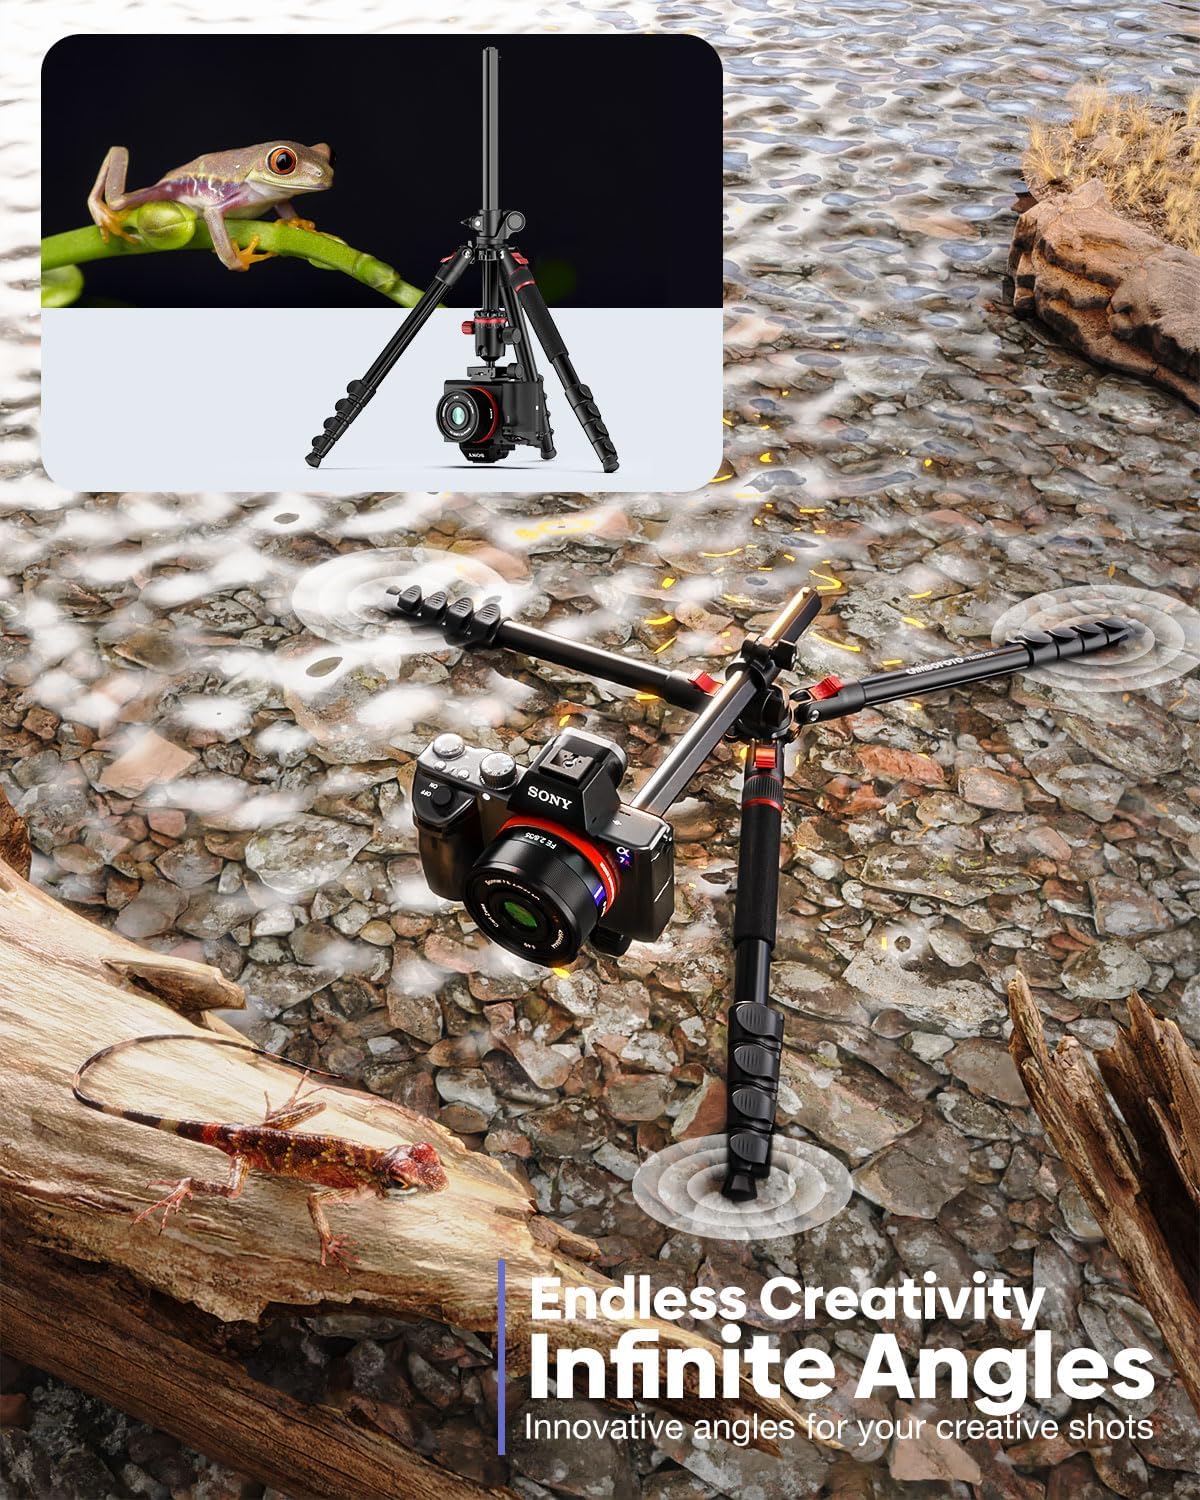
Figure 8: Example of low-angle macro shooting with the inverted center column.
4.3 Monopod Conversion
One of the tripod legs (the one with the anti-slip grip) can be detached and combined with the ball head to form a 53" monopod, perfect for lightweight travel photography or as a trekking pole.
- Unscrew the leg with the anti-slip grip from the tripod base.
- Detach the ball head from the main tripod body.
- Screw the ball head onto the top of the detached leg.

Figure 9: The tripod leg converted into a monopod for portable use.
4.4 Using the Phone Holder
The included 360° rotatable phone holder is compatible with smartphones between 1.45" and 3.3" wide, allowing for mobile photography needs.
- Attach the phone holder to the quick release plate or directly to the ball head's 1/4" screw.
- Gently expand the clamp and insert your smartphone.
- Adjust the phone holder's rotation as needed.
4.5 Counterweight Hook
A counterweight hook is located at the bottom of the center column. This allows you to hang a bag or other weight to increase stability, especially when the center column is extended horizontally or when using heavy lenses.

Figure 10: The load-bearing hook provides additional stability for horizontal setups.
4.6 Official Product Video Overview
Watch this official video from the seller for a comprehensive overview of the CAMBOFOTO TM265 tripod's features and functionalities.
Video 1: Official product video showcasing the CAMBOFOTO 68" Horizontal Overhead Tripod for Camera.
5. Maintenance
- Regularly clean the tripod with a soft, dry cloth to remove dust and debris.
- Avoid exposing the tripod to extreme temperatures or harsh chemicals.
- Ensure all locking mechanisms are clean and free of obstructions for smooth operation.
- Store the tripod in its carry bag in a dry, cool place when not in use.
6. Troubleshooting
- Issue: Tripod feels unstable.
- Ensure all leg sections are fully extended and their flip locks are securely closed.
- Verify that the leg angle adjustment buttons are properly engaged.
- If using the horizontal center column with heavy equipment, attach a counterweight to the hook for added stability.
- Ensure the correct feet (rubber pads for indoors, spikes for outdoors) are used for the surface.
- Issue: Center column is difficult to adjust or remove.
- Ensure the locking knob for the center column is fully loosened before attempting to adjust or remove it.
- Press the triangular release button firmly at the base of the center column for smooth removal.
- Issue: Phone holder does not fit my phone.
- Verify your phone's width (including case) is within the 1.45" to 3.3" range supported by the holder.
7. Specifications
| Feature | Detail |
|---|---|
| Brand | CAMBOFOTO |
| Model Name | TM265 |
| Material | Aluminum, Iron, Plastic, Rubber |
| Maximum Height | 68 Inches |
| Folded Length | 22 Inches |
| Item Weight | 3.77 Pounds |
| Load Capacity | 33 Pounds (Tripod), 8.8 Pounds (Center Column) |
| Tripod Head Type | Ball Head |
| Compatible Devices | Camcorder, Camera, Projector, Smartphone, Telescope |
| Special Features | Adjustable, Ball Head, Shock Resistant, Slip Resistant, Spirit Level, Horizontal Center Column, Detachable Monopod |

Figure 11: The tripod's maximum load capacity and stability features.
8. Warranty and Support
CAMBOFOTO offers a 2-year after-sales guarantee for this product. If you encounter any quality issues with the tripod during this period, please contact customer service for assistance. Refer to the contact information provided with your purchase or on the official CAMBOFOTO website.
Ask a question about this manual
Ask about setup, troubleshooting, compatibility, parts, safety, or missing instructions. Manuals+ will review the question and use this page’s manual context to help answer it.