
1. Important Safety Instructions
Read all safety warnings and instructions before operating this electric weed trimmer. Failure to follow the warnings and instructions may result in electric shock, fire, and/or serious injury.
- Personal Safety: Always wear eye protection (goggles), gloves, long pants, and sturdy footwear when operating the trimmer. Keep bystanders, children, and pets at a safe distance (at least 15 meters/50 feet) from the operating area.
- Work Area Safety: Keep the work area clean and well-lit. Do not operate power tools in explosive atmospheres, such as in the presence of flammable liquids, gases, or dust.
- Electrical Safety: Prevent unintentional starting. Ensure the switch is in the off-position before connecting to a battery pack, picking up or carrying the tool. Do not expose power tools to rain or wet conditions.
- Tool Use and Care: Do not force the power tool. Use the correct power tool for your application. Disconnect the battery pack from the power tool before making any adjustments, changing accessories, or storing power tools.
- Battery Pack Use and Care: Recharge only with the charger specified by the manufacturer. Do not use battery packs or tools that are damaged or modified.
2. Package Contents
Verify that all items listed below are included in your package. If any parts are missing or damaged, contact customer support.
- 1 x Electric Lawn Mower (Weed Trimmer)
- 2 x 21V Batteries
- 1 x Charger
- 4 x Straight Metal Blades
- 2 x Round Metal Blades
- 1 x User Manual (this document)
- 1 Pair of Gloves
- 1 Pair of Goggles
- 1 x Wrench
3. Product Overview and Features
The Smalibal 9-inch cordless electric weed trimmer is designed for efficient lawn and garden maintenance. It features a lightweight design and a powerful brushless motor for extended durability and high-speed operation.

Image: Overview of the weed trimmer, illustrating its brushless copper core motor, large capacity lithium battery, telescopic rod, alloy blade, lightweight design, multi-functional use, and noise reduction capabilities.
- Brushless Motor: Provides long endurance and high-speed operation, reducing entanglement with grass and extending service life.
- Telescopic Rod: Adjustable design allows for customization to different user heights, ensuring comfortable and labor-saving operation.
- Adjustable Head Angle: The trimmer head can be adjusted up to 60 degrees, facilitating trimming in various angles and hard-to-reach areas.
- Dual Blade System: Includes both straight metal blades for lawns, twigs, and vines, and round metal blades for branches and shrubs.
- Battery Power Display: Integrated display allows monitoring of battery life for timely replacement.
- Safety Lock: Prevents accidental activation of the trimmer.
- Grass Baffle: Protects against debris splash during operation.

Image: Detailed view of the high-power, high-speed brushless motor, designed for strong cutting performance and long service life.
4. Setup and Assembly
4.1 Charging the Battery
- Insert the battery into the charger.
- Plug the charger into a standard electrical outlet.
- Allow 2-3 hours for each battery to fully charge. The charger indicator light will change to indicate a full charge.
- Disconnect the charger from the outlet and remove the battery once charging is complete.
4.2 Attaching the Grass Baffle
Attach the grass baffle to the trimmer head using the provided screws. Ensure it is securely fastened to prevent debris from splashing during operation.
4.3 Installing Blades
Select the appropriate blade type for your task:
- Straight Metal Blades: Ideal for cutting lawns, twigs, and vines.
- Round Metal Blades: Suitable for cutting branches and shrubs.

Image: Detailed view of the 9-inch saw blade, designed for high efficiency in mowing and irrigation tasks.
- Ensure the battery is removed from the trimmer.
- Align the chosen blade with the trimmer head's mounting point.
- Use the provided wrench to securely fasten the blade. Ensure it is tight but do not overtighten.
4.4 Adjusting the Telescopic Handle
The trimmer features a telescopic rod for height adjustment:
- Loosen the locking collar on the telescopic rod.
- Extend or retract the rod to your desired operating height (approximately 110cm to 142cm).
- Tighten the locking collar firmly to secure the handle in place.
5. Operating Instructions
5.1 Inserting the Battery
Slide a charged battery pack into the battery slot on the trimmer handle until it clicks into place.
5.2 Starting and Stopping the Trimmer
- To start, press and hold the safety lock button, then squeeze the trigger switch.
- To stop, release the trigger switch. The safety lock will automatically reset.
5.3 Adjusting the Trimmer Head Angle
The trimmer head can be adjusted up to 60 degrees for versatile cutting:

Image: A user operating the weed trimmer, demonstrating the 60-degree angle adjustment feature for flexible trimming in various areas like flower beds and corners.
- Ensure the trimmer is off and the battery is removed before adjusting.
- Locate the angle adjustment button or lever on the trimmer head.
- Press the button/lever and rotate the head to the desired angle.
- Release the button/lever to lock the head in position.
5.4 General Trimming Tips
- Always maintain a firm grip on the trimmer with both hands.
- Work in a sweeping motion, moving the trimmer from side to side.
- Avoid cutting into hard objects like rocks, fences, or concrete.
- Monitor the battery power display and replace the battery when low to ensure continuous operation.

Image: A man using the cordless grass cutting machine for garden weeding, crop harvesting, and shrub cutting, demonstrating its versatility.
6. Maintenance
Regular maintenance ensures optimal performance and extends the life of your weed trimmer.
6.1 Cleaning
- Always remove the battery before cleaning.
- Use a dry cloth or soft brush to remove grass clippings, dirt, and debris from the trimmer head, guard, and motor housing.
- Do not use water or cleaning solvents, as they can damage electrical components.
6.2 Blade Care and Replacement
Inspect blades before each use for damage or dullness. Dull or damaged blades can reduce cutting efficiency and increase strain on the motor.
- Remove the battery.
- Use the provided wrench to loosen the blade fastening nut.
- Carefully remove the old blade and replace it with a new one, ensuring it is correctly aligned.
- Tighten the fastening nut securely with the wrench.
6.3 Battery Storage
Store batteries in a cool, dry place away from direct sunlight and extreme temperatures. For long-term storage, charge batteries to approximately 50% capacity.
7. Troubleshooting
Refer to this section for common issues and their solutions.
| Problem | Possible Cause | Solution |
|---|---|---|
| Trimmer does not start | Battery not charged or improperly inserted; Safety lock not engaged; Faulty switch. | Ensure battery is fully charged and correctly inserted. Press safety lock before squeezing trigger. If problem persists, contact support. |
| Poor cutting performance | Dull or damaged blade; Excessive grass/weeds; Low battery charge. | Replace blade. Do not attempt to cut excessively thick material. Recharge or replace battery. |
| Excessive vibration | Damaged or unbalanced blade; Loose components. | Inspect and replace blade if damaged. Check all fasteners for tightness. |
| Battery drains quickly | Battery not fully charged; Old battery; Overworking the trimmer. | Ensure full charge. Consider replacing old batteries. Avoid continuous heavy-duty cutting. |
8. Specifications
Technical details for the Smalibal 9-inch cordless electric weed trimmer.
| Feature | Specification |
|---|---|
| Model Number | 67E6667E6656D27444 |
| Brand | Smalibal |
| Battery Voltage | 21V |
| Battery Capacity | 2000mAh (2.0Ah) |
| Electric Power | 1280W |
| Motor Type | Brushless Motor |
| Motor Speed | 18000 r/min |
| Charging Time | 2-3 hours per battery |
| No-load Time | 120-150 minutes |
| Work Cutting Time | 30-60 minutes |
| Number of Batteries | 2 |
| Cutting Diameter | 9 inches (230mm) |
| Telescopic Length | 110cm - 142cm (43.34" - 55.95") |
| Item Weight | 5000 Grams |
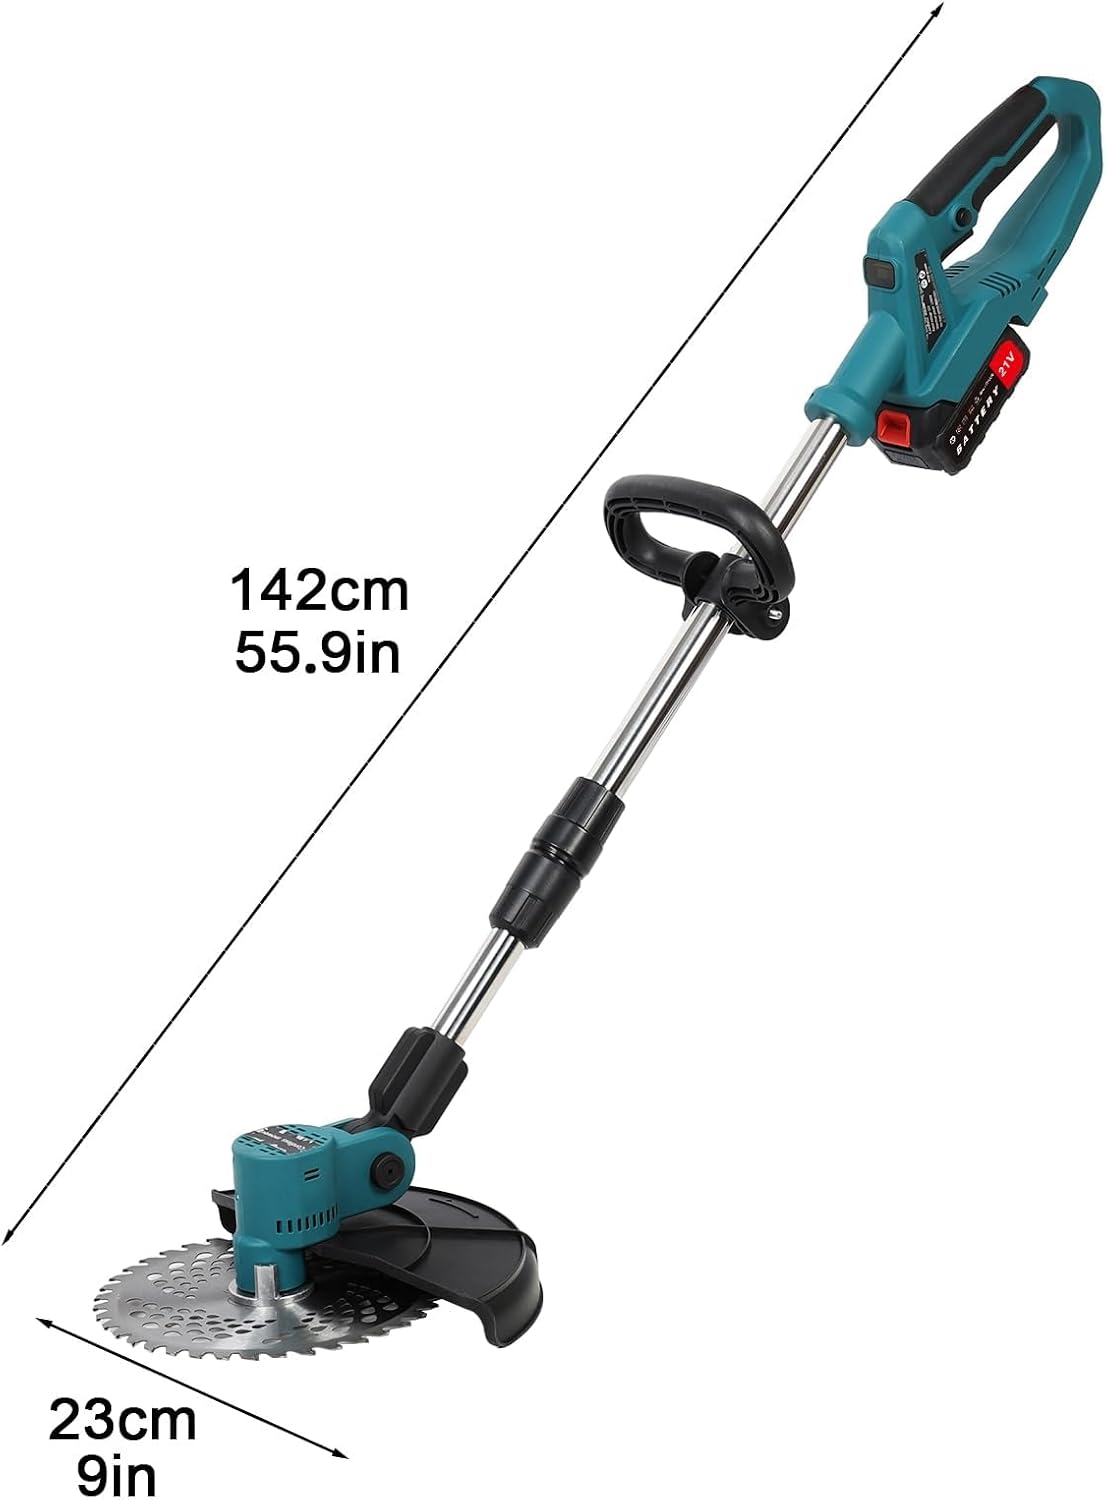
Image: Diagram showing the overall dimensions of the electric weed trimmer, with a length of 142cm (55.9 inches) and a cutting head width of 23cm (9 inches).
9. Warranty and Support
For warranty information or technical support, please refer to the documentation included with your purchase or contact the retailer/manufacturer directly. Keep your proof of purchase for any warranty claims.