Important Safety Information
Read all instructions carefully before assembly and use.
- Keep small parts away from children.
- Ensure all connections are secure before placing items on the desk.
- Do not overload the desk. Maximum weight recommendation: 440 Pounds.
- Use only as intended for gaming, studying, or working.
- Avoid exposing electrical components to moisture.
Package Contents
Verify all components are present before beginning assembly.
- Desk components (desktop, legs, frame)
- Monitor Stand
- Built-in Power Outlet with USB Ports
- Headphone Hook
- Cup Holder
- Mouse Pad (oversized)
- LED Light Strip (pre-installed or separate)
- Assembly Hardware (screws, washers, tools)
- Instruction Manual

Image: The VidaTeco 55 Inch Gaming Desk fully assembled, showcasing the monitor stand, LED lights, mouse pad, headphone hook, and cup holder. An app interface for LED control is also visible.
Setup and Assembly
Assembly typically requires two people and takes approximately 1-2 hours. All necessary tools are included.
Step 1: Unpack and Identify Components
Carefully remove all parts from the packaging. Lay them out on a soft, clean surface to prevent scratches. Refer to the included parts list to identify each component.
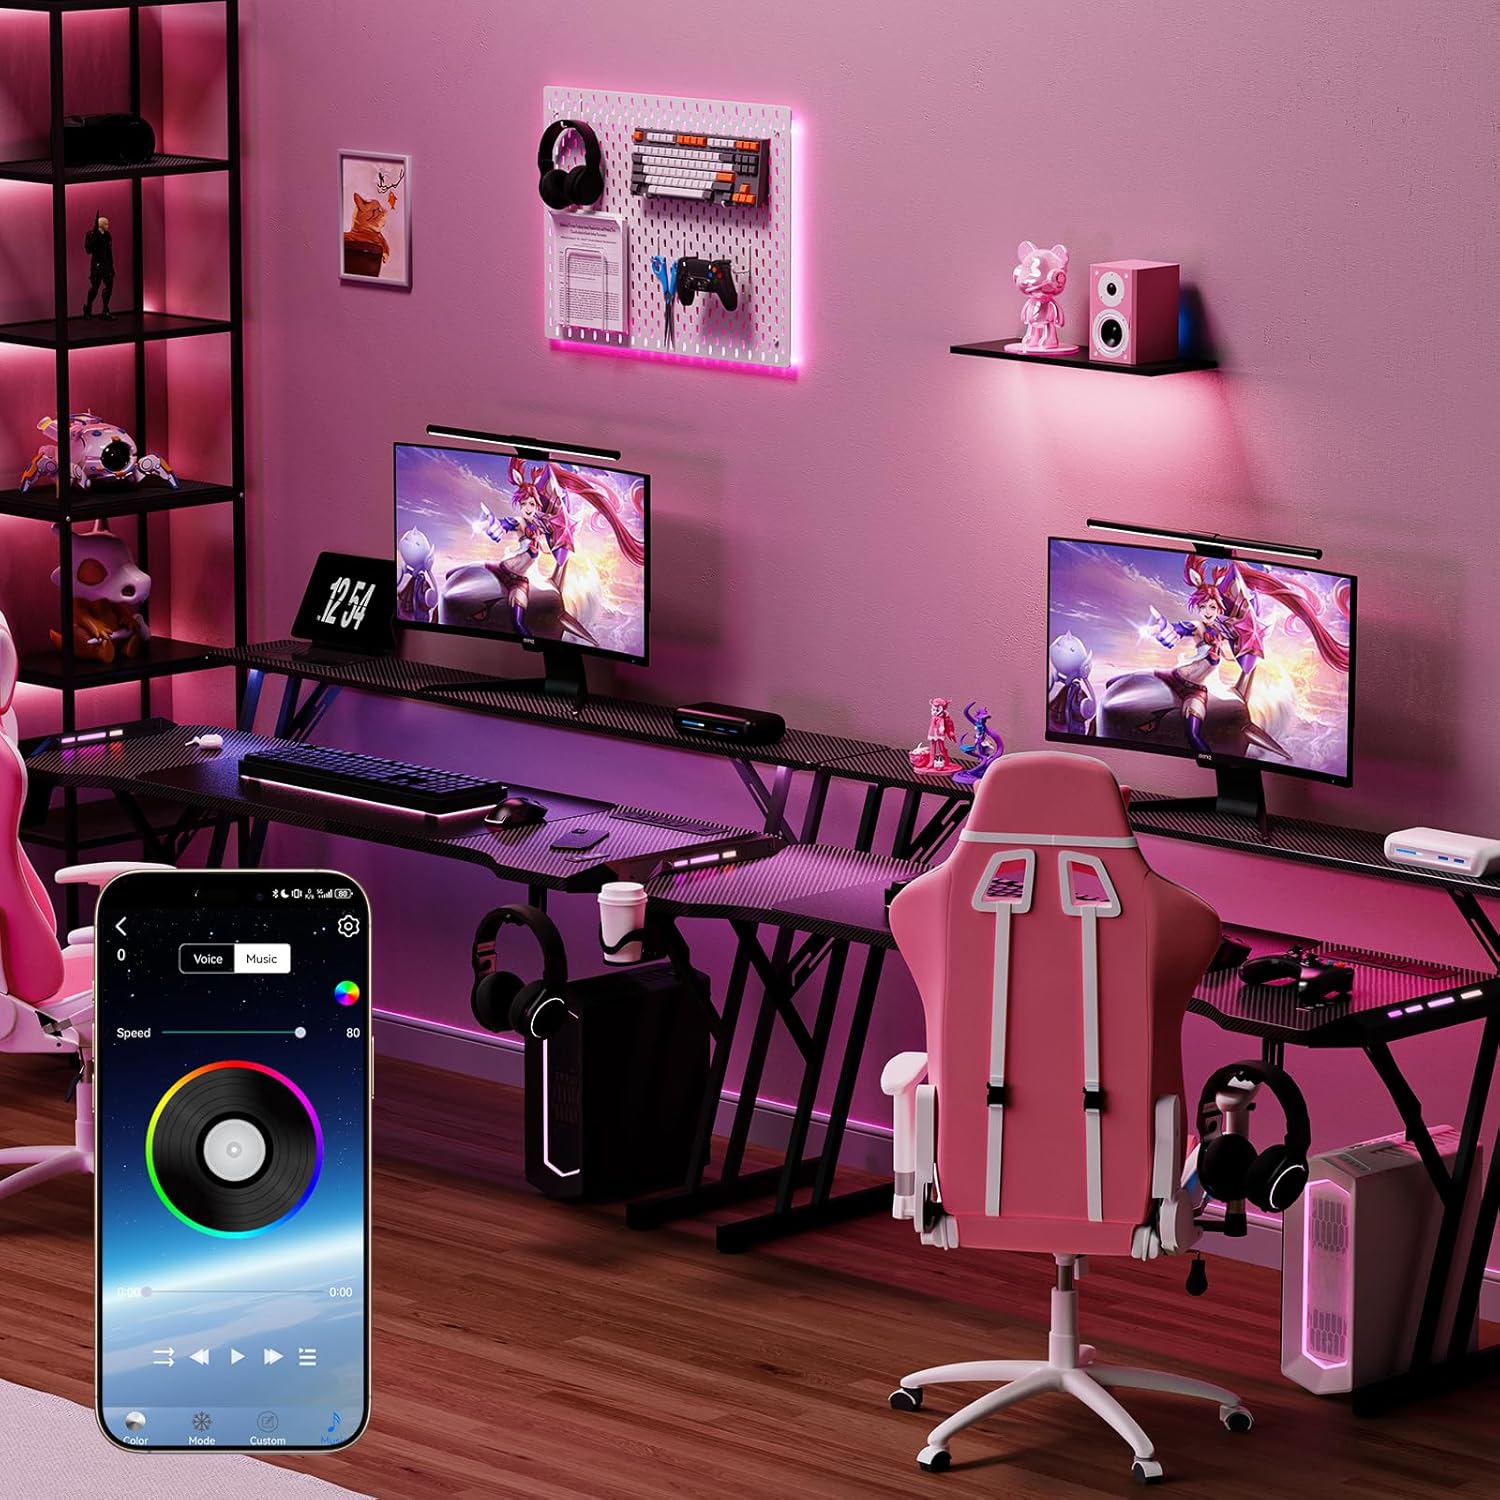
Image: Various desk components laid out, including the desktop, leg frames, and hardware, ready for assembly.
Step 2: Assemble the Desk Frame
Attach the main support beams to the desk legs using the provided screws and Allen wrench. Ensure all connections are finger-tight before fully tightening.
Step 3: Attach the Desktop Sections
Carefully place the desktop sections onto the assembled frame. Secure them with the designated screws. The carbon fiber finish should face upwards.
Step 4: Install the Monitor Stand
Mount the monitor stand to the designated points on the desktop. This stand helps elevate your monitor for ergonomic viewing.

Image: A close-up view of the monitor stand being attached to the main desk surface, showing the elevated design.
Step 5: Connect the Power Outlet and LED Lights
Integrate the built-in power outlet strip into its recessed slot. Connect the LED light strip if it's not pre-installed. Ensure all wiring is neatly managed using the provided cable management solutions.

Image: A detailed view of the recessed power strip with 4 AC outlets and 2 USB ports, showing a phone charging.
Step 6: Attach Accessories
Install the headphone hook and cup holder to the desired locations on the desk. Place the oversized mouse pad on the desktop.

Image: The gaming desk with a headphone hook on the side and a cup holder, demonstrating accessory placement.
Step 7: Final Tightening
Once all components are in place, carefully tighten all screws to ensure stability. Do not overtighten.
Operating Instructions
LED Light Strip Operation
The integrated LED light strip can be controlled via a dedicated mobile application or the included remote control.
- App Control: Download the specified app (refer to the quick start guide or packaging for app name). Connect your device via Bluetooth. The app allows for customization of over 60,000 colors, various modes (including music sync), and a timer function.
- Remote Control: Use the provided remote to power on/off, change colors, adjust brightness, and select preset modes.
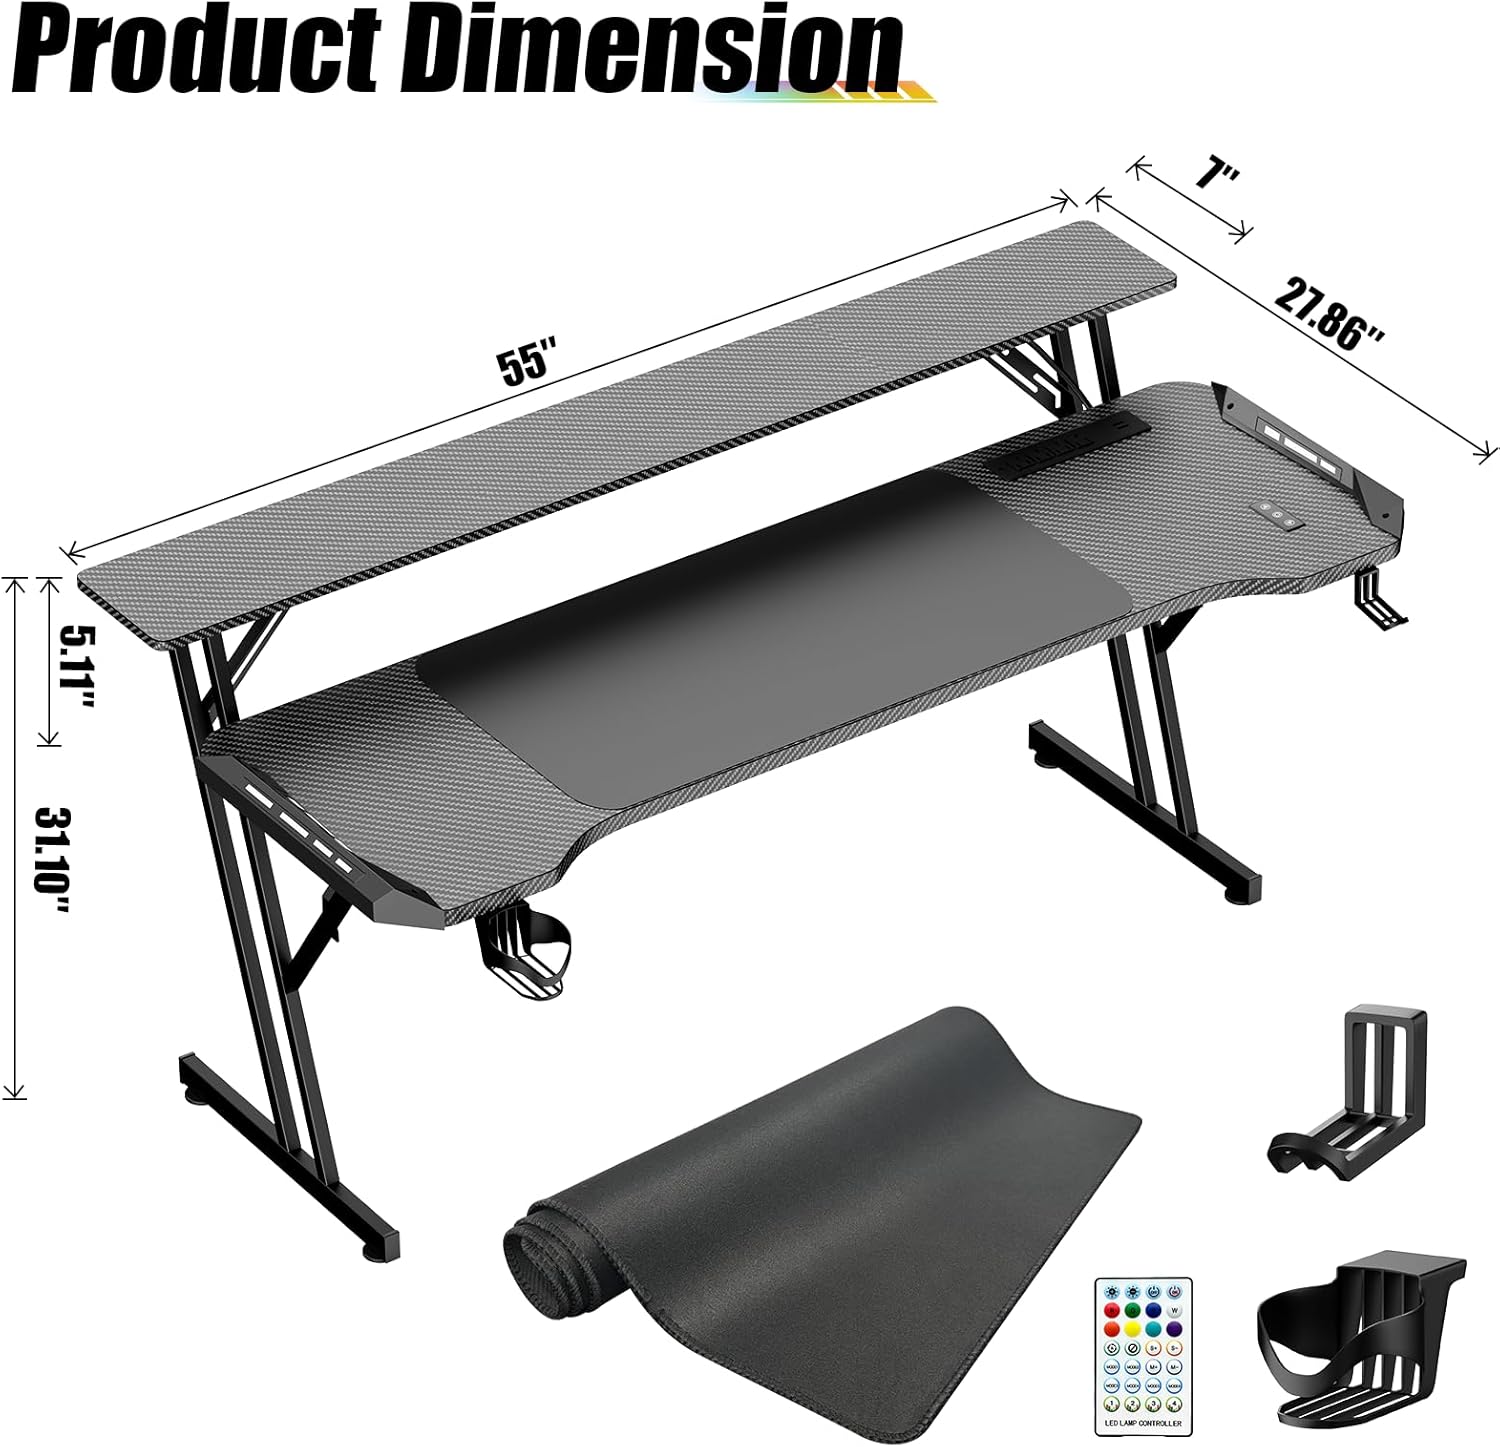
Image: A gaming desk illuminated by its LED lights, with a smartphone displaying the control app interface for color and mode selection.
Power Outlet and USB Ports
The recessed power strip includes 4 standard AC outlets (120V/12A) and 2 USB ports (5V/2A). Plug in your computer, monitor, gaming devices, and charge mobile devices directly from the desk.
Ensure the desk's main power cord is securely plugged into a wall outlet.
Maintenance
- Cleaning: Wipe the carbon fiber desktop with a soft, damp cloth. Avoid abrasive cleaners or harsh chemicals that may damage the finish.
- Electrical Components: Keep the power outlets and LED lights dry. Do not spray liquids directly onto them.
- Stability Check: Periodically check all screws and connections to ensure they remain tight. Retighten if necessary.
Troubleshooting
| Problem | Possible Cause | Solution |
|---|---|---|
| LED lights not working | Power connection loose; remote battery dead; app not connected. | Check power cord connection. Replace remote battery. Ensure Bluetooth is enabled and app is paired correctly. |
| Power outlets not functioning | Desk not plugged in; circuit breaker tripped. | Verify the desk's main power cord is securely plugged into a live wall outlet. Check your household circuit breaker. |
| Desk is wobbly | Loose screws; uneven floor. | Retighten all assembly screws. Adjust leveling feet if present, or place shims under legs on uneven surfaces. |
Specifications
- Model: ZK-14
- Brand: VidaTeco
- Dimensions (D x W x H): 55"D x 20"W x 27"H
- Material: Carbon Fiber (Top), Metal (Base)
- Color: Black
- Maximum Weight Capacity: 440 Pounds
- Power Outlets: 4 AC Outlets (120V/12A)
- USB Ports: 2 USB Ports (5V/2A)
- Special Features: Built-In USB Outlet, Electric LED Lights, Ergonomic Design, Cable Management, Monitor Stand, Smart Control, Headphone Hook, Cup Holder, Oversized Mouse Pad.

Image: A diagram illustrating the key dimensions of the 55-inch gaming desk, including length, width, and height of the main desk and monitor stand.
Warranty and Support
VidaTeco is committed to providing high-quality products and excellent customer service.
For any questions, concerns, or assistance with your VidaTeco Gaming Desk, please contact our customer support team. Refer to your purchase documentation for specific warranty details.
Contact Information: Please visit the official VidaTeco website or refer to your product packaging for the most current contact details.


