
1. Introduction
Thank you for choosing the Aairsk Electric Mountain Bike. This manual provides essential information for the safe operation, maintenance, and troubleshooting of your new electric bicycle. Please read this manual thoroughly before your first ride to ensure proper assembly, safe usage, and optimal performance.
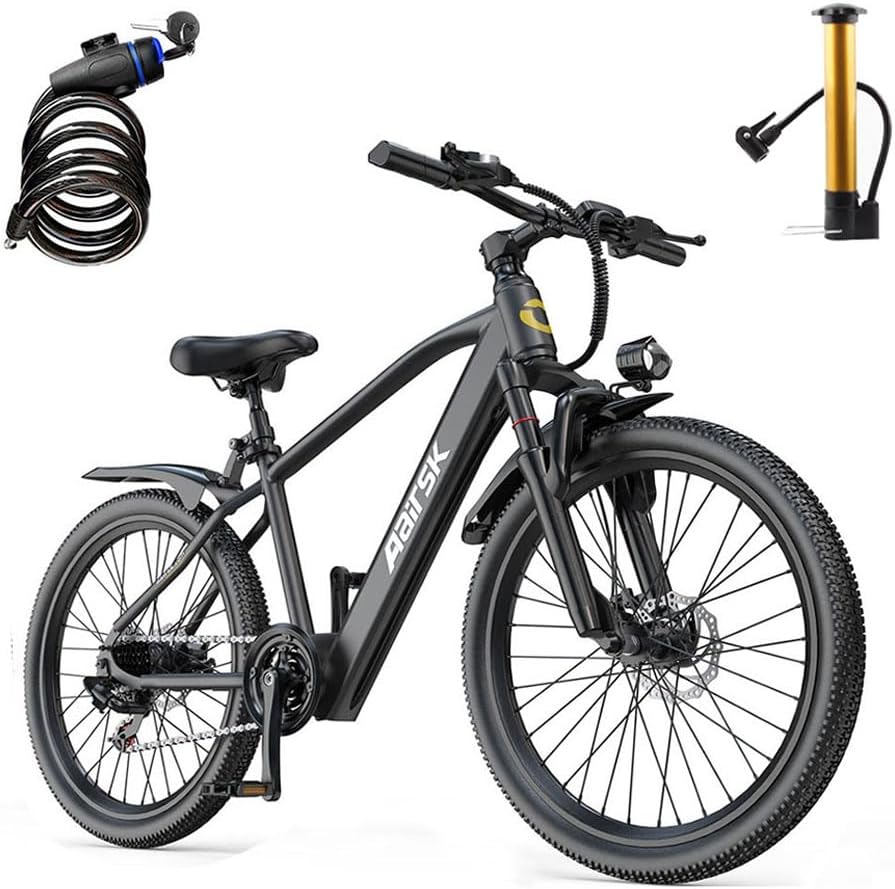
Figure 1.1: Aairsk Electric Mountain Bike (Black 24" GT300) with cable lock and pump.
2. Safety Information
Your safety is paramount. Always wear a helmet and appropriate safety gear when riding. Adhere to all local traffic laws and regulations. Perform a pre-ride inspection before each use.
- Helmet Use: Always wear a certified bicycle helmet.
- Pre-Ride Check: Inspect brakes, tires, battery, and all fasteners before each ride.
- Weather Conditions: Exercise caution in wet or slippery conditions.
- Weight Limit: Do not exceed the maximum load capacity of 330 lbs.
- Age Range: Suitable for adults and teens with a minimum user height of 4.99 feet.
3. Components Overview
Familiarize yourself with the main components of your Aairsk Electric Bike.
- Motor: 750W Peak Brushless Motor for powerful assistance.
- Battery: Built-in Removable 360WH (10Ah/13Ah) Li-ion Battery.
- Display: Multi-function LCD display for speed, mileage, and battery status.
- Gears: Professional 7-speed Shimano transmission.
- Suspension: Lockable front suspension and dual suspension system.
- Brakes: Front and rear dual disc brakes.
- Tires: 24"x1.95" inch pneumatic tires.
- Frame: Carbon Steel / Alloy Steel frame with lightweight geometry.

Figure 3.1: Illustration of the powerful 750W peak brushless motor.

Figure 3.2: Details of the adjustable front fork and shock-absorbing seat.

Figure 3.3: Key control and safety components: LCD display, shifter, tires, and brakes.
4. Setup and Initial Assembly
While the bike is largely pre-assembled, some minor setup is required. Ensure all components are securely fastened before your first ride.
- Handlebar Installation: Attach and secure the handlebar to the stem. Ensure it is centered and tightened properly.
- Pedal Installation: Identify left (L) and right (R) pedals. Thread them into the crank arms carefully. Note that the left pedal is reverse-threaded.
- Seat Post Adjustment: Insert the seat post into the frame and adjust the seat height for comfortable riding. Secure with the quick-release lever.
- Tire Inflation: Inflate tires to the recommended pressure indicated on the tire sidewall.
- Brake Check: Verify that both front and rear brakes engage properly and stop the wheels effectively.
- Battery Installation: Ensure the removable battery is securely inserted and locked into the frame.
5. Operating Your Electric Bike
Your Aairsk Electric Bike offers versatile riding experiences with multiple modes and features.
5.1 Riding Modes
The bike features three distinct riding modes:
- Bicycle Mode: Ride like a traditional bicycle without electric assistance.
- Pedal Assist Mode (PAS): The motor provides assistance as you pedal. There are 5 levels of pedal assist, adjustable via the LCD display.
- Throttle Mode: Engage the motor without pedaling by twisting the throttle on the right handlebar grip.

Figure 5.1: The three working modes of the Aairsk Electric Bike.
5.2 LCD Display Functions
The multi-function LCD display provides real-time riding data:
- Current Speed: Displays your current riding speed.
- Total Mileage: Tracks the total distance traveled.
- Battery Power: Shows the remaining battery charge level.
- PAS Level: Indicates the current pedal assist level (1-5).
To adjust PAS levels, press the '+' or '-' buttons on the display unit. The maximum speed for each PAS level is:
- PAS 1: Max. Speed 12 Mph
- PAS 2: Max. Speed 15 Mph
- PAS 3: Max. Speed 18 Mph
- PAS 4: Max. Speed 21 Mph
- PAS 5: Max. Speed 25 Mph
5.3 Gear Shifting
The 7-speed Shimano derailleur allows for smooth gear changes to adapt to various terrains. Use the twist grip shifter on the handlebar to select your desired gear. Shift gears proactively when approaching inclines or declines to maintain a comfortable pedaling cadence.
6. Battery Care and Charging
Proper battery care ensures longevity and optimal performance.
6.1 Charging the Battery
The 360WH battery can be charged both on or off the bike. Connect the charger to the battery charging port and then to a standard power outlet. A full charge typically takes 5-6 hours. The charger indicator light will change when charging is complete.

Figure 6.1: The built-in removable Li-ion battery with over-temp, over-voltage, and over-charger protection.
6.2 Battery Removal and Storage
To remove the battery, unlock it with the provided key and slide it out. Store the battery in a cool, dry place, away from direct sunlight and extreme temperatures. If storing for extended periods, charge the battery to 50-70% every 2-3 months to maintain its health.
7. Maintenance
Regular maintenance is crucial for the safety and lifespan of your electric bike.
- Cleaning: Clean the bike regularly with a damp cloth. Avoid high-pressure washing directly on electrical components.
- Tires: Check tire pressure before each ride. Inspect for wear and tear.
- Brakes: Regularly check brake pads for wear and ensure brake levers provide firm and responsive braking. Adjust as needed.
- Chain: Keep the chain clean and lubricated to ensure smooth shifting and prevent rust.
- Fasteners: Periodically check all bolts and nuts for tightness, especially on critical components like handlebars, wheels, and seat post.
- Suspension: Inspect the front suspension fork for proper function and cleanliness.
8. Troubleshooting
This section addresses common issues you might encounter.
| Problem | Possible Cause | Solution |
|---|---|---|
| Bike does not power on | Battery not charged or not properly seated; power cable loose. | Charge battery fully. Ensure battery is securely locked in place. Check all cable connections. |
| Motor not assisting | PAS level set to 0; throttle not engaged; brake levers engaged. | Increase PAS level on display. Ensure throttle is twisted fully. Release brake levers. |
| Brakes feel weak | Worn brake pads; loose brake cable; disc rotor dirty. | Inspect and replace brake pads. Adjust brake cable tension. Clean disc rotors with rubbing alcohol. |
| Gears not shifting smoothly | Derailleur out of adjustment; dirty or dry chain. | Adjust derailleur limits and cable tension. Clean and lubricate chain. |
If you encounter issues not listed here or require further assistance, please contact Aairsk customer support.
9. Specifications
Detailed technical specifications for your Aairsk Electric Mountain Bike.

Figure 9.1: Key dimensions and size parameters of the Aairsk Electric Bike.
| Feature | Specification |
|---|---|
| Bike Type | Electric Bike |
| Age Range | Adult |
| Brand | Aairsk |
| Model Name | GT300 (also GT900 for 26" variant) |
| Number of Speeds | 7 |
| Color | Black (other colors available) |
| Wheel Size | 24 Inches (also 26 Inches variant) |
| Frame Material | Carbon Steel / Alloy Steel |
| Suspension Type | Dual |
| Special Features | Digital Display, Quick Release Wheels, Dual Disc Brake, Adjustable Seat |
| Included Components | Fender, Kickstand, Light, Tool Kit |
| Brake Style | Disc |
| Specific Uses | Trail, Road |
| Assembly Required | No (minimal setup) |
| Minimum User Height | 4.99 Feet |
| Max Load Capacity | 330 LBS |
| Bicycle Weight | 52.9 LBS |
| Motor Power | 750W Peak Brushless |
| Max Speed | 23-25 Mph |
| Battery Capacity | 360WH (10Ah/13Ah) |
| Range (PAS Mode) | Up to 40 Miles |
| Charging Time | 5-6 Hours |
10. Warranty and Support
Aairsk provides a 12 Months Warranty with free replacement parts and lifetime technical support for your electric bike.
For warranty claims or technical assistance, please contact Aairsk customer support via email at support@aairsk.com. When contacting support, please include a detailed description of the issue and attach relevant videos or pictures to expedite the process.