1. Introduction
This manual provides essential instructions for the safe and effective use of your Keenstone 24V 3200mAh Lithium-Ion Replacement Battery. This battery is designed for compatibility with Bissell CleanView XR series cordless vacuum cleaners, specifically models 4054, 3789U, and 3797V. Please read this manual thoroughly before installation and operation to ensure optimal performance and safety.

Figure 1: Keenstone 24V 3200mAh Lithium-Ion Replacement Battery. This image shows the black battery pack with "24V" and "3.2Ah Lithium-Ion" markings, along with a power indicator light and release button.
2. Safety Information
Always observe the following safety precautions to prevent injury or damage to the battery and vacuum cleaner:
- Use only with specified Bissell CleanView XR series vacuum cleaners (models 4054, 3789U, 3797V).
- Do not disassemble, modify, or attempt to repair the battery.
- Avoid exposing the battery to water, moisture, or extreme temperatures.
- Do not short-circuit the battery terminals.
- Keep the battery away from children and pets.
- Dispose of used batteries according to local regulations. Do not incinerate.
- If the battery shows signs of damage, overheating, or leakage, discontinue use immediately.
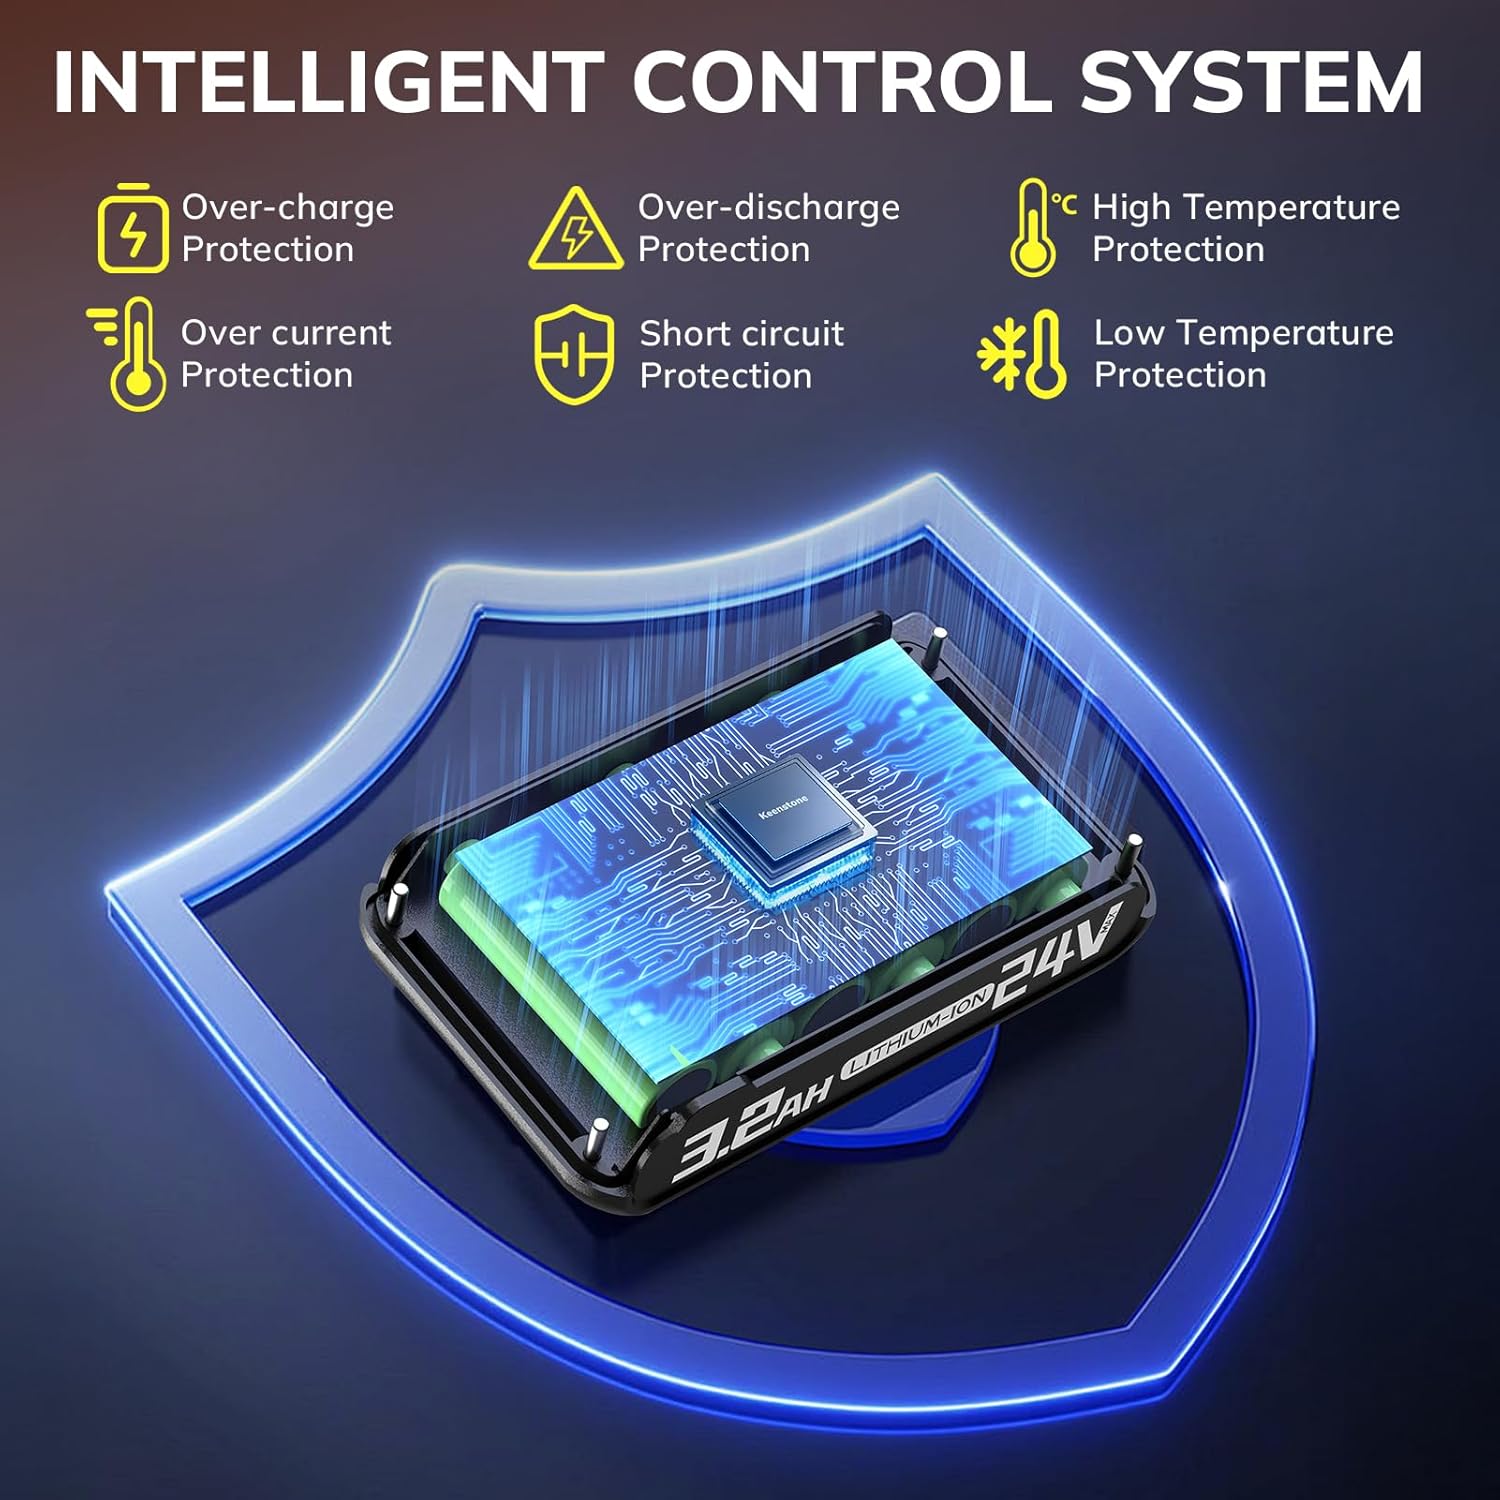
Figure 2: Diagram illustrating the intelligent control system with multiple protections. This image highlights the battery's built-in safeguards against over-charge, over-discharge, high temperature, over-current, short circuit, and low temperature.
3. Product Overview
The Keenstone 24V 3200mAh Lithium-Ion Replacement Battery is engineered to provide reliable power for your Bissell cordless vacuum. Key features include:
- High Capacity: 3200mAh for extended runtime.
- Lithium-Ion Technology: Ensures stable power output and longer lifespan.
- Multi-Protection System: Integrated intelligent control system protects against over-charge, over-discharge, high temperature, over-current, short circuit, and low temperature.
- Power Display: LED indicator for monitoring remaining battery charge.

Figure 3: Exploded view of the Keenstone battery, showing its internal components. This image illustrates the PC+ABS material shell for durability, the high-quality Li-ION battery cells, and the circuit board, emphasizing compatibility with the vacuum cleaner and charger.
4. Setup and Installation
Installing the Keenstone replacement battery is a straightforward process:
- Ensure Vacuum is Off: Before handling the battery, ensure your Bissell vacuum cleaner is turned off and unplugged from any charging source.
- Remove Old Battery: Locate the battery release mechanism on your vacuum cleaner. Press the release button or slide the latch to detach the existing battery.
- Insert New Battery: Align the Keenstone replacement battery with the battery slot on your vacuum cleaner. Slide the battery into place until it clicks securely. The design ensures perfect alignment and effortless installation without the need for additional tools.
- Verify Connection: Gently tug on the battery to confirm it is firmly seated and locked into the vacuum cleaner.

Figure 4: Various views of the Keenstone battery integrated with Bissell CleanView XR series vacuum cleaners. This collage demonstrates the battery being inserted, removed, and the vacuum in use with the battery attached, highlighting its seamless fit.
5. Operating Instructions
5.1 Charging the Battery
The Keenstone battery charges using your existing Bissell vacuum cleaner charger. Connect the vacuum cleaner (with the battery installed) to its charger. The LED indicator lights on the battery will typically show charging progress.
5.2 Checking Battery Level
The battery features an integrated power display button and LED lights to indicate the remaining charge:
- When connected to the vacuum: Press the power display button on the battery. If the battery charge is low, the LED light will flash.
- When not connected to the vacuum: Press the power display button. The LED lights will illuminate to show the remaining power level.

Figure 5: Visual guide on how to check the battery's power display. The image shows two scenarios: pressing the power display button when the battery is installed in the vacuum (LED flashes if low) and when the battery is detached (LEDs show remaining power).
5.3 Battery Endurance
Expect the following approximate runtimes with a fully charged Keenstone 3200mAh battery:
- Standard Mode: Up to 52 minutes
- Max Mode: Up to 12 minutes

Figure 6: Comparison of battery endurance. This image contrasts the Keenstone 3200mAh battery's runtime (52 minutes in standard mode, 15 minutes in max mode) with a typical 2000mAh battery (40 minutes standard, 10 minutes max).
6. Maintenance
Proper maintenance extends the life of your battery:
- Storage: Store the battery in a cool, dry place away from direct sunlight and extreme temperatures. For long-term storage, it is recommended to store the battery with a partial charge (around 50%).
- Cleaning: Wipe the battery's exterior with a dry, soft cloth. Do not use harsh chemicals or abrasive cleaners.
- Charging Cycles: Avoid completely draining the battery before recharging, as this can reduce its overall lifespan.
7. Troubleshooting
| Problem | Possible Cause | Solution |
|---|---|---|
| Battery not charging |
|
|
| Short runtime after full charge |
|
|
| Battery LED indicator flashing |
|
|
8. Specifications
| Feature | Detail |
|---|---|
| Brand | Keenstone |
| Model Number | 29842 |
| Battery Voltage | 24V |
| Battery Capacity | 3200 mAh |
| Battery Cell Composition | Lithium Ion |
| Product Dimensions | 5.35 x 3.07 x 2.08 inches |
| Item Weight | 1.12 pounds |
| Compatible Vacuum Models | Bissell CleanView XR 4054, 3789U, 3797V |
| Protection Features | Over-charge, Over-discharge, High Temperature, Over-current, Short circuit, Low Temperature |

Figure 7: Image displaying the Keenstone battery alongside two compatible Bissell CleanView XR series stick vacuums (XR and XR Pet models). This visually confirms the battery's compatibility with these specific vacuum cleaner types.
9. Warranty and Support
For warranty information or technical support, please refer to the documentation provided with your original purchase or visit the official Keenstone website. If you have questions regarding the compatibility or performance of this replacement battery, please contact Keenstone customer service.
Keenstone Store Link: Visit Keenstone Store on Amazon


