1. Introduction
Welcome to the DigitPro VHS to Digital Converter 3.0 user manual. This device is designed to help you preserve your cherished memories by converting analog video tapes (VHS, Hi8, 8mm, Mini DV) and other analog video sources into digital MP4 format. With its 5-inch display and 4K recording capability, you can easily digitize and share your old videos without the need for a computer.
2. Important Safety Information
Please read and understand all safety instructions before using this product. Failure to follow these instructions may result in electric shock, fire, or damage to the device.
- Do not expose the device to rain, moisture, or extreme temperatures.
- Avoid placing the device near heat sources or in direct sunlight.
- Use only the provided power adapter.
- Do not attempt to open or repair the device yourself. Refer all servicing to qualified personnel.
- Keep out of reach of children.
3. Package Contents
Verify that all items are present in your package:
- DigitPro VHS to Digital Converter 3.0 Unit
- Power Adapter
- HDMI Cable
- User Manual
- Micro SD Card
- 3.5mm Jack to AV Cable (RCA)
- Type-C USB Cable
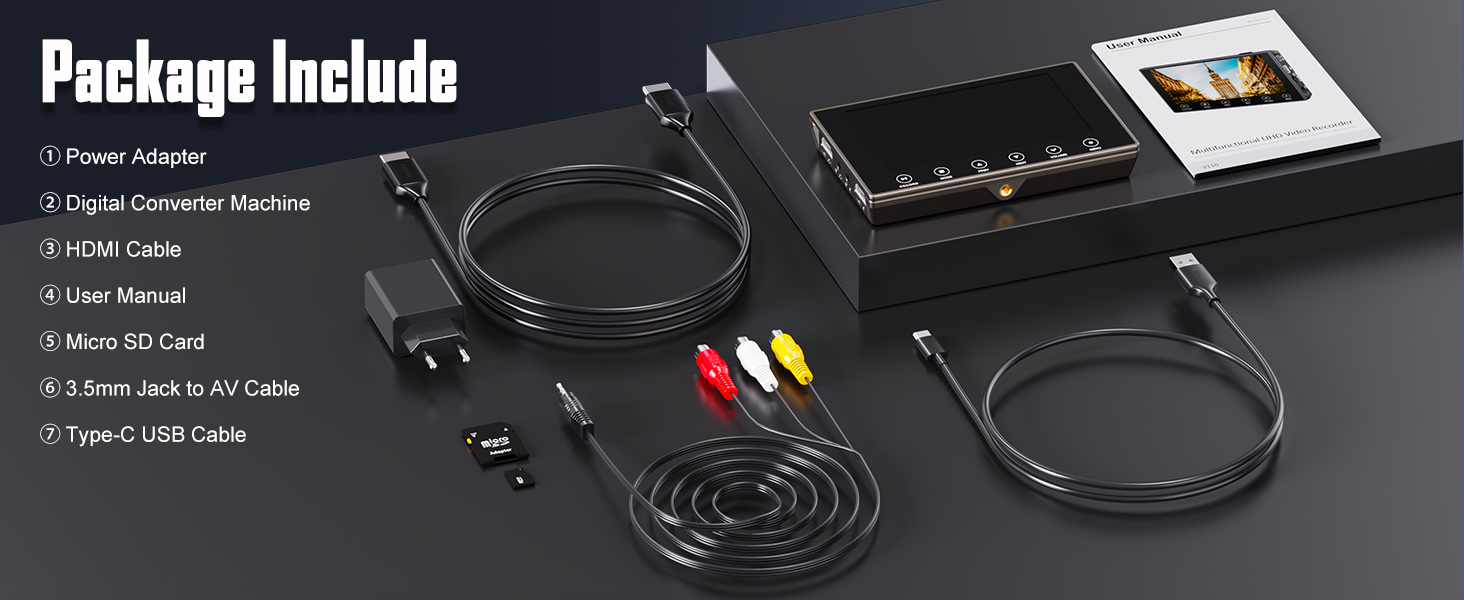
Image: Contents of the DigitPro VHS to Digital Converter 3.0 package.
4. Product Overview
4.1 Device Layout

Image: Front view of the converter with its 5-inch display and control buttons.

Image: Side view illustrating the various input/output ports and storage slots.
4.2 Key Features
- 5-inch Large Display Screen: For previewing and playing back videos directly on the device.
- 4K Recording Resolution: Capture video with high clarity (also supports 720p and 1080p).
- Standalone Operation: No computer or software required for conversion.
- Multiple Input Sources: Compatible with VCR, DVR, DVD, VHS, Hi8, 8mm, Mini DV camcorders, and other analog players.
- Flexible Storage: Records directly to SD card (included) or USB flash drive (not included).
- Built-in Battery: 2000mAh rechargeable battery provides up to 3 hours of playback.
- Audio Features: Built-in stereo speakers, 3.5mm headphone output, and 3.5mm microphone input for live commentary.
- HDMI Passthrough: Connect to a larger screen for viewing.
5. Setup
5.1 Charging the Device
- Connect the provided Type-C USB cable to the Power/PC Port on the converter.
- Connect the other end of the USB cable to the power adapter.
- Plug the power adapter into a wall outlet. The device will begin charging.
- A full charge provides approximately 3 hours of operation.
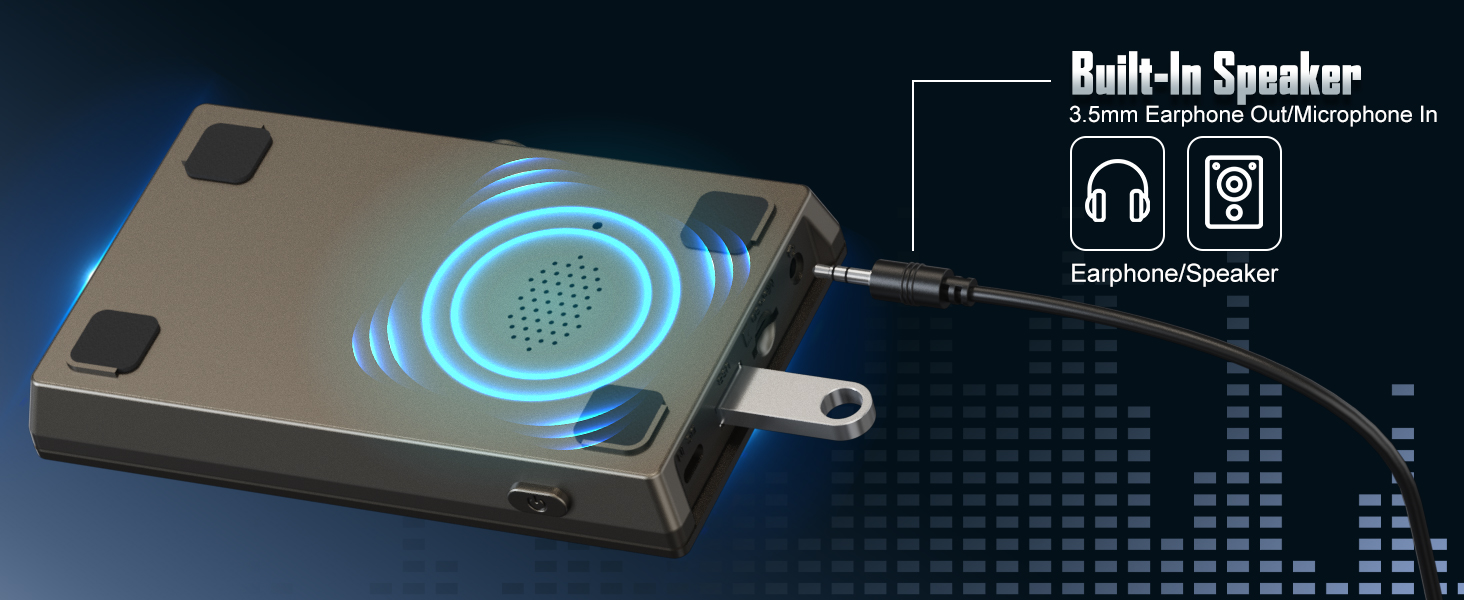
Image: The converter being charged via its USB-C port.
5.2 Inserting Storage Media
The device supports Micro SD cards (up to 512GB) and USB flash drives (not included).
- For Micro SD Card: Insert the Micro SD card into the Micro SD slot until it clicks into place.
- For USB Flash Drive: Insert the USB flash drive into the USB Flash Drive port.
- Ensure the storage device is formatted to FAT32 or exFAT for optimal compatibility.

Image: Illustrates the Micro SD card and USB flash drive insertion points.
6. Operating Instructions
6.1 Connecting an Analog Video Source (e.g., VCR, Camcorder)
- Ensure your analog video source (VCR, camcorder, DVD player) is powered off.
- Connect the 3.5mm Jack to AV Cable (RCA) to the AV In port on the DigitPro converter.
- Connect the yellow, white, and red RCA plugs to the corresponding Video Out (yellow), Audio Left Out (white), and Audio Right Out (red) ports on your analog video source.
- Power on the DigitPro converter and your analog video source.
- Select the correct input source on the converter using the MODE button if necessary.
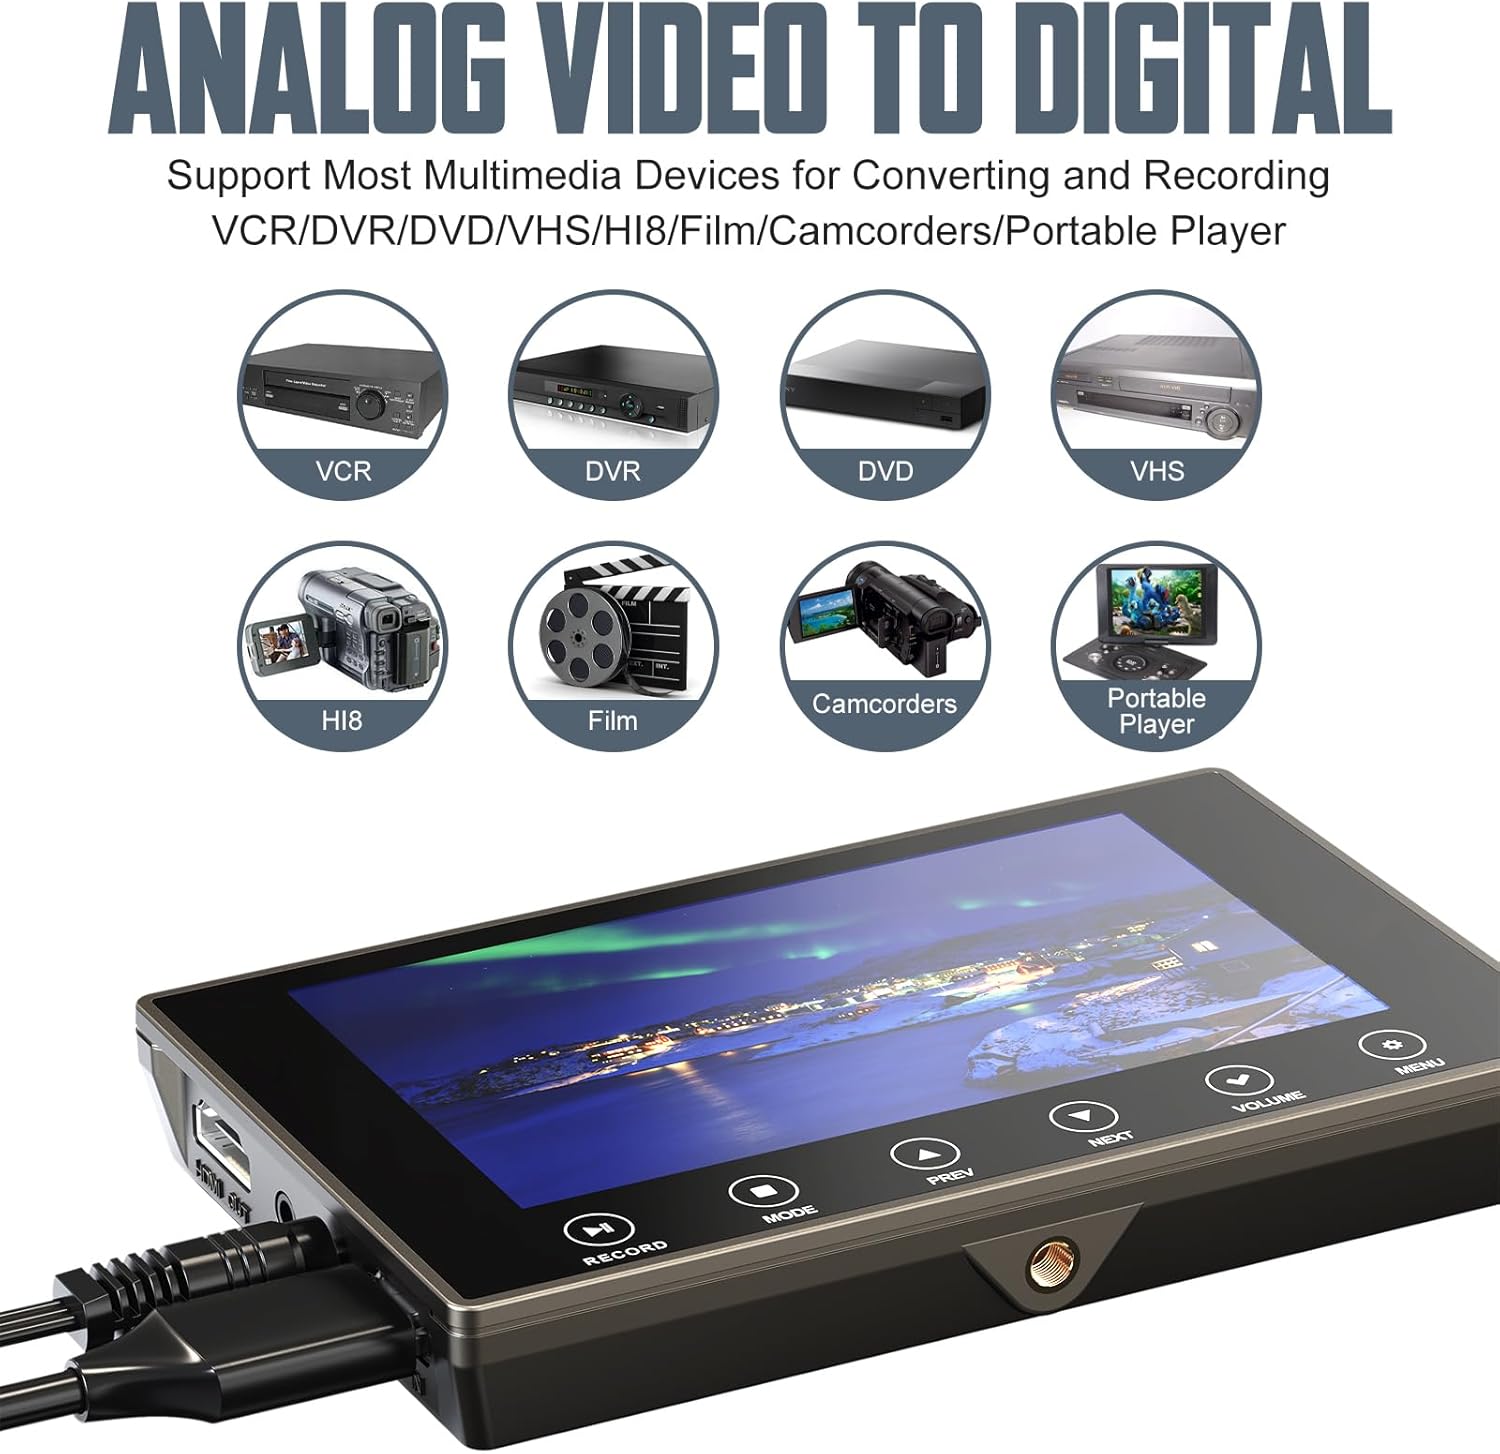
Image: Examples of analog devices that can be connected to the converter.
6.2 Connecting an HDMI Video Source
- Connect an HDMI cable from your HDMI video source to the HDMI In port on the DigitPro converter.
- Power on the DigitPro converter and your HDMI video source.
- Select the correct input source on the converter using the MODE button if necessary.
6.3 Recording Video
- Ensure your video source is connected and powered on, and a Micro SD card or USB flash drive is inserted.
- On the converter's screen, you should see the live video feed from your source.
- Press the RECORD button to start recording. The recording indicator will appear on the screen.
- Play the video on your analog source (e.g., VCR).
- Press the RECORD button again to stop recording. The recorded video will be saved to your storage media.
- Note: The device may save recordings in 20-minute segments. You may need editing software to combine these files if a continuous recording is desired.

Image: The converter facilitating recording from a VCR to a digital file, viewable on its screen or an external display.
6.4 Playback
- Press the MODE button to switch to playback mode.
- Use the PREV and NEXT buttons to navigate through your recorded files.
- Press the RECORD button (often doubles as Play/Pause in playback mode) to play or pause a video.
- Adjust volume using the VOLUME buttons.
6.5 Connecting to a TV/Monitor (HDMI Out)
- Connect an HDMI cable from the HDMI Out port on the DigitPro converter to an HDMI input on your TV or monitor.
- Select the corresponding HDMI input on your TV/monitor.
- The converter's display will be mirrored on the larger screen.
6.6 Using the Microphone Input
You can add live commentary to your recordings:
- Connect a 3.5mm microphone (not included) to the 3.5mm mic jack on the device.
- Ensure the microphone is properly connected before starting a recording.
- Your commentary will be recorded along with the video and audio from your source.
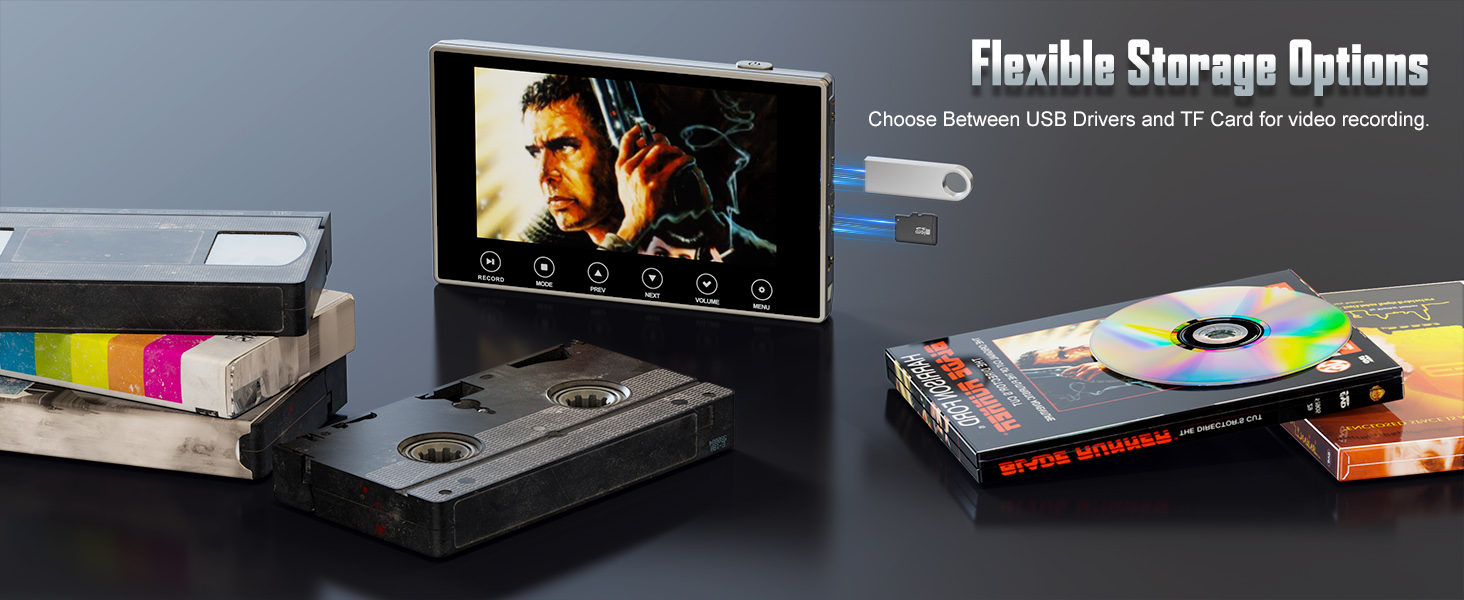
Image: The converter highlighting its built-in speaker and the 3.5mm audio jack for headphones or microphone.
7. Maintenance
- Cleaning: Use a soft, dry cloth to clean the device. Do not use liquid cleaners or aerosols.
- Storage: Store the device in a cool, dry place away from direct sunlight and extreme temperatures.
- Battery Care: For optimal battery life, charge the device regularly, even if not in frequent use. Avoid fully discharging the battery for extended periods.
8. Troubleshooting
| Problem | Possible Cause | Solution |
|---|---|---|
| "No input signal detected!" message | Incorrect cable connection, wrong input source selected, or source device not playing. |
|
| No audio during playback or recording | Audio cables not connected, volume too low, or source device audio issue. |
|
| Recording stops after 20 minutes | This is a design feature of the device to manage file sizes. |
|
| Device does not power on | Low battery or power adapter issue. |
|
9. Specifications
| Feature | Detail |
|---|---|
| Model | VHS to Digital Converter 3.0 |
| Display Screen | 5-inch LCD |
| Recording Resolution | Up to 4K (also 1080p, 720p selectable) |
| Video Input | RCA (AV In), HDMI (HDMI In) |
| Video Output | HDMI (HDMI Out) |
| Audio Input | 3.5mm Microphone Jack, RCA (via AV In) |
| Audio Output | Built-in Stereo Speakers, 3.5mm Headphone Jack, HDMI (via HDMI Out) |
| Storage Media | Micro SD Card (up to 512GB), USB Flash Drive |
| Battery | 2000mAh Rechargeable Lithium Battery |
| Battery Life | Approximately 3 hours (playback) |
| Dimensions | 7.09 x 4.61 x 3.46 inches |
| Weight | 1.12 pounds (0.51 Kilograms) |
| Manufacturer | DigitPro |
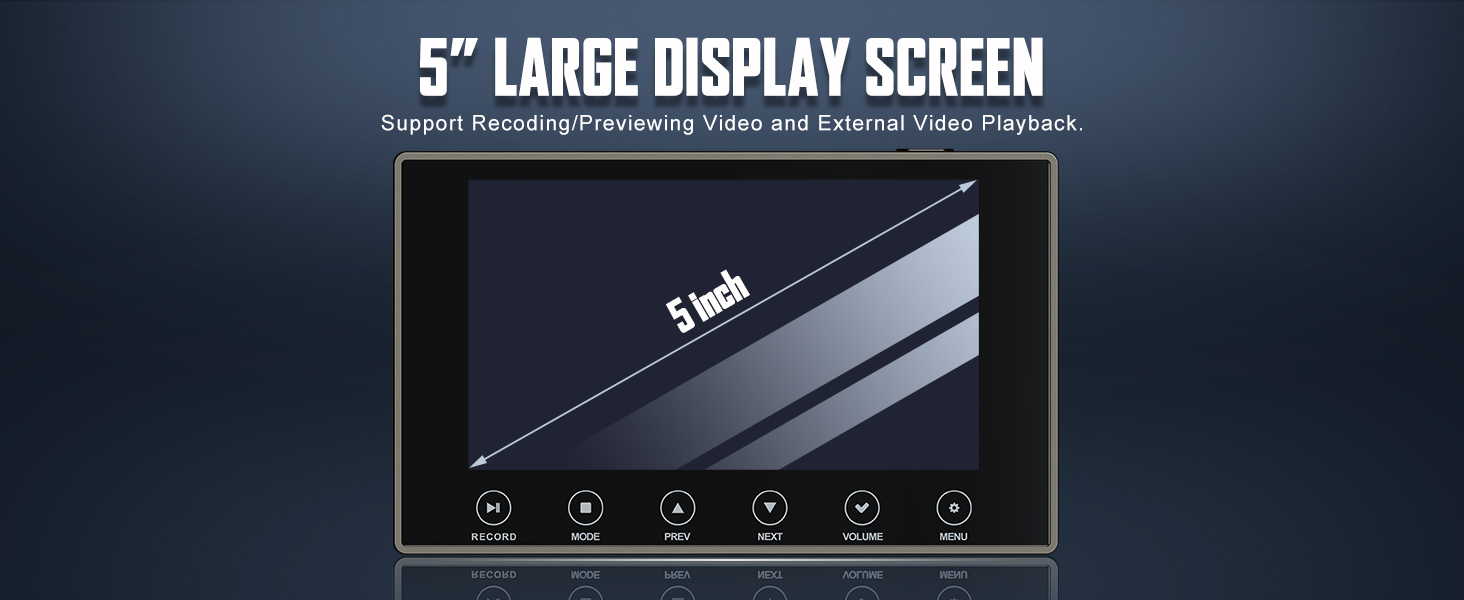
Image: The converter supports recording resolutions up to 4K.
10. Warranty and Support
For warranty information and technical support, please refer to the official DigitPro website or contact their customer service directly.
You can visit the DigitPro Store on Amazon for more product information and support resources.
Please retain your proof of purchase for any warranty claims.


