1. Introduction
This manual provides detailed instructions for the safe and efficient operation of your BEVA Handheld GPS Survey Equipment. Please read this manual thoroughly before using the device to ensure optimal performance and to prevent damage.
2. Product Overview
The BEVA Handheld GPS Survey Equipment is a high-precision, rugged device designed for land surveying across various terrains. It features advanced satellite positioning systems and multiple measurement modes.
2.1 Key Features
- High Precision Accuracy: Powered by 4 satellite positioning systems (GPS+BEIDOU+GLONASS+QZSS) for ultra-accurate signals within ±0.002 acres.
- Multiple Measurement Modes: Supports area, distance, and slope measurements for diverse terrains like farmland, gardens, parking lots, and pastures.
- 3.2 Inch HD Display: Anti-glare TFT screen with backlight for clear data readability in various lighting conditions.
- Durable and Robust Design: Strong waterproof and dust-proof functionality, designed to withstand sudden storms and muddy job sites.
- Portable: Compact design fits comfortably in hand or pockets. Rubberized case provides a secure grip.
2.2 Included Components
- BEVA Handheld GPS Survey Equipment (blue)
- USB Charging Cable
- Wristband
- User Manual
3. Setup
3.1 Initial Charge
Before first use, fully charge the device using the provided USB charging cable. The device uses a rechargeable battery.

Figure 1: Device displaying battery life and charging information.
3.2 Powering On/Off
Press and hold the power button located on the device to power it on or off. Allow the device a few minutes to acquire satellite signals in an open outdoor area after powering on.
3.3 Signal Acquisition
For accurate measurements, ensure the device has acquired optimal satellite signals. This is best achieved in an open outdoor environment. Wait until the signal data stabilizes before beginning any measurements.
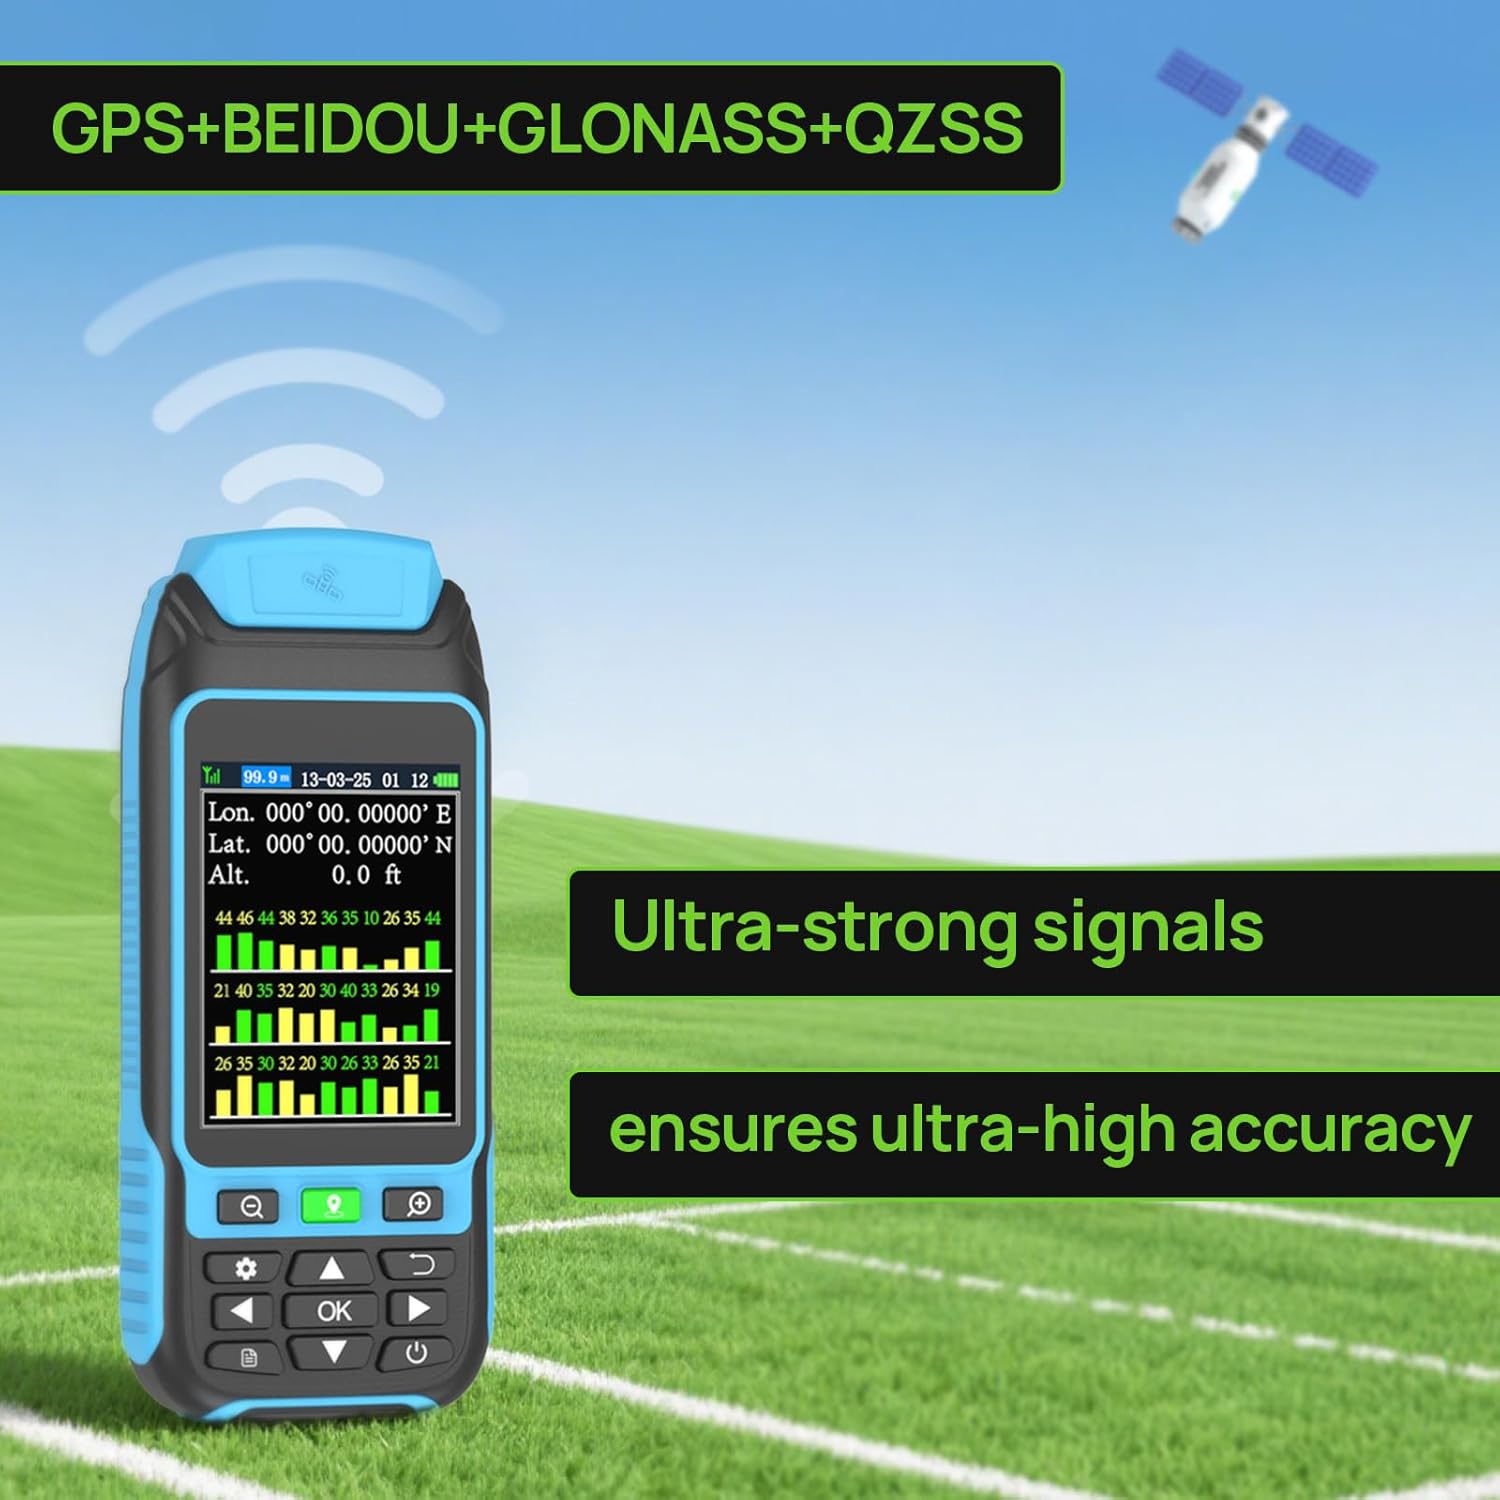
Figure 2: Device showing satellite signal strength and accuracy.
4. Operating Modes
The BEVA Handheld GPS Survey Equipment supports several measurement modes:
4.1 Area Measurement (Auto-Track Area)
To measure an area, select the 'Auto-track Area' mode. Walk along the perimeter of the area you wish to measure. The device will display the tracked path and calculate the area in real-time. Ensure you return to your starting point to complete the measurement.

Figure 3: Examples of Auto-track Area and Auto-track Distance measurements.

Figure 4: Example of 'Collect-Poi Area' measurement.
4.2 Distance Measurement (Auto-Track Dist)
For measuring linear distances, select 'Auto-track Dist'. Walk from your starting point to your end point. The device will record the distance covered.
4.3 Slope Measurement
The device can also measure the slope of the terrain. This feature is integrated into the measurement modes and provides valuable data for uneven landscapes.
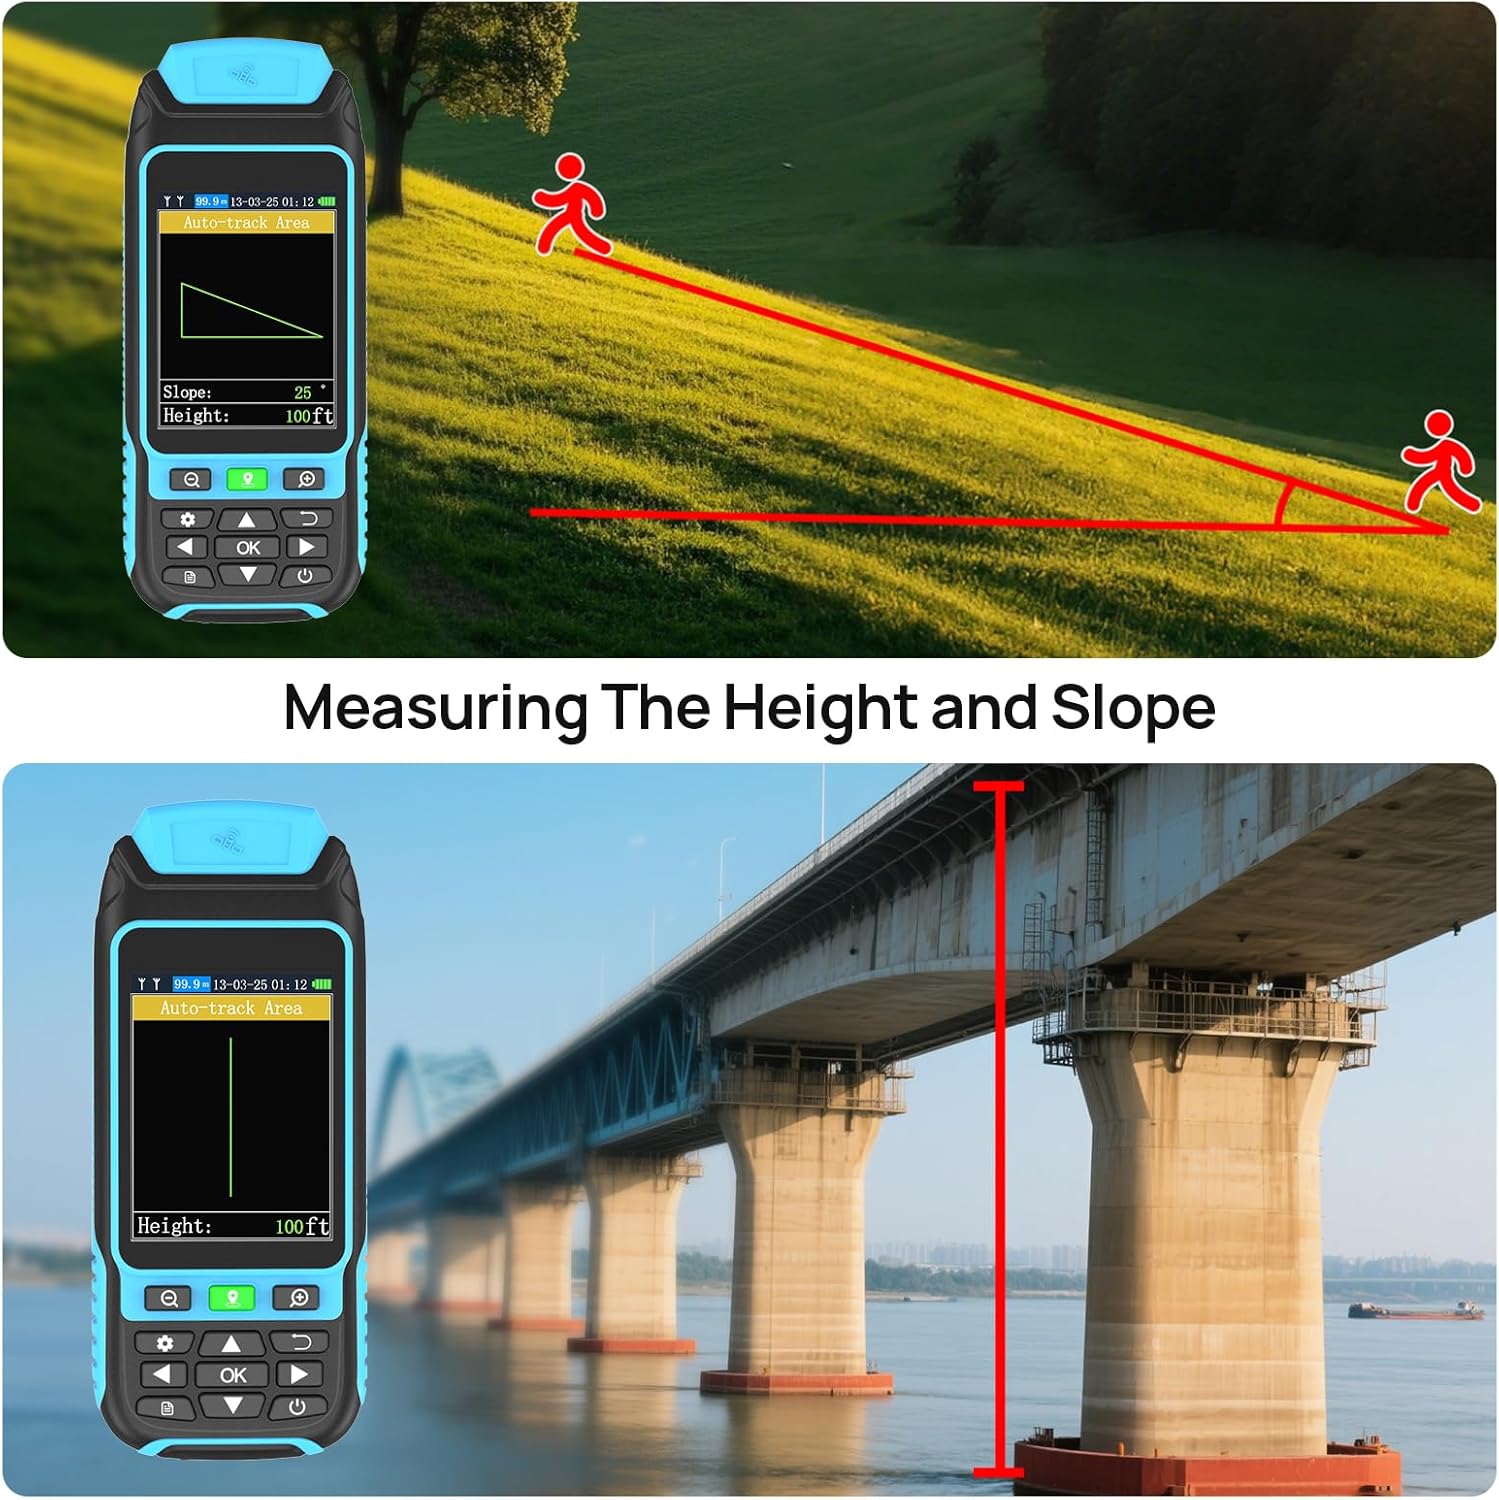
Figure 5: Measuring height and slope using the device.
4.4 Adjustable Settings
The device allows for adjustable settings including area units (m², sq.ft, hm², acre) and length units (m, ft, hm, km). You can also adjust brightness and other parameters.

Figure 6: Adjustable unit settings on the device.
5. Data Management
The device can store up to 100 data records. Once the limit is reached, the latest data will automatically overwrite the earliest data.
5.1 Viewing Records
Access 'Historical records' from the menu to view previously saved measurements. You can review details such as total area, distance, and slope for each record.
5.2 Data Export
You can export previous records to your computer for long-term storage and analysis. Connect the device to your computer using the USB cable and follow the on-screen instructions or refer to the detailed user guide for specific software requirements.
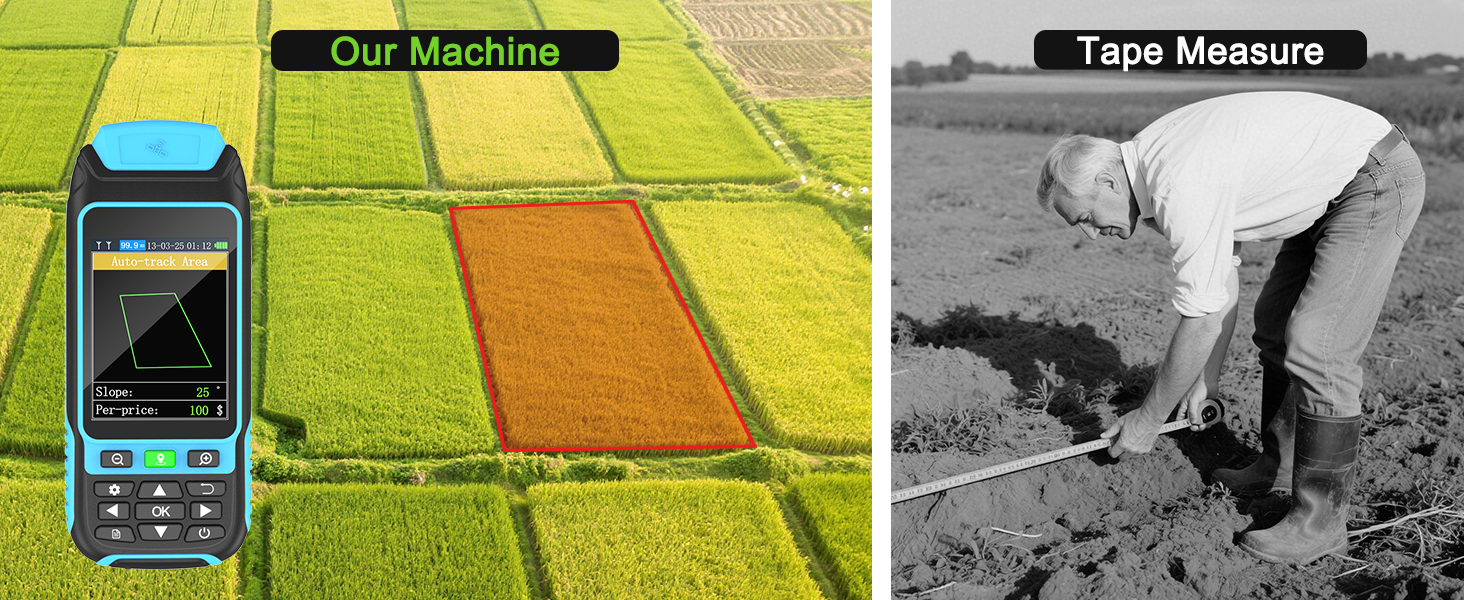
Figure 7: Data records and export functionality.
6. Maintenance
6.1 Charging
Regular charging helps maintain the life cycle of the device's rechargeable battery. Avoid completely draining the battery frequently.
6.2 Cleaning
Wipe the device with a soft, damp cloth. Do not use harsh chemicals or abrasive cleaners. Ensure the charging port cover is securely closed to maintain waterproof and dust-proof integrity.
7. Troubleshooting
7.1 Inaccurate Readings
- Ensure you are in an open area with a clear view of the sky for optimal satellite signal reception.
- Wait for the device's signal data to stabilize before starting measurements.
- Perform a factory reset if persistent inaccuracies occur (Note: this will delete all records).
7.2 Device Not Powering On
- Ensure the battery is sufficiently charged. Connect to a power source using the USB cable.
- Press and hold the power button for several seconds.
8. Specifications
| Brand | BEVA |
| Color | blue |
| Material | Rubber |
| Item Weight | 14.88 Ounces |
| Battery Type | Rechargeable battery |
| Package Dimensions (L x W x H) | 7.44 x 4.06 x 2.72 inches |
| Package Weight | 0.42 Kilograms |
| Included Components | Handheld GPS Survey Equipment |
9. Warranty and Support
9.1 Warranty Information
This BEVA Handheld GPS Survey Equipment comes with a 1-year warranty from the date of purchase. Please retain your proof of purchase for warranty claims. The warranty covers manufacturing defects and malfunctions under normal use conditions.
9.2 Customer Support
For any questions, technical assistance, or warranty claims, please contact BEVA customer support through the retailer's platform or the official BEVA website.
10. Demonstration Videos
10.1 How to Use the Handheld GPS Land Meter
This video provides a comprehensive guide on how to use the BEVA Handheld GPS Survey Equipment, including unboxing, identifying components, powering on, and demonstrating area measurement by walking a perimeter.
10.2 Land Surveying Equipment Demonstration
Watch this video for a practical demonstration of the handheld GPS land meter in action. It shows the device being used to survey a plot of land, tracking the user's movement and displaying the calculated area and other relevant data.
10.3 A6 Handheld GPS Navigator Overview
This video introduces the A6 Handheld GPS Navigator, highlighting its features such as 4-system GNSS support, waypoint saving, point and track navigation, and various charging methods. It also showcases the device's durable design and ease of use.