1. Introduction
This manual provides instructions for the SHEEVONIX Wireless Selfie Monitor Screen. This device allows for real-time wireless screen mirroring from your smartphone, enabling you to use your phone's rear camera for selfies, vlogging, and live streaming while monitoring the output.
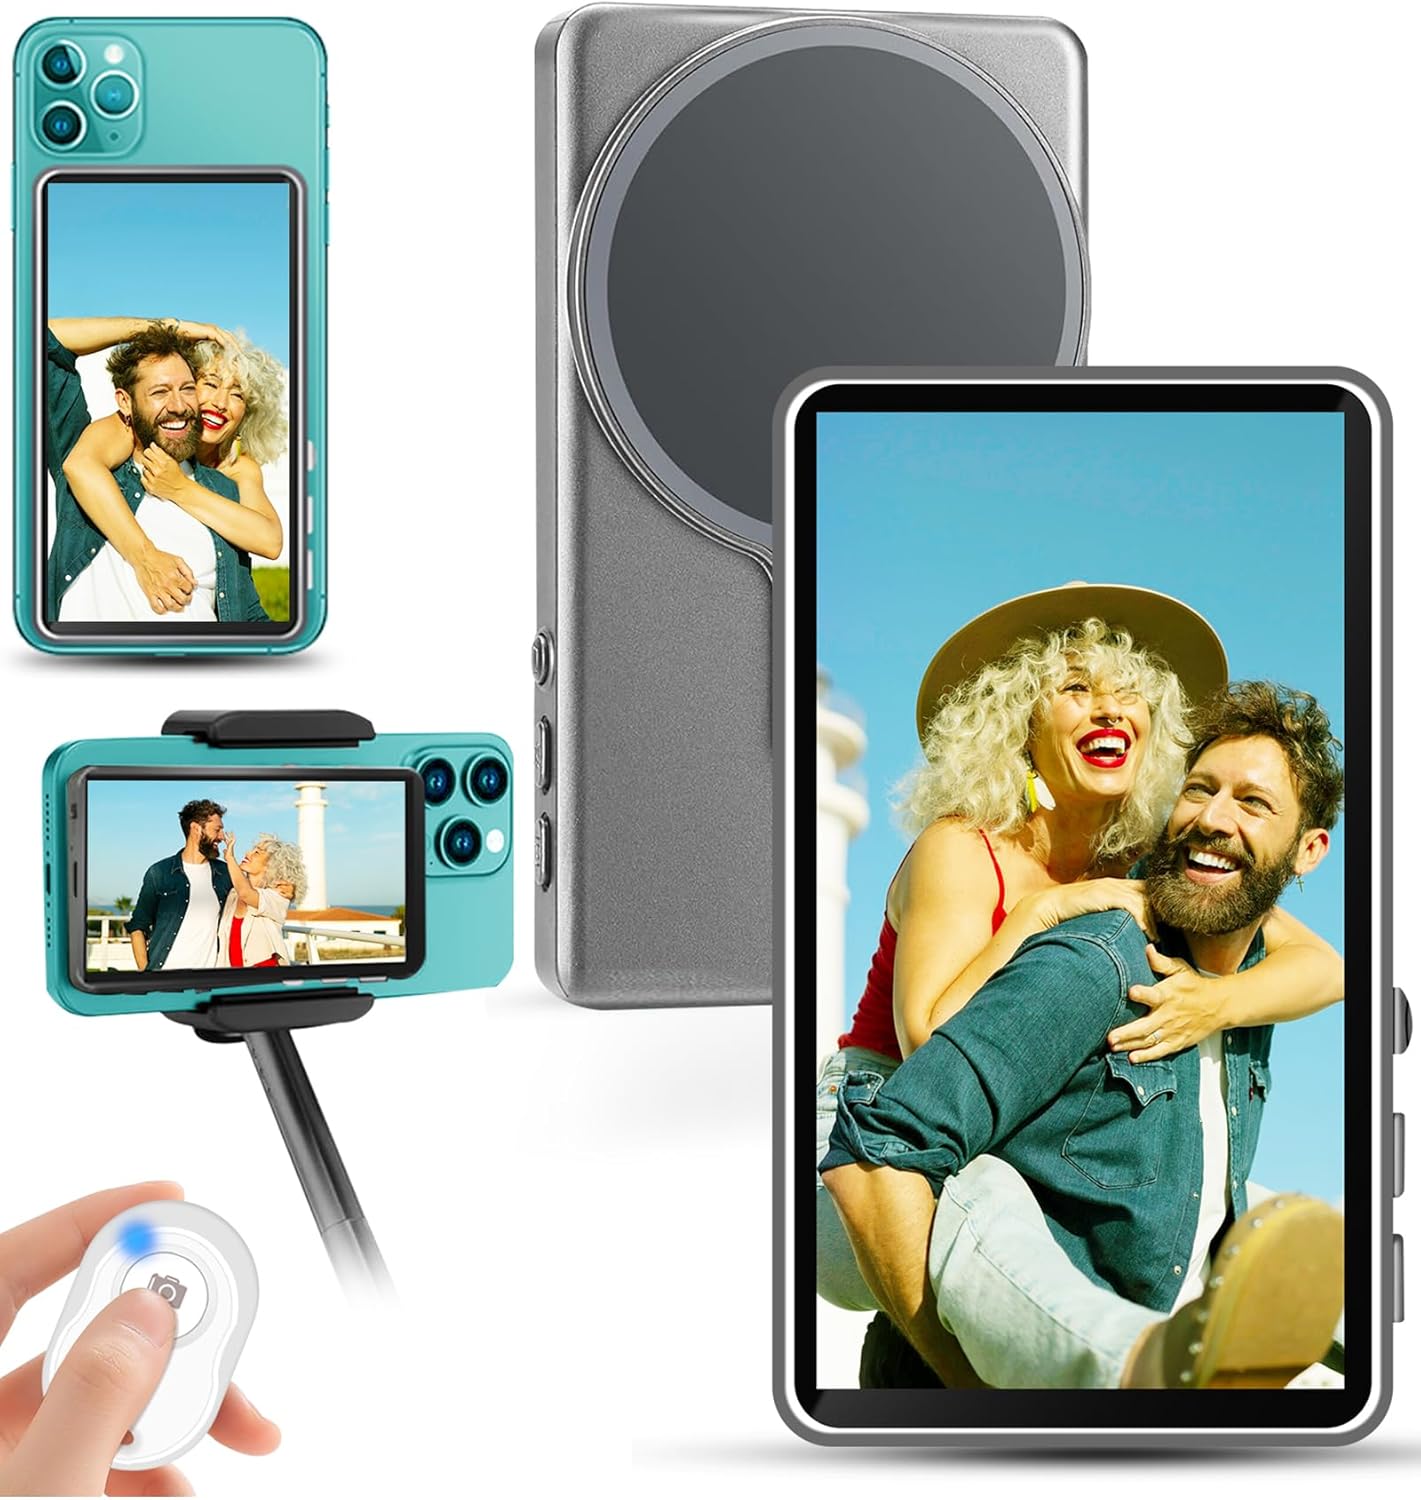
Image 1.1: The SHEEVONIX Wireless Selfie Monitor Screen, shown with a smartphone attached and a Bluetooth remote control.
2. Package Contents
Verify that all items are present in your package:
- Phone Vlog Selfie Monitor Screen
- Bluetooth Remote Control
- USB Type-C Charging Cable
- Metal Ring (for non-magnetic phones)
- Instruction Manual
3. Setup
Follow these steps to set up your SHEEVONIX Wireless Selfie Monitor Screen:
3.1 Attaching Your Smartphone
- Magnetic Attachment: The monitor features a magnetic attachment system. Simply align your MagSafe-compatible phone or phone case with the monitor's magnetic surface.
- For Non-Magnetic Phones: If your phone or case is not magnetic, use the included metal ring. Adhere the metal ring to the back of your phone or phone case to enable magnetic attachment to the monitor.
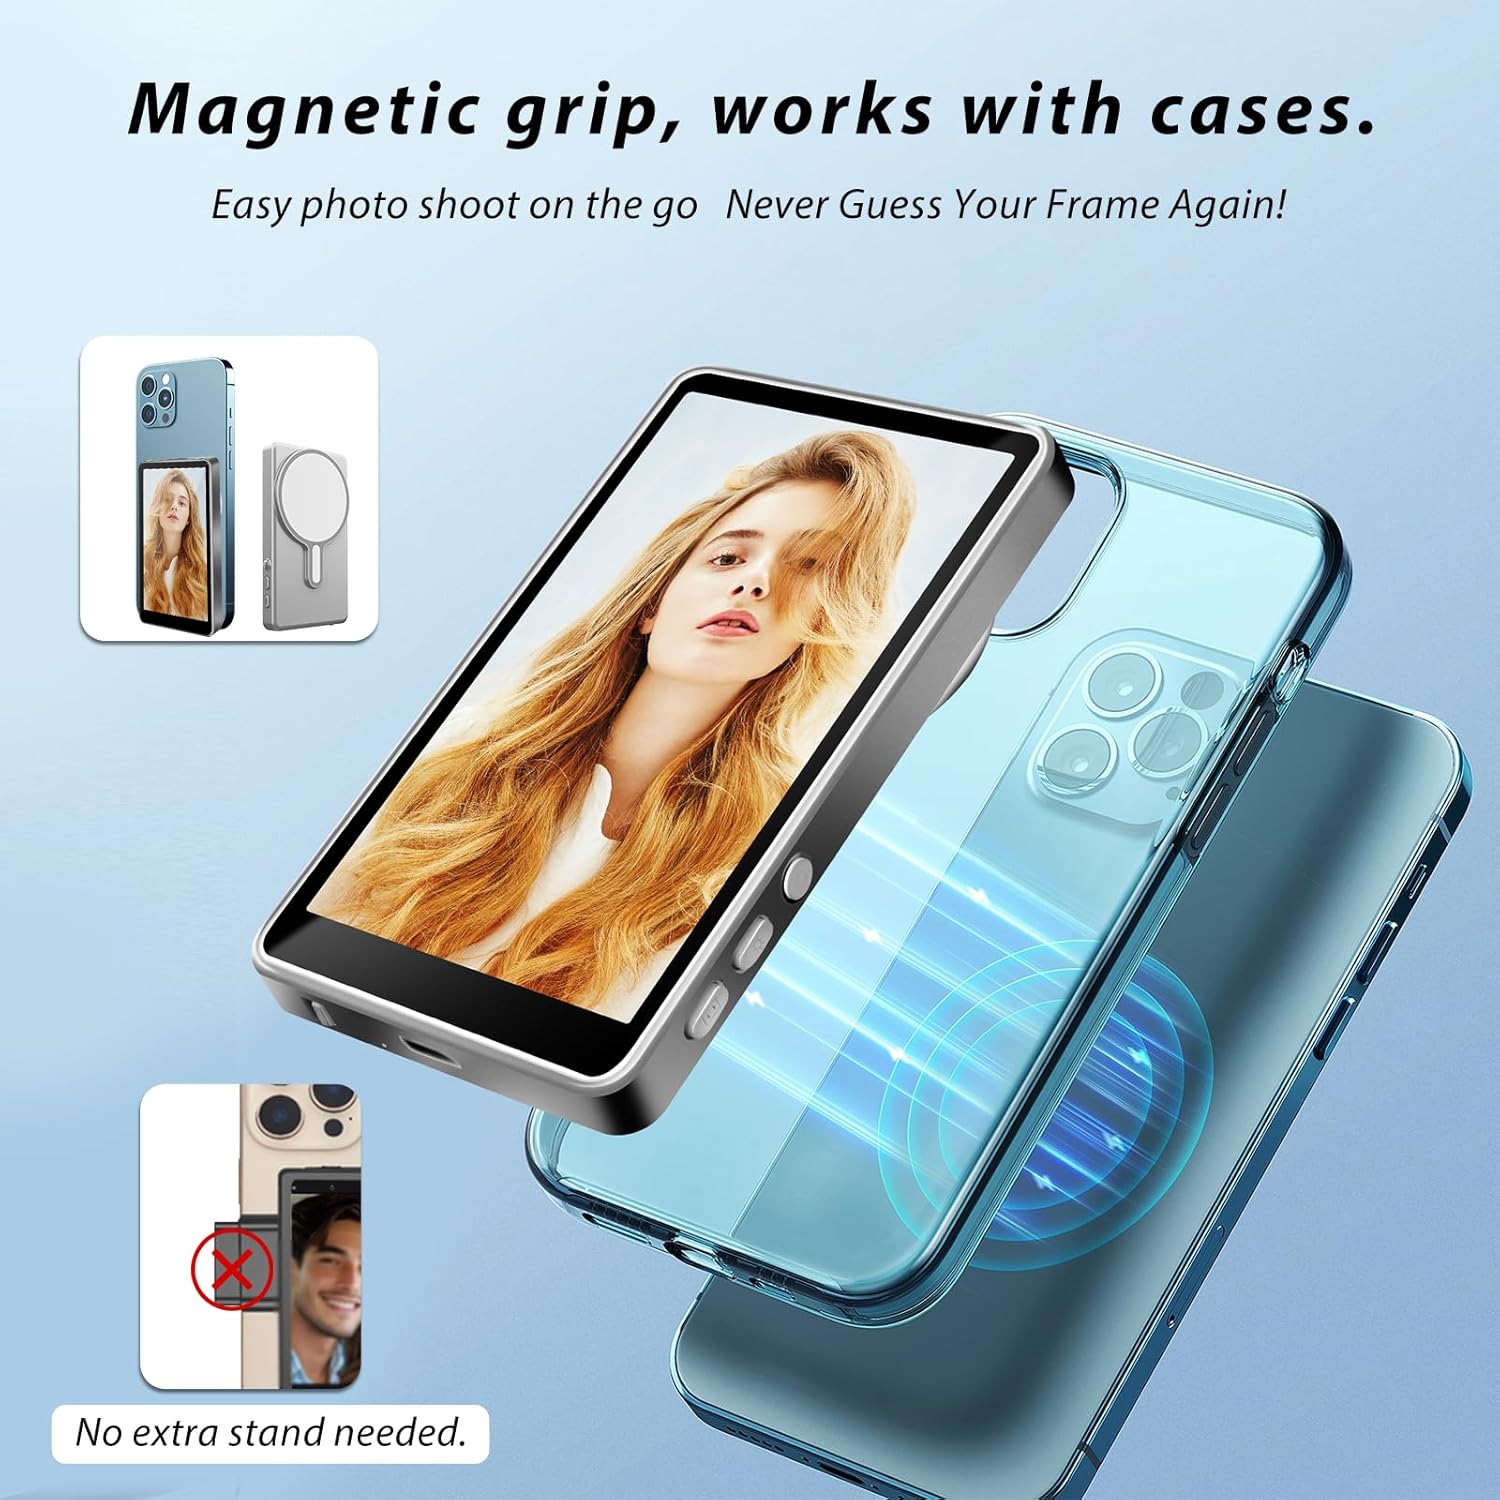
Image 3.1: The magnetic grip allows for easy attachment of the monitor to a smartphone, even with a case.
3.2 Initial Power On and Screen Mirroring
- Turn On the Selfie Screen: Locate the power switch on the monitor and slide it to the 'ON' position.
- Connect Screen Casting Function: On your smartphone, activate the screen casting or screen mirroring function. Search for and select the device named "iScreen_p2p" to establish a wireless connection. This enables real-time, lag-free preview of your phone's screen on the monitor.
3.3 Connecting the Bluetooth Remote Control
- Activate Bluetooth Remote: Turn on the Bluetooth remote control.
- Pair with Smartphone: On your smartphone, go to Bluetooth settings and pair with the device named "AB Shutter3".
- Once paired, the remote can be used to trigger your phone's camera shutter from a distance of up to 48 feet.

Image 3.2: Easy setup guide showing how to power on, connect screen casting, and pair the Bluetooth remote.
4. Operating Instructions
4.1 Real-Time Monitoring
The monitor provides a real-time view of your phone's rear camera, allowing you to frame shots accurately while using the higher quality rear lens for photos and videos.

Image 4.1: The monitor connects instantly via P2P screen mirroring, requiring no additional app.

Image 4.2: Real-time monitoring allows for precise framing when using the rear camera.
4.2 Screen Flip and Wide-Screen Mode
- Screen Flip: Press the designated button on the monitor to flip the screen 180 degrees. This is useful for correcting inverted views or adjusting the display orientation.
- Cinematic Wide-Screen Mode: Activate wide-screen mode with a single tap to expand the field of view, suitable for capturing landscapes or group shots.

Image 4.3: The screen rotation button allows for seamless display orientation changes.
4.3 Brightness Adjustment
The monitor offers 3 levels of brightness adjustment (Low, Medium, High) to optimize visibility in various lighting conditions, from bright sunlight to dim indoor environments.
5. Maintenance
To ensure the longevity and optimal performance of your SHEEVONIX Wireless Selfie Monitor Screen:
- Keep the device clean by wiping it with a soft, dry cloth.
- Avoid exposure to extreme temperatures, moisture, or direct sunlight for extended periods.
- Do not attempt to disassemble the device, as this will void any potential warranty.
- Charge the device using the provided Type-C cable and a compatible power source.
6. Troubleshooting
If you encounter issues with your monitor, refer to the following common solutions:
- No Power: Ensure the device is fully charged. Connect it to a power source using the Type-C cable.
- No Screen Mirroring:
- Verify the monitor is powered on.
- Ensure your phone's screen casting/mirroring function is active and connected to "iScreen_p2p".
- Check for any obstructions or excessive distance between the phone and monitor.
- Restart both the monitor and your smartphone.
- Bluetooth Remote Not Connecting:
- Ensure the remote is powered on.
- Check your phone's Bluetooth settings to confirm "AB Shutter3" is paired. If not, re-pair the device.
- Replace the remote's battery if necessary.
- Compatibility Issues: Note that the monitor is not compatible with iPhone 17, Google Pixel devices, AQUOS sense 9, and Sony Xperia 1 II.
7. Specifications
| Feature | Detail |
|---|---|
| Brand | SHEEVONIX |
| Model | Wireless Selfie Monitor Screen |
| ASIN | B0F2MH2CCN |
| UPC | 792105724096 |
| Color | Grey |
| Item Weight | 3.52 ounces |
| Product Dimensions | 0.47"D x 2.32"W x 4.13"H |
| Battery | 1800mAh Lithium Ion (included) |
| Battery Life | Approximately 4 hours of use (180 minutes) |
| Charging Port | Type-C |
| Bluetooth Remote Range | Up to 48 feet |
| Display Size | 4.02-inch |
| Brightness Levels | 3 (Low, Medium, High) |
| Compatible OS | iOS 9.0+, Android 2.0+, HarmonyOS 3.0+, MagicOS 4.0+ |
| Incompatible Devices | iPhone 17, Google Pixel devices, AQUOS sense 9, Sony Xperia 1 II |

Image 7.1: Overview of monitor compatibility and physical features including power switch, Type-C port, and display size.

Image 7.2: Battery capacity and physical dimensions of the monitor.
8. Warranty and Support
Information regarding product warranty and customer support was not provided in the available documentation. Please refer to the product packaging or the manufacturer's official website for details on warranty coverage and how to contact customer support.