Introduction
This manual provides detailed instructions for the installation, operation, and maintenance of your ZEROXCLUB 10.1" RV Backup Camera Wireless System BY504. Please read this manual thoroughly before using the product to ensure proper function and safety. Keep this manual for future reference.
The ZEROXCLUB BY504 system is designed to enhance visibility and safety for RVs, trailers, campers, and other large vehicles. It features a 10.1-inch HD 1080P monitor, two rear-view cameras, and two side-view cameras, all with IP69K waterproof rating and stable wireless signal transmission.
Package Contents
Verify that all items listed below are included in your package:
- 10.1" Monitor x 1
- Rear View Camera x 2
- Side View Camera x 2
- Bracket for Monitor x 1
- 12V Car Charger x 1
- Camera Power Cord x 4
- User Manual x 1
- Antenna x 6 (2 for monitor, 4 for cameras)
- Monitor Power Cord x 1
- T-Taps x 8
- 12V DC Power Connector x 1

Figure 1: Contents of the ZEROXCLUB RV Backup Camera System package.
Product Features
The ZEROXCLUB BY504 system offers several features designed for optimal performance and user convenience:
- HD 1080P Quad-Split Monitor: The 10.1-inch screen provides clear 1080P resolution and supports simultaneous display from up to four cameras. It can be configured for single, dual, triple, or quad-split views.
- IP69K Waterproof Cameras: All cameras are rated IP69K, ensuring resistance to water ingress and fogging, suitable for various weather conditions.
- Dual Antennas for Stable Signal: The system utilizes a dual antenna design with a built-in signal booster for fast and stable wireless transmission, minimizing image freezing or lagging.
- Night Vision: Cameras automatically activate infrared (IR) lights in low-light conditions to provide clear night vision.
- Loop Recording Functionality: When a memory card (not included) is inserted, the monitor can function as a dash cam, recording video footage.
- Wide Compatibility: Operates with a DC 12-24V power supply, making it suitable for RVs, 5th Wheels, trucks, travel trailers, campers, and buses.
- Easy Installation: Rear cameras are compatible with Furrion pre-wired plugs and mounting holes. Side cameras are compatible with Furrion pre-wired plugs. For other vehicles, installation involves screwing in cameras and connecting to the vehicle's power supply.

Figure 2: Overview of the ZEROXCLUB 10.1" RV Backup Camera Wireless System.
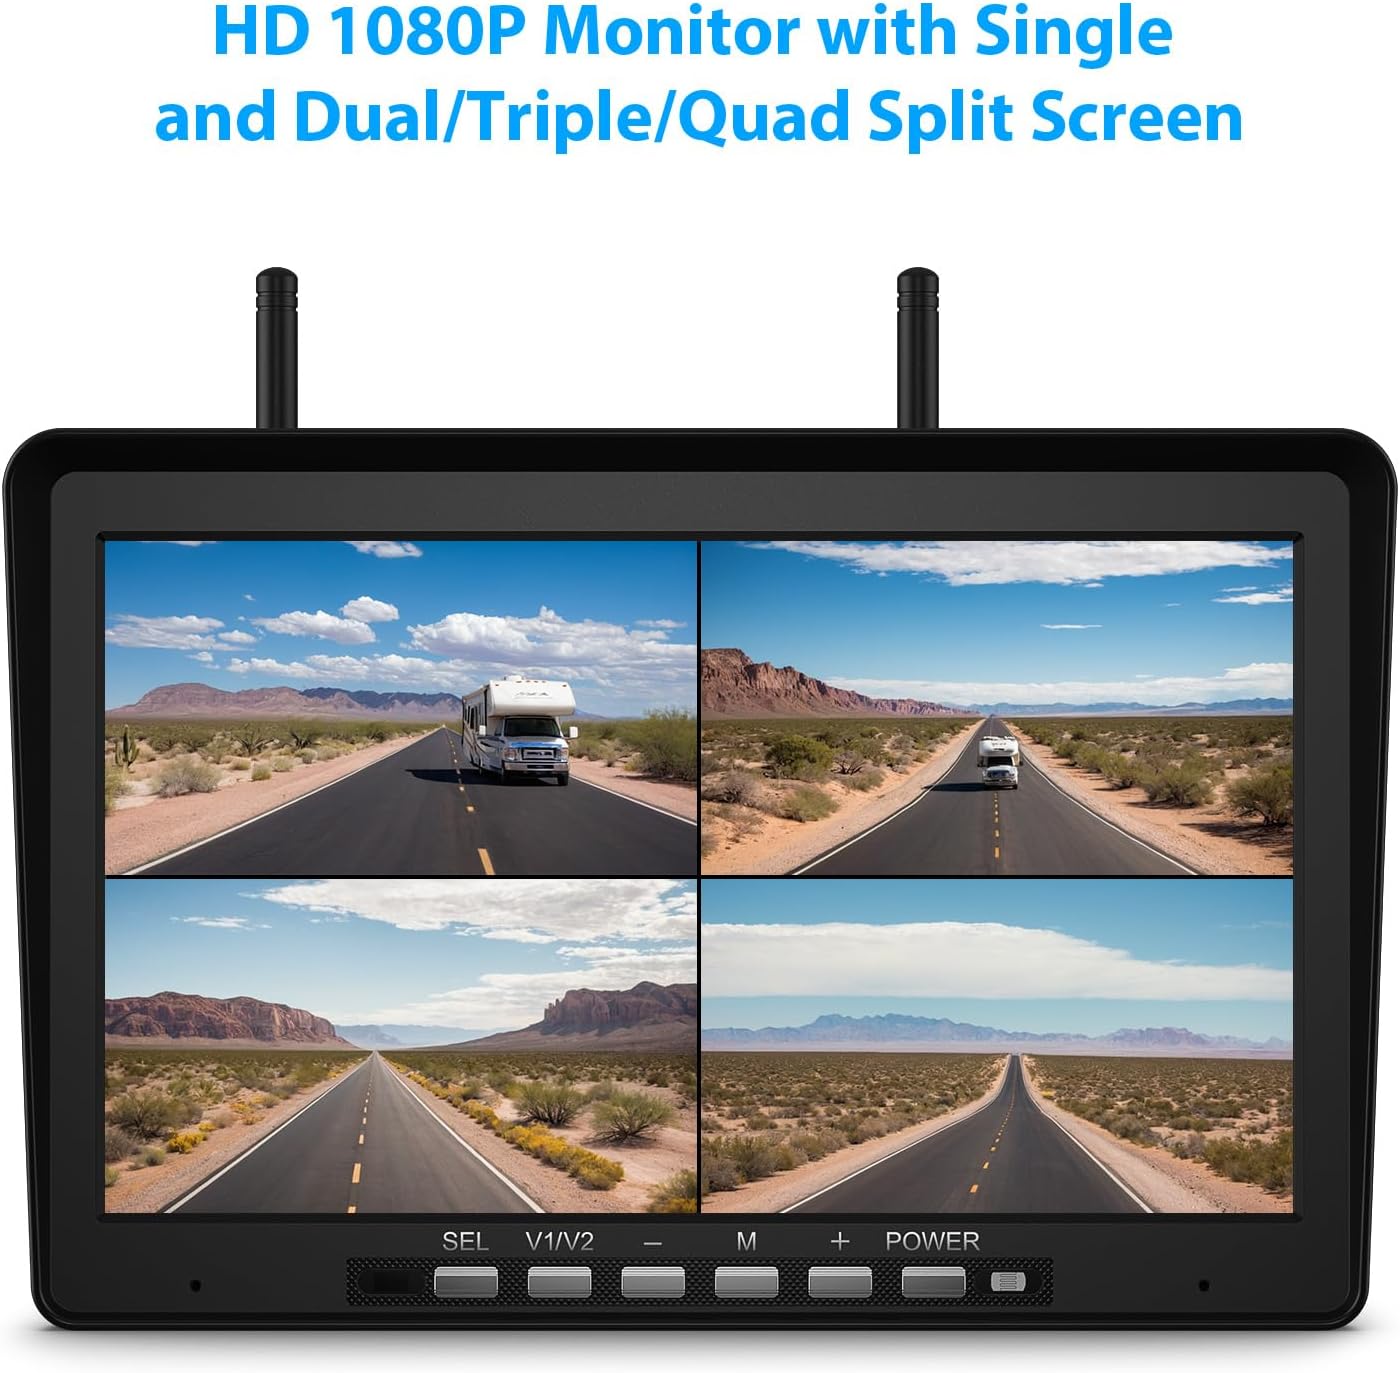
Figure 3: HD 1080P Quad-Split Monitor display.

Figure 4: IP69K Waterproof cameras in adverse weather.

Figure 5: Camera night vision capability.
Installation Guide
Follow these steps for proper installation of your wireless backup camera system.
1. Monitor Installation
- Choose a suitable location on your dashboard or windshield for the 10.1-inch monitor, ensuring it does not obstruct your view or interfere with driving controls.
- Attach the monitor to the provided bracket.
- Connect the monitor power cord to the monitor and plug the 12V car charger into your vehicle's cigarette lighter socket, or hardwire it to a 12-24V DC power source.

Figure 6: Monitor mounted on a vehicle dashboard.
2. Camera Installation
The system includes two rear-view cameras and two side-view cameras. Ensure each camera is securely mounted and connected to a power source.
Rear View Cameras:
- If your RV is Furrion pre-wired, the rear cameras are compatible with existing plugs and mounting holes. No additional drilling is required.
- For vehicles without Furrion pre-wiring, mount the cameras securely using screws. Connect the camera power cord to a 12-24V DC power source, such as your vehicle's running lights or reverse lights.
Side View Cameras:
- Side view cameras are compatible with Furrion pre-wired plugs but not mounting holes. Securely mount the cameras to the side of your RV or trailer.
- Connect the camera power cord to a 12-24V DC power source, typically the vehicle's turn signal lights for activation.

Figure 7: Easy installation wiring diagram for cameras and monitor.
3. Important Notes for Specific Vehicles
For GMC, Chevrolet, and Ford owners: Newer GM vehicles use PWM (Pulse Width Modulation) power signals that can disrupt video transmission, leading to flickering or signal loss. To ensure stable performance, it is recommended to add a Furrion 7-way adapter (not included) or a 12V PWM filter (not included). These accessories help clean the power supply for reliable operation. This is generally not required for most other vehicle brands. Consult your vehicle manual or dealer regarding "PWM tail lights" if you are unsure.
Operating Instructions
1. Powering On/Off
Once the monitor is connected to a power source, press the 'POWER' button on the monitor to turn it on or off. The cameras will power on automatically when connected to their respective power sources (e.g., vehicle ignition, running lights).
2. Monitor Functions
- Camera Selection (SEL): Use the 'SEL' button to cycle through individual camera views or different split-screen modes (dual, triple, quad).
- View Mode (V1/V2): This button may switch between different camera inputs or display modes depending on the system configuration.
- Menu (M): Press 'M' to access the monitor's settings menu. Here you can adjust brightness, contrast, color, image flip, parking lines, and other display parameters.
- Adjustments (+/-): Use the '+' and '-' buttons to navigate menu options or adjust values within the menu.
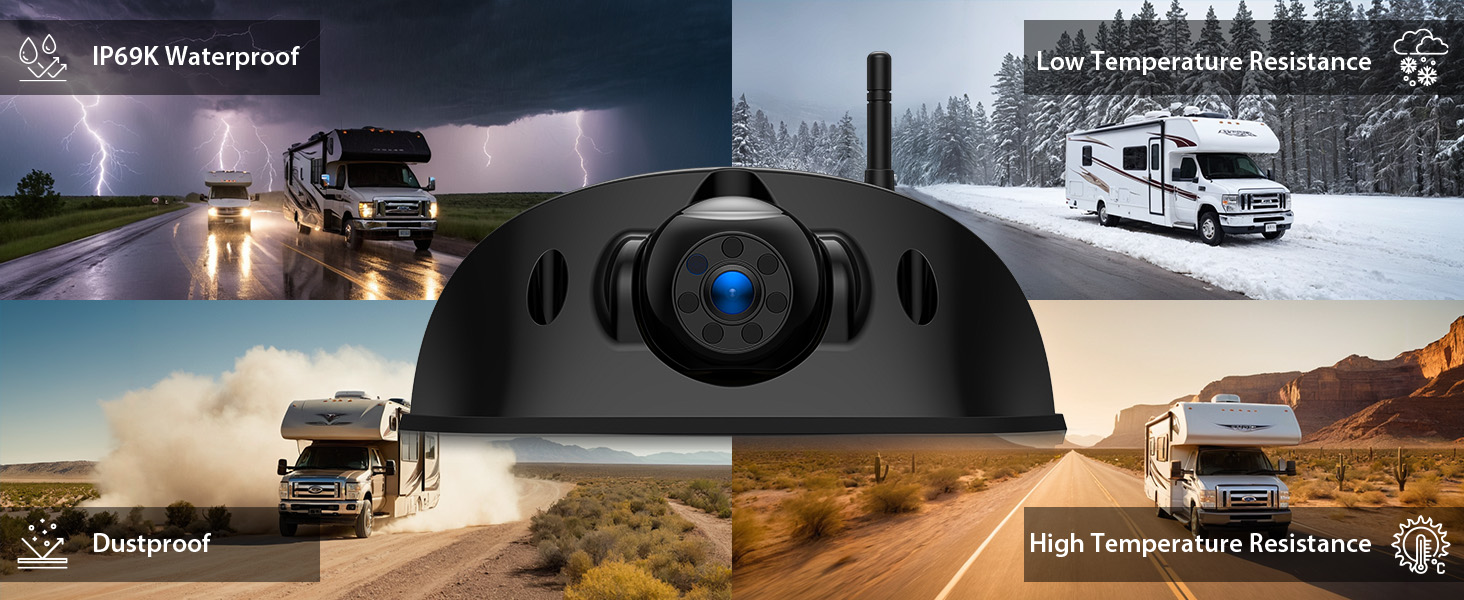
Figure 8: Monitor displaying quad-split screen with four camera views.
3. Image Flip Function
The monitor supports image flipping (normal, mirror, horizontally, vertically) to accommodate various camera mounting orientations and user preferences. Access this setting through the 'M' (Menu) button.

Figure 9: Image flip options for camera views.
4. Video Recording (Dash Cam Function)
Insert a compatible memory card (not included) into the designated slot on the monitor to enable loop recording. The system will automatically record video footage, functioning as a dash cam. Refer to the monitor's menu for recording settings and playback options.

Figure 10: Monitor with loop recording feature enabled.
Maintenance
Regular maintenance ensures the longevity and optimal performance of your ZEROXCLUB backup camera system.
- Cleaning: Regularly clean the camera lenses and monitor screen with a soft, damp cloth. Avoid abrasive cleaners that could scratch surfaces.
- Connection Checks: Periodically inspect all power cables and connections for signs of wear, corrosion, or looseness. Ensure all antennas are securely attached.
- Waterproof Integrity: While cameras are IP69K waterproof, avoid directing high-pressure water jets directly at them during cleaning to prevent potential damage over time.
- Software Updates: Check the ZEROXCLUB official website or contact customer support for any available firmware updates for your system.
Troubleshooting
If you encounter issues with your system, refer to the following troubleshooting guide:
| Problem | Possible Cause | Solution |
|---|---|---|
| No image on monitor | No power to monitor or camera; Loose connection; Camera not paired. | Check power connections to both monitor and cameras. Ensure the monitor is turned on. Re-pair cameras if necessary (refer to monitor menu). |
| Flickering or unstable image | Signal interference; Weak signal; PWM power signals (GMC/Chevy/Ford). | Ensure antennas are clear and unobstructed. Reduce distance between camera and monitor if possible. For GMC/Chevy/Ford, install a Furrion 7-way adapter or 12V PWM filter. |
| Poor image quality (blurry/dark) | Dirty camera lens; Incorrect monitor settings; Low light conditions. | Clean camera lenses. Adjust brightness, contrast, and color settings on the monitor. Ensure night vision is active in low light. |
| Recording not working | No memory card; Incompatible memory card; Memory card full. | Insert a compatible memory card. Format the memory card via the monitor menu. Replace full memory card. |
If the problem persists after attempting these solutions, please contact ZEROXCLUB customer support for further assistance.
Specifications
- Monitor Screen Size: 10.1 Inches
- Display Technology: LCD
- Video Resolution: HD 1080P
- Camera Waterproof Rating: IP69K
- Operating Voltage: DC 12-24V
- Wireless Frequency: 2.4GHz (Dual Antennas)
- Optical Sensor Technology: CMOS
- Lens Type: Wide Angle, Fixed
- Product Dimensions (Monitor): 10.1"L x 2.75"W x 6.7"H
- Item Weight: 5.72 pounds (System total)
- Manufacturer: ZEROXCLUB
Warranty and Support
ZEROXCLUB products are designed for reliability and performance. For specific warranty details, please refer to the warranty card included with your product or visit the official ZEROXCLUB website. If you require technical assistance, have questions about installation, or need troubleshooting support, please contact ZEROXCLUB customer service. Contact information can typically be found in the product packaging or on the brand's official online store.


