1. Introduction
This manual provides detailed instructions for the installation, operation, and maintenance of your Generic Android 13 Single DIN 10.1 Inch Rotatable Car Stereo. Please read this manual thoroughly before using the product to ensure proper function and safety. Keep this manual for future reference.
2. Product Overview
The Generic Android 13 Single DIN Car Stereo features a 10.1-inch rotatable touch screen, offering a versatile and interactive in-car entertainment and navigation experience. It integrates modern connectivity options and smart features.
Key Features:
- Android 13 Operating System
- 10.1-inch Rotatable Touch Screen
- Wireless Apple CarPlay & Android Auto
- Built-in GPS Navigation
- WiFi Connectivity
- FM/RDS Radio
- HiFi Audio with DSP/EQ
- Bluetooth 5.2 for Hands-Free Calling and Music Streaming
- Support for Backup Camera Input
- Steering Wheel Control Compatibility
Package Contents:
Verify that all items are present in the package:
- Main Head Unit with 10.1-inch Screen
- Power Cable
- RCA Cable
- 2 USB Cables
- Backup Camera
- Ankle Buckle (Installation Hardware)
- Reversing Input Cable
- Microphone
- GPS Antenna
- User Manual (this document)

Image: Main product view of the Android 13 car stereo with its 10.1-inch screen and single DIN chassis.

Image: Visual representation of all components included in the product package, such as the head unit, cables, camera, and antenna.
3. Setup and Installation
Installation of the car stereo requires basic automotive electrical knowledge. If you are unsure, professional installation is recommended.
3.1 Pre-Installation Checks
- Ensure your vehicle has a standard Single DIN slot. The outer frame dimensions comply with length 7.4 inches, width 2.26 inches, and depth 6.38 inches.
- Disconnect the vehicle's negative battery terminal before starting installation.
- Confirm all package contents are present.

Image: Comparison of a car console before and after installation, illustrating the fitment for 7.4 inch x 2.26 inch console and dash kits.
3.2 Wiring Connections
Refer to the wiring diagram for correct connections. Improper wiring can damage the unit or vehicle electrical system.
- Power Cable: Connect the yellow wire to constant 12V power, red wire to accessory 12V power, and black wire to ground.
- RCA Cables: Connect audio output (FR OUT, FL OUT, RR OUT, RL OUT) to your amplifier if applicable. Connect video output (VIDEO OUT) for external monitors.
- USB Cables: Connect for data transfer or charging.
- GPS Antenna: Mount the GPS antenna in a location with a clear view of the sky, typically on the dashboard.
- Reversing Line: Connect to the vehicle's reverse light trigger for automatic backup camera display.
- Microphone: Connect the external microphone for improved call quality.

Image: Detailed diagram showing the dimensions of the head unit and screen, along with the various wiring harnesses for power, RCA, and other connections.
3.3 Backup Camera Installation
Install the backup camera at the rear of your vehicle, ensuring a clear view. Connect its video output to the 'Reversing Input' on the head unit and its power to the vehicle's reverse light circuit.
4. Operating Instructions
4.1 Power On/Off
The unit will power on automatically when the vehicle's ignition is turned on. To manually power off, press and hold the power button on the unit or use the software power option on the screen.
4.2 Touch Screen Operation
Navigate the interface by tapping, swiping, and pinching on the 10.1-inch capacitive touch screen, similar to a smartphone or tablet.
4.3 Screen Rotation and Adjustment
The screen can be rotated 360 degrees and adjusted for height and tilt (up/down/left/right) to optimize viewing angles and avoid obstructing vehicle controls.

Image: Illustration of the screen's rotatable and adjustable features, including 360-degree rotation, adjustable height, and 30-degree up/down/left/right tilt.
4.4 Detachable Screen
The screen is detachable for security or preference. Follow the instructions in the manual for safe removal and reattachment.

Image: Visual demonstrating the detachable screen functionality, showing the screen separated from the main unit.
5. Connectivity
5.1 Wireless Apple CarPlay & Android Auto
Connect your iPhone or Android smartphone wirelessly to access navigation, music, messages, and more directly on the car stereo's screen. Follow the on-screen prompts for initial setup.
5.2 Bluetooth 5.2
Pair your mobile phone via Bluetooth for hands-free calling and wireless audio streaming. Access your phonebook and call history directly from the stereo.
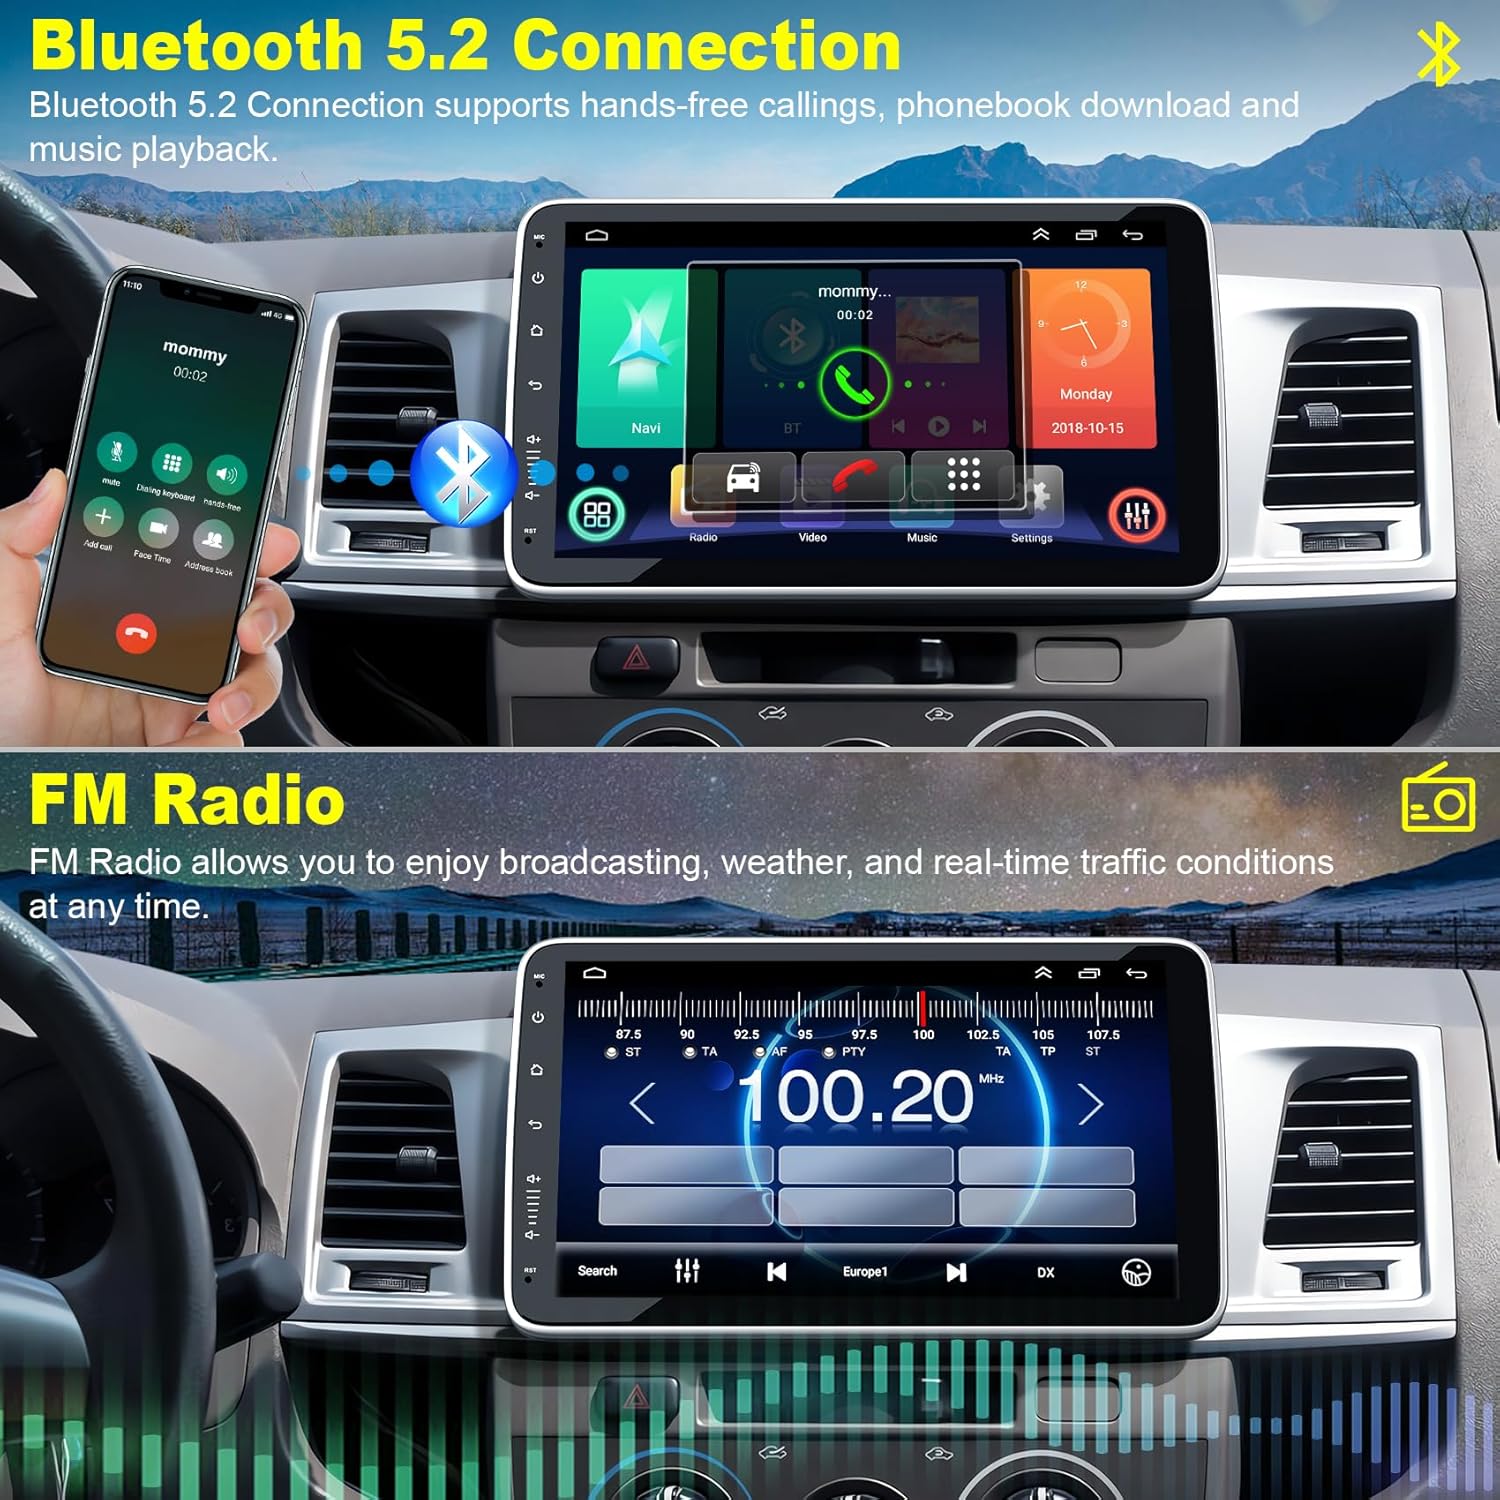
Image: Display showing the Bluetooth 5.2 interface for hands-free calls and music playback, alongside the FM radio interface.

Image: Icons representing the built-in Bluetooth functions: Call, Phonebook, Music, and general Bluetooth connectivity.
5.3 WiFi Connection
Connect the stereo to a WiFi hotspot (e.g., from your smartphone) to access online features, download apps, browse the internet, and stream online videos.
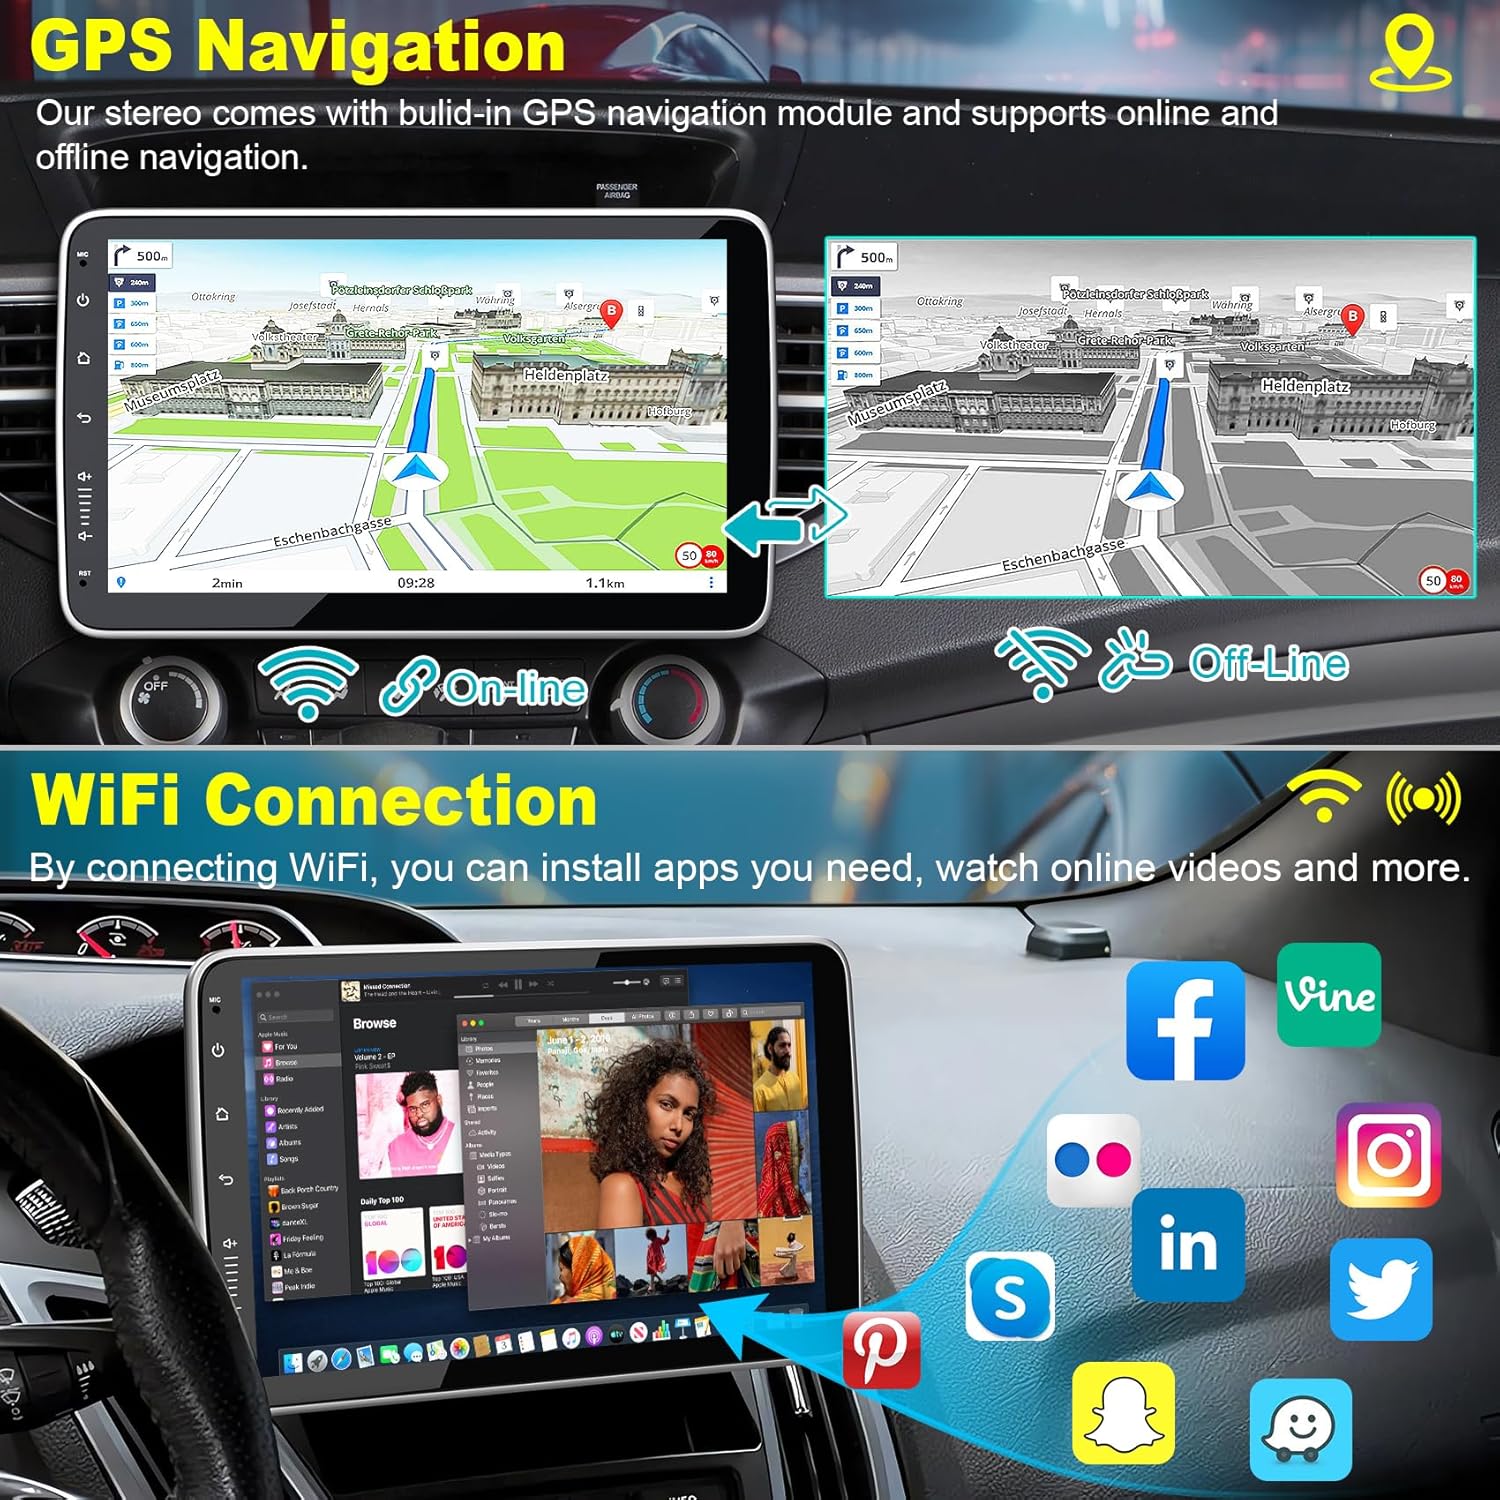
Image: Split view showing GPS navigation on the top and the WiFi connection interface with various app icons on the bottom.

Image: Illustrates three methods for internet connectivity: Hotlink (tethering), WiFi link, and Wired link, with a browser interface shown below.
5.4 Mirror Link
Use the Mirror Link function to display your smartphone's screen content directly on the car stereo, allowing you to control phone apps from the larger display.

Image: Depicts the Mirror Link function, showing a smartphone screen mirrored onto the car stereo display.
6. Navigation
The stereo includes a built-in GPS navigation module, supporting both online and offline navigation. Download offline maps for areas with limited internet access.

Image: Shows the GPS navigation interface with icons for popular navigation applications like iGO, Google Maps, and HERE WeGo.
7. Backup Camera
The included backup camera provides a clear, wide-angle view of the area behind your vehicle when reversing. Features include HD image quality, waterproof design, night vision, and a 170° wide viewing angle.

Image: Top section displays the backup camera view with parking guidelines. The bottom section shows the steering wheel control learning interface.

Image: Icons highlighting the key features of the backup camera: HD Image, Waterproof, Night Vision, and 170° wide view, with an example parking scenario.
8. Steering Wheel Control
The unit supports steering wheel controls, allowing you to manage functions like volume, track skipping, and answering calls without taking your hands off the wheel. The system includes a 'Steering Learn' function to map your vehicle's steering wheel buttons.

Image: Screenshot of the 'Steering Learn' interface, showing options for assigning various functions to steering wheel buttons.
9. Audio Features
9.1 FM/RDS Radio
Tune into your favorite FM radio stations. The RDS (Radio Data System) feature displays station information, song titles, and traffic updates where available.
9.2 Hi-Fi/DSP/EQ
The stereo is equipped with Hi-Fi audio processing, a Digital Sound Processor (DSP), and an Equalizer (EQ) to customize your audio experience. Adjust frequency bands, balance, and fader settings for optimal sound quality.

Image: Graphical interface for Hi-Fi, DSP, and EQ settings, showing adjustable frequency bands for front and rear speakers.
10. Maintenance
To ensure the longevity and optimal performance of your car stereo, follow these maintenance guidelines:
- Screen Cleaning: Use a soft, lint-free cloth to gently wipe the touch screen. For stubborn smudges, slightly dampen the cloth with water or a screen-safe cleaner. Avoid harsh chemicals.
- General Cleaning: Keep the unit free from dust and debris. Use a soft brush or compressed air to clean vents and buttons.
- Software Updates: Periodically check for available software updates to ensure the system runs efficiently and has the latest features.
- Temperature: Avoid exposing the unit to extreme temperatures for extended periods.
11. Troubleshooting
If you encounter issues with your car stereo, refer to the following common problems and solutions:
| Problem | Possible Cause | Solution |
|---|---|---|
| No Power | Incorrect wiring, blown fuse, vehicle battery issue. | Check power cable connections (yellow, red, black). Inspect vehicle fuses. Ensure battery is charged. |
| No Sound | Volume too low, mute activated, incorrect speaker wiring, amplifier issue. | Increase volume. Check mute setting. Verify speaker connections. Check external amplifier if used. |
| Bluetooth Not Connecting | Bluetooth off on phone/stereo, device not in pairing mode, interference. | Ensure Bluetooth is enabled on both devices. Put stereo in pairing mode. Restart both devices. |
| GPS Signal Lost | GPS antenna obstructed or disconnected, poor satellite coverage. | Ensure GPS antenna has a clear view of the sky and is securely connected. Move to an open area. |
| Backup Camera Not Displaying | Camera not powered, video cable disconnected, reversing trigger not connected. | Check camera power and video cable connections. Verify the 'Reversing Line' is correctly wired to the reverse light. |
| Screen Unresponsive | Software glitch, temporary freeze. | Perform a soft reset (refer to unit's specific reset method, usually a small reset button or holding power). If issue persists, contact support. |
12. Specifications
Detailed technical specifications for the Generic Android 13 Single DIN Car Stereo:
| Feature | Specification |
|---|---|
| Operating System | Android 13 |
| Display Size | 10.1 Inches |
| Touch Screen Type | Capacitive |
| Display Type | LED |
| Memory Storage Capacity | 64 GB |
| Connectivity Technology | Bluetooth 5.2, WiFi, FM/RDS |
| Mounting Type | Dashboard Mount (Single DIN) |
| Control Method | Touch, Voice |
| Map Type | Road (GPS Navigation) |
| Item Weight | 4.62 pounds |
| Package Dimensions | 11.69 x 9.09 x 5.31 inches |
| Manufacturer | electrosmart |
| ASIN | B0F2HJR881 |
13. Warranty and Support
For warranty information and technical support, please refer to the documentation provided with your purchase or contact the seller directly. Keep your proof of purchase for warranty claims.


