
1. Product Overview
The Toolkitrc M6AC is a versatile multi-function battery charger and discharger designed for various battery types, including LiPo, LiHV, LiFe, Lilon, LTO, NiMH, and Pb. It features a 2.0-inch IPS LCD screen for clear display of real-time charging status and offers both AC and DC input capabilities. This manual provides essential information for safe and efficient operation of your M6AC charger.
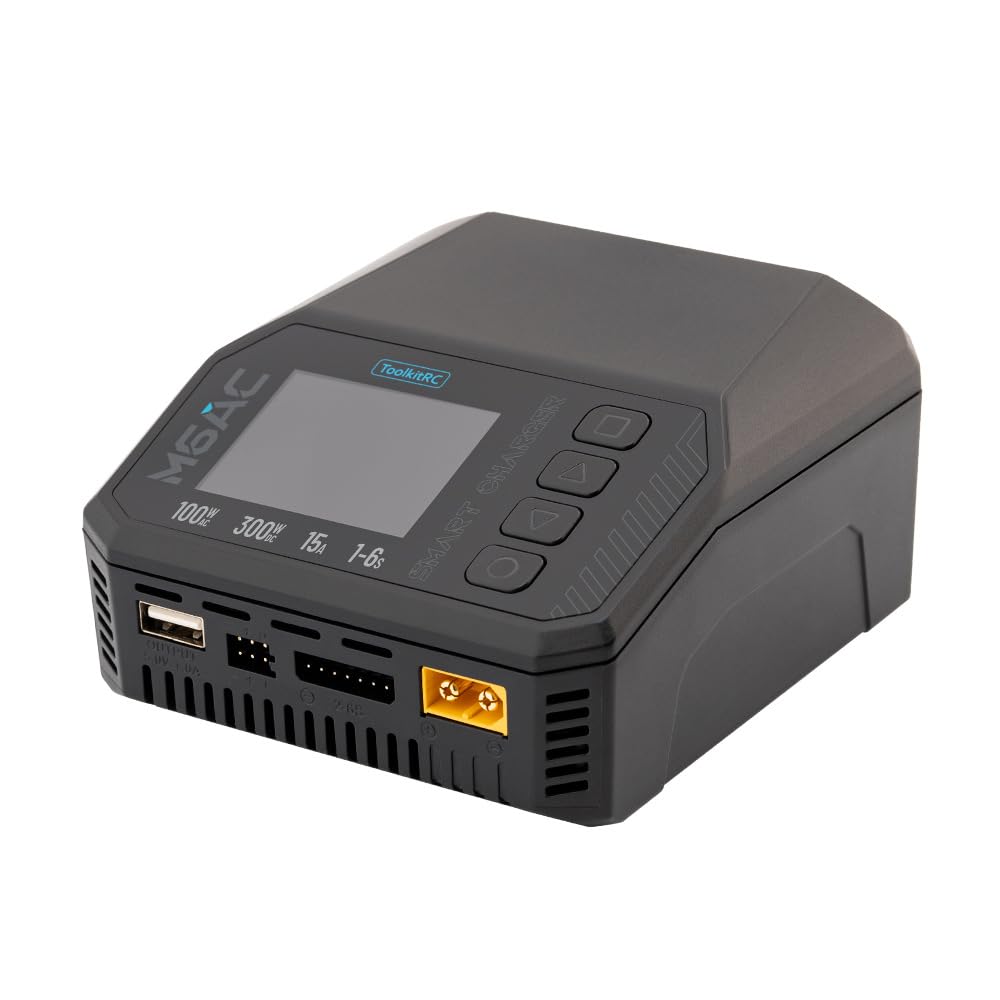
Image 1.1: The Toolkitrc M6AC charger shown alongside its retail packaging.
2. Key Features
- Dual Input Capability: Supports both AC 100-240V (up to 120W) and DC 7-35V (up to 30A) power inputs, enhancing charging flexibility.
- High Power Output: Delivers up to 300W charging and discharging power.
- Wide Battery Compatibility: Compatible with 1-6S LiPo, LiHV, LiFe, Lilon, LTO; 1-16S NiMH; and 1-10S Pb batteries.
- Robust Balance Current: Features a 1000mA balance current with high accuracy (<0.005V) for efficient battery balancing.
- 2.0-inch IPS LCD Display: Provides clear, real-time charging status and data from various viewing angles.
- Multi-Functionality: Beyond charging, it offers adjustable power supply, resistance and signal measurement, signal output, ESC testing, and can function as a drone charger.
- Comprehensive Security Protection: Includes short circuit, voltage, current, capacity, temperature, time-out, and cut-off protections, along with flame-retardant materials.

Image 2.1: Visual representation of the M6AC's primary features.
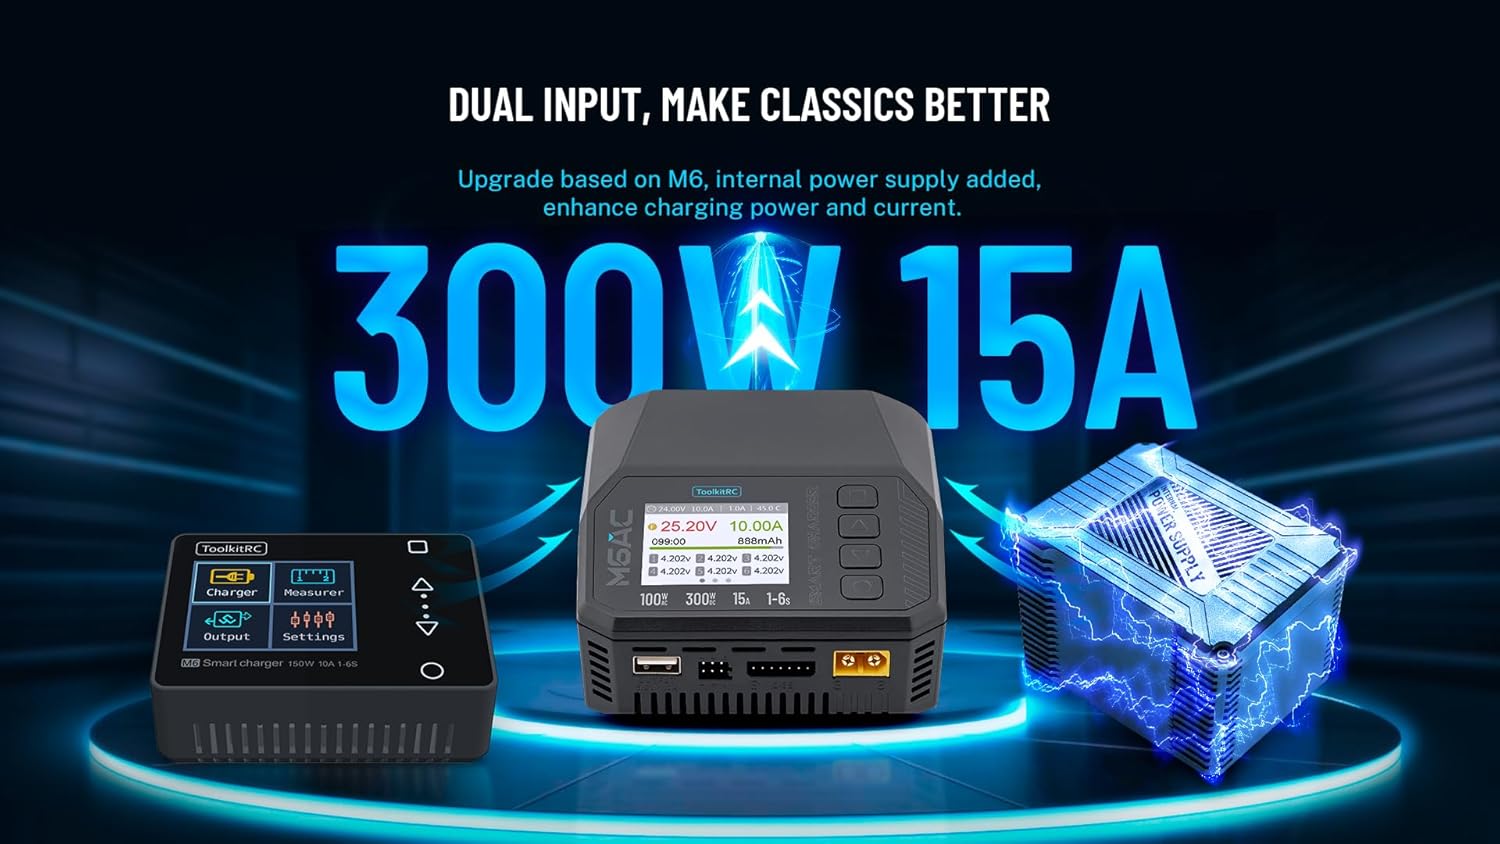
Image 2.2: The M6AC's dual input feature, showing both AC and DC power options.

Image 2.3: Illustration of the M6AC's efficient battery balancing capabilities.
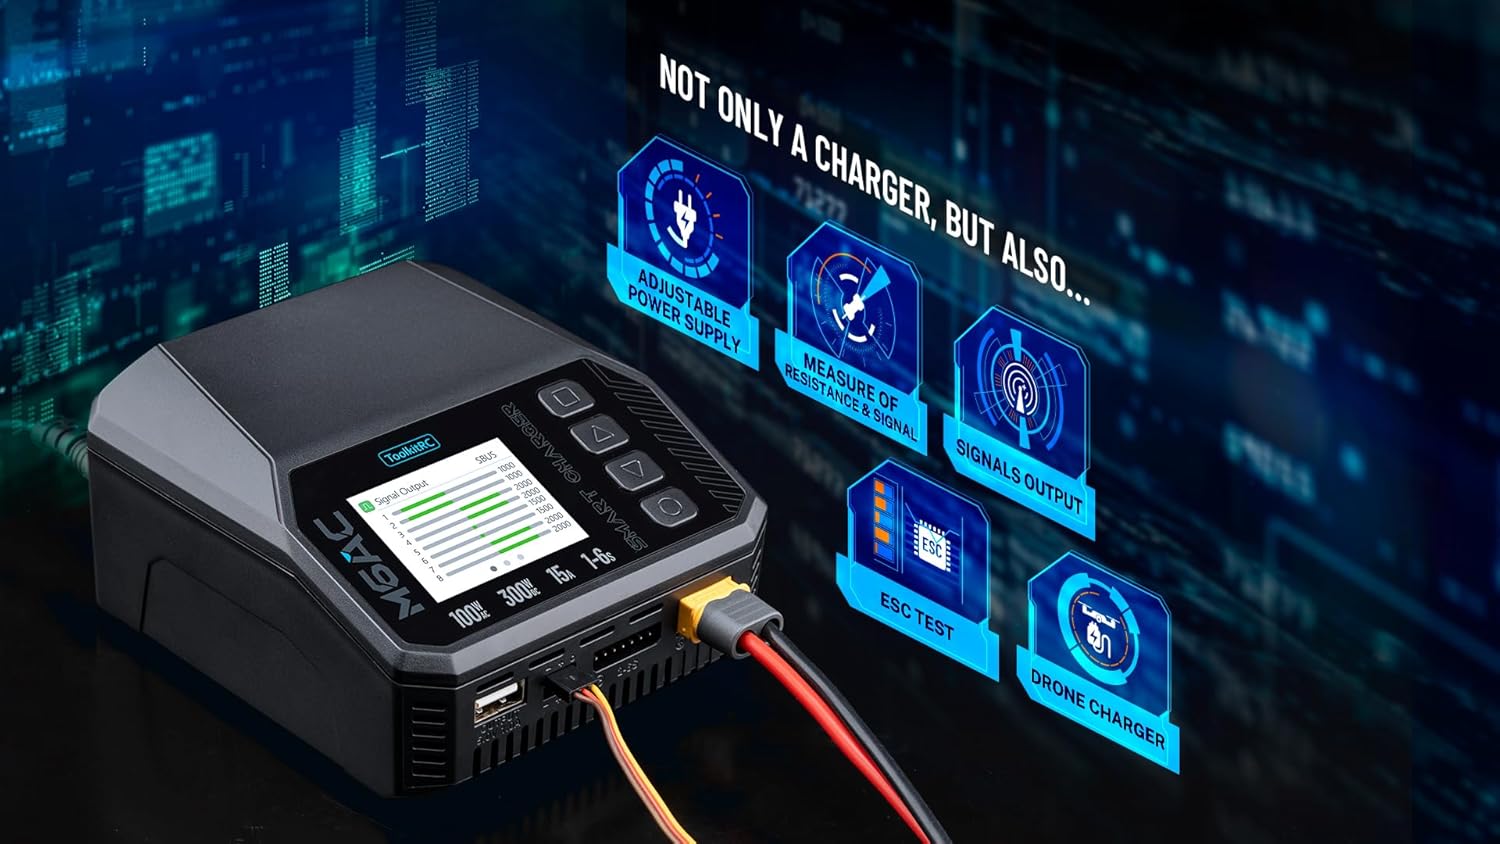
Image 2.4: The M6AC's additional functions beyond standard battery charging.

Image 2.5: The M6AC's 2.0-inch IPS LCD display offers clear visibility from wide angles.

Image 2.6: The M6AC incorporates multiple safety features for secure operation.
3. Technical Specifications

Image 3.1: Physical dimensions of the Toolkitrc M6AC charger.
Charger Parameters:
- Input Voltage: AC 100-240V @ MAX 120W, DC 7-35V @ MAX 30A
- Battery Type Compatibility:
- LiPo/LiHV/LiFe/Lilon/LTO: 1-6S
- NiMH: 1-16S
- Pb: 1-10S
- Balance Current: 1000mA @ 4.2V
- Balance Accuracy: <0.005V
- Charging Power: 0.1-15A @ 300W
- Discharging Power:
- Recycle Mode: 0.1-15A @ 300W
- Internal Mode: 0.1-3A @ 15W
- USBA Output: 5.0V/1.0A @ 10W (or upgrade)
Measurer Parameters:
- Voltage: 1.0V-5.0V @ 1-6S
- Internal Resistance: 0.1mΩ-99mΩ @ 1-6S
- PWM: 880us-2200us @ 20-400Hz
- PPM: 880us-2200us × 8 CH @ 20-50Hz
- SBUS: 880us-2200us × 16 CH @ 20-100Hz
Output Parameters:
- PWM: 500us-2500us @ 20-1000Hz
- PPM: 880us-2200us × 8 CH @ 50Hz
- SBUS: 880us-2200us × 16 CH @ 74Hz
- Power Supply: 0.5-15A @ 1-28V Mode: CC+CV
General:
- Product Dimensions: 108 × 106 × 60 mm (4.17"D x 4.25"W x 2.36"H)
- Product Weight: 350g (1.12 pounds)
- LCD: IPS 2.0″ LCD 320 × 240 px
- Manufacturer: newstartrc
- Certifications: FCC, RoHS
4. Initial Setup
- Unpack the Charger: Carefully remove the M6AC charger and all accessories from the packaging. Verify that all components listed in the "Package Contents" section are present.
- Power Connection:
- AC Power: Connect the provided AC input cable to the charger's AC input port and then to a standard wall outlet (100-240V).
- DC Power: Alternatively, connect a DC power source (7-35V) to the DC input port using appropriate cables. Ensure correct polarity.
- Initial Power On: Once connected to power, the charger's IPS LCD screen should illuminate, displaying the Toolkitrc logo and then the main interface.
- Language Selection (if prompted): Follow on-screen instructions to select your preferred language if this option appears during the first startup.
Note: Always ensure the charger is placed on a stable, non-flammable surface during operation.
5. Operating Instructions
The M6AC charger features an intuitive interface controlled by buttons adjacent to the LCD screen. Navigation typically involves using arrow buttons to scroll through menus and an 'OK' or 'Enter' button to confirm selections.
5.1. Charging a Battery
- Select Battery Type: From the main menu, navigate to the "Charger" section. Select the correct battery chemistry (e.g., LiPo, NiMH) and cell count (e.g., 3S, 6S) that matches your battery.
- Set Charging Parameters: Adjust the charging current (Amps) according to your battery's specifications. A common guideline is to charge at 1C (e.g., for a 5000mAh battery, charge at 5A).
- Connect Battery: Connect the main discharge lead of your battery to the charger's output port. For LiPo/LiHV/LiFe batteries, also connect the balance lead to the corresponding balance port on the charger.
- Start Charging: Confirm the settings and initiate the charging process. The screen will display real-time information such as current voltage, current, capacity charged, and cell voltages (for balanced charging).
- Monitor Progress: Continuously monitor the charging process. The charger will automatically stop when the battery is fully charged or if an error is detected.
- Disconnect Battery: Once charging is complete, disconnect the balance lead first, then the main discharge lead from the charger.
5.2. Discharging a Battery
- Select Discharge Mode: Navigate to the "Charger" section and select the discharge function. Choose between "Recycle Mode" (for higher power discharge, often requiring an external load or another battery) or "Internal Mode" (for lower power discharge using the charger's internal resistance).
- Set Discharge Parameters: Specify the discharge current and the desired end voltage for the battery.
- Connect Battery: Connect the battery as described for charging.
- Start Discharging: Confirm settings and begin the discharge process. Monitor the battery and charger.
5.3. Other Functions (Measurer, Power Supply, etc.)
- Measurer: Access the "Measurer" menu to check individual cell voltages, total pack voltage, and internal resistance of connected batteries. It also allows for PWM, PPM, and SBUS signal analysis.
- Power Supply: The M6AC can function as a regulated DC power supply. Navigate to the "Power Supply" option, set the desired output voltage (1-28V) and current (0.5-15A), and connect your device.
- Signal Output: Generate PWM, PPM, or SBUS signals for testing servos or other RC components.
Refer to the on-screen menu for specific navigation and setting adjustments for each function.
6. Maintenance
- Cleaning: Keep the charger clean and free from dust and debris. Use a soft, dry cloth for cleaning. Do not use solvents or abrasive cleaners.
- Storage: Store the charger in a cool, dry place away from direct sunlight and extreme temperatures.
- Cable Inspection: Regularly inspect all cables and connectors for signs of wear, damage, or corrosion. Replace damaged cables immediately.
- Firmware Updates: Check the manufacturer's website (Toolkitrc or newstartrc) periodically for firmware updates. Updates can improve performance and add new features. Use the provided USB cable for updates.
7. Troubleshooting
| Problem | Possible Cause | Solution |
|---|---|---|
| Charger does not power on. | No power supply, loose connection, faulty cable. | Ensure AC or DC power is connected correctly. Check cables for damage. Try a different power outlet or DC source. |
| "Connection Error" or "Battery Not Detected". | Battery not connected properly, damaged battery lead, incorrect battery type selected. | Verify battery main and balance leads are securely connected. Inspect leads for damage. Ensure the correct battery type and cell count are selected in the charger menu. |
| Charging process stops prematurely. | Over-temperature, over-voltage, capacity limit reached, internal resistance too high. | Check the charger and battery temperature. Ensure battery parameters are correctly set. Inspect battery health. |
| Display is dim or unreadable. | Brightness setting too low, screen protector issues. | Adjust screen brightness in the settings menu. Ensure the screen protector is applied correctly or remove it if it's causing issues. |
If problems persist, contact customer support. Do not attempt to disassemble the charger.
8. Safety Information
Read all safety warnings and instructions before using the charger. Failure to follow these instructions may result in electric shock, fire, or serious injury.
- Never leave charging batteries unattended.
- Always charge batteries on a non-flammable surface, away from flammable materials.
- Ensure proper ventilation during charging to prevent overheating.
- Do not charge damaged, swollen, or leaking batteries.
- Always use the correct battery type and cell count settings for the battery being charged. Incorrect settings can lead to fire or explosion.
- Keep the charger away from water, moisture, and extreme temperatures.
- Do not attempt to disassemble or modify the charger.
- Keep out of reach of children and pets.
- Disconnect the charger from the power source when not in use.
9. Package Contents
The Toolkitrc M6AC package includes the following items:
- M6AC Charger × 1
- AC Input Cable × 1
- USB Cable × 1
- Quick Manual × 1 (This document serves as a comprehensive guide)
- Screen Protector × 1
10. Warranty and Support
The Toolkitrc M6AC charger is covered by a manufacturer's warranty against defects in materials and workmanship. Please refer to the warranty card included in your package or visit the official Toolkitrc website for detailed warranty terms and conditions.
For technical support, troubleshooting assistance, or warranty claims, please contact the manufacturer or your authorized dealer. Keep your purchase receipt as proof of purchase.
- Manufacturer: newstartrc
- Model: M6AC
- Website: www.toolkitrc.com (Note: This is a placeholder URL, please refer to actual product documentation for official support channels.)


