1. Introduction
This manual provides essential instructions for the safe and effective installation, operation, and maintenance of your TANIQIACA 1000W 36V Electric Bicycle Controller and Throttle Grip Set. Please read this manual thoroughly before use to ensure proper function and to prevent damage or injury. Keep this manual for future reference.
2. Product Overview
2.1 Components Included
The package includes the following items:
- 1 x Electric Bicycle Controller (1000W, 36V)
- 1 Pair x Throttle Grips (left and right, with integrated power display and key lock)
- 2 x Keys for the throttle lock
2.2 Key Features
- Powerful Controller: 1000W rated power and 36V rated voltage for stable and efficient performance.
- Advanced Throttle Grip: Features a key lock for security and an integrated LED power display for monitoring battery levels.
- Comfortable Design: Soft rubber material on grips for enhanced comfort during extended use.
- Durable Construction: Controller shell made from aluminum alloy for protection and efficient heat dissipation.
2.3 Product Visuals

Image 1: Overview of the TANIQIACA 1000W 36V Electric Bicycle Controller and Throttle Grip Set, showing the controller unit with its wiring harness, the pair of throttle grips (one with integrated display and key switch), and two keys.
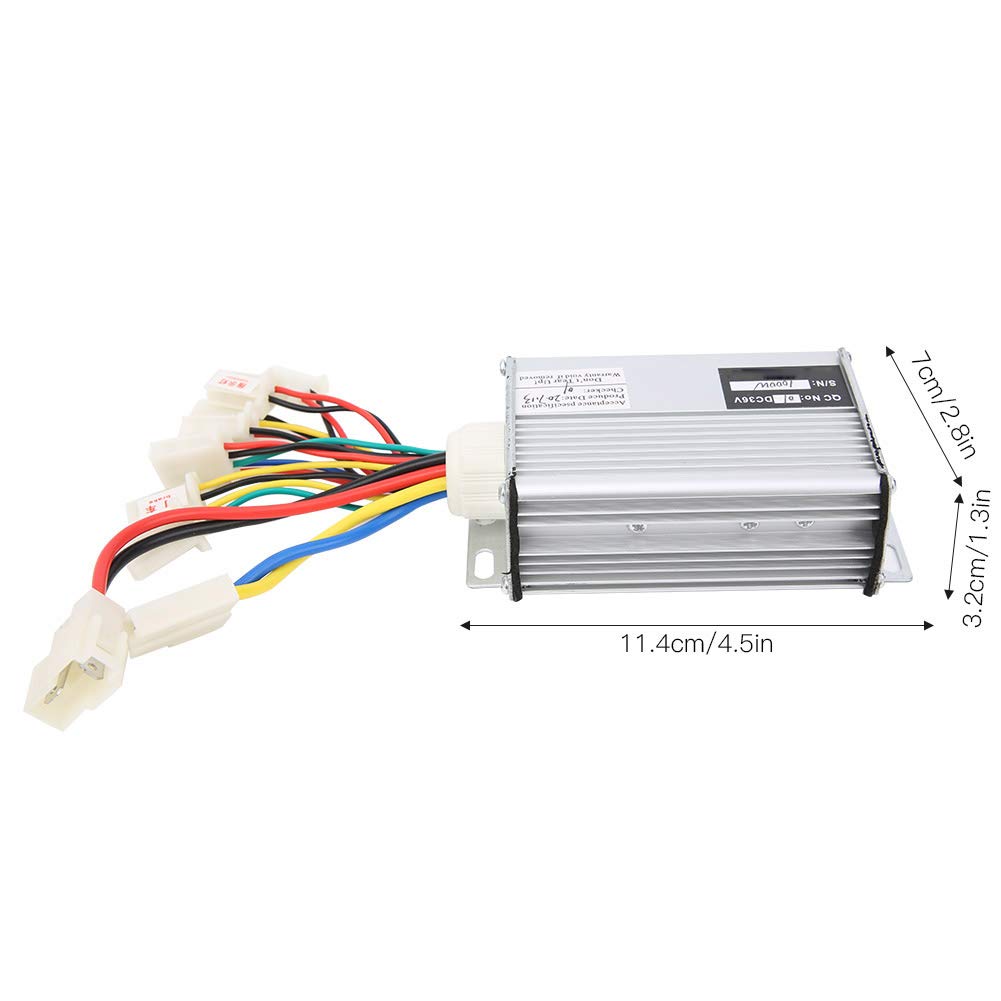
Image 2: The electric bicycle controller unit with approximate dimensions indicated: 11.4 cm (4.5 inches) in length, 7 cm (2.8 inches) in width, and 3.2 cm (1.3 inches) in height. This image highlights the compact size of the controller.

Image 3: A closer view of the TANIQIACA throttle grips and keys. One grip features an integrated LED power display and a key switch for turning the system on/off, while the other is a standard grip. Both grips have a textured, soft rubber surface for comfort and control.
3. Safety Information
- Professional Installation Recommended: Due to the electrical nature of this product, professional installation by a qualified technician is highly recommended to ensure correct wiring and safe operation.
- Power Disconnection: Always disconnect the battery power before performing any installation, maintenance, or troubleshooting.
- Voltage Compatibility: Ensure your electric bicycle's battery voltage matches the controller's rated voltage (DC36V). Incorrect voltage can cause severe damage to the components.
- Wiring: Follow all wiring diagrams and instructions carefully. Incorrect wiring can lead to short circuits, component damage, or fire.
- Environmental Conditions: Avoid exposing the controller and grips to extreme temperatures, moisture, or corrosive environments.
- Secure Mounting: Ensure all components are securely mounted to prevent loosening during operation, which could lead to loss of control or damage.
4. Setup and Installation
This section provides general guidance for installation. Specific wiring configurations may vary depending on your electric bicycle model. Consult a professional if you are unsure about any steps.
4.1 Controller Mounting
- Choose a secure and protected location on your electric bicycle for the controller, away from direct water exposure and physical impact.
- Mount the controller using appropriate fasteners, ensuring it is firmly attached and does not vibrate excessively during operation. The aluminum alloy shell is designed for heat dissipation, so ensure adequate airflow around the unit.
4.2 Throttle Grip Installation
- Remove existing grips from your handlebars.
- Slide the new TANIQIACA throttle grips onto the handlebars. The grip with the integrated display and key switch typically goes on the right side.
- Secure the grips in place, ensuring they do not rotate freely and the throttle mechanism operates smoothly without obstruction.
4.3 Wiring Connections
The controller features a multi-wire harness designed for various connections. While specific color codes can vary, general connections include:
- Battery Power: Connect the main power wires from the controller to your 36V battery. Ensure correct polarity (positive to positive, negative to negative).
- Motor: Connect the motor phase wires and Hall sensor wires from the controller to your electric bicycle motor.
- Throttle: Connect the throttle grip's wiring harness to the corresponding throttle input on the controller. This typically includes power, ground, and signal wires.
- Key Switch: The key switch on the throttle grip connects to the controller's power lock circuit, enabling or disabling the system.
- Power Display: The power display on the throttle grip connects to the controller to show battery voltage/level.
- Other Accessories: Additional connections may include brake levers (with cut-off switches), pedal assist sensors (PAS), and lights, depending on your e-bike's configuration. Refer to your e-bike's specific wiring diagram for these connections.
Warning: Incorrect wiring can damage the controller, motor, or battery, and may pose a fire hazard. If you are not experienced with electrical wiring, seek professional assistance.

Image 4: A detailed view of the TANIQIACA electric bicycle controller's wiring harness, showing multiple color-coded connectors. Each connector serves a specific function, such as connecting to the battery, motor, throttle, and other accessories. Proper identification and connection of these wires are crucial for correct operation.
5. Operating Instructions
5.1 Powering On/Off
- To power on the electric bicycle system, insert the key into the throttle grip's key switch and turn it to the "ON" position. The integrated power display should illuminate.
- To power off, turn the key to the "OFF" position and remove it.
5.2 Using the Throttle
Once the system is powered on, gently twist the right throttle grip towards you to engage the motor. The amount of twist corresponds to the power output and speed. Release the throttle to reduce power or stop.
5.3 Reading the Power Display
The LED display on the throttle grip indicates the current battery charge level. Monitor this display to avoid running out of power unexpectedly. A full display indicates a fully charged battery, while fewer illuminated segments or a lower voltage reading indicate a decreasing charge.
6. Maintenance
- Regular Inspection: Periodically check all wiring connections for tightness and signs of wear or damage. Ensure the controller is securely mounted.
- Cleaning: Keep the controller and throttle grips clean. Use a soft, dry cloth to wipe away dust and dirt. Avoid using harsh chemicals or excessive moisture.
- Heat Dissipation: Ensure the controller's fins are free from obstructions to allow for proper heat dissipation.
- Cable Management: Ensure all cables are neatly routed and secured to prevent snagging or damage during riding.
7. Troubleshooting
| Problem | Possible Cause | Solution |
|---|---|---|
| System does not power on. |
|
|
| Motor does not respond to throttle. |
|
|
| Power display is not working or inaccurate. |
|
|
For complex issues or if troubleshooting steps do not resolve the problem, it is recommended to seek assistance from a qualified electric bicycle technician.
8. Specifications
| Feature | Detail |
|---|---|
| Brand | TANIQIACA |
| Model Number | TANIQIACA3xr6y2gct7 |
| Rated Power | 1000W |
| Rated Voltage | DC36V |
| Controller Box Size (Approx.) | 11.4 x 7 x 3.2 cm (4.5 x 2.8 x 1.3 inches) |
| Material | Aluminum alloy (controller shell) + Rubber (grips) |
| Weight (Approx.) | 637g (1.4 lbs) |
9. Warranty and Support
For warranty information, please refer to the terms and conditions provided by your retailer or contact TANIQIACA directly. Keep your proof of purchase for any warranty claims.
If you require technical support or have questions not covered in this manual, please contact the seller or manufacturer through their official support channels. When contacting support, please provide your product model number (TANIQIACA3xr6y2gct7) and a detailed description of the issue.