1. Introduction
This manual provides essential information for the safe and effective operation of your EENOUR HM2319 Resin Bubble Remover. Please read these instructions thoroughly before first use and retain for future reference. This device is designed to efficiently remove air bubbles from various resin types, ensuring crystal-clear results for your crafting projects.
Safety Precautions
- Always use the device on a stable, level surface.
- Ensure the lid is securely latched before operating.
- Do not pour resin directly into the bubble removing machine; always use appropriate containers.
- Keep out of reach of children and pets.
- Disconnect from power when not in use or during cleaning.
- Avoid exposing the device to water or excessive moisture.
2. Product Overview
The EENOUR HM2319 Resin Bubble Remover is an intelligent vacuum chamber designed for efficient bubble elimination in resin. It features high-vacuum technology and a user-friendly digital display.
Key Features:
- Effortless Bubble Removal: Utilizes -98kPa high vacuum technology for up to 99% bubble removal in 5 minutes with one-touch automation.
- Large Capacity: Processes up to 3 x 8 oz (240 ml) cups or 1 x 32 oz (960 ml) cup of resin per cycle, with a total capacity of 3.4L (38oz).
- Smart Digital Control Display: Provides real-time tracking of pressure levels and a customizable countdown timer (05:00 to 59:59).
- Low Noise & Stable Operation: Operates at 58-61dB with an integrated non-slip silicone base to prevent spills.
- Versatile Applications: Suitable for resin casting, jewelry making, sculpture crafting, landscape DIY, and model making.
- Durable Construction: Built with premium material for superior pressure and crack resistance.
- Bonus Accessories: Includes a removable silicone mat for easy cleaning in case of drips, and 10 measuring cups with ratio markings.
Components:

This image shows the main unit of the EENOUR HM2319 Resin Bubble Remover, a purple and clear vacuum chamber. To its right, two clear cups illustrate the product's function: one cup contains resin with many bubbles, while the other shows clear, bubble-free resin, indicating the effectiveness of the remover.

A close-up view of the EENOUR HM2319's control panel, highlighting the digital display and control buttons. Labels point to the 'Switch', 'Start/Pause', 'Vacuum Level', 'Timer Display', 'Time Increase', and 'Time Decrease' buttons, illustrating the intuitive interface for operation.

This image showcases a variety of finished resin art pieces, including jewelry, decorative items, and molds, demonstrating the versatile applications of the EENOUR HM2319 Resin Bubble Remover in achieving clear, professional-grade results across different crafting projects.
This image displays the EENOUR HM2319 Resin Bubble Remover along with its bonus accessories: a removable silicone mat for easy cleaning and multiple measuring cups with ratio markings, designed to enhance the user's workflow and ensure accurate resin mixing.
3. Setup
- Unpack: Carefully remove all components from the packaging. Verify that all accessories, including the silicone mat and measuring cups, are present.
- Placement: Place the EENOUR HM2319 on a stable, flat, and dry surface. Ensure adequate space around the unit for ventilation.
- Power Connection: Connect the power adapter to the device's power port and then plug it into a standard electrical outlet.
- Initial Cleaning: Before first use, wipe the interior of the vacuum chamber and the silicone mat with a damp cloth. Ensure all parts are dry before use.

This image displays the EENOUR HM2319 Resin Bubble Remover alongside its packaging box and included accessories. The main unit is a purple and clear vacuum chamber. Next to it are two clear measuring cups (one with bubbles, one without) and a white silicone mat, all ready for use.
4. Operating Instructions
- Prepare Resin: Mix your resin components (e.g., resin A and B) thoroughly in one of the provided measuring cups. Ensure the resin is mixed according to its manufacturer's instructions. Bubbles will be present after mixing.
- Place Resin in Chamber: Open the lid of the EENOUR HM2319 by unlatching the side clips and lifting the top handle. Place the measuring cup containing the mixed resin onto the silicone mat inside the vacuum chamber.
- Secure Lid: Close the lid firmly and ensure the side clips are securely latched.
- Connect Power: Plug the power cable into the designated port on the device.
- Power On: Press the power button (⏻) to turn on the device. The digital display will illuminate.
- Set Timer: Use the up (▲) and down (▼) arrow buttons to set the desired vacuum time. The timer can be adjusted from 5 minutes to 59 minutes and 59 seconds (05:00 to 59:59). A typical cycle for most resins is 5 minutes.
- Start Vacuum: Press the Start/Pause button (▶‖) to begin the bubble removal process. The vacuum level (kPa) and countdown timer will be displayed. You will observe bubbles rising and bursting in the resin.
- Monitor Process: The transparent chamber allows you to monitor the bubble removal. If the resin rises significantly, you may pause the process by pressing the Start/Pause button, wait for it to settle, and then resume.
- Completion: Once the timer reaches zero, the device will automatically stop.
- Release Pressure: Gently press the pressure release valve on the top of the lid to equalize the pressure inside the chamber. You will hear a hissing sound as air enters.
- Remove Resin: Once the pressure is fully released, unlatch the clips, open the lid, and carefully remove your bubble-free resin.

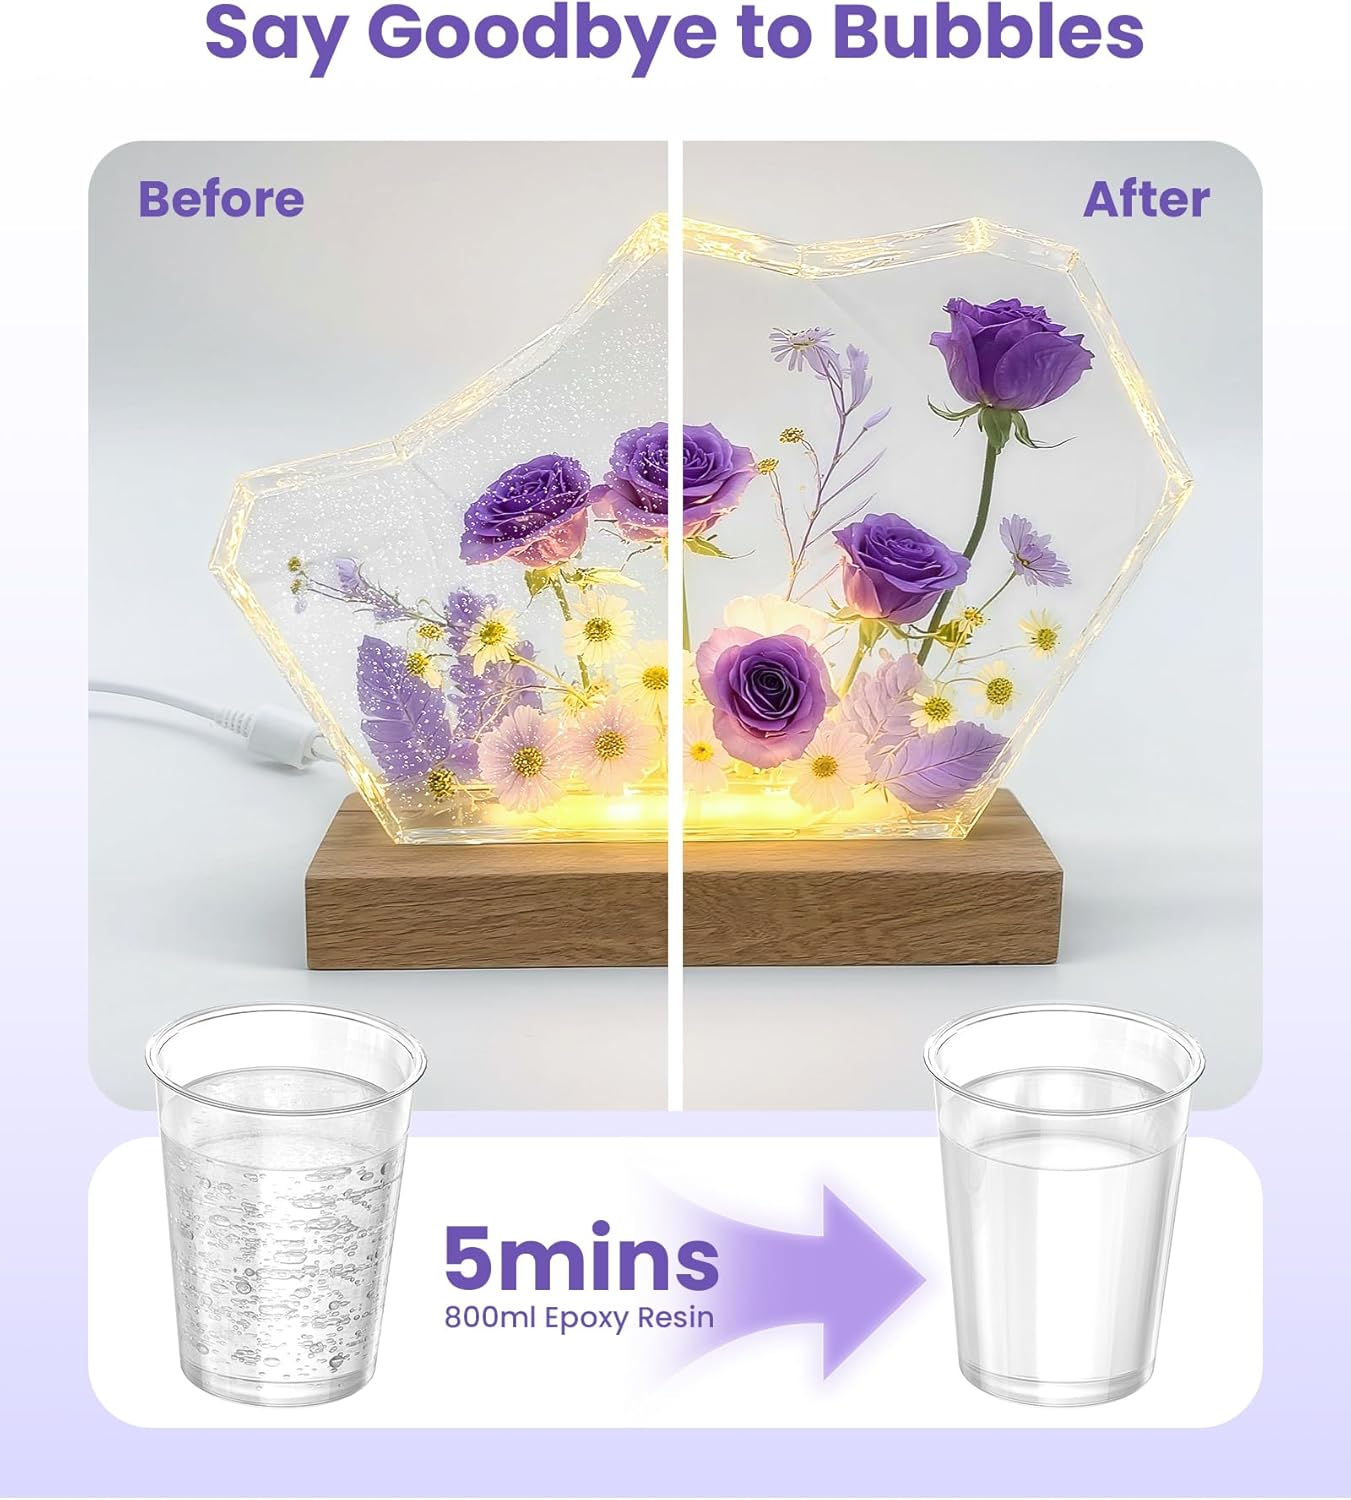
This image visually demonstrates the effectiveness of the EENOUR HM2319. On the left, a resin art piece is filled with numerous small bubbles, appearing cloudy. On the right, the same art piece is crystal clear and bubble-free after processing, highlighting the product's ability to achieve flawless results.

An internal view of the EENOUR HM2319 vacuum chamber, illustrating the powerful -98kPa vacuum technology. Bubbles are visibly being drawn out of the resin, showcasing the high-performance bubble elimination system at work.

This image highlights the adjustable smart timing feature of the EENOUR HM2319. A hand is shown interacting with the digital control panel, which displays a time setting of "05:00". The visual emphasizes the ease of customizing the vacuum duration for different resin volumes and viscosities.
Official Product Video: EENOUR Resin Bubble Remover in Use
This video demonstrates the EENOUR Resin Bubble Remover in action, showcasing the process from mixing resin to placing it in the vacuum chamber, operating the device, and revealing the final bubble-free result. It highlights the ease of use and the effectiveness of the high-vacuum technology for various resin projects.
5. Maintenance
- Cleaning: After each use, wipe the interior of the vacuum chamber and the silicone mat with a soft, damp cloth. For resin spills, allow the resin to cure on the silicone mat, then peel it off. Do not use abrasive cleaners or solvents.
- Storage: Store the device in a cool, dry place away from direct sunlight and extreme temperatures.
- Silicone Mat: The removable silicone mat is designed for easy cleaning in case of drips or spills.
6. Troubleshooting
| Problem | Possible Cause | Solution |
|---|---|---|
| Device does not power on. | Power cable not connected, power outlet issue. | Ensure power cable is securely plugged in. Test the outlet with another device. |
| Bubbles not fully removed. | Insufficient vacuum time, resin too viscous, overfilled container. | Increase vacuum time. Ensure resin is within recommended viscosity. Do not overfill cups (fill only 1/2 full to prevent overflow). After degassing, any remaining surface bubbles can be removed with alcohol spray, a heat gun, or by letting the resin rest. |
| Resin overflows during vacuum. | Container overfilled. | Reduce the amount of resin in the container. Fill cups only 1/2 full. |
| Device is noisy. | Normal operation sound, unstable surface. | The device operates at a low noise level (58-61dB). Ensure it is on a stable surface; the non-slip silicone base helps reduce vibration. |
7. Specifications
- Model Number: HM2319
- Brand: EENOUR
- Product Dimensions: 7.52 x 7.52 x 11.81 inches
- Item Weight: 4.54 pounds
- Vacuum Pressure: -98kPa
- Capacity: Up to 3.4L (38oz)
- Timer Range: 05:00 - 59:59 minutes
- Noise Level: 58-61dB
- Manufacturer: EENOUR
- ASIN: B0F2981FDS
- Date First Available: August 1, 2025
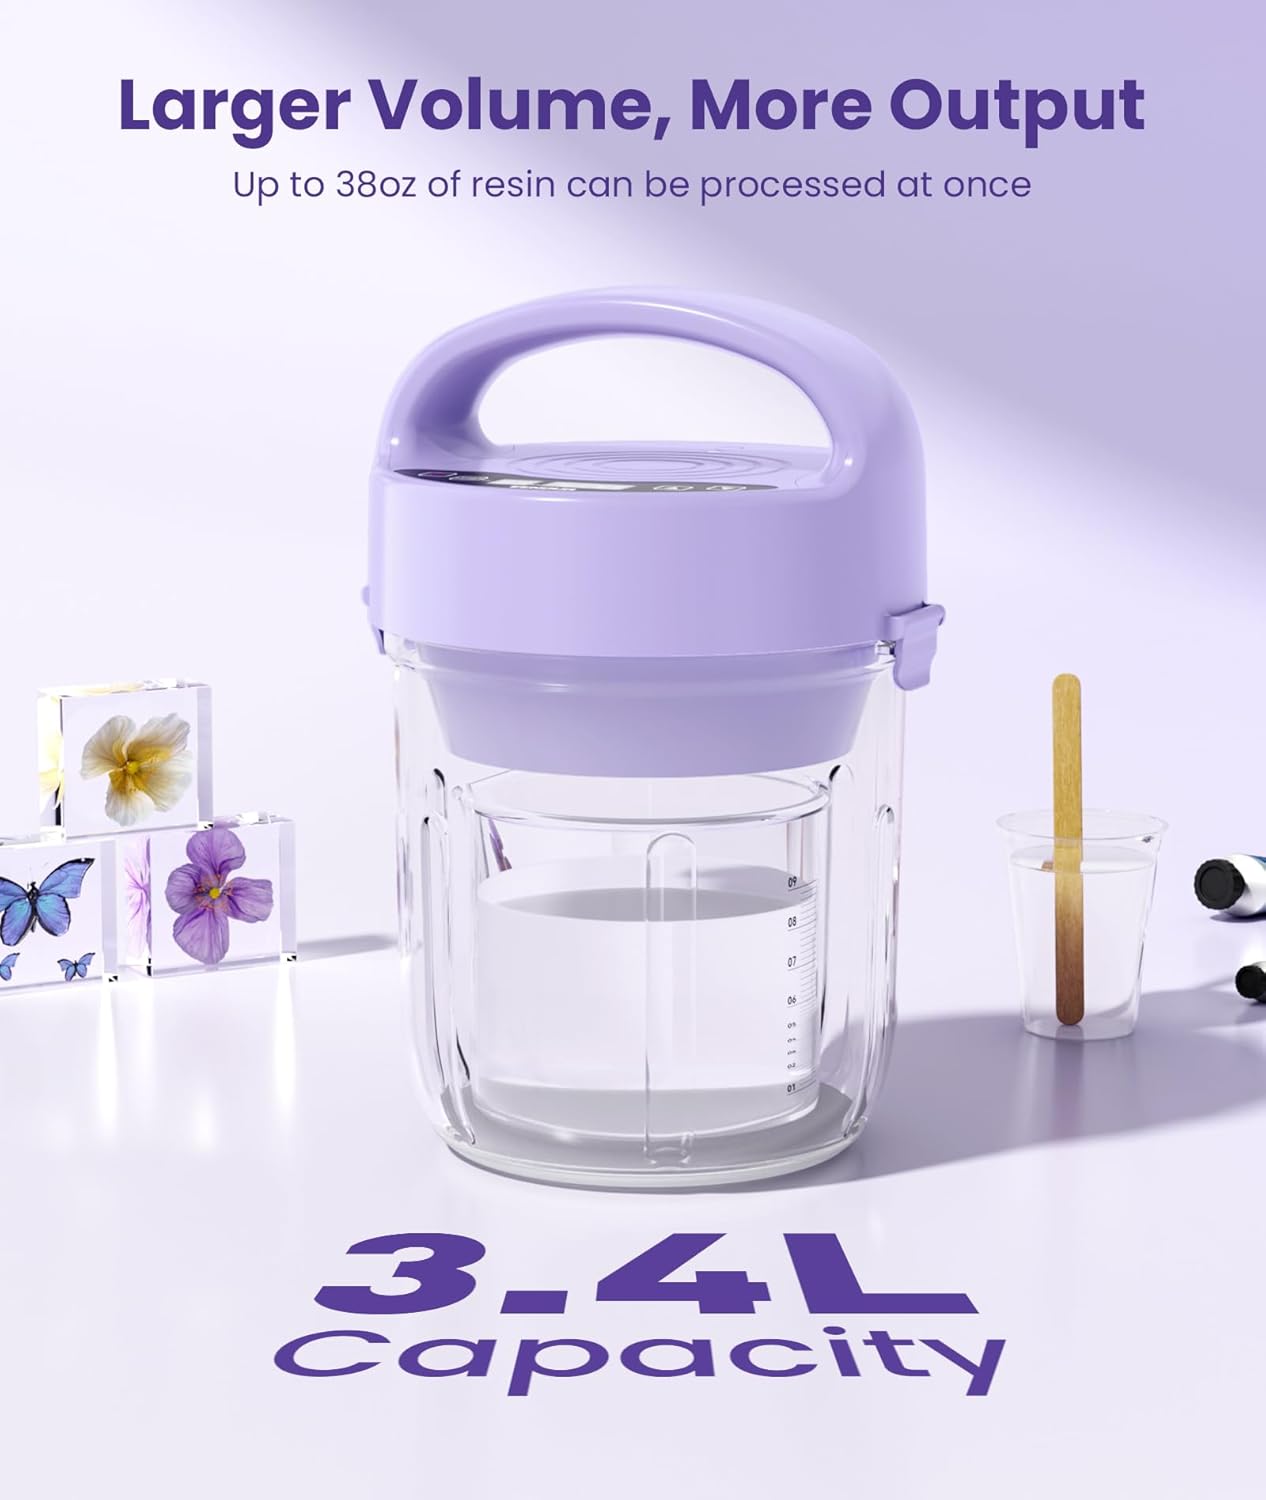
This image highlights the large capacity of the EENOUR HM2319, capable of processing up to 3.4 liters (38 oz) of resin at once. The clear chamber contains a measuring cup filled with resin, surrounded by various resin art pieces like flowers and butterflies, illustrating its suitability for diverse projects.
8. Warranty and Support
EENOUR offers a 100% Satisfaction Guarantee. For optimal performance, please consult this instruction manual before initial use. Should you have any questions or encounter issues, our 24/7 customer support team is available to assist you and ensure your complete satisfaction.
For support, please refer to the contact information provided with your product or visit the official EENOUR website.


