1. Introduction
Welcome to the user manual for your new ASUS Zen AIO 23.8" FHD Touchscreen Desktop Computer. This manual provides essential information for setting up, operating, maintaining, and troubleshooting your device. Please read this manual thoroughly to ensure proper use and to maximize the performance and longevity of your computer.
The ASUS Zen AIO is an all-in-one desktop solution designed for efficiency and user experience, featuring a 23.8-inch Full HD touchscreen display, an AMD Ryzen 7 5825U processor, 16GB DDR4 RAM, and a 512GB PCIe NVMe M.2 SSD, running on Windows 11 Pro.
2. Product Overview
2.1. Package Contents
- ASUS Zen AIO Desktop Computer
- Wireless Keyboard
- Wireless Mouse
- Power Adapter
- User Manual (this document)
2.2. Component Identification
Familiarize yourself with the various components and ports of your ASUS Zen AIO.

Figure 2.1: Front View. The ASUS Zen AIO features a 23.8-inch Full HD touchscreen display with a narrow bezel, and a speaker bar integrated below the screen. The webcam is located at the top center of the display.
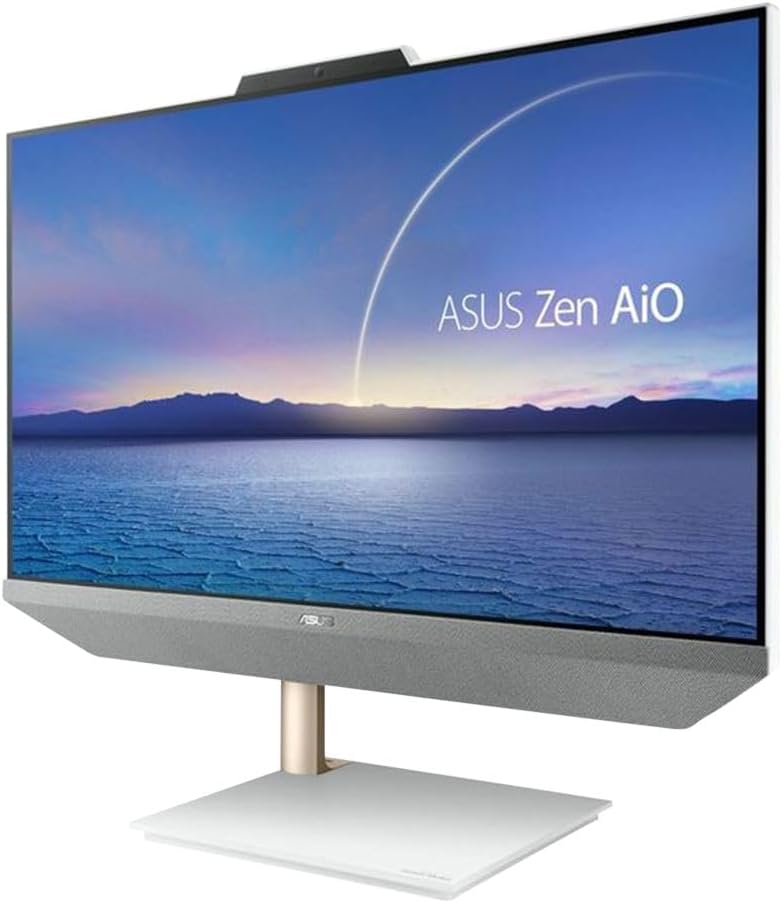
Figure 2.2: Angled View. This image shows the ASUS Zen AIO from an angled perspective, highlighting the slim profile and the elegant stand design.

Figure 2.3: Side View with Ports. The side of the ASUS Zen AIO features various connectivity options for peripherals and external devices.

Figure 2.4: Back View. The rear of the ASUS Zen AIO shows the ASUS logo and the main port cluster for power and additional connections.

Figure 2.5: Included Peripherals. The ASUS Zen AIO comes with a matching wireless keyboard and mouse for immediate use.
2.3. Display and Audio Features

Figure 2.6: Display Features. The 23.8-inch Full HD (1920x1080) WVA Anti-Glare Touch Screen offers a 93% screen-to-body ratio, 100% sRGB color gamut, IPS-level wide-view technology, and a 7.7 mm thin bezel for an immersive visual experience. It supports 10-point multi-touch input.

Figure 2.7: Audio Features. The ASUS Zen AIO is equipped with array microphones for clear voice input and Harman/Kardon certified upward-facing speakers with a 300cc chamber for rich audio output.
3. Setup
3.1. Unpacking and Placement
- Carefully remove the ASUS Zen AIO and its accessories from the packaging.
- Place the computer on a stable, flat surface with adequate ventilation. Ensure there is enough space around the device for heat dissipation.
- Avoid placing the computer in direct sunlight or near heat sources.
3.2. Connecting Power
- Connect the power adapter to the power input port on the back of the ASUS Zen AIO.
- Plug the power cord into a grounded electrical outlet.
3.3. Connecting Peripherals
- Wireless Keyboard and Mouse: The included keyboard and mouse are pre-paired. Insert the USB receiver (usually found in the mouse or keyboard battery compartment) into an available USB port on the computer. Ensure batteries are installed in both devices.
- External Devices: Connect any other external devices (e.g., external hard drives, printers) to the appropriate USB ports.
- Network Connection: For a wired network connection, connect an Ethernet cable from your router or modem to the LAN RJ-45 port on the back of the computer. For Wi-Fi, the device supports Wi-Fi 6 (802.11ax) and will guide you through setup during the initial Windows configuration.
3.4. Initial Power On and Windows Setup
- Press the power button, typically located on the side or back of the display.
- Follow the on-screen instructions to complete the Windows 11 Pro setup process. This includes selecting your region, connecting to a network, creating a user account, and configuring privacy settings.
4. Operating Instructions
4.1. Using the Touchscreen
- Tap: Equivalent to a mouse click.
- Double-tap: Equivalent to a double-click.
- Press and hold: Equivalent to a right-click.
- Swipe: Move your finger across the screen to scroll or navigate.
- Pinch-to-zoom: Use two fingers to zoom in or out on content.
4.2. Windows 11 Pro Basics
- Start Menu: Access applications, settings, and power options from the Start button on the taskbar.
- Taskbar: Pin frequently used applications for quick access.
- Action Center: Access quick settings and notifications by clicking the icons on the far right of the taskbar.
- Multitasking: Use Snap Layouts to organize multiple windows on your screen efficiently.
4.3. Power Management
- Shut Down: Go to Start > Power > Shut down.
- Restart: Go to Start > Power > Restart.
- Sleep: Go to Start > Power > Sleep.
5. Maintenance
5.1. Cleaning the Device
- Screen: Use a soft, lint-free cloth slightly dampened with water or a screen cleaner specifically designed for LCD/LED displays. Do not spray cleaner directly onto the screen.
- Chassis: Wipe the exterior surfaces with a soft, dry cloth. Avoid abrasive cleaners or solvents.
- Ventilation: Periodically check and clean the ventilation openings to prevent dust buildup, which can affect performance and lead to overheating. Use compressed air if necessary.
5.2. Software Updates
Regularly update your Windows operating system and drivers to ensure optimal performance, security, and compatibility.
- Windows Updates: Go to Start > Settings > Windows Update.
- Driver Updates: Visit the official ASUS support website for the latest drivers for your Zen AIO model.
6. Troubleshooting
This section addresses common issues you might encounter with your ASUS Zen AIO.
6.1. No Power
- Ensure the power adapter is securely connected to both the computer and a working electrical outlet.
- Test the outlet with another device to confirm it has power.
- Check the power adapter for any visible damage.
6.2. Display Issues
- If the screen is blank, ensure the computer is powered on and not in sleep mode.
- Adjust the display brightness settings in Windows.
- If using an external monitor, ensure the correct input source is selected on the external monitor.
6.3. Peripheral Not Responding
- Wireless Keyboard/Mouse: Check battery levels and ensure the USB receiver is properly inserted into a functional USB port. Try a different USB port.
- Other USB Devices: Try connecting the device to a different USB port. Restart the computer.
6.4. Slow Performance
- Close unnecessary applications running in the background.
- Ensure Windows and drivers are up to date.
- Check for malware or viruses using reputable antivirus software.
- Ensure sufficient free space on the SSD.
7. Specifications
Below are the detailed technical specifications for the ASUS Zen AIO Desktop Computer.
| Feature | Specification |
|---|---|
| Model Name | Zen AIO |
| Operating System | Windows 11 Pro |
| CPU | AMD Ryzen 7 5825U (2.0GHz, Up to 4.5GHz), Eight-Core, 16 Threads |
| Graphics | AMD Radeon Graphics |
| RAM | 16GB DDR4 |
| Storage | 512GB PCIe 3.0 x4 NVMe M.2 SSD |
| Display | 23.8" Full HD (1920x1080) WVA Anti-Glare Touch Screen |
| Webcam | 720p |
| Audio | Built-in Speaker, Built-in Microphone (Array Microphones), Harman/Kardon certified |
| LAN | Gigabit LAN (10/100/1000Mbps) |
| WLAN | 2x2 Wi-Fi 6 802.11ax |
| Bluetooth | Bluetooth 5.2 |
| Ports (Back Panel) |
|
| Power Supply | 90 Watt External Adapter |
| Dimensions (LxWxH) | 21.30 x 17.83 x 0.55 inches |
| Weight | 15.43 lbs |
8. Warranty and Support
Your ASUS Zen AIO Desktop Computer comes with a standard manufacturer's warranty. Please refer to the warranty card included in your package for specific terms and conditions, including warranty period and coverage details.
For technical support, driver downloads, FAQs, and further assistance, please visit the official ASUS support website: www.asus.com/support/.
When contacting support, please have your product model (Zen AIO) and serial number ready. The serial number is typically located on a sticker on the back or bottom of the device.


