1. Introduction
Thank you for choosing the Generic Queen Size Bed Frame. This manual provides essential information for the safe assembly, operation, and maintenance of your new bed frame. Please read these instructions carefully before assembly and retain them for future reference.
2. Safety Information
- Ensure all parts are present and undamaged before beginning assembly. Do not use if any parts are missing or broken.
- Assemble the bed frame on a soft, clean surface to prevent scratches.
- Always use the correct tools as specified in the assembly guide.
- Do not overtighten screws or bolts, as this may damage the material.
- Keep children and pets away from the assembly area.
- For electrical components (LED lights, charging station), ensure proper connection to a suitable power outlet. Do not overload the charging station.
- Regularly check all connections and fasteners to ensure they remain tight.
3. Package Contents
The bed frame is delivered in one box and includes all necessary components and hardware for assembly. Please refer to the detailed parts list in the included instruction book to verify all items are present.
Included Components: All parts as depicted in the assembly diagram, including frame components, headboard, drawers, LED strip, charging station, and hardware kit.
4. Setup and Assembly Instructions
Assembly of this bed frame is designed to be straightforward, typically taking approximately 45 minutes. Follow the complete instructions book and numbered parts provided in the package.
- Unpack and Identify Parts: Carefully unpack all components and lay them out on a clean, soft surface. Match each part to the corresponding number in the instruction book.
- Assemble the Frame: Begin by connecting the main frame components as per the step-by-step diagrams. Ensure all bolts are securely tightened.
- Install the Headboard: Attach the headboard to the main frame, ensuring the LED strip and charging station components are correctly aligned.
- Assemble and Insert Drawers: Assemble the 8 storage drawers according to the instructions. The drawers are equipped with pulleys for smooth operation. Insert them into their designated slots under the bed frame.
- Install Slats: Place the metal platform slats onto the frame. These slats are designed to provide stable mattress support without the need for a box spring and prevent mattress sliding.

Figure 1: Overall dimensions and component breakdown of the bed frame.

Figure 2: The integrated design ensures mattress stability, preventing sliding.
5. Operating Instructions
5.1 LED Headboard Lighting
The headboard features multifunctional LED light strips. Connect the power cord to a standard electrical outlet.
- Color Control: Choose from 16 beautiful RGB LED light colors, with access to over 60,000 colors via the mobile application.
- Brightness Adjustment: Adjust the light intensity to your preference.
- Mode Selection: Select various lighting modes (e.g., static, flashing, fading).
- Timing Functions: Set timers for the lights to turn on or off automatically.
- Control: Use the included switch controller or download the dedicated mobile application for advanced control.
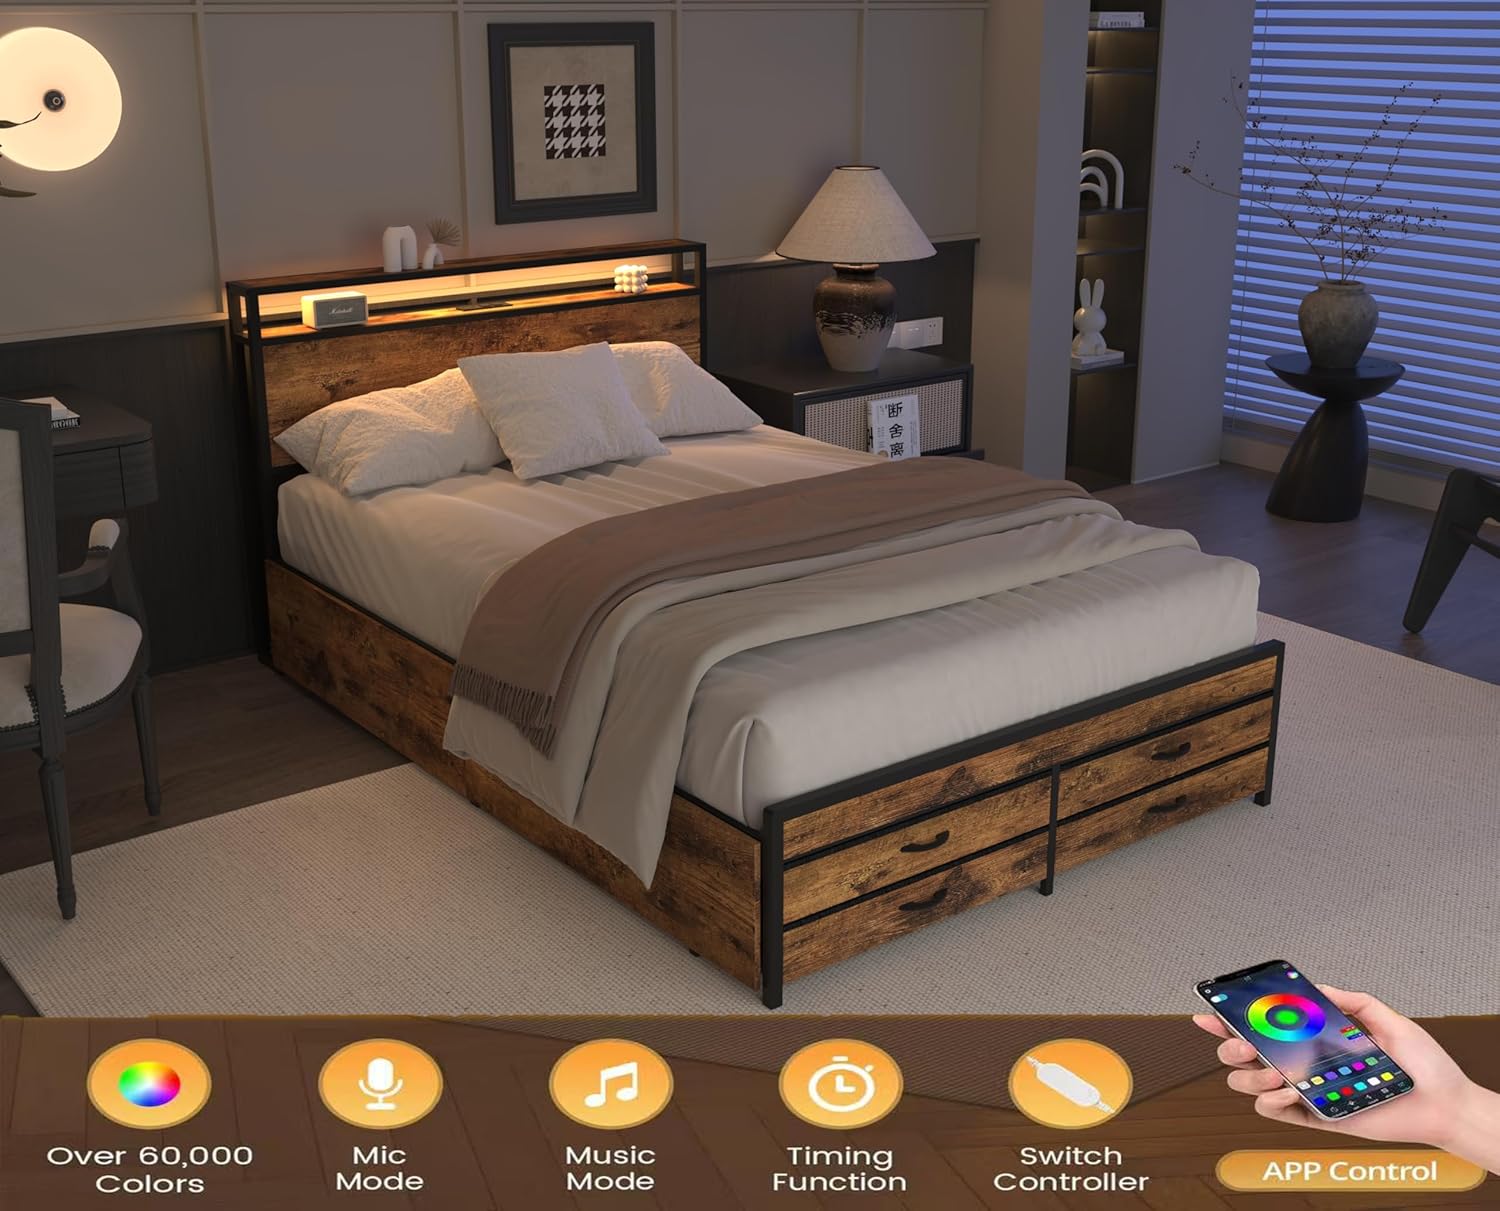
Figure 3: The LED headboard in operation, highlighting control features.
5.2 Charging Station
The headboard includes a built-in charging station for convenience.
- Power Outlets: Features 2 standard plug outlets for electronic devices.
- USB Ports: Includes 2 USB ports for charging smartphones, tablets, and other USB-powered devices.
- Cable Management: Designed with cable management features to keep cords tidy.
- Power Cord: The charging station is powered by a 7.9ft long power supply cord. Ensure it is plugged into a functional wall outlet.

Figure 4: Detail of the headboard charging station.
5.3 Storage Drawers
The bed frame is equipped with 8 storage drawers, providing ample space for various items.
- Capacity: Ideal for storing clothing, pillows, sheets, and other bedding items.
- Operation: Each drawer features pulleys for smooth and easy sliding in and out, even on carpeted surfaces.
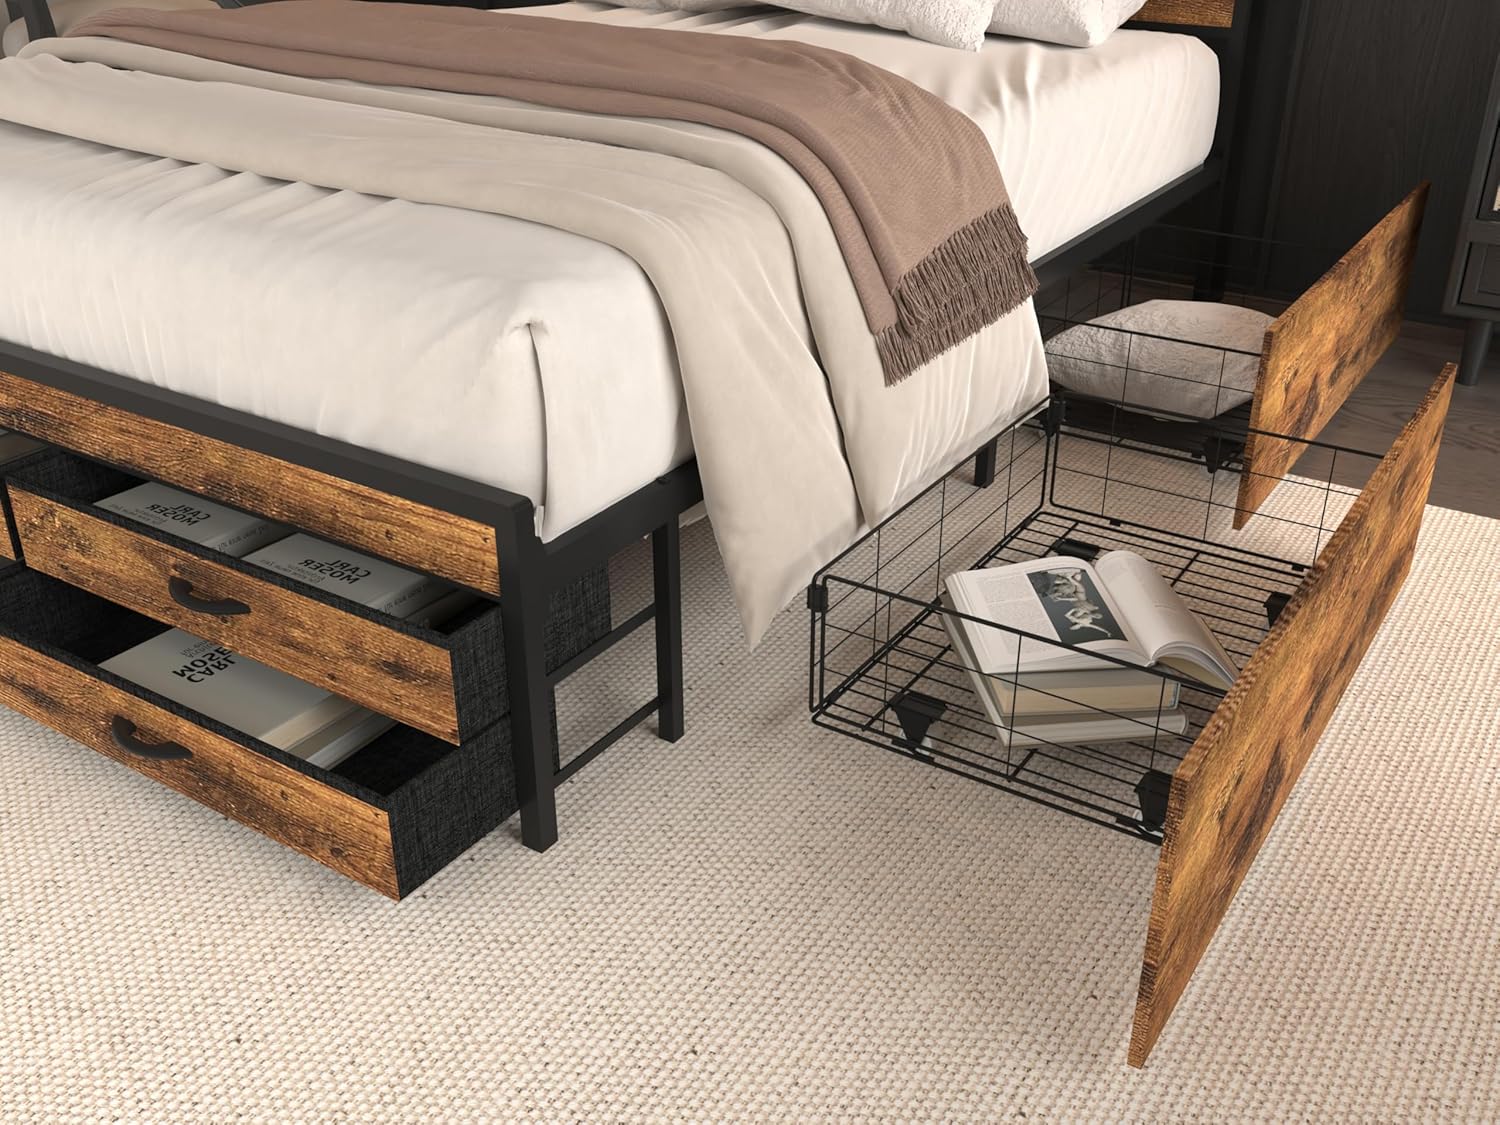
Figure 5: The bed frame with storage drawers extended.

Figure 6: Detail of the storage drawers, illustrating their practical use.
6. Maintenance
- Cleaning: Wipe the bed frame surfaces with a soft, damp cloth. Avoid harsh chemicals or abrasive cleaners.
- Drawer Maintenance: Periodically check the drawer pulleys for smooth operation. Clean any dust or debris that may hinder movement.
- Fastener Check: Every few months, inspect all bolts and screws to ensure they are still tight. Retighten if necessary to maintain stability.
- Electrical Components: Ensure the power cord for the LED lights and charging station is not pinched or damaged. Do not attempt to repair electrical components yourself.
7. Troubleshooting
- LED Lights Not Working:
Solution: Check if the power cord is securely plugged into the wall outlet and the connection to the LED strip is firm. Ensure the remote control or app is functioning correctly and batteries (if applicable) are not depleted. - Charging Station Not Providing Power:
Solution: Verify the main power cord for the charging station is fully inserted into a live electrical outlet. Test the outlet with another device. Ensure devices are properly connected to the USB ports or outlets. - Drawers Sticking or Not Sliding Smoothly:
Solution: Check for any obstructions in the drawer tracks or wheels. Clean any accumulated dust or debris. Ensure the drawers are correctly aligned within their slots. - Bed Frame Squeaking or Unstable:
Solution: Re-check all assembly bolts and screws. Tighten any loose fasteners. Ensure the bed frame is on a level surface.
8. Specifications
| Product Dimensions | 86.49"L x 60.19"W x 39.17"H |
| Material | Engineered Wood, Metal |
| Item Weight | 100.4 pounds |
| Color | Black+brown |
| Special Feature | Strong construction, LED Headboard, Charging Station, 8 Storage Drawers |
| Style | Modern |
| ASIN | B0F26ZBS37 |
9. Warranty Information
For specific warranty details regarding this product, please refer to the documentation included with your purchase or contact the seller directly. Warranty terms typically cover manufacturing defects for a specified period from the date of purchase.
10. Customer Support
If you have any questions, require assistance with assembly, or encounter any issues not covered in this manual, please contact the seller or manufacturer for support. Have your purchase details and product model number (B0F26ZBS37) ready when contacting support.


