1. Introduction
This manual provides essential instructions for the safe and efficient operation of your EQIMMFLJ Battery Charger BC3A. Please read this manual thoroughly before use and retain it for future reference. This device is designed to charge 12V and 24V batteries.
2. Safety Instructions
- Indoor Use Only: This charger is designed for indoor use in a dry, well-ventilated area. Do not expose to rain or moisture.
- Ventilation: Ensure adequate ventilation around the charger during operation to prevent overheating.
- Disconnect Power: Always disconnect the AC power supply before making or breaking connections to the battery.
- Correct Polarity: Connect the battery charger terminals to the correct battery poles (+ to + and - to -). Incorrect connection can cause damage to the charger, battery, or personal injury.
- Avoid Short Circuits: Prevent the positive and negative battery clamps from touching each other or any conductive material.
- Fuse Protection: The charger is equipped with a fuse. If the charger stops working, check and replace the fuse with one of the same type and rating (0.1A).
- Children and Pets: Keep the charger and battery out of reach of children and pets.
- Qualified Personnel: Do not attempt to open or repair the charger yourself. Refer all servicing to qualified personnel.
3. Product Overview
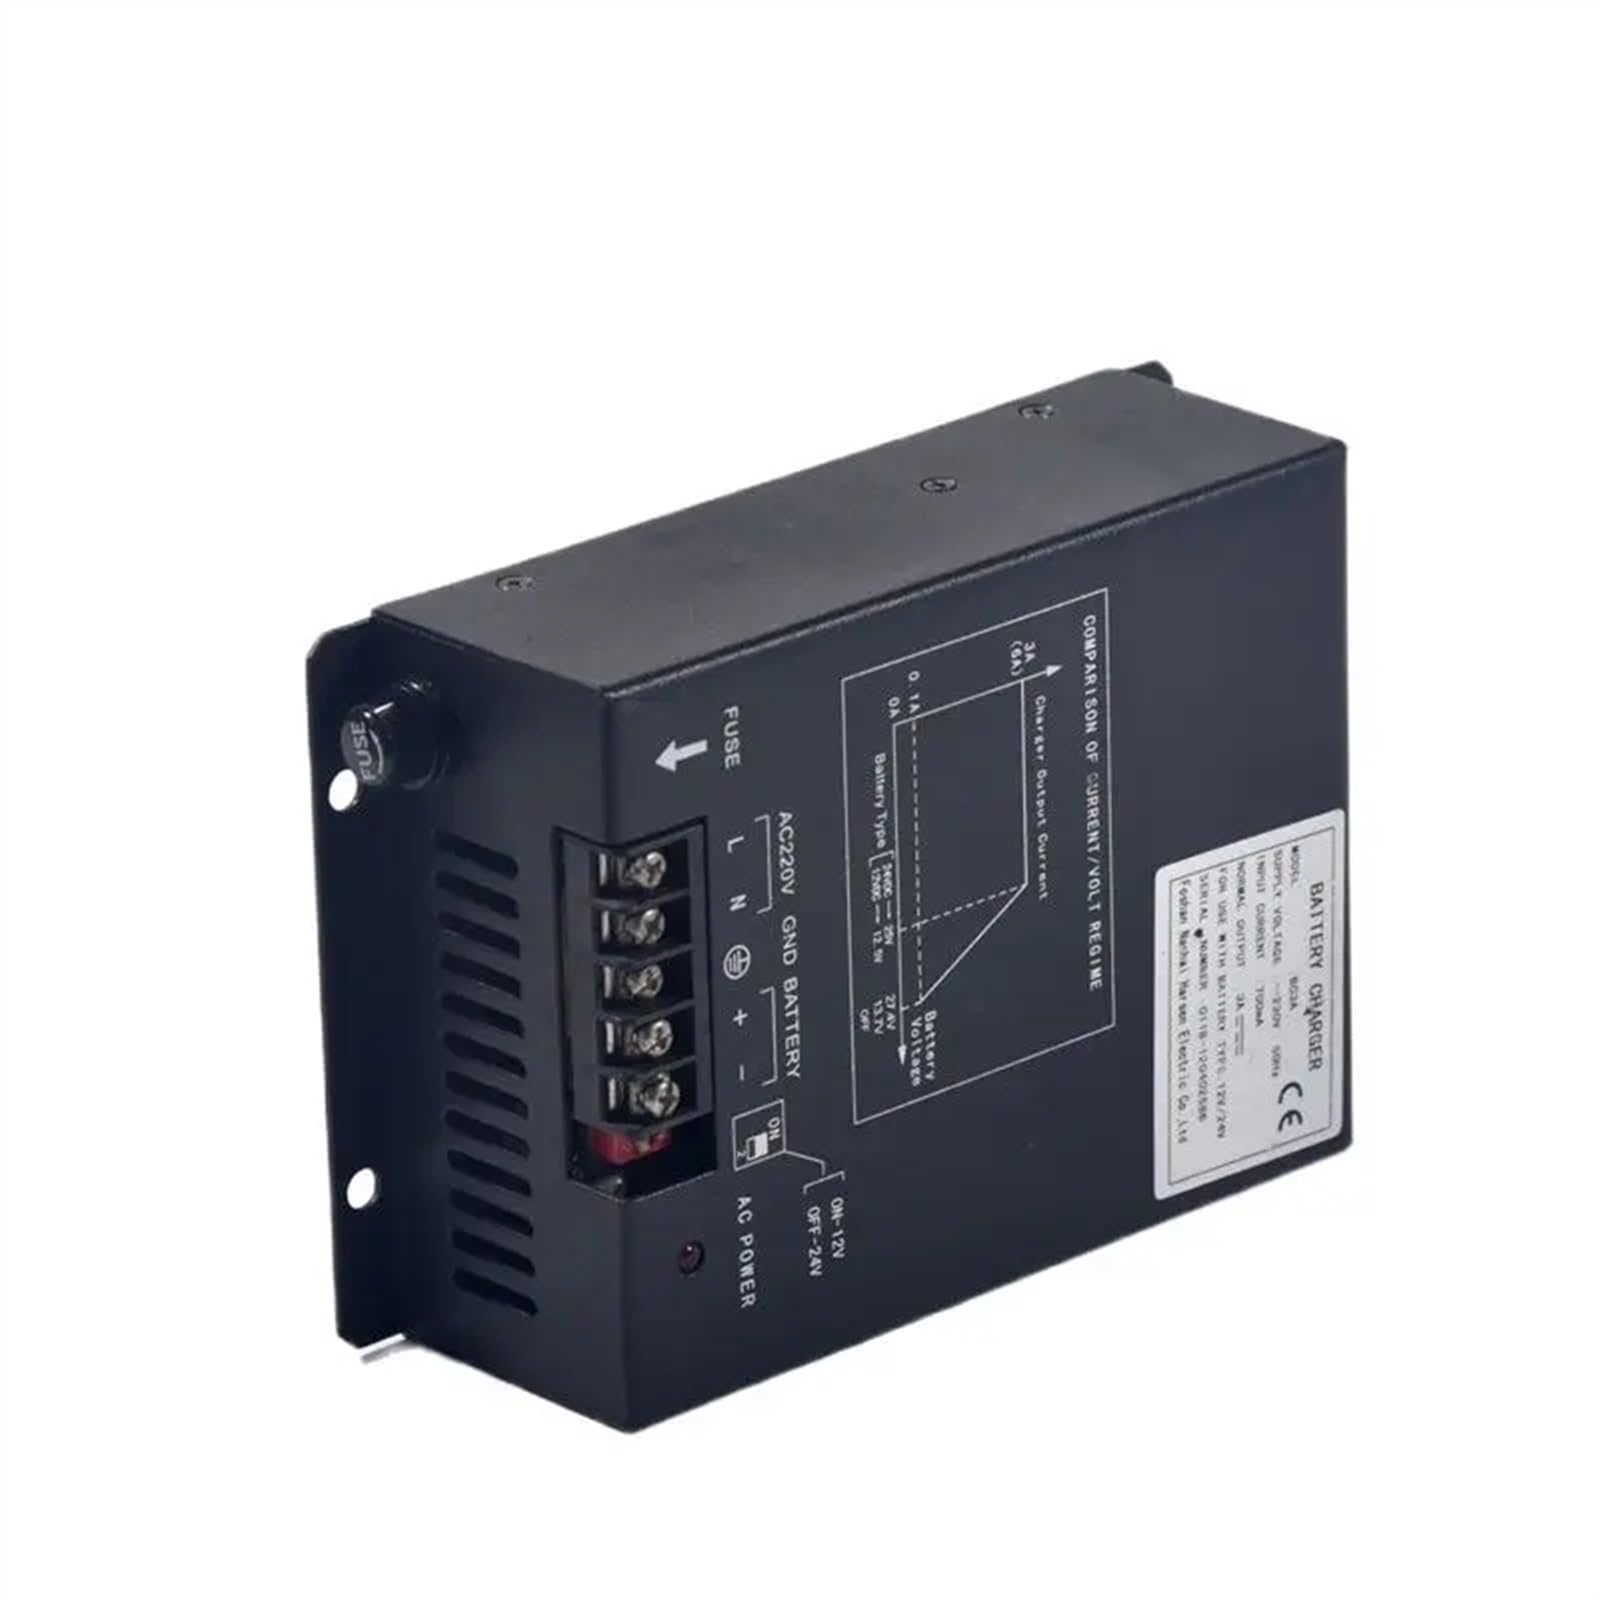
Figure 1: EQIMMFLJ Battery Charger BC3A
The EQIMMFLJ Battery Charger BC3A features an AC220V input, GND, and battery terminals (positive and negative). A fuse is located near the AC input. The front panel includes an AC power indicator and a switch for selecting 12V or 24V operation. A diagram illustrates the comparison of current/volt regime, indicating charger output current (0-3A, up to 6A peak) and battery voltage (12VDC-12.5V, 24VDC-25V, with OFF points at 13.7V and 27.4V).
4. Setup Instructions
- Placement: Ensure the charger is placed on a stable, dry, and well-ventilated surface, away from flammable materials.
- Power Off: Verify the AC power switch on the charger is in the 'OFF' position before making any connections.
- AC Power Connection: Connect the AC220V power supply to the designated 'L' (Live) and 'N' (Neutral) terminals on the charger. Ensure proper grounding ('GND') is established.
- Battery Connection: Connect the battery to be charged to the '+' (positive) and '-' (negative) terminals on the charger. Always observe correct polarity to prevent damage.
- Voltage Selection: Select the appropriate battery voltage (12V or 24V) using the switch located near the 'AC POWER' indicator. For 12V batteries, set the switch to 'ON-12V'. For 24V batteries, set the switch to 'OFF-24V'.
5. Operating Instructions
- Initiate Charging: After connecting the AC power and battery, and selecting the correct voltage, switch the 'AC POWER' to 'ON'.
- Power Indicator: The AC power indicator light will illuminate, signifying that the charger is active and beginning the charging process.
- Automatic Charging: The charger will automatically begin charging the connected battery according to its internal current/volt regime. The normal output current is 3A, with a peak capacity of 6A.
- Monitoring: During charging, the charger will maintain the battery voltage at approximately 12.5V for 12V batteries and 25V for 24V batteries. When the battery is fully charged or in float mode, the voltage will reach approximately 13.7V for 12V batteries or 27.4V for 24V batteries.
- Completion: Once charging is complete, switch the 'AC POWER' to 'OFF' before disconnecting the battery from the charger.
6. Maintenance
- Cleaning: Keep the charger's exterior clean and free from dust and debris using a dry cloth. Do not use liquid cleaners.
- Storage: Store the charger in a dry, cool environment when not in use.
- Cable Inspection: Regularly inspect the AC power cord and battery cables for any signs of damage, such as cuts or fraying. Replace damaged cables immediately.
- Fuse Check: If the charger ceases to function, check the fuse located near the AC input. Replace only with a fuse of the identical type and rating (0.1A).
7. Troubleshooting
- No Power Indicator:
- Check if the AC power cord is securely plugged into a working wall outlet.
- Ensure the 'AC POWER' switch on the charger is in the 'ON' position.
- Inspect the internal fuse. If blown, replace it with a new 0.1A fuse.
- Battery Not Charging:
- Verify that the battery terminals are connected with correct polarity (+ to +, - to -).
- Confirm that the 12V/24V switch setting matches the voltage of the battery being charged.
- Check the battery's health. A severely discharged or damaged battery may not accept a charge.
- Charger Overheating:
- Ensure there is adequate airflow and ventilation around the charger. Do not cover it.
- If the charger is operating in a very hot environment, move it to a cooler location.
8. Specifications
| Feature | Specification |
|---|---|
| Model | BC3A |
| Supply Voltage | ~230V 50Hz |
| Input Current | 700mA |
| Normal Output | 3A |
| For Use With Battery Type | 12V/24V |
| Serial Number | 0118-120402586 |
| Manufacturer | Foshan Nanhai Harsen Electric Co.,Ltd |
| Package Dimensions | 1.18 x 0.79 x 0.39 inches |
| Item Weight | 1.76 ounces (50 Grams) |
| ASIN | B0F25Z13N3 |
| Date First Available | March 22, 2025 |
9. Warranty and Support
For warranty information, technical assistance, or customer support regarding your EQIMMFLJ Battery Charger BC3A, please contact your retailer or the manufacturer, EQIMMFLJ, directly. Please have your model number (BC3A) and serial number (0118-120402586) available when contacting support.