1. Product Overview
The Powerhorse 4500 Watt Portable Dual Fuel Generator is designed to provide reliable power for residential use, emergency home backup, camping, and outdoor events. This generator features dual fuel technology, allowing operation on either gasoline or propane, and includes advanced safety features such as CO detection and automatic shut-off.
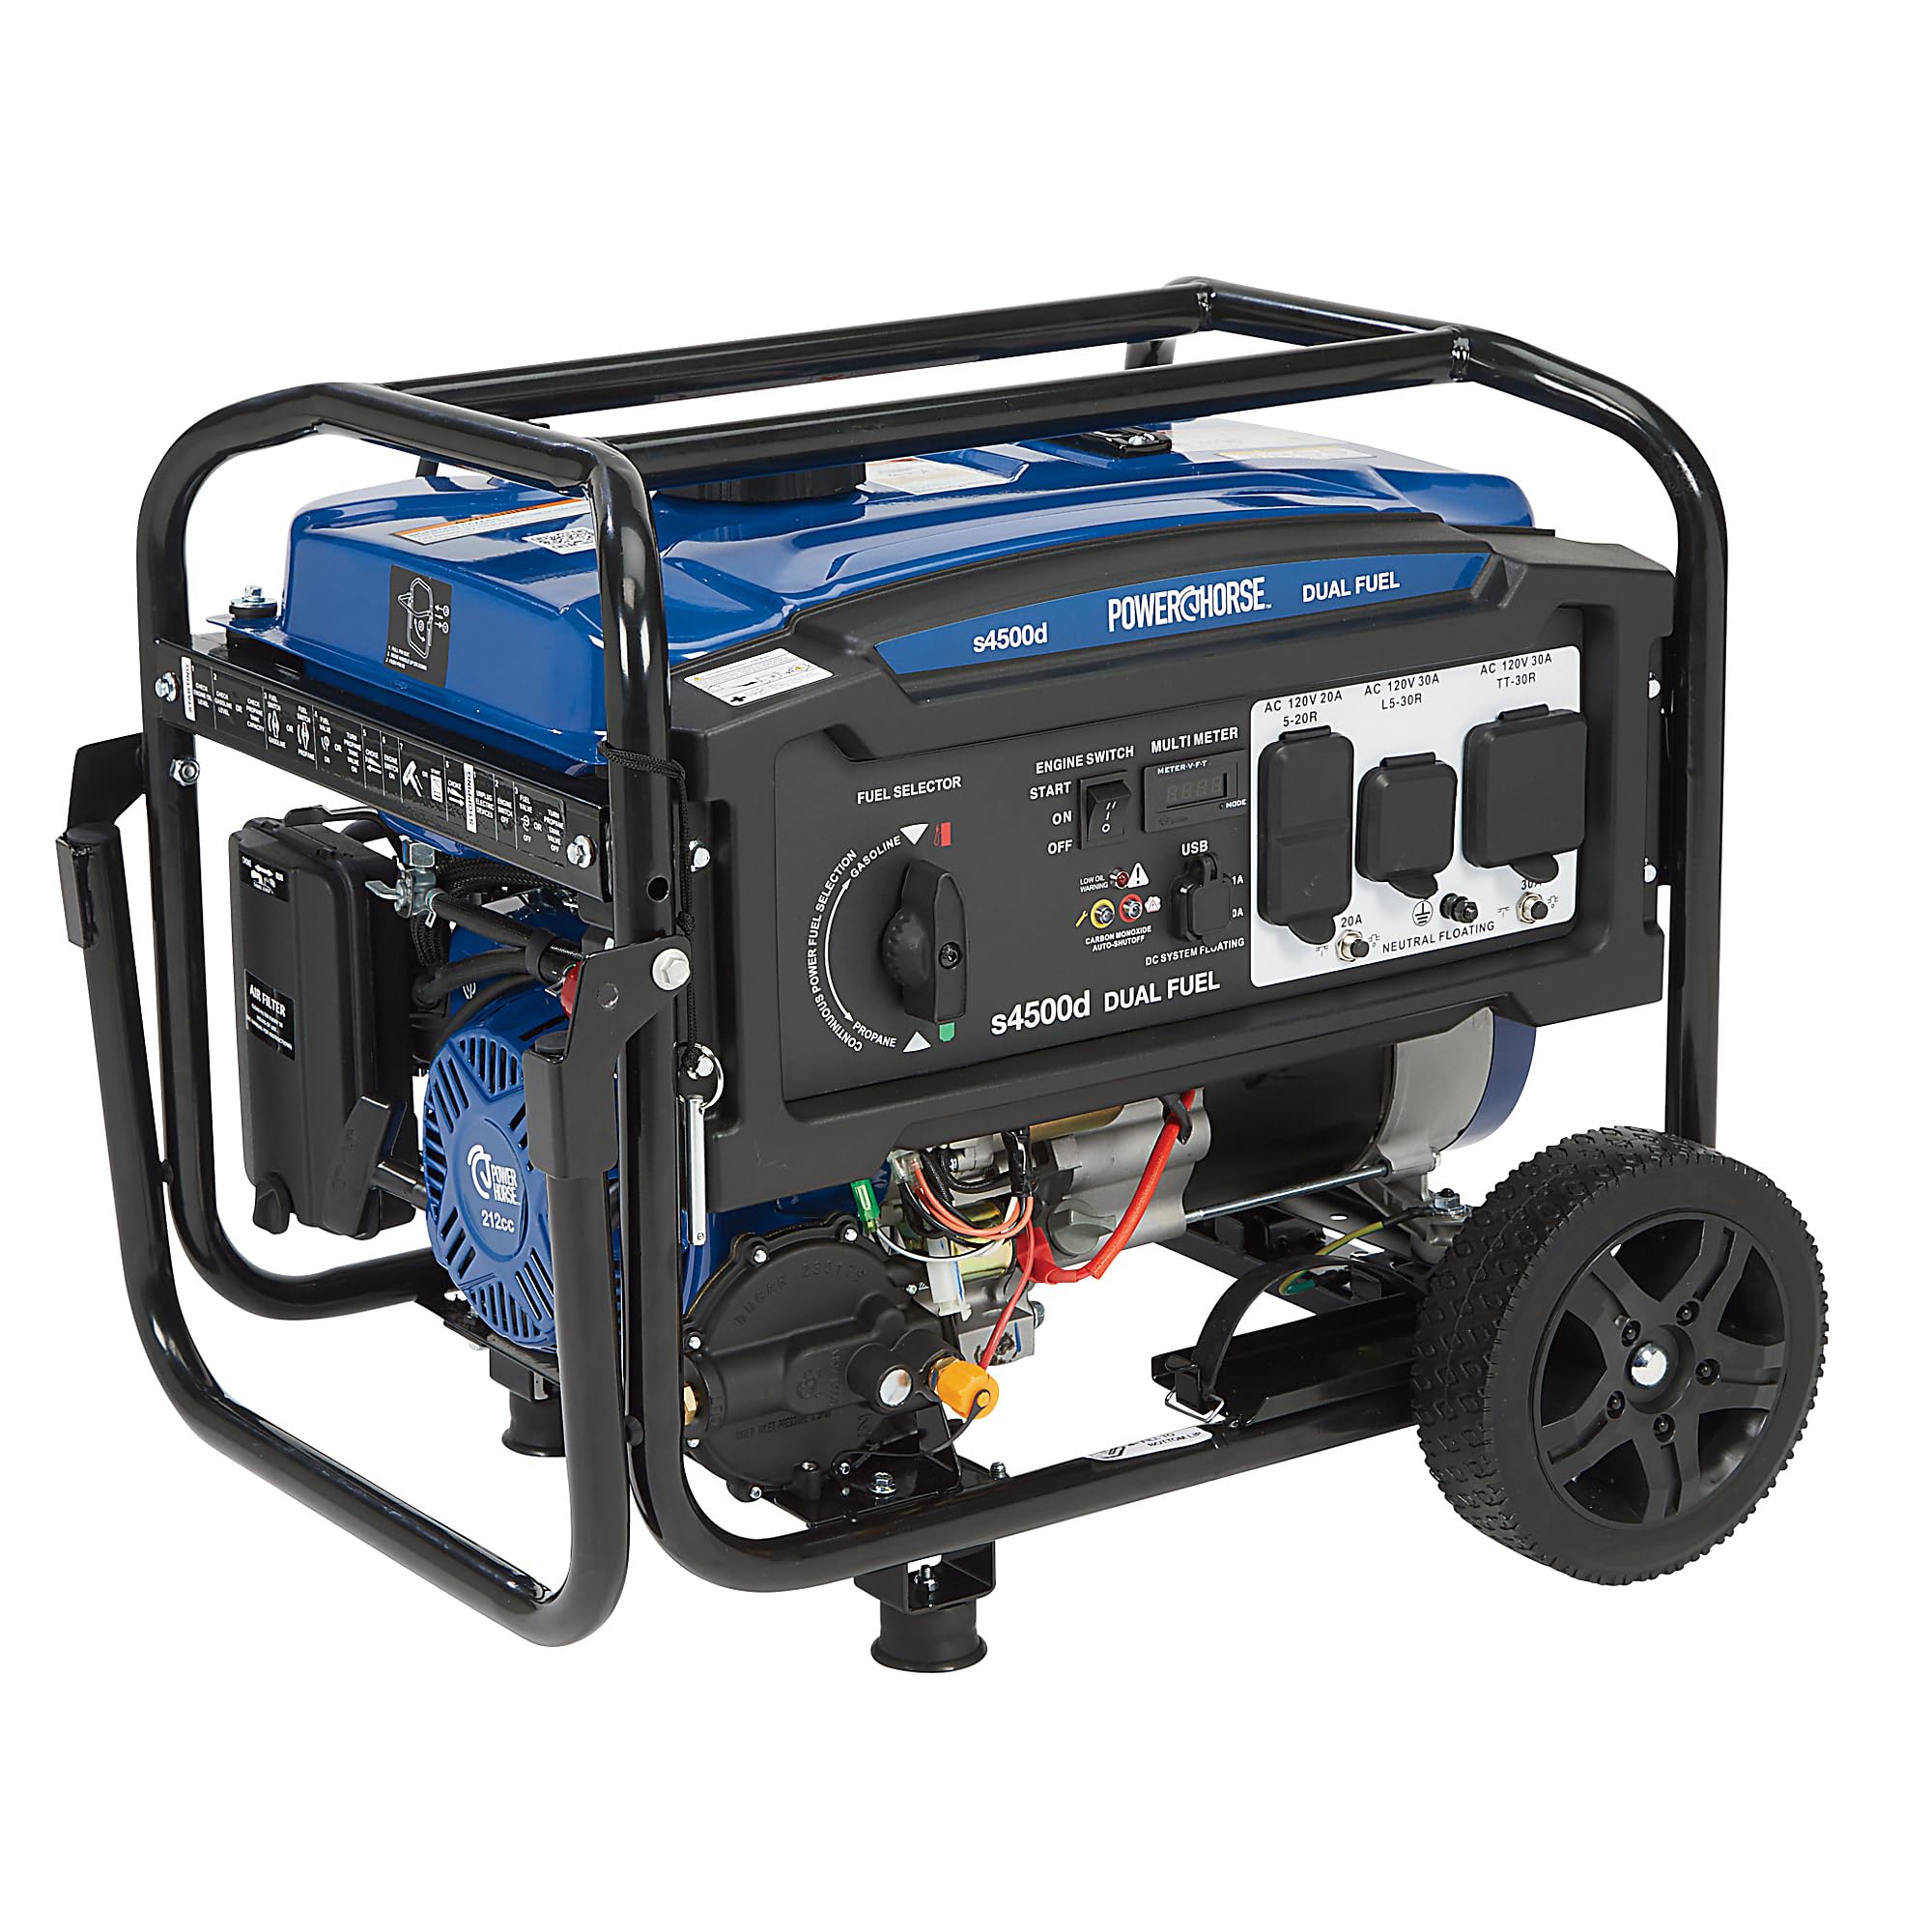
Image 1.1: Powerhorse 4500 Watt Portable Dual Fuel Generator, showcasing its robust frame and control panel.
Key Features:
- Equipped with CO detection and indicator light for excessive emission warning.
- Dual fuel technology allows the generator to switch between gasoline and propane without the unit shutting down.
- 212cc engine with durable cast iron cylinder sleeve.
- Automatic voltage regulator with multimeter ensures consistent, reliable power.
- Full-featured control panel displays run time, voltage, and frequency.
2. Safety Information
WARNING: Read and understand all safety precautions and instructions in the complete operator manual before operating this generator. Failure to follow these instructions may result in serious injury or death.
General Safety Guidelines:
- Carbon Monoxide Hazard: Generators produce carbon monoxide, an odorless, colorless gas that can kill you. Operate the generator outdoors only, far away from windows, doors, and vents.
- Electrical Shock Hazard: Never operate the generator in wet conditions. Ensure proper grounding to prevent electrical shock.
- Fire Hazard: Fuel is highly flammable. Always refuel in a well-ventilated area with the engine off and cool. Do not overfill the fuel tank.
- Hot Surfaces: The generator's engine and muffler become very hot during operation and remain hot for a period after shutdown. Avoid contact to prevent burns.
- Proper Grounding: Always ensure the generator is properly grounded before operation. Refer to your local electrical codes and the operator manual for specific grounding instructions.

Image 2.1: Generator with visible safety labels, emphasizing the importance of reading warnings.
3. Setup
3.1 Unpacking and Assembly
The generator comes mostly pre-assembled. You will need to attach the wheels and the handle bar. Refer to the included assembly instructions for detailed steps.
3.2 Adding Engine Oil
- Locate the oil fill cap (yellow cap) on the engine.
- Remove the oil fill cap/dipstick.
- Using a funnel, carefully add the recommended 10W-30 oil until it reaches the bottom lip of the oil fill opening. Do not overfill.
- Replace the oil fill cap/dipstick securely.

Image 3.1: Engine oil fill location with the yellow cap, indicating where to add oil.
3.3 Adding Fuel (Gasoline or Propane)
This generator operates on either gasoline or propane. Ensure the generator is off and cool before adding fuel.
For Gasoline:
- Ensure the fuel selector switch on the control panel is set to 'GAS'.
- Unscrew the gasoline tank cap.
- Carefully pour fresh, unleaded gasoline (E10 or less ethanol content) into the tank using a funnel. The tank capacity is approximately 10 gallons.
- Securely replace the gasoline tank cap.
Image 3.2: Top view of the generator, highlighting the gasoline tank cap.
For Propane (LPG):
- Ensure the fuel selector switch on the control panel is set to 'LPG'.
- Connect the propane hose (included) to the generator's propane inlet and to a propane tank.
- Ensure all connections are tight and leak-free.
3.4 Grounding the Generator
For safe operation, the generator must be properly grounded. Connect a grounding wire from the generator's grounding terminal to a suitable ground rod. Consult a qualified electrician for proper grounding procedures in your area.

Image 3.3: Detail of the control panel, showing the grounding terminal (labeled "NEUTRAL BONDED TO FRAME").
4. Operating Instructions
4.1 Starting the Generator
- Ensure the generator is on a level surface, outdoors, and away from any structures.
- Check engine oil and fuel levels.
- Select the desired fuel type (GAS or LPG) using the fuel selector switch on the control panel.
- Turn the engine switch to the 'ON' position.
- If starting a cold engine, apply choke as needed (refer to the choke lever position).
- Press and hold the 'START' button (electric start) or pull the recoil start handle firmly until the engine starts.
- Once the engine starts, slowly return the choke lever to the 'RUN' position.

Image 4.1: The main control panel, showing the fuel selector, engine switch, multimeter, and various power outlets.
4.2 Connecting Electrical Loads
Once the generator is running stably, you can connect your electrical devices. Ensure the total wattage of connected devices does not exceed the generator's running wattage.
- AC 120/240V 50A (14-50R) Outlet: For high-power appliances or connecting to a transfer switch.
- AC 120/240V 30A (L14-30R) Outlet: For heavy-duty appliances.
- AC 120V 30A (L5-30R) Outlet: For 120V 30A applications.
- AC 120V 20A GFCI Outlets: For standard household appliances, featuring ground fault circuit interrupter for safety.
- DC 12V 8A Outlet: For charging 12V batteries.
- USB Outlets (2.1A, 1.0A): For charging small electronic devices.
4.3 Shutting Down the Generator
- Disconnect all electrical loads from the generator.
- Turn the engine switch to the 'OFF' position.
- If using gasoline, turn the fuel shut-off valve to the 'OFF' position to run the carburetor dry, preventing fuel stagnation.
- If using propane, close the valve on the propane tank.
5. Maintenance
Regular maintenance is crucial for the longevity and safe operation of your generator. Always refer to the complete operator manual for detailed maintenance schedules and procedures.
General Maintenance Tasks:
- Check Oil Level: Before each use, check the engine oil level and add if necessary.
- Change Engine Oil: Change the engine oil after the first 20 hours of operation, and then every 100 hours or annually.
- Clean Air Filter: Inspect and clean the air filter regularly, more often in dusty conditions.
- Inspect Spark Plug: Check the spark plug condition and gap periodically. Replace if worn.
- Fuel System Maintenance: If storing the generator for an extended period, drain the fuel tank and carburetor or use a fuel stabilizer to prevent fuel degradation.
- Clean Generator: Keep the generator clean and free of debris.
6. Troubleshooting
If your generator experiences issues, consult the following basic troubleshooting guide. For more complex problems, refer to the full operator manual or contact customer support.
| Problem | Possible Cause | Solution |
|---|---|---|
| Engine will not start | No fuel, low oil, engine switch off, choke not set, spark plug issue. | Add fuel, check oil level, turn engine switch on, adjust choke, inspect/replace spark plug. |
| No power output | Circuit breaker tripped, overload, loose connections. | Reset circuit breakers, reduce load, check connections. |
| Engine runs rough | Stale fuel, dirty air filter, spark plug issue. | Drain and replace fuel, clean air filter, inspect/replace spark plug. |
| CO detection shut-off | High carbon monoxide levels detected. | Move generator to a well-ventilated outdoor area. Allow to cool before restarting. |
7. Specifications
| Feature | Detail |
|---|---|
| Brand | Powerhorse |
| Model Name | Generator |
| Item Model Number | 6075716 |
| Wattage (Starting) | 4500 Watts |
| Wattage (Running) | 3600 Watts |
| Fuel Type | Gasoline, Liquefied Petroleum Gas (LPG) |
| Engine Displacement | 212 Cubic Centimeters |
| Ignition System Type | Recoil Start |
| Product Dimensions | 23.2"L x 18.3"W x 18.8"H |
| Item Weight | 125 Pounds |
| Total Power Outlets | 2 (AC 120/240V 50A, AC 120/240V 30A, AC 120V 30A, 2x AC 120V 20A GFCI, DC 12V 8A, USB 2.1A, USB 1.0A) |
| Special Feature | Super Quiet, CO Detection |
| Included Components | (1) Generator, (1) Propane regulator and hose |
| UPC | 840321764058 |
8. Warranty and Support
Warranty Information:
This Powerhorse generator comes with a 2-year limited warranty. Please retain your proof of purchase for warranty claims.
Customer Support:
For technical assistance, parts, or warranty inquiries, please contact Powerhorse customer support. Refer to your complete operator manual for contact details or visit the official Powerhorse website.
Additional protection plans may be available for purchase, such as a 4-Year Protection Plan or Complete Protect monthly plan. Check with your retailer for details.


