
1. Introduction
The FLYRUIT 10.1-inch Digital Day Clock (Model P10C3) is designed to provide clear, easy-to-read time, date, and day information. Its large 1280x800p HD IPS screen ensures excellent visibility from various angles, making it suitable for individuals with visual impairments, seniors, or anyone desiring a highly legible display. This clock features customizable brightness, multiple alarms and reminders, and flexible placement options to integrate seamlessly into any living space.

Image: The FLYRUIT Digital Day Clock on a desk, showing clear timekeeping for daily schedules.
2. Package Contents
Please verify that all items are present in your package:
- 1 x FLYRUIT 10.1-inch Digital Day Clock (Model P10C3)
- 1 x Remote Control
- 1 x Power Adapter
- 1 x Detachable Stand
- 1 x User Manual (this document)
3. Setup
3.1 Attaching the Stand
To use the clock on a desktop or table, attach the provided stand. Locate the screw hole on the back of the clock unit. Insert the stand into this hole and rotate clockwise until securely fastened.
3.2 Powering On
Connect the power adapter to the DC IN port on the back of the clock and then plug it into a standard electrical outlet. The clock will automatically power on and display the default time and date. The internal battery ensures timekeeping during power outages, eliminating the need for a reset.
3.3 Initial Time and Date Setting
Upon first use, or after a factory reset, you may need to set the correct time and date. Use the remote control to navigate the on-screen menu:
- Press the MENU button on the remote.
- Navigate to Set Time and Set Date using the arrow buttons.
- Press OK/ENTER to adjust values.
- Use the arrow buttons to change hours, minutes, month, day, and year.
- Press OK/ENTER to confirm each setting.
- Press EXIT/SETUP to return to the main display.

Image: The back of the clock unit with the stand attached, and the remote control for easy setup.
4. Operating Instructions
4.1 Using the Remote Control
The included remote control allows for convenient adjustment of all clock settings from a distance. Ensure the remote has a working battery (pull the plastic tab if it's new). Point the remote directly at the clock for optimal response.
4.2 Basic Navigation
- Power Button: Turns the clock display on or off.
- MENU Button: Accesses the main settings menu.
- Arrow Buttons (Up/Down/Left/Right): Navigates through menu options and adjusts values.
- OK/ENTER Button: Confirms selections or enters sub-menus.
- EXIT/SETUP Button: Exits the current menu or returns to the main display.
Video: An overview of the 10.1-inch Digital Clock, demonstrating its features and remote control functionality.
5. Alarms and Reminders
The clock supports up to 6 programmable alarms and 10 customizable reminders. These features are particularly useful for managing daily routines, medication schedules, and appointments.
5.1 Setting Alarms
- Press MENU on the remote.
- Navigate to Alarm.
- Select an alarm (e.g., Alarm 1) and press OK/ENTER.
- Set the desired time, frequency (e.g., daily, weekdays), and alarm tone.
- Ensure the alarm is set to ON.
- Press EXIT/SETUP to save and exit.
5.2 Setting Reminders
The clock offers 10 customizable reminders with clear visual icons for common tasks.
- Press MENU on the remote.
- Navigate to Reminder.
- Select a reminder slot and press OK/ENTER.
- Choose a reminder icon (e.g., Take Medicine, Drink Water, Meal Time).
- Set the desired time and frequency.
- Ensure the reminder is set to ON.
- Press EXIT/SETUP to save and exit.

Image: An elderly couple with the digital clock displaying a 'Take Medicine' reminder, illustrating its utility for daily tasks.

Image: A visual representation of the 10 customizable reminders with themed icons for an organized daily life.
6. Display Settings
Customize the clock's display to suit your preferences and environment.
6.1 Brightness Adjustment
- Auto-Dimming: The clock automatically adjusts brightness between day (clear) and night (soft) modes. This feature is enabled by default.
- Manual Brightness: You can manually select from 5 brightness levels via the menu.
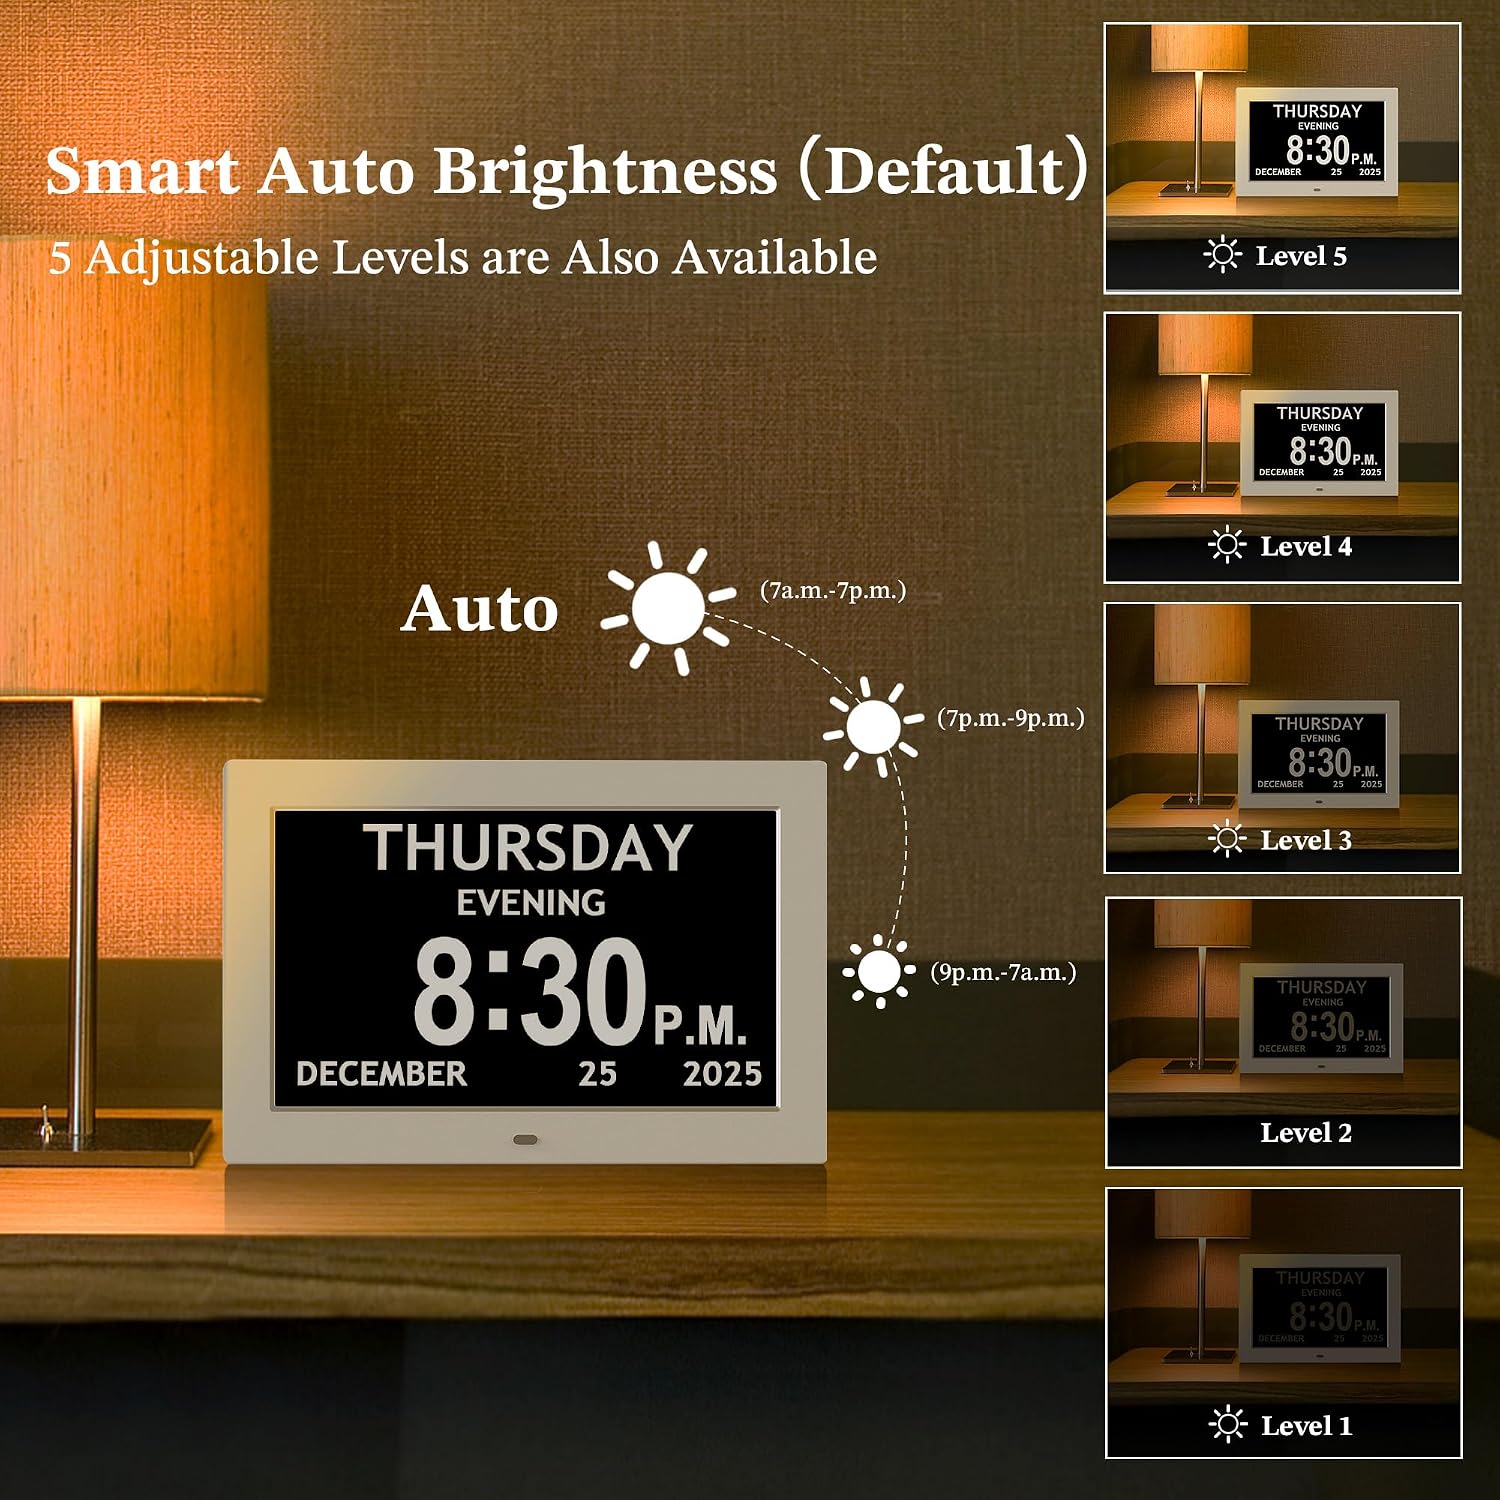
Image: Illustration of the smart auto-brightness feature and 5 adjustable manual brightness levels.
6.2 Time and Date Format
- 12/24-Hour Options: Switch between 12-hour (with AM/PM) and 24-hour formats.
- Date Mode: Choose your preferred date display format (e.g., Month-Day-Year).
- 5-Phase Day System: The clock displays the time of day as Before Dawn, Morning, Afternoon, Evening, and Night, aiding in time orientation.

Image: The clock displaying various phases of the day, such as 'Morning', 'Afternoon', 'Evening', and 'Night', for enhanced clarity.
6.3 Language and Themes
- Languages: Select from 8 available languages (English, Cymraeg, Polski, Español, Nederlands, Italiano, Deutsch, Français).
- Display Styles: Choose from 4 different display styles.
- Color Themes: Personalize the display with 4 color themes.

Image: Icons illustrating the 8 language options available for the clock display.

Image: The clock showcasing 4 distinct display modes and 5 color options for personalization.
6.4 Daylight Saving Time (DST)
The clock can automatically update for Daylight Saving Time based on region. This feature is off by default and can be enabled in the settings menu.

Image: A graphic depicting the concept of Daylight Saving Time, indicating regions where it applies.
7. Placement Options
The FLYRUIT Digital Day Clock offers versatile placement options to fit your needs:
- Desktop Placement: Use the included detachable stand to place the clock on any flat surface, such as a desk, nightstand, or shelf.
- Wall Mounting: The clock features a keyhole slot on the back for easy wall mounting. Ensure you use appropriate hardware (not included) for your wall type.
8. Maintenance
To ensure the longevity and optimal performance of your digital day clock, follow these simple maintenance guidelines:
- Cleaning: Gently wipe the screen and casing with a soft, dry, lint-free cloth. Avoid using abrasive cleaners, solvents, or aerosol sprays, as these can damage the display or finish.
- Power: Always use the provided power adapter. Disconnect the power adapter during electrical storms or when not in use for extended periods.
- Environment: Keep the clock away from direct sunlight, extreme temperatures, high humidity, and strong magnetic fields.
- Handling: Handle the clock with care to prevent drops or impacts that could damage internal components or the screen.
9. Troubleshooting
If you encounter any issues with your FLYRUIT Digital Day Clock, please refer to the following common problems and solutions:
| Problem | Possible Cause | Solution |
|---|---|---|
| Clock does not turn on. | No power, faulty adapter, or power button not pressed. | Ensure the power adapter is securely connected to both the clock and a working electrical outlet. Press the power button on the remote or the back of the clock. |
| Display is dim or too bright. | Brightness settings need adjustment. | Access the Brightness setting in the menu to adjust manually or enable auto-dimming. |
| Time or date is incorrect. | Incorrect manual setting or DST not enabled/disabled correctly. | Go to Set Time and Set Date in the menu to correct. Check DST settings if applicable. |
| Alarms/Reminders do not sound. | Alarm/Reminder is off, volume is too low, or incorrect time set. | Verify the alarm/reminder is set to ON, check the Volume setting, and ensure the correct time is programmed. |
| Remote control is not working. | Battery issue or obstruction. | Ensure the remote's battery is correctly inserted and has power. Remove any obstructions between the remote and the clock's sensor. |
10. Specifications
- Brand: FLYRUIT
- Model Number: P10C3
- Screen Size: 10.1 Inches
- Display Type: Digital, 1280x800p HD IPS
- Color: White
- Product Dimensions: 10.4"W x 7.1"H
- Power Source: Corded Electric
- Special Features: Adjustable Brightness, Adjustable Volume, Auto Dimmable, Daylight Saving, Programmable Alarms (6), Reminders (10)
- Mounting Type: Wall Mount, Tabletop
- Material: Plastic
- Languages: 8 options (English, Cymraeg, Polski, Español, Nederlands, Italiano, Deutsch, Français)
11. Warranty and Support
FLYRUIT products are designed for reliability and performance. For specific warranty details, please refer to the documentation included with your purchase or contact FLYRUIT customer support.
Customer Support:
For technical assistance, troubleshooting, or warranty inquiries, please visit the official FLYRUIT store on Amazon or contact their customer service directly through the platform. You can find the FLYRUIT store at: FLYRUIT Amazon Store