SHEHDS 230W Spot Zoom Moving Head Stage Light User Manual
Model: ZNENJVYB777 | Brand: ZNENJVYB
1. Product Overview
The SHEHDS 230W Spot Zoom Moving Head is a professional stage lighting fixture designed for dynamic performances in various settings. It offers versatile control options and precise movement capabilities, making it suitable for DJs, concerts, nightclubs, and theatrical productions. This fixture enhances any atmosphere with its striking illumination and well-defined projections.
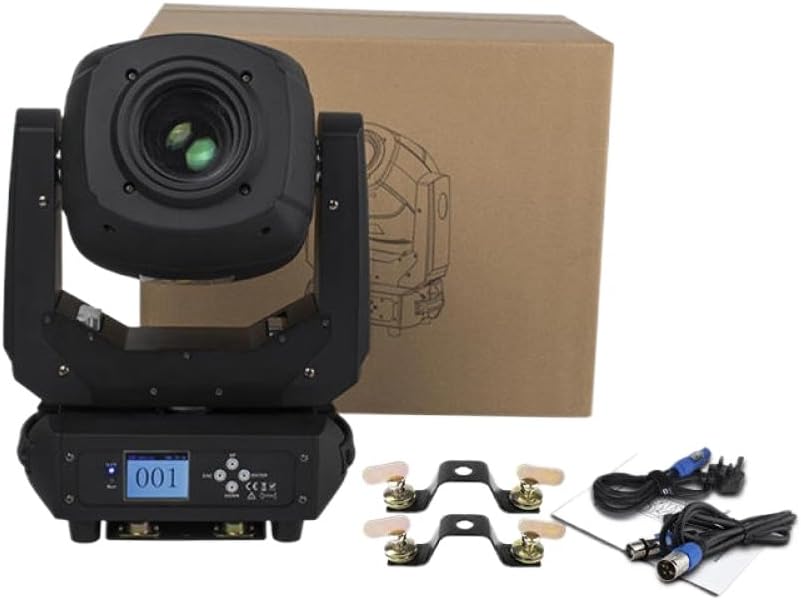
This image displays the SHEHDS 230W Spot Zoom Moving Head Stage Light, a black fixture with a prominent lens, alongside its brown cardboard packaging. Also visible are two mounting brackets and two DMX cables, indicating the product comes ready for installation and connectivity.
2. Technical Specifications
| Feature | Specification |
|---|---|
| Input Power | AC 100V-240V, 50/60Hz |
| Control Channels | 6 / 18 Channels |
| Pan Scan | 540° (16-bit) Electric Correction |
| Tilt Scan | 220° (16-bit) Electric Correction |
| Color Wheel | One Color Wheel with 7 Kinds of Color Chips |
| Gobo Wheel | 7 Gobos + Open |
| Rotation Gobo | 7 Gobos + Open |
| Control Mode | DMX512 / Master-Slave / Auto Run |
| Dimmer | 0-100% |
| Strobe | 0-20 Hz |
| Display | LCD Display |
| Net Weight | 13.05 kg (28.77 lbs) |
| Gross Weight | 15.35 kg (33.84 lbs) |
| Packing Size | 56 x 40 x 31.5 cm (22.05 x 15.75 x 12.4 inches) |
| Product Dimensions | Approx. 3 x 2 x 1 inches (Fixture body, not packing) |
3. Setup Instructions
- Unpacking: Carefully remove the fixture and all accessories from the packaging. Inspect for any damage during transit.
- Mounting: Securely attach the fixture to a truss or stable surface using the provided mounting brackets. Ensure all clamps and bolts are tightened properly. Always use a safety cable.
- Power Connection: Connect the power cable to the fixture's power input and then to a suitable AC 100V-240V, 50/60Hz power outlet.
- DMX Connection (Optional): For DMX control, connect a DMX cable from your DMX controller's output to the fixture's DMX IN port. If connecting multiple fixtures, daisy-chain them by connecting the first fixture's DMX OUT to the next fixture's DMX IN.
- Address Setting: Set the DMX address for the fixture using the LCD display and control buttons. Refer to the DMX channel chart in the operating section for specific channel assignments.
4. Operating Instructions
4.1 Control Modes
- DMX512 Mode: This is the standard professional control mode. Connect the fixture to a DMX controller and set the DMX address. The fixture will respond to commands from the controller, allowing precise control over all functions.
- Master-Slave Mode: Connect multiple fixtures via DMX cables. Set one fixture as the 'Master' and the others as 'Slave'. The slave fixtures will mimic the movements and effects of the master fixture.
- Auto Run Mode: The fixture will run through pre-programmed internal sequences and patterns automatically. This mode is suitable for standalone operation without an external controller.
4.2 Basic Functions
- Pan & Tilt: Control the horizontal (Pan) and vertical (Tilt) movement of the light head. The 16-bit electric correction ensures smooth and precise positioning.
- Color Wheel: Cycle through 7 distinct colors plus open white to create vibrant lighting effects.
- Gobo Wheel: Project various patterns (gobos) onto surfaces. The fixture includes 7 static gobos plus an open position, and 7 rotating gobos plus an open position.
- Dimmer: Adjust the light intensity from 0% (off) to 100% (full brightness) for smooth fades and intensity control.
- Strobe: Create flashing effects with adjustable speed from 0 to 20 flashes per second.
- Zoom: Adjust the beam angle to create wider washes or tighter spot effects.
- Focus: Sharpen or blur the projected gobos and beam edges for desired visual effects.
5. Maintenance
- Cleaning: Regularly clean the lens and exterior casing with a soft, lint-free cloth. For stubborn dirt, use a mild, non-abrasive cleaning solution. Ensure the fixture is powered off and unplugged before cleaning.
- Fan and Vent Cleaning: Periodically clean the cooling fans and ventilation openings to prevent dust buildup, which can lead to overheating. Use compressed air to clear debris.
- Inspection: Routinely check all cables, connections, and mounting hardware for wear, damage, or looseness. Replace any damaged components immediately.
- Lamp Replacement: (If applicable, for non-LED models) Refer to a qualified technician for lamp replacement to ensure proper handling and safety.
6. Troubleshooting
- No Power:
Solution: Check the power cable connection, ensure the power outlet is active, and verify the fixture's power switch is in the 'ON' position. - No DMX Control:
Solution: Verify DMX cable connections (IN/OUT), ensure the DMX address is correctly set on the fixture and matches the controller, and check for proper DMX termination if using a long chain. - Fixture Not Moving/Responding:
Solution: Check the selected control mode (DMX, Master-Slave, Auto). If in DMX mode, ensure the DMX signal is present and the correct channels are being sent. Reset the fixture by power cycling. - Light Output Issues (Dim/Flickering):
Solution: Check power supply stability. Ensure ventilation is not blocked, as overheating can cause performance issues. - Display Not Working:
Solution: Power cycle the unit. If the issue persists, contact customer support.
7. Important Safety Information
- Always connect the fixture to a grounded power outlet.
- Do not open the fixture casing; there are no user-serviceable parts inside. Refer all servicing to qualified personnel.
- Avoid direct eye exposure to the light source.
- Ensure adequate ventilation around the fixture to prevent overheating.
- Do not operate the fixture in wet or damp conditions.
- Always use safety cables when suspending the fixture overhead.