1. Introduction
This manual provides comprehensive instructions for the setup, operation, maintenance, and troubleshooting of your EPOMAKER Aula Hero 68 HE Wired Magnetic Gaming Keyboard. Please read this manual thoroughly to ensure proper use and to maximize your keyboard's performance.

Image 1.1: EPOMAKER Aula Hero 68 HE Wired Magnetic Gaming Keyboard.
2. Package Contents
Verify that all items are present in the package:
- EPOMAKER Aula Hero 68 HE Keyboard
- USB A to C Cable
- 2-in-1 Keycap-and-Switch Puller
- 2 Extra Magnetic Switches
- Keyboard Ribbon
- User Manual (this document)
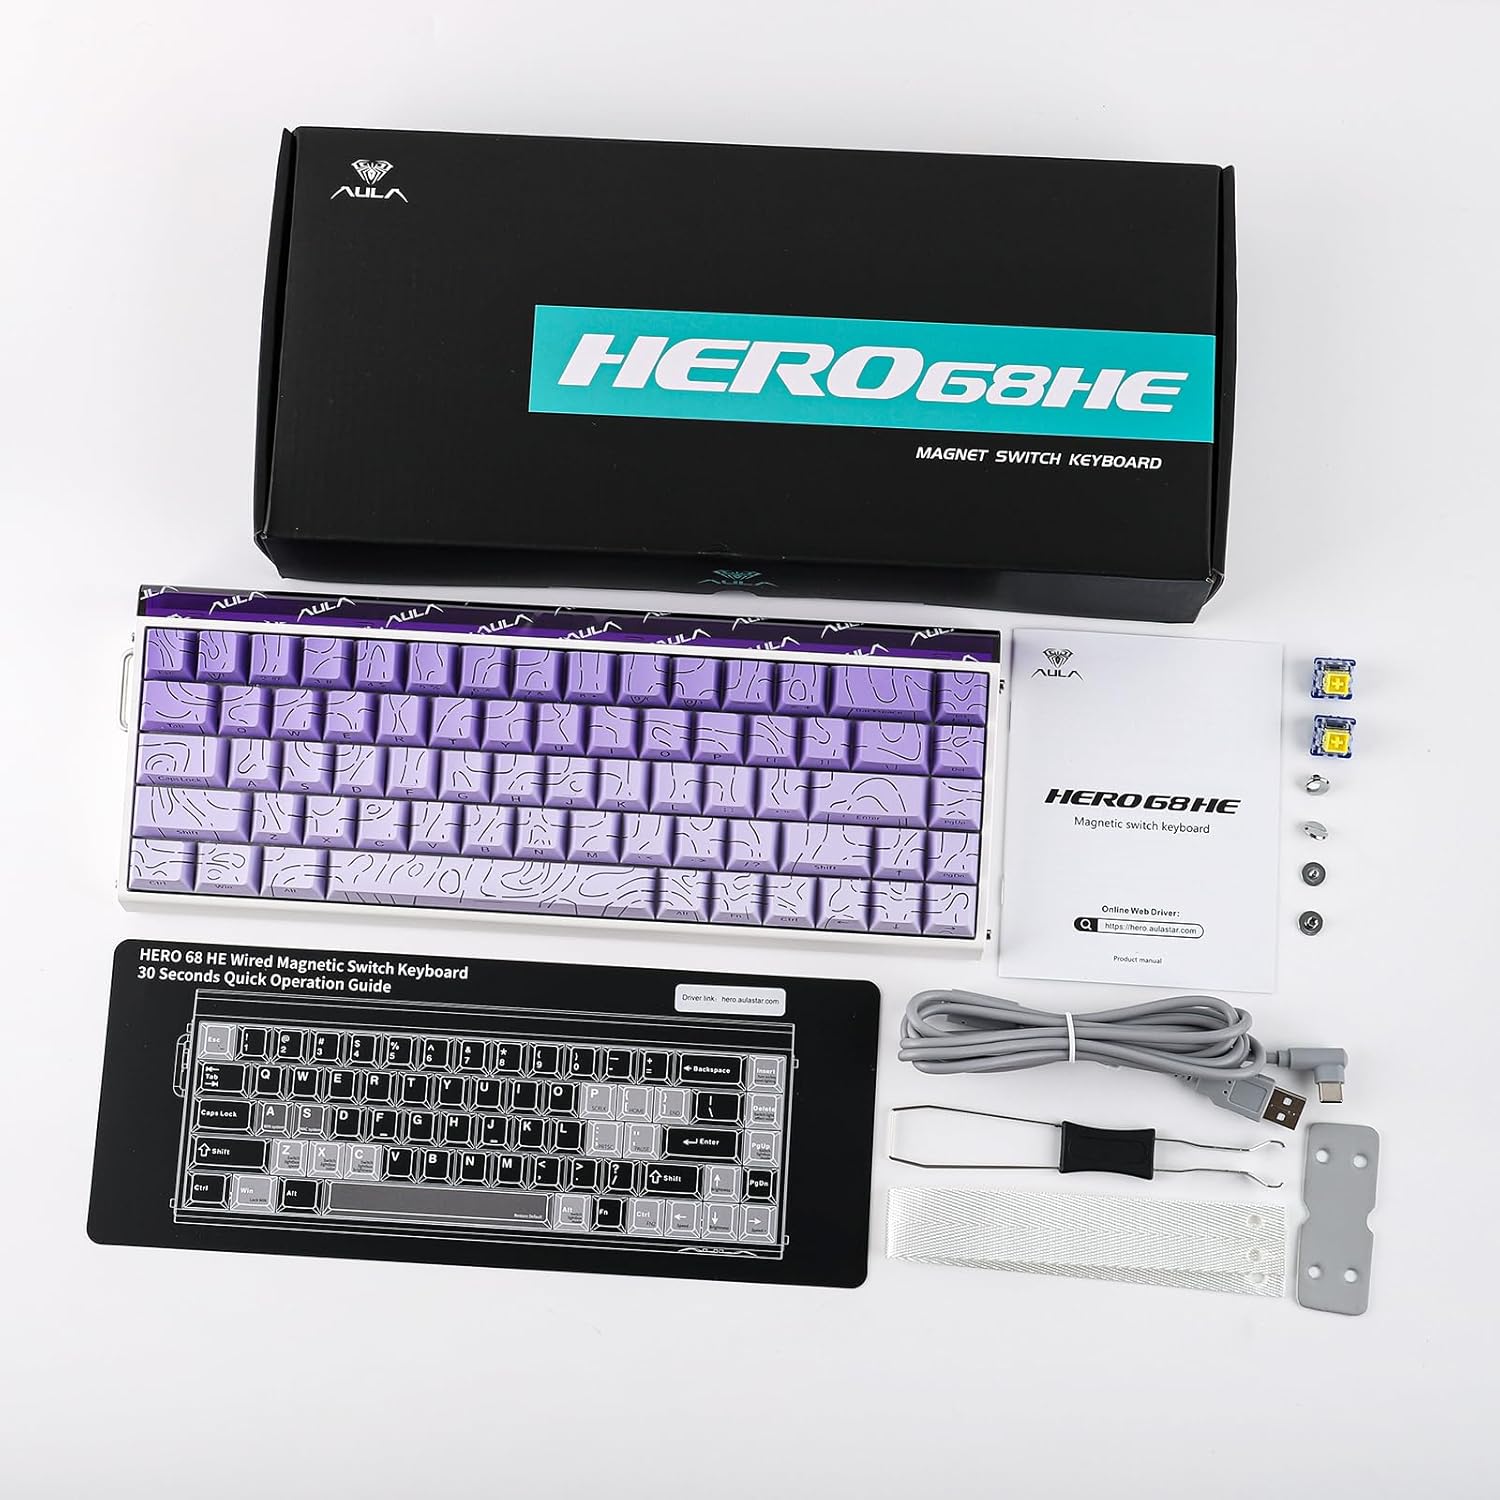
Image 2.1: Contents included in the EPOMAKER Aula Hero 68 HE package.
3. Product Overview
3.1 Key Features
- Magnetic Hall Effect Switches: Offers adjustable actuation from 0.01mm to 3.4mm.
- 8kHz Polling Rate: Provides ultra-low latency for rapid response.
- 5-Layer Sound Dampening: Enhances typing acoustics.
- RGB Box & Backlight: Customizable per-key RGB lighting and side light effects.
- Hot-Swappable Design: Compatible with various magnetic switches.
- Web Driver: Online configuration tool for advanced customization.
- Advanced Gaming Features: Includes SOCD, Mod Tap, and Dynamic Keystroke.
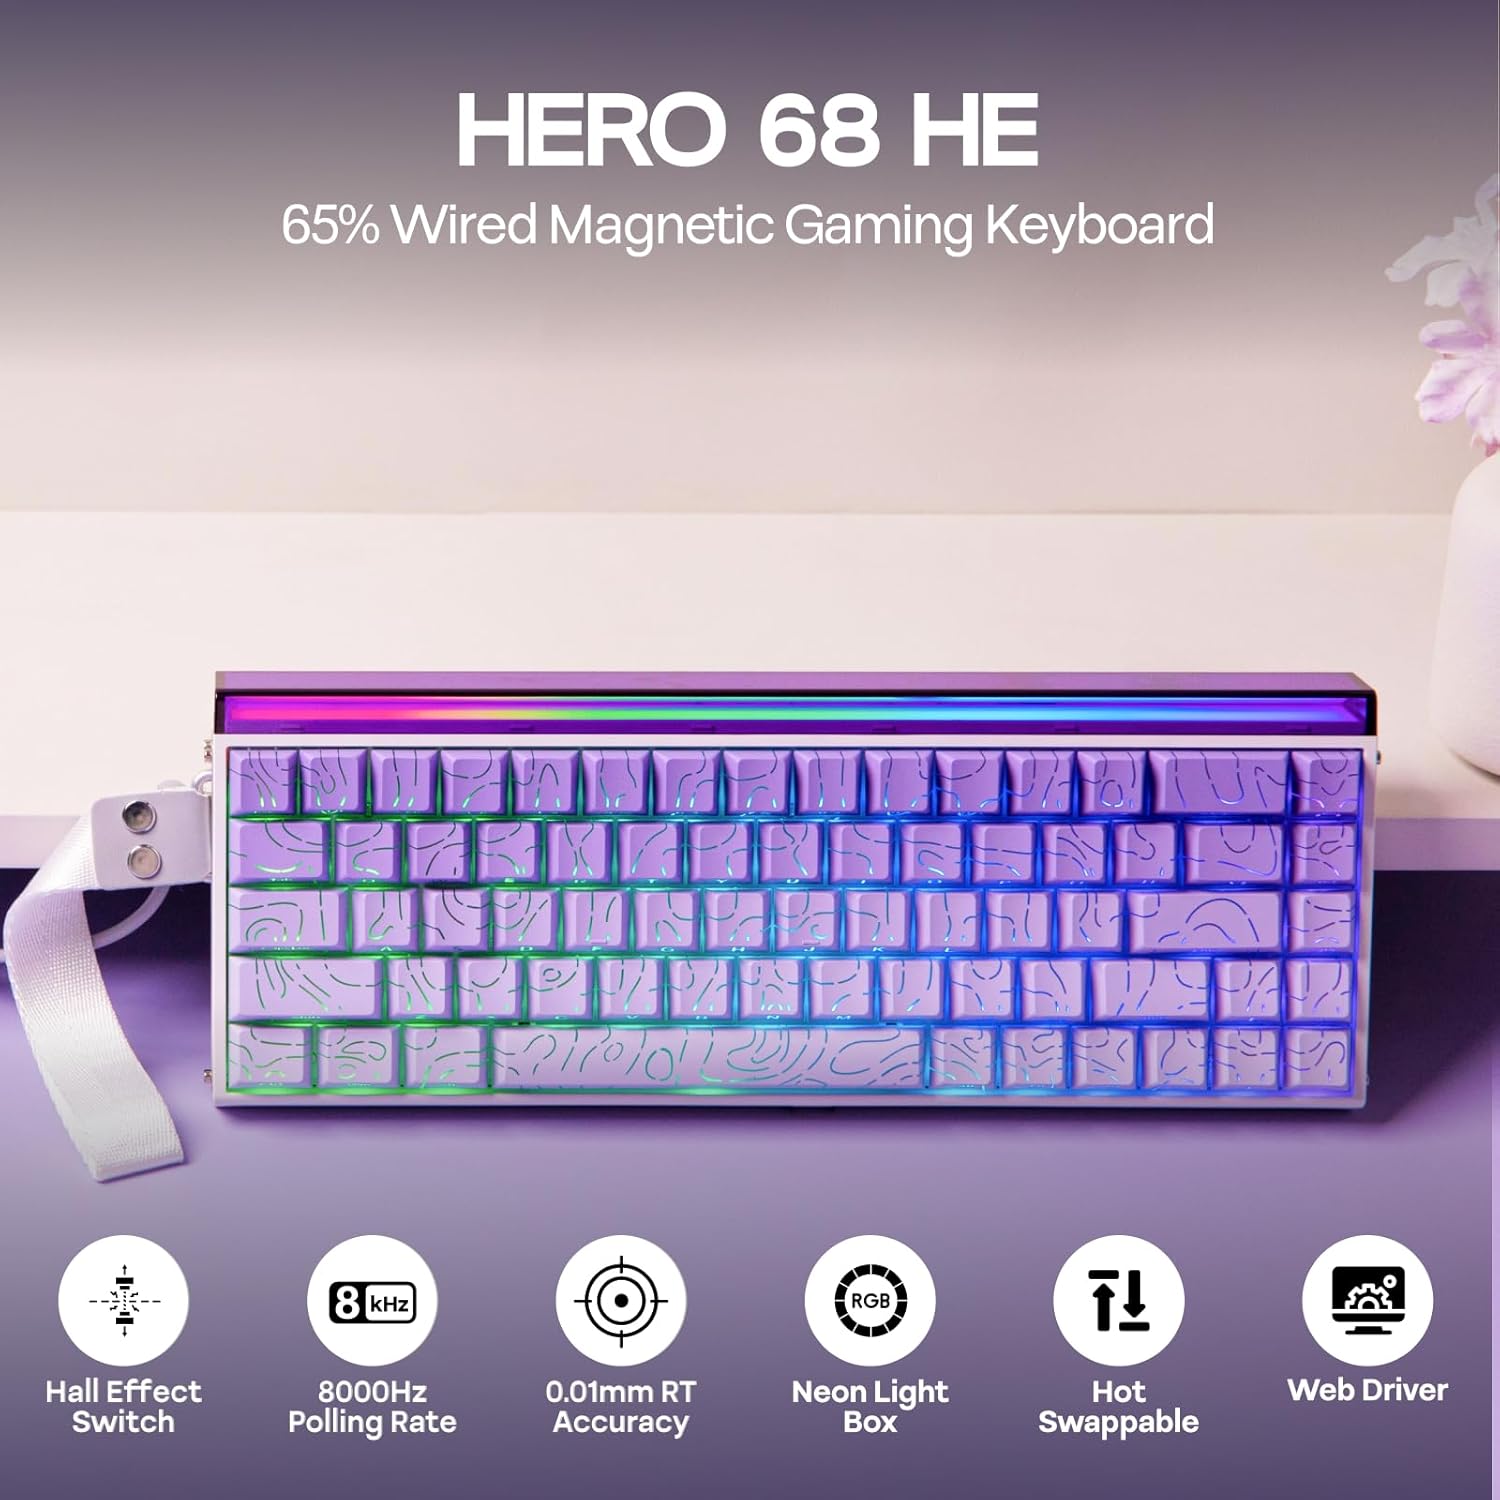
Image 3.1: Overview of the Hero 68 HE keyboard and its main features.
3.2 Keyboard Layout
The Hero 68 HE features a 65% compact layout with 68 keys, designed for efficiency and space-saving. The keycaps are side-printed PBT with a Cherry profile for ergonomic comfort.

Image 3.2: Details of the keycap design and ergonomic profile.
4. Setup
4.1 Connecting the Keyboard
- Locate the USB A to C cable included in the package.
- Connect the USB-C end of the cable to the port on the keyboard.
- Connect the USB-A end of the cable to an available USB port on your computer or compatible device.
- The keyboard will automatically be recognized by your operating system.
The Hero 68 HE is a wired-only keyboard, ensuring consistent performance without wireless latency.

Image 4.1: The keyboard is compatible with Windows, macOS, Laptops, Xbox, PlayStation, and Switch.
5. Operating Instructions
5.1 Adjustable Actuation
The magnetic Hall Effect switches allow for precise adjustment of the actuation point from 0.01mm to 3.4mm. This feature enables users to customize key sensitivity for different tasks, such as rapid trigger for gaming or a deeper press for typing accuracy.

Image 5.1: Visual representation of adjustable actuation for magnetic switches.
5.2 Polling Rate
The keyboard supports an 8kHz polling rate, significantly reducing input latency to 0.125ms. This high polling rate ensures that every keystroke is registered almost instantaneously, which is crucial for competitive gaming.

Image 5.2: Latency and polling rate settings for the Hero 68 HE keyboard.
5.3 Customization with Web Driver
The Hero 68 HE utilizes a web-based driver for comprehensive customization. Access the driver via a Chromium-based browser to configure:
- Key Remapping
- RGB Effect Settings
- Hall Effect Switch Customization
- Macro Recording
- Dynamic Keystroke and Mod Tap functions
- SOCD (Simultaneous Opposite Cardinal Directions) settings
The web driver allows for advanced control over your keyboard's behavior without installing desktop software.

Image 5.3: The programmable web driver for customizing keyboard settings.
5.4 RGB Lighting
The keyboard features per-key RGB backlighting and a side light box. Lighting effects, colors, saturation, brightness, and speed can be fully customized through the web driver to match your preferences.

Image 5.4: The keyboard's customizable RGB lighting and light box.
5.5 Hot-Swappable Switches
The Hero 68 HE is hot-swappable, allowing you to easily change switches without soldering. This provides flexibility for users to experiment with different magnetic switch types.

Image 5.5: The hot-swappable design allows for easy switch replacement.
6. Maintenance
6.1 Cleaning the Keyboard
- General Cleaning: Use a soft, lint-free cloth slightly dampened with water or a mild cleaning solution to wipe down the keycaps and chassis. Avoid excessive moisture.
- Dust Removal: Use compressed air to remove dust and debris from between the keycaps and switches.
- Keycap Removal: Use the included keycap puller to carefully remove keycaps for deeper cleaning. Gently pull straight up to avoid damaging the switch stem.
6.2 Switch Care
While magnetic switches are durable, avoid exposing them to strong magnetic fields or excessive force. If replacing switches, use the included switch puller and ensure proper alignment before pressing them into the PCB.
7. Troubleshooting
| Issue | Possible Cause | Solution |
|---|---|---|
| Keyboard not responding | Loose cable connection, faulty USB port, driver issue. | Ensure USB cable is securely connected. Try a different USB port. Restart your computer. Check the web driver for any error messages. |
| RGB lighting not working | Lighting disabled, software conflict, faulty LED. | Check RGB settings in the web driver. Ensure no other lighting software is interfering. |
| Keys not registering or double-typing | Switch issue, actuation point set too low/high, debris under keycap. | Clean under the keycap. Adjust actuation point in the web driver. If a specific switch is faulty, replace it using the hot-swap feature. |
| Web driver not accessible | Browser incompatibility, internet connection issue. | Ensure you are using a Chromium-based browser (e.g., Chrome, Edge). Check your internet connection. |
8. Specifications
| Feature | Detail |
|---|---|
| Model | Hero 68 HE |
| Keyboard Description | Magnetic Gaming Keyboard |
| Connectivity Technology | Wired Only (USB A to C cable included) |
| Actuation | 0.01mm - 3.4mm Adjustable |
| Polling Rate | 8kHz |
| Sound Dampening | 5-Layer Construction |
| Backlighting | RGB (Per-key & Side Light Box) |
| Switches | Hall Effect, Hot-Swappable |
| Compatible Devices | Gaming Console, Laptop, PC, Projector |
| Product Dimensions | 4.7 x 12.3 x 1.2 inches (12cm L x 31.2cm W x 3cm H) |
| Item Weight | 2.46 pounds (1.11 kg) |
| Material | Plastic |

Image 8.1: Detailed technical specifications and physical dimensions.

Image 8.2: Internal structure illustrating the five-layer sound dampening system.
9. Warranty and Support
9.1 Warranty Information
EPOMAKER products typically come with a standard manufacturer's warranty. For specific warranty terms and conditions, please refer to the warranty card included with your product or visit the official EPOMAKER website. Protection plans may also be available for extended coverage.
9.2 Customer Support
For technical assistance, troubleshooting, or product inquiries, please contact EPOMAKER customer support through their official website. You can also refer to the digital user manual (PDF) available at https://manuals.plus/m/3bf63b34745dab409acedb4a4009fb12c0590896132f9c6ba67c6c5c399490a5 for additional details.


