
1. Product Overview
The Sodola 10Gbps 6-Port Web Managed Ethernet Switch (Model SL510S-4T2XS-JP) is designed for high-speed network environments. It features 4x10G RJ45 ports and 2x10G SFP+ ports, enabling advanced network connectivity for devices such as NAS, servers, and 4K streaming setups. This switch incorporates a robust metal casing with efficient fan cooling for reliable and stable operation.
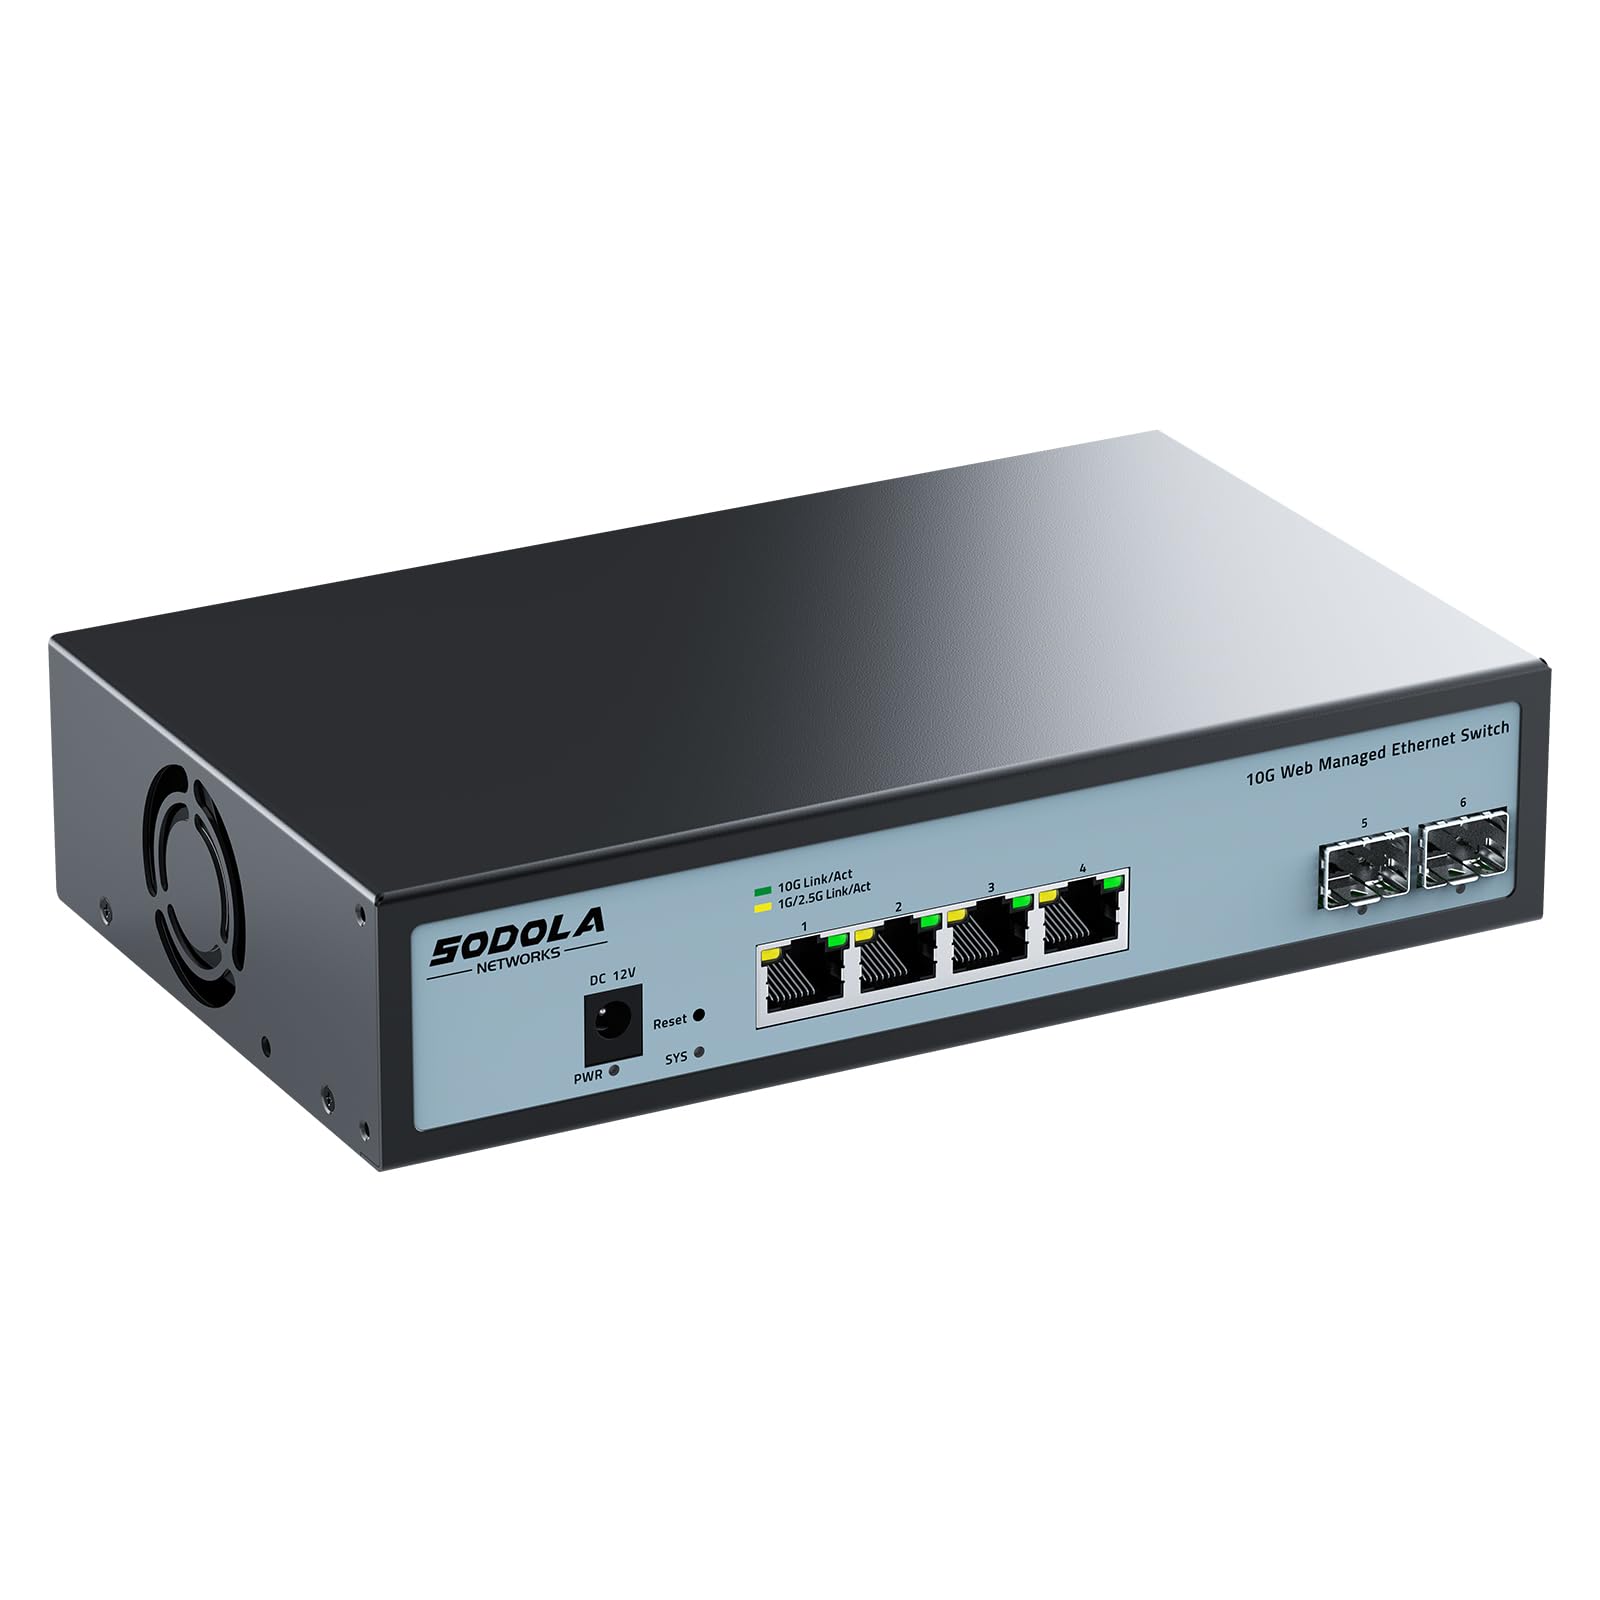
Figure 1: Sodola 10Gbps 6-Port Web Managed Ethernet Switch.
2. Key Features
- 10G High-Speed Connectivity: Equipped with Realtek RTL9303+RTL8264B chipset, this switch provides 10G high-speed network connections, suitable for high-load network environments like NAS, servers, and 4K streaming.
- Comprehensive Management Functions: Supports LACP (Link Aggregation), QoS, VLAN, IGMP, Port Mirroring, STP/RSTP, DHCP Snooping, SNMP, Flow Control, MAC Filtering, and Multicast. Note: Manually set the IPv4 address before logging in to the web interface.
- Robust Metal Casing Design: The 10Gbps switch features a durable metal casing with additional heat dissipation holes on the sides and a built-in cooling fan to ensure device longevity and stable, reliable operation.
- Enhanced Heat Dissipation: The internal fan provides reliable cooling even under full load. The fan can be removed if necessary (requires disassembling the casing) for noise-sensitive environments.
- Lightning Protection: Designed with 4KV lightning protection to effectively prevent damage from sudden power surges.

Figure 2: High-speed performance and capacity of the Sodola 10Gbps switch, featuring 120Gbps switching capacity and 89.28Mpps packet forwarding rate.

Figure 3: Web management interface illustrating comprehensive network management functions.
3. Package Contents
Verify that all items listed below are included in your package. If any item is missing or damaged, please contact customer support.
- Sodola 10Gbps 6-Port Web Managed Ethernet Switch (Model SL510S-4T2XS-JP) x 1
- Power Adapter x 1
- Rubber Feet x 4
- Product Manual x 1
- Inspection Certificate x 1

Figure 4: Contents of the product package.
4. Setup Instructions
4.1 Physical Installation
The switch supports both desktop placement and wall-mounting. Choose the installation method that best suits your environment.

Figure 5: Desktop and wall-mount installation options.
Ensure proper ventilation around the device, especially if operating under heavy load, to maintain optimal performance and prevent overheating.
4.2 Connecting the Switch
Connect your network devices (NAS, PCs, routers, etc.) to the RJ45 or SFP+ ports on the switch using appropriate Ethernet cables or SFP+ transceivers.

Figure 6: Front and rear panel overview with port labels and indicators.
- DC Input: Connect the provided power adapter here.
- Reset Button: Used to reset the device to factory defaults.
- 4x10G RJ45 Ports: Connect standard Ethernet cables for 10Gbps, 1Gbps, or 2.5Gbps connections.
- 2x10G SFP+ Ports: Insert SFP+ modules for fiber optic or direct attach copper (DAC) connections.
- Power Indicator: Lights up when the device is powered on.
- System Indicator: Indicates system status.
- Grounding Screw: For grounding the device to protect against electrical surges.
- Fan Cooling: Integrated fan for heat dissipation.
4.3 Initial Web Management Access
To access the web management interface, follow these steps:
- Clear your web browser's cache to ensure a fresh connection.
- Adjust your PC's network settings. You may need to manually set your PC's IPv4 address to be in the same subnet as the switch (e.g., if the switch's default IP is 192.168.2.1, set your PC's IP to 192.168.2.X, where X is not 1, and subnet mask to 255.255.255.0).
- Open a web browser and navigate to the default IP address: http://192.168.2.1.
- Enter the default login credentials:
- Username: admin
- Password: admin

Figure 7: Web management login method and IP address configuration example.
5. Operation
5.1 Configuring Port Settings
The web management interface allows you to configure various settings for each port, including transmission speed.
- Log in to the web interface.
- Navigate to the "Port Setting" section.
- Select the desired port and choose the appropriate speed (e.g., 10M, 100M, 1G, 2.5G, 5G, 10G) and duplex mode (Auto, Full, Half).
- Click "Apply" to save the changes.
- After applying settings, ensure you save the configuration and reboot the switch for changes to take effect.

Figure 8: Port speed configuration and saving settings.
5.2 Advanced Management Functions
The web interface provides access to advanced features such as VLAN configuration, QoS settings, Link Aggregation (LACP), Port Mirroring, and SNMP for network monitoring and control. Refer to the detailed online help or the full product manual for specific instructions on configuring these advanced features.

Figure 9: Example 10G LAN setup for home or office use.
6. Maintenance
6.1 Cooling System
The switch is equipped with an internal cooling fan to maintain optimal operating temperatures. Ensure that the ventilation holes are not obstructed to allow for proper airflow. Regularly check for dust accumulation and clean as needed to prevent overheating.

Figure 10: Integrated cooling fan for efficient heat dissipation.
6.2 Lightning Protection
The device includes 4KV lightning protection. For enhanced safety, especially in areas prone to electrical storms, ensure the grounding screw is properly connected to an earth ground.

Figure 11: 4KV Lightning Protection feature.
7. Troubleshooting
- No Power: Ensure the power adapter is securely connected to both the switch and a working power outlet. Check the power indicator light on the switch.
- No Network Connection:
- Verify that Ethernet cables are properly connected to both the switch and your devices.
- Check the link/activity LEDs on the ports. If they are off, try a different cable or port.
- Ensure your device's network adapter is enabled and configured correctly.
- Cannot Access Web Management Interface:
- Confirm your PC's IP address is in the same subnet as the switch (default 192.168.2.1).
- Try clearing your browser's cache or using a different browser.
- Ensure there are no IP address conflicts on your network.
- If the default IP has been changed and forgotten, a factory reset may be necessary (refer to the reset button in Section 4.2).
- Slow Network Speed:
- Verify that all connected devices and cables support the desired speed (e.g., 10Gbps).
- Check port speed settings in the web management interface (Section 5.1).
- Ensure the switch is adequately cooled and not overheating.
- Device Malfunction: If the switch exhibits unusual behavior, try rebooting it. If the issue persists, perform a factory reset. If problems continue, contact customer support.
8. Specifications
| Feature | Detail |
|---|---|
| Brand | Sodola |
| Model Number | SL510S-4T2XS-JP |
| Port Configuration | 4x10G RJ45, 2x10G SFP+ |
| Total Port Count | 6 |
| Switch Type | Managed (Web-based) |
| Data Transfer Rate | 10 Gigabits per second (per port) |
| Interface | RJ45, SFP+ |
| Compatible Devices | NAS, Desktop, Laptop, Router |
| Case Material | Metal |
| Cooling | Integrated Fan |
| Lightning Protection | 4KV |
| Included Components | 10Gbps Switching Hub, Power Adapter, Rubber Feet, Product Manual, Inspection Certificate |
9. Warranty and Support
This Sodola product comes with a 1-year warranty from the date of purchase. The warranty covers defects in materials and workmanship under normal use.
For technical support, warranty claims, or any questions regarding the product, please contact Sodola customer service through the retailer where you purchased the product or visit the official Sodola website for contact information.
Please retain your proof of purchase for warranty service.


