1. Safety Information
Please read and understand all safety instructions before operating the device. Failure to follow these instructions may result in electric shock, fire, or serious injury.
- This device is designed to detect AC voltage only. Do not attempt to measure DC voltage.
- Always verify the device's functionality on a known live circuit before use.
- Do not use the device if it appears damaged or is not operating correctly.
- The integrated laser is a Class II laser product with an output of less than 1mW. Avoid direct eye exposure to the laser beam.
- Always wear appropriate personal protective equipment (PPE) when working with electrical circuits.
- Keep the device away from children.
2. Product Overview
The VENLAB vd-200a2 is a pen-type non-contact voltage detector designed for safe and convenient electrical testing. It features adjustable sensitivity, visual and audible alarms, a built-in flashlight, and a laser pointer.
2.1. Components
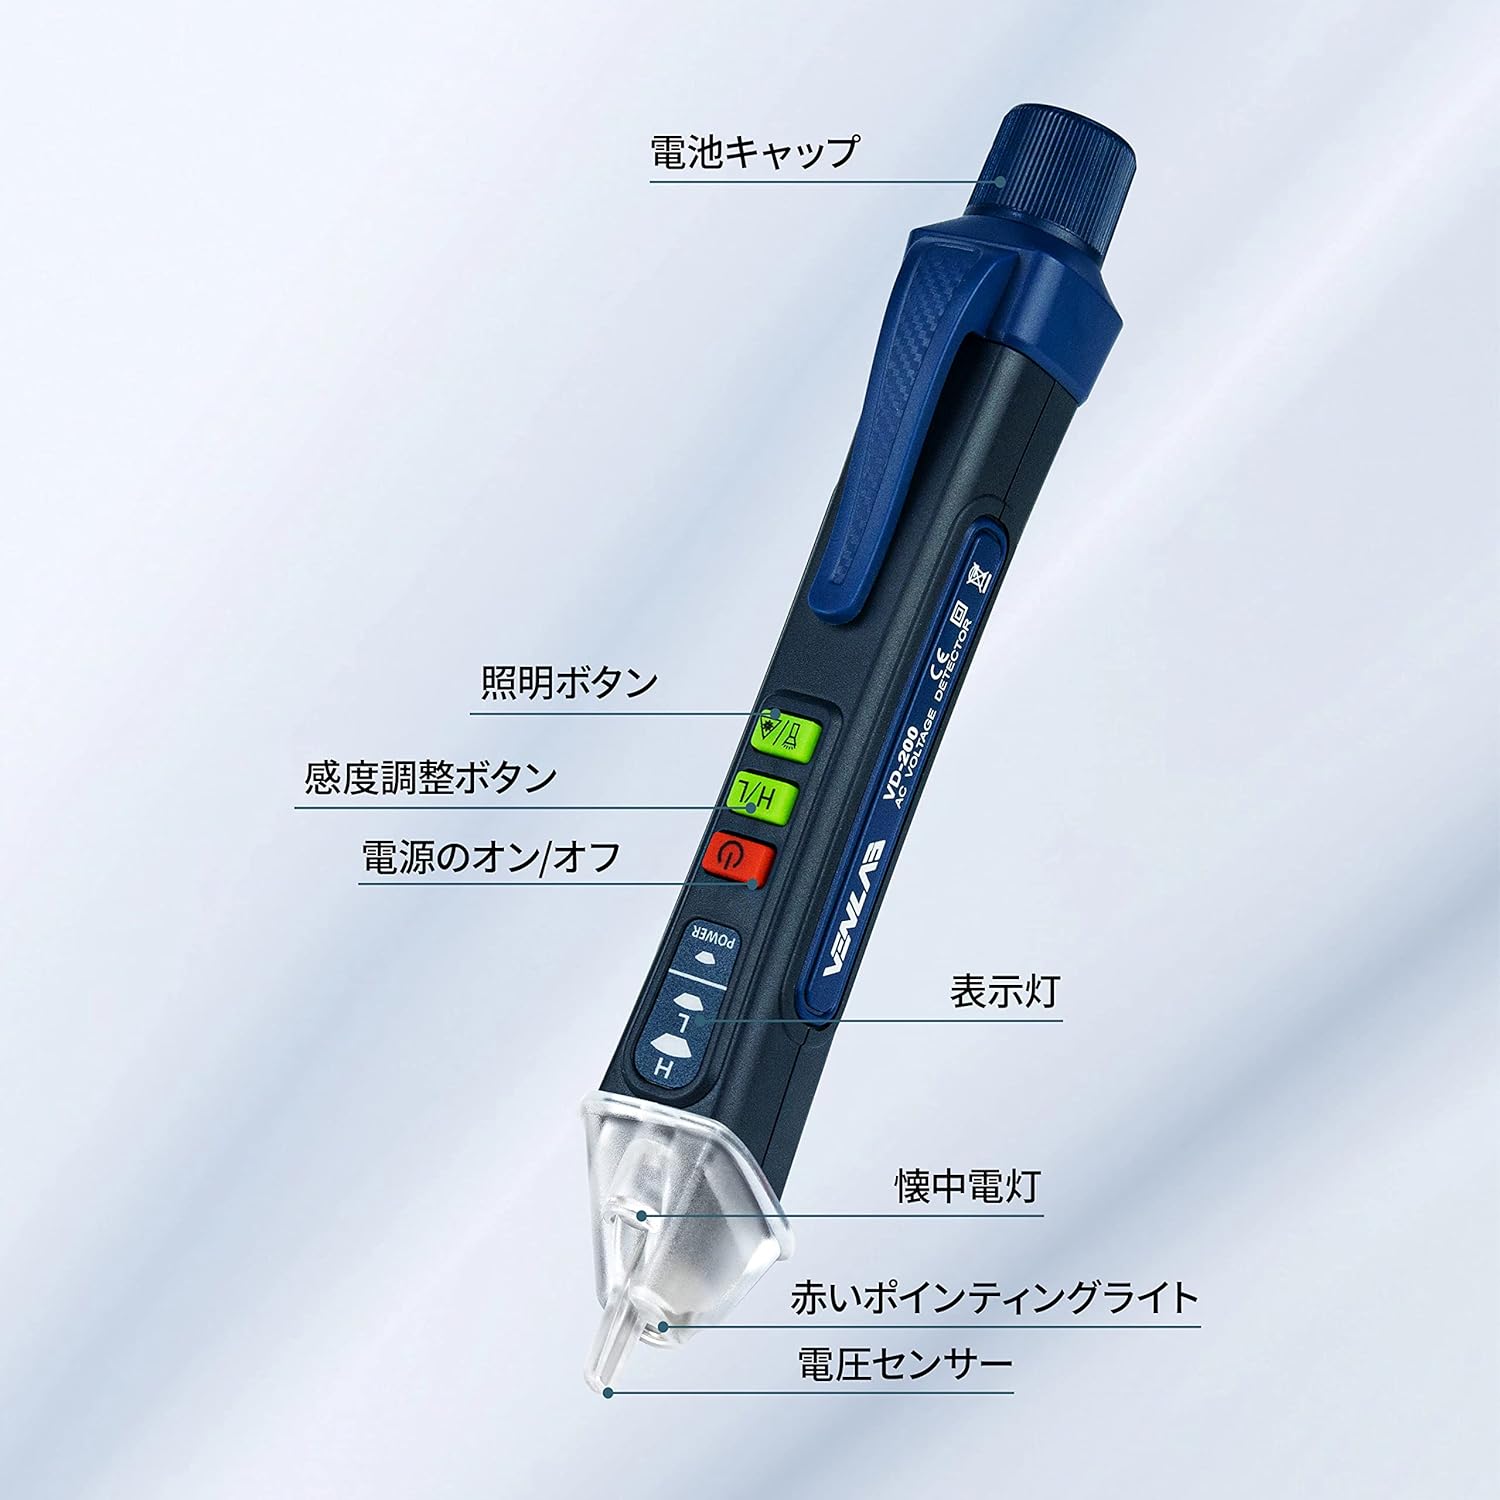
Image: Labeled components of the VENLAB Voltage Detector.
- Battery Cap
- Illumination Button (Flashlight)
- Sensitivity Adjustment Button (H/L)
- Power On/Off Button
- Indicator Light
- Flashlight
- Red Pointing Light (Laser)
- Voltage Sensor Tip
2.2. Key Features
- Non-Contact Voltage (NCV) Detection: Safely detects AC voltage without direct contact.
- Adjustable Sensitivity: High sensitivity mode (12V-1000V) for general detection and low sensitivity mode (48V-1000V) for specific applications.
- Visual and Audible Alarm: Provides clear indications of voltage presence with LED lights and a buzzer.
- Wire Break Detection: Assists in identifying breaks in insulated wires.
- Built-in Flashlight: Convenient for working in dimly lit areas.
- Laser Pointer: Useful for pointing or marking.
- Compact and Lightweight Design: Easy to carry and use.
- Automatic Power Off: Conserves battery life.
3. Setup
3.1. Battery Installation
The device requires one AAA battery (included) for operation.
- Unscrew the battery cap at the top of the device.
- Insert one AAA battery, ensuring correct polarity (+/-).
- Securely screw the battery cap back into place.
4. Operating Instructions
4.1. Power On/Off
Press the Power On/Off button to turn the device on or off.
4.2. Non-Contact Voltage (NCV) Detection
The NCV function allows for safe detection of AC voltage without direct contact with live wires.
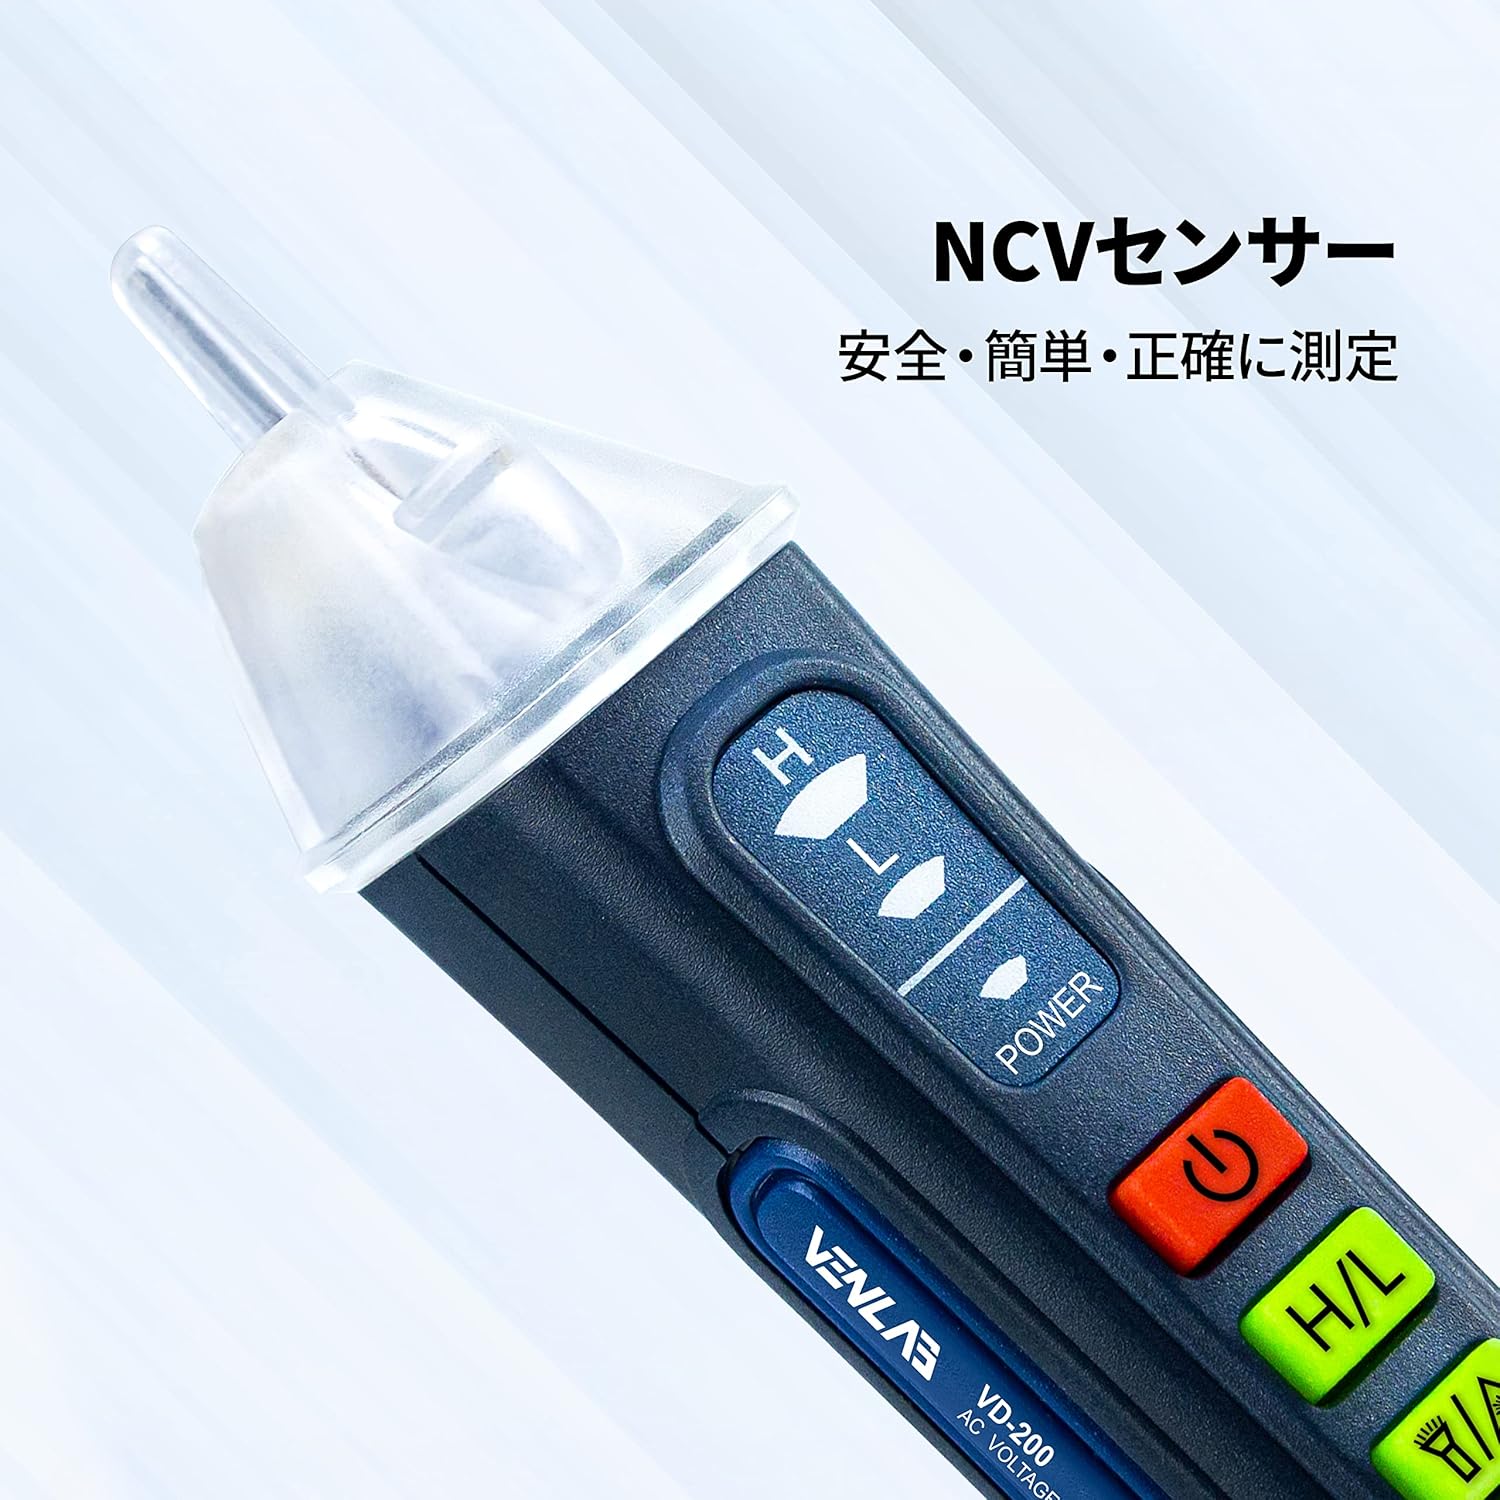
Image: The NCV sensor at the tip of the detector.
- Turn on the device.
- Place the voltage sensor tip near the wire, outlet, or electrical component you wish to test.
- If AC voltage is detected, the indicator light will illuminate and the buzzer will sound.

Image: Using the detector to test an electrical outlet for voltage.
4.3. Sensitivity Adjustment
The device offers two sensitivity modes:
- High Sensitivity (H): Detects voltage in the range of 12V to 1000V. This mode is suitable for general detection and identifying weaker signals.
- Low Sensitivity (L): Detects voltage in the range of 48V to 1000V. This mode is useful for pinpointing voltage in specific areas and reducing false positives from ambient electrical fields.
Press the Sensitivity Adjustment (H/L) button to switch between high and low sensitivity modes.
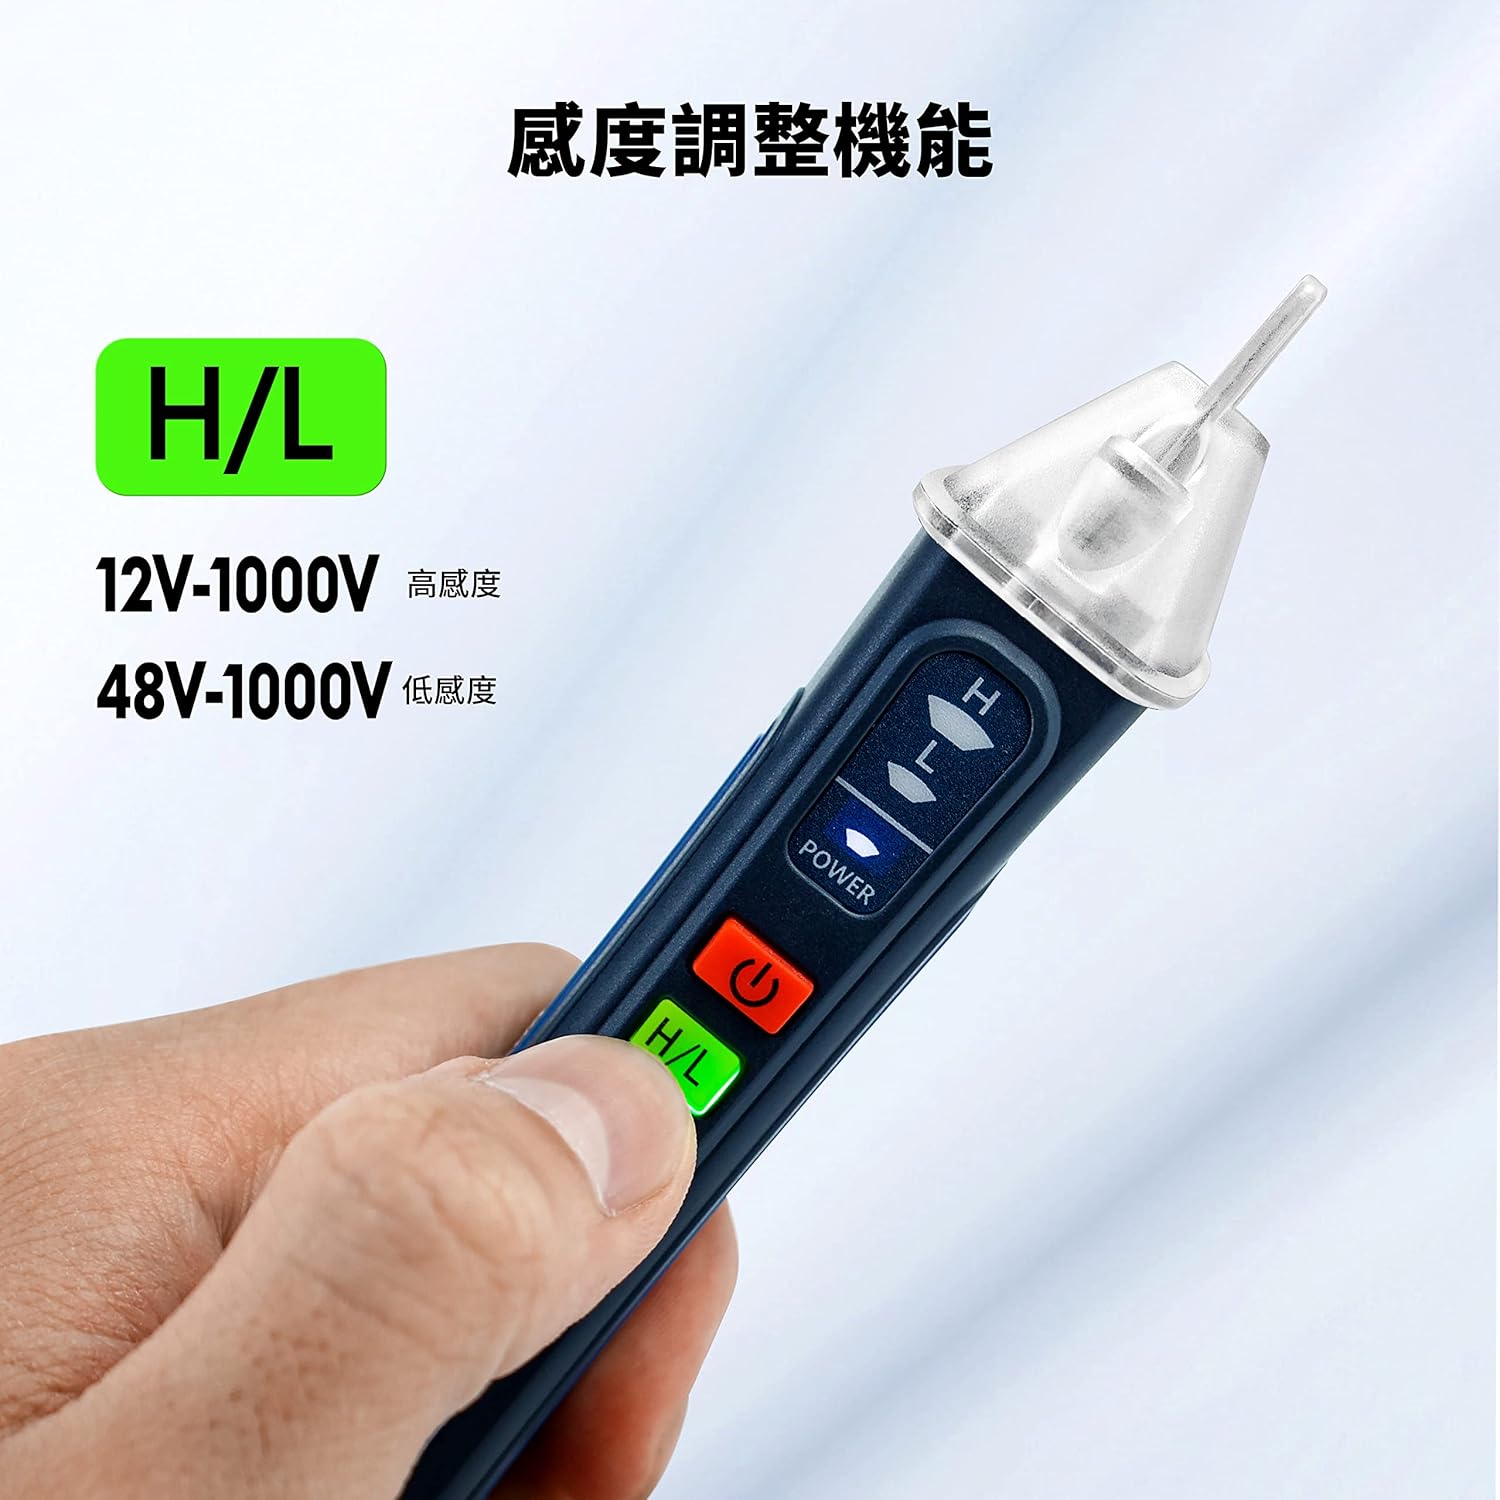
Image: Hand demonstrating the sensitivity adjustment button.
4.4. Visual and Audible Alarm Indications
- High Voltage Detection: The tip will glow red, and a high-frequency beep will sound.
- Low Voltage Detection: The tip will glow yellow, and a low-frequency beep will sound.

Image: Visual representation of low voltage (yellow light) and high voltage (red light) indications.
4.5. Wire Break Detection
This feature helps locate breaks in insulated wires.

Image: Detector indicating a break in an electrical wire.
To use, set the device to high sensitivity mode. Move the sensor along the insulated wire. The alarm will stop or change significantly at the point of the break.
4.6. Flashlight Function
Press the Illumination button to turn the built-in flashlight on or off. This is useful for working in dark environments.
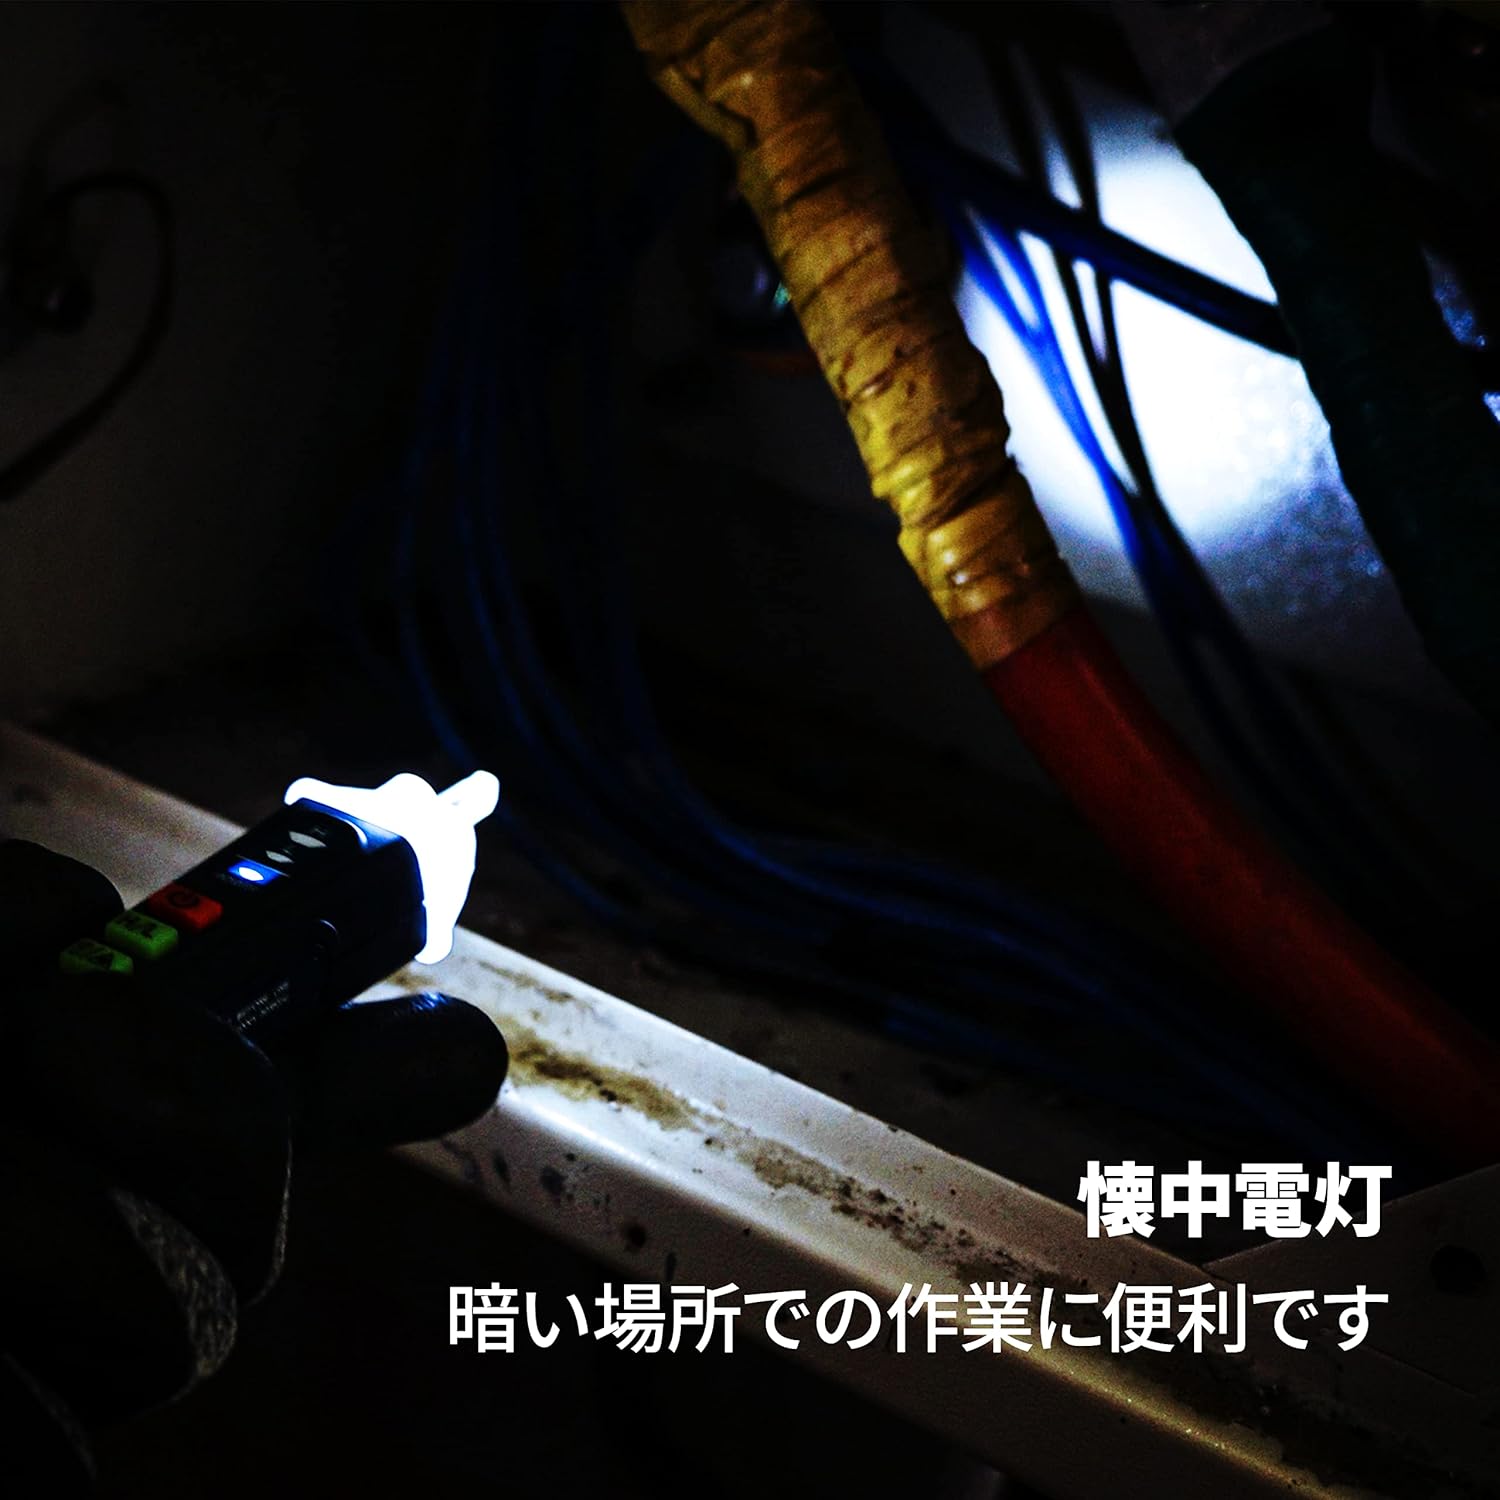
Image: The detector's flashlight illuminating a dark workspace.
4.7. Laser Pointer Function
The device includes a red laser pointer. Press the Illumination button twice quickly to activate the laser pointer. Press it again to turn it off.

Image: The detector's laser pointer being used to indicate a point on an electrical panel.
5. Maintenance
- Cleaning: Wipe the device with a dry, clean cloth. Do not use abrasive cleaners or solvents.
- Battery Replacement: Replace the AAA battery when the indicator light dims or the device fails to power on. Follow the battery installation steps in Section 3.1.
- Storage: Store the device in a cool, dry place away from direct sunlight and extreme temperatures. If storing for extended periods, remove the battery to prevent leakage.
6. Troubleshooting
| Problem | Possible Cause | Solution |
|---|---|---|
| Device does not power on. | Dead or incorrectly installed battery. | Check battery polarity or replace with a new AAA battery. |
| No detection on live circuit. | Device is off; low battery; incorrect sensitivity mode; thick insulation. | Ensure device is on; replace battery; switch to high sensitivity mode; try closer proximity to the conductor. |
| False positives (detects voltage where none exists). | High sensitivity mode in an electrically noisy environment. | Switch to low sensitivity mode. |
| Flashlight or laser not working. | Low battery; button not pressed correctly. | Replace battery; ensure button is pressed firmly (for flashlight) or double-pressed quickly (for laser). |
7. Specifications
| Feature | Specification |
|---|---|
| Brand | VENLAB |
| Model Number | vd-200a2 |
| Product Weight | 70 g |
| Product Dimensions (LxWxH) | 18 x 3.2 x 3.6 cm |
| Battery | 1 AAA battery (included) |
| Color | BLUE |
| Style | Lightweight, Compact |
| Power Source | AC |
| Voltage Detection Range (High Sensitivity) | 12V ~ 1000V AC |
| Voltage Detection Range (Low Sensitivity) | 48V ~ 1000V AC |
| Laser Class | Class II, Output <1mW |
8. Warranty and Support
For warranty information or technical support, please refer to the product packaging or contact VENLAB customer service through the retailer where the product was purchased. Please have your model number (vd-200a2) and purchase details ready when contacting support.


