1. Introduction
The Rapoo MT760 PRO is a versatile wireless mouse designed for enhanced productivity and comfort. It features advanced NearLink and Bluetooth 5.0 multi-device connectivity, high-precision tracking, and programmable buttons to streamline your workflow across various operating systems and devices.
2. Package Contents
Please verify that all items are present in your package:
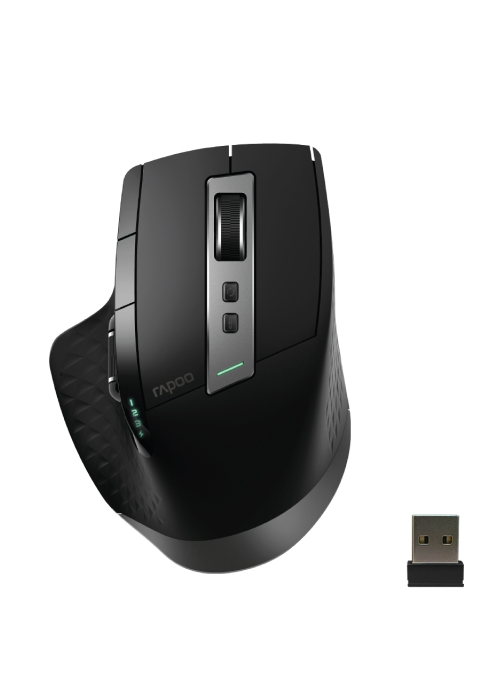
- 1 x Rapoo MT760 PRO Wireless Mouse
- 2 x NearLink USB Dongles
- 1 x USB-C Charging Cable (USB-A to USB-C)
- 1 x User Manual
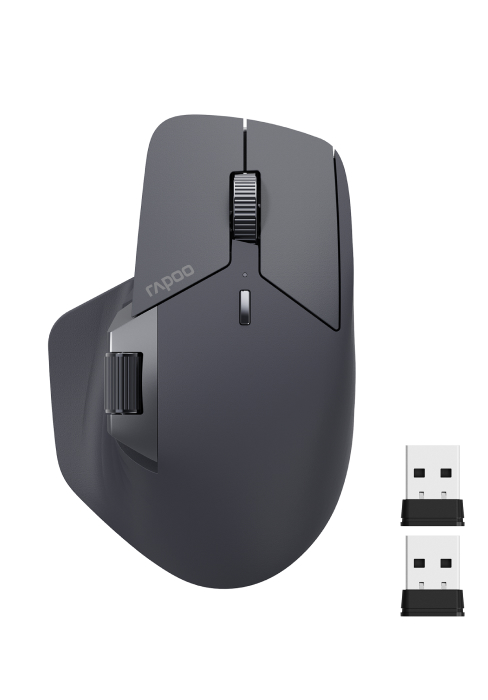
3. Product Overview
The Rapoo MT760 PRO mouse is engineered for ergonomic comfort and advanced functionality. Below is an image illustrating the mouse design and its various components.

The mouse features 11 programmable buttons, including the main left/right clicks, two scroll wheels (vertical and horizontal), forward/back buttons, and a DPI switch. An on-board memory allows for saving custom settings directly to the mouse.

4. Setup
4.1 Charging the Mouse
The MT760 PRO mouse is equipped with a built-in Lithium Polymer battery. To charge, connect the provided USB-C cable to the mouse and a power source. A 5-minute quick charge can provide a full day of use. The mouse also supports Qi wireless charging with compatible mouse pads (P3 Wireless Charging Module sold separately).

4.2 Connecting to Devices
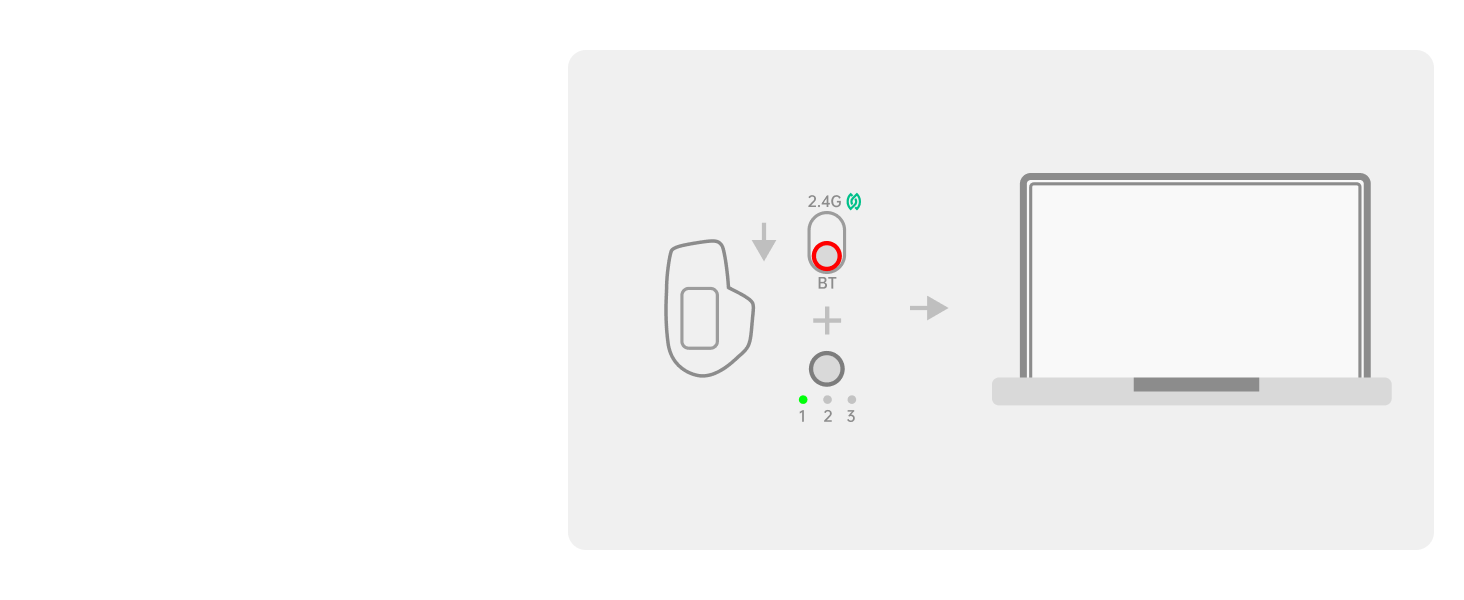
The MT760 PRO offers multiple connectivity options, allowing connection to up to 7 devices simultaneously.

4.2.1 NearLink USB Connection
- Locate one of the two NearLink USB dongles provided. One is typically stored in the mouse's bottom compartment, and another is in the package.
- Plug the NearLink USB dongle into an available USB port on your computer.
- Ensure the mouse is powered on and set to a NearLink channel (indicated by a specific LED color, usually green for 2.4G).
- The mouse should automatically connect to the dongle.
4.2.2 NearLink Wireless Direct Connection
This mode allows direct connection without a USB dongle, typically assigned to Channel 3.
4.2.3 Bluetooth Connection
- Switch the mouse to one of the Bluetooth channels (e.g., BT1, BT2, BT3). The LED indicator will change color.
- On your device, navigate to Bluetooth settings and enable Bluetooth.
- Select "Rapoo MT760 PRO" from the list of available devices to pair.
4.2.4 Wired Connection
Connect the mouse to your device using the provided USB-C cable. The wired connection takes priority over NearLink and Bluetooth modes.
4.3 Driver Installation
For full functionality, including programmable buttons and M+ Cross-Computer technology, install the Rapoo mouse driver. The driver can typically be downloaded from the official Rapoo website. Note that M+ Cross-Computer functionality is compatible only with Windows systems.
5. Operating Instructions
5.1 DPI Adjustment
The mouse features 7 adjustable DPI levels: 800, 1200, 1600, 2400, 3200, 6400, and 12000. You can switch between these preset values using the dedicated DPI button on the mouse. Finer adjustments (50 interval) can be made via the mouse driver.

5.2 Programmable Buttons and On-Board Memory
Utilize the 11 programmable buttons to assign shortcuts, media keys, or macros. The on-board memory stores your settings directly on the mouse, eliminating the need for reconfiguration after rebooting or when switching computers, and reducing system resource usage.
5.3 M+ Cross-Computer Technology
This feature allows seamless control across multiple computers by simply moving the cursor to the edge of the screen. You can also transfer files, images, and text between connected computers by copying and pasting. This function requires the Rapoo driver and is compatible with Windows systems.

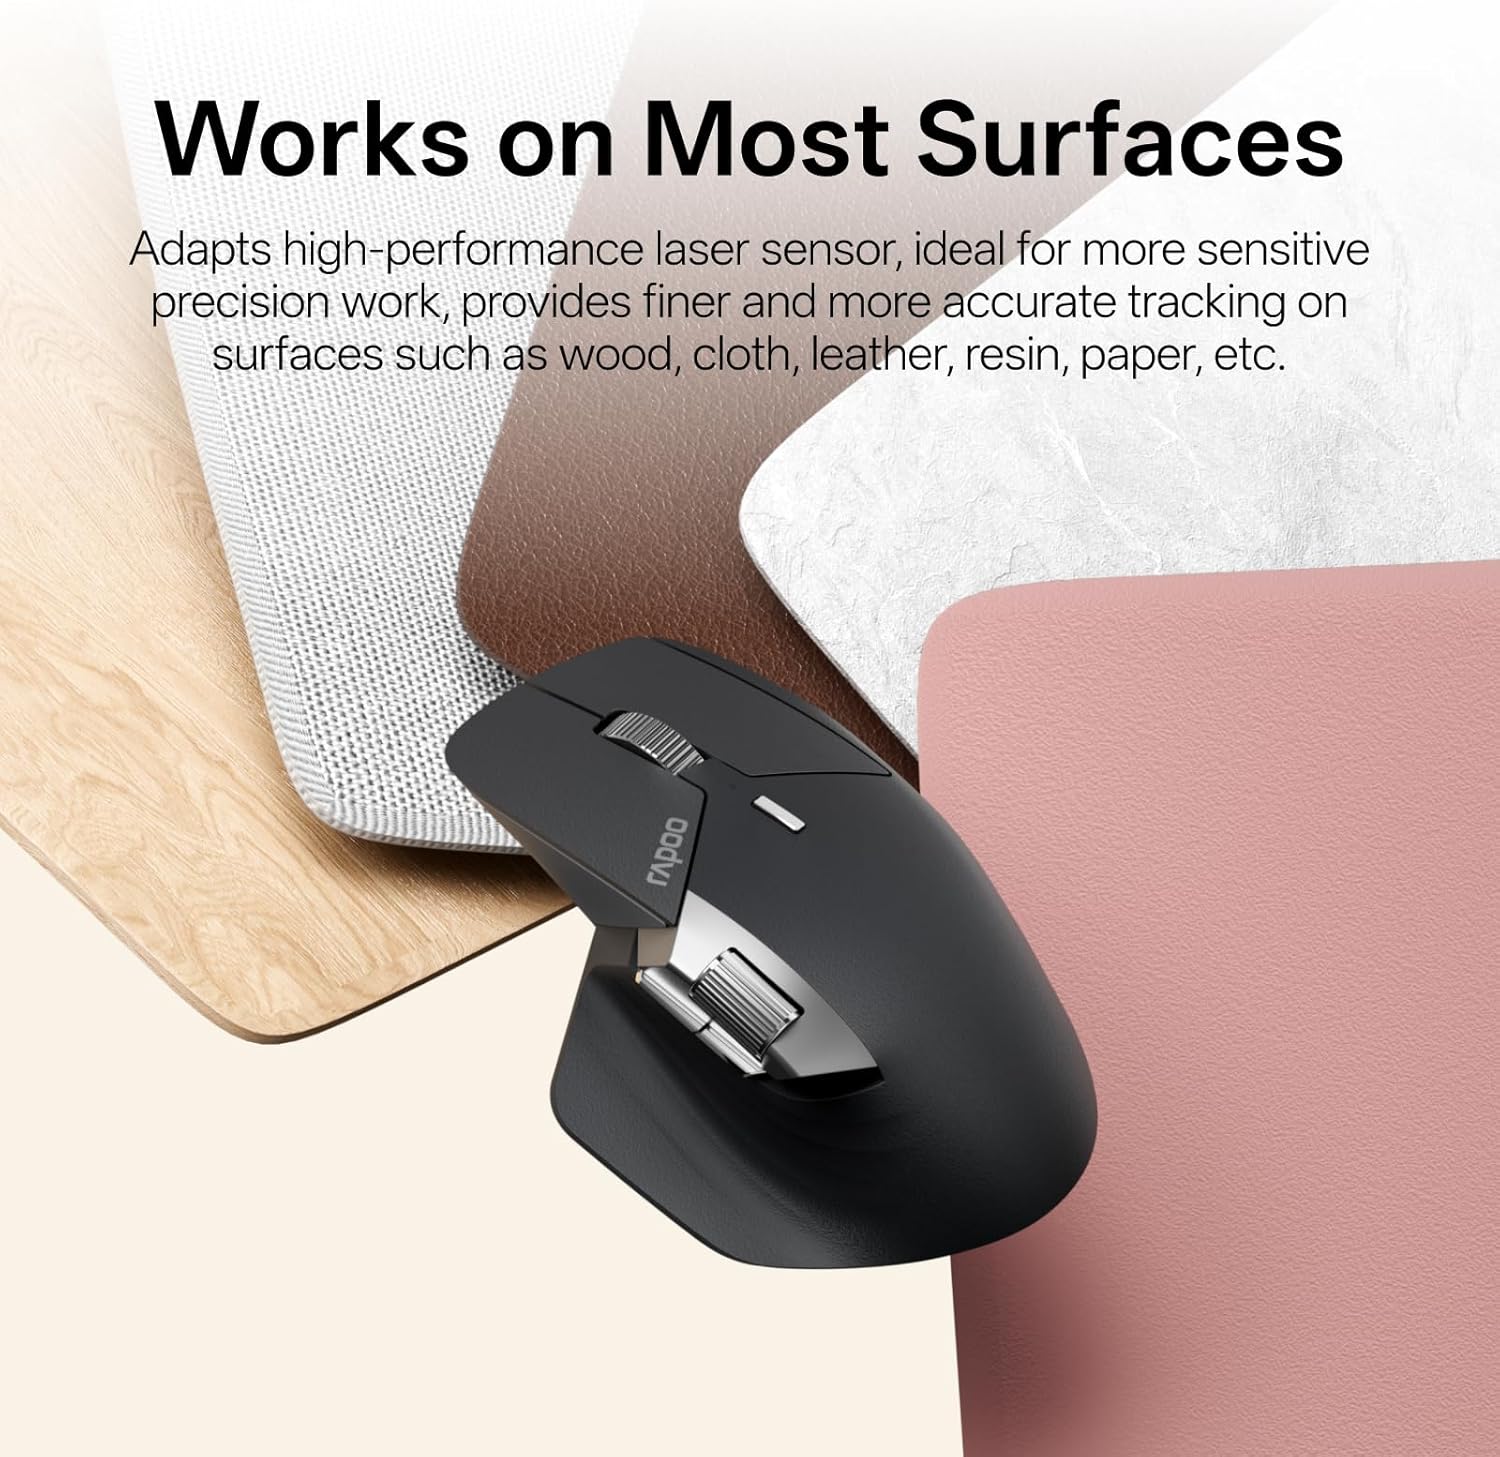
5.4 Surface Compatibility
The MT760 PRO incorporates a high-performance laser sensor, providing precise and accurate tracking on a variety of surfaces, including wood, cloth, leather, resin, and paper.
6. Maintenance
6.1 Battery Life and Charging
The mouse offers up to 120 days of battery life due to NearLink's low-power access mode. Recharge using the USB-C cable or a compatible Qi wireless charging pad. Avoid using the mouse in wired mode while simultaneously attempting wireless charging, as this may interfere with charging efficiency.
6.2 Cleaning
To clean the mouse, use a soft, dry cloth. For stubborn dirt, a slightly damp cloth with mild soap can be used, ensuring no moisture enters the internal components. Avoid abrasive cleaners or solvents.
7. Troubleshooting
7.1 Connectivity Issues
- No Connection (NearLink USB): Ensure the USB dongle is securely plugged in and the mouse is set to the correct NearLink channel. Try a different USB port.
- No Connection (Bluetooth): Verify Bluetooth is enabled on your device and the mouse is in pairing mode on a Bluetooth channel. Remove previous pairings and try re-pairing.
- Intermittent Connection: Check for potential interference from other wireless devices. Ensure the mouse is within range of your device.
7.2 Tracking Issues
- Inaccurate Tracking: Clean the mouse sensor on the underside. Try using the mouse on a different surface or a mouse pad.
- Cursor Lag: Ensure the mouse battery is sufficiently charged. For NearLink, ensure the dongle is not obstructed. For Bluetooth, check for system resource usage on your device.
7.3 Software Issues
- Driver Not Recognizing Mouse: Reinstall the Rapoo driver from the official website. Ensure your operating system is up to date.
- Custom Settings Not Applying: Verify that the settings are saved to the mouse's on-board memory. Restart the driver software.
8. Specifications
| Feature | Specification |
|---|---|
| Product Dimensions | 6.73 x 4.4 x 0.1 inches |
| Item Weight | 3.88 ounces |
| Item Model Number | MT760 PRO |
| Batteries | 1 Lithium Polymer batteries required (included) |
| Connectivity Technology | Bluetooth, NearLink, USB |
| Special Features | 11 Programmable Buttons with On-Board Memory, 120 Days Battery Life, NearLink Technology, Ultra-Low Latency, 7 Adjustable DPI Levels, Up to 7 Devices, M+ Cross-Computer Technology |
| Movement Detection Technology | Optical |
| Manufacturer | Shenzhen Rapoo Technology Co., Ltd. |
9. Official Product Video
10. Warranty and Support
For warranty information, technical support, or further assistance, please refer to the official Rapoo website or contact their customer service. Details regarding specific warranty periods and support channels are typically provided with your product documentation or on the manufacturer's website.


