Introduction
This manual provides detailed instructions for the safe and efficient use of your Northpoint NP-RWL-25 Cordless LED Work Light. Please read this manual thoroughly before operating the device and retain it for future reference.
The Northpoint NP-RWL-25 is a versatile 20W LED work light, delivering up to 2000 lumens of illumination. It features adjustable brightness, selectable color temperatures (cool white/warm white), and a robust IP65-rated aluminum housing. Designed for both indoor and outdoor use, it includes a foldable handle, a hanging hook, and powerful magnets for flexible positioning. The integrated Li-ion battery is rechargeable via USB-C and includes a battery level indicator.
Safety Instructions
- Do not look directly into the LED light source when it is active, as this may cause eye damage.
- Keep the device away from extreme temperatures, direct sunlight, and moisture.
- Do not attempt to disassemble or modify the work light. Repairs should only be performed by qualified personnel.
- Ensure the USB-C charging cable is undamaged before use.
- Keep out of reach of children.
- Dispose of the battery and device according to local regulations.
Package Contents
- Northpoint NP-RWL-25 Cordless LED Work Light
- USB-C Charging Cable
- User Manual
Product Overview
Familiarize yourself with the components of your work light.
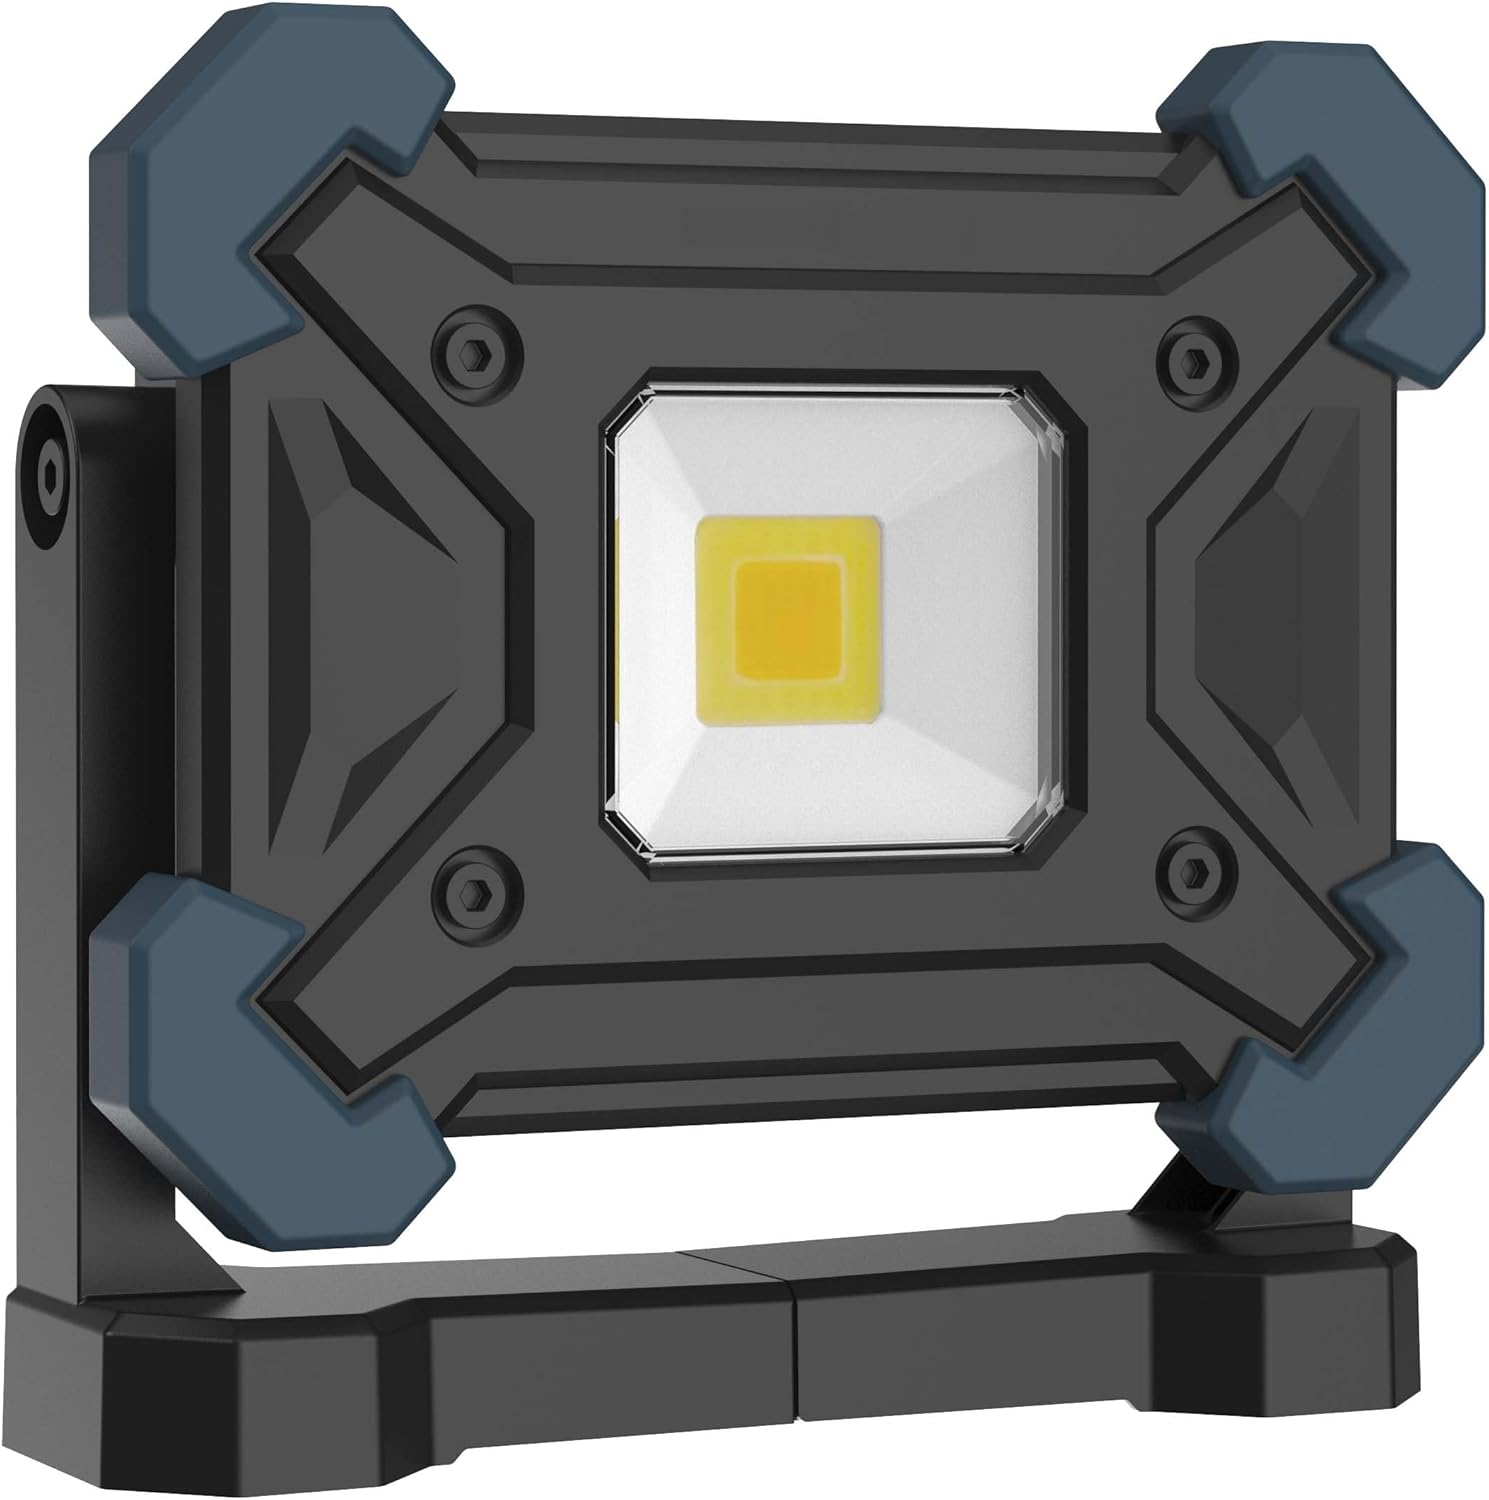
Figure 1: Front view of the Northpoint NP-RWL-25 Cordless LED Work Light, showing the central LED panel and protective blue corner bumpers.
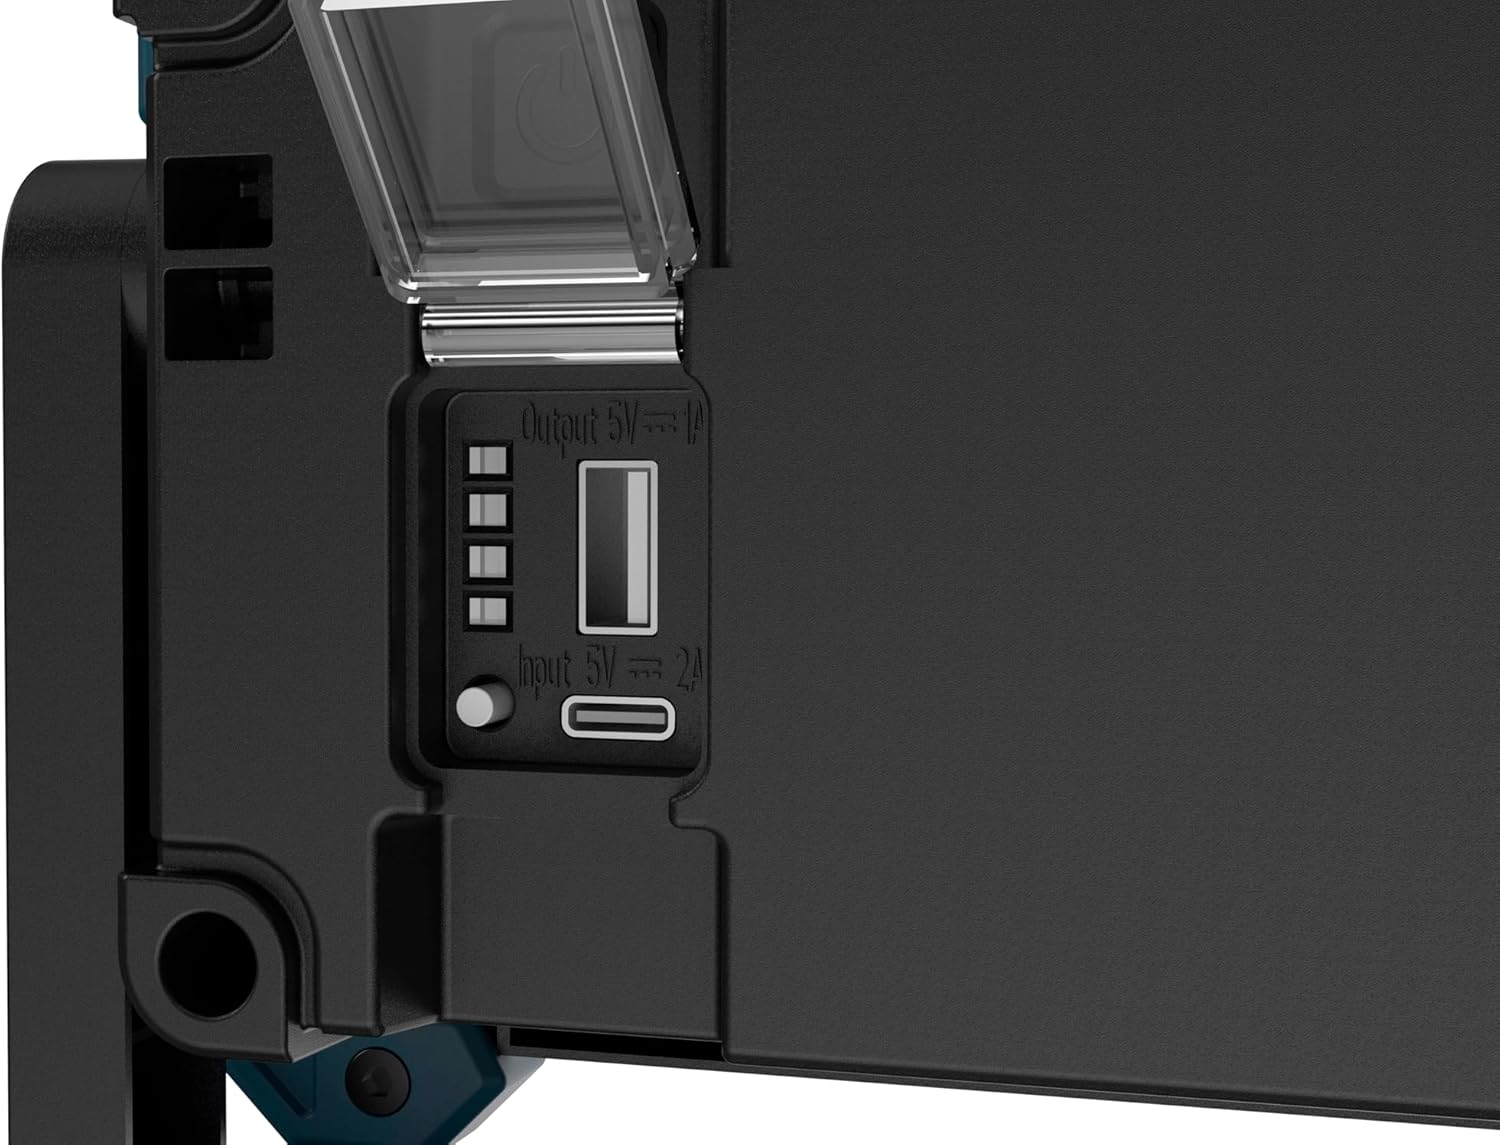
Figure 2: Close-up view of the side panel, illustrating the USB-C input port (5V 2A), a standard USB-A output port (5V 1A) for charging other devices, and four LED battery level indicator lights.

Figure 3: Rear view of the work light demonstrating its versatile mounting options. On the left, the foldable handle is shown extended, revealing the integrated magnets. On the right, the handle is folded, and the retractable hanging hook is deployed.
Setup
1. Initial Charging
- Before first use, fully charge the work light.
- Connect the supplied USB-C cable to the USB-C input port on the side of the work light (refer to Figure 2).
- Connect the other end of the USB-C cable to a compatible USB power adapter (not included).
- The four LED indicators will illuminate sequentially during charging. All four LEDs will be solid when fully charged.
2. Positioning the Work Light
The work light offers multiple positioning options:
- Freestanding: Use the adjustable handle as a stand to position the light on a flat surface.
- Magnetic Attachment: The powerful magnets integrated into the handle allow for secure attachment to metallic surfaces (refer to Figure 3 and Figure 4).
- Hanging: Extend the foldable hook from the handle to hang the work light (refer to Figure 3 and Figure 5).

Figure 4: The work light is shown magnetically attached to the side of a metal drill press, demonstrating its strong magnetic mounting capability for hands-free operation.
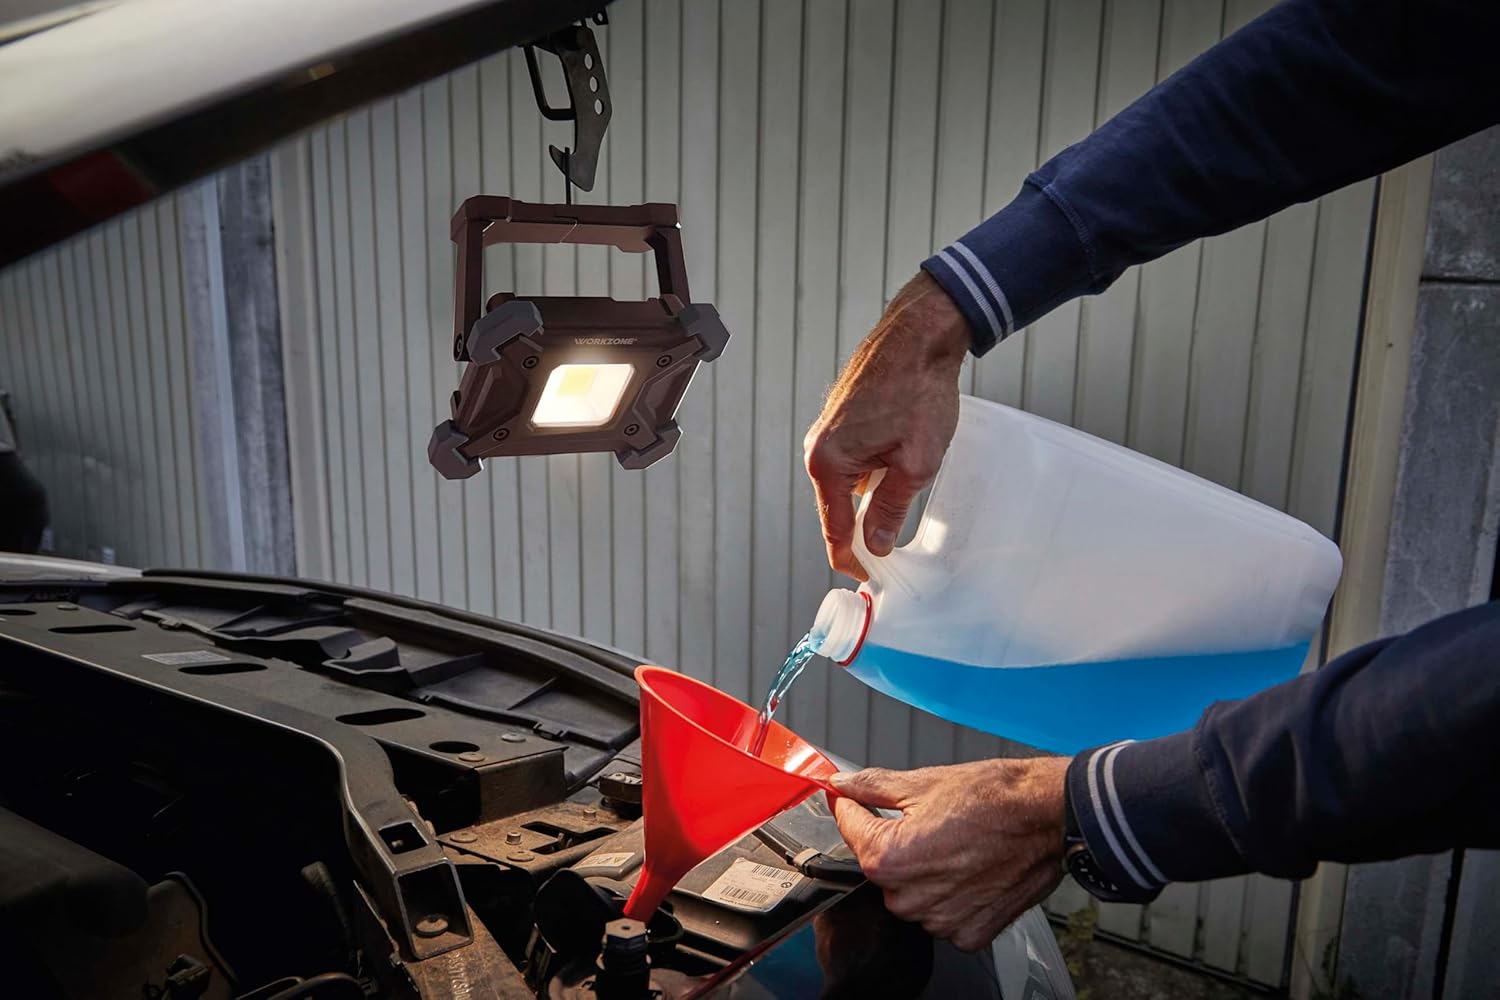
Figure 5: The work light is suspended from a hook under the hood of a car, providing illumination for engine maintenance. This highlights its utility in automotive repair.

Figure 6: The work light is shown mounted on a metal rail on a garage ceiling, illustrating its adaptability for overhead lighting in various work environments.
Operating Instructions
1. Power On/Off
- Press the power button (usually located near the charging ports) once to turn the light on.
- Press the power button again to cycle through different light modes or turn off the light.
2. Adjusting Brightness (Dimming)
The work light features continuous dimming. While the light is on:
- Press and hold the power button to gradually increase or decrease the brightness. Release the button when the desired brightness level is reached.
- The light has a memory function, recalling the last brightness setting used.
3. Changing Color Temperature
The work light offers different color temperature modes (cool white and warm white).
- Short press the power button to cycle through the available color temperature modes.
- Select the mode that best suits your working environment or preference.
4. Battery Level Indicator
Press the battery indicator button (if separate from power button, otherwise a short press of power button when off) to check the current battery level. The four LED indicators will show the remaining charge:
- 4 LEDs: 75-100% charge
- 3 LEDs: 50-75% charge
- 2 LEDs: 25-50% charge
- 1 LED: Below 25% charge (recharge soon)
5. Power Bank Function
The work light can also serve as a power bank to charge other small electronic devices.
- Connect your device's charging cable to the USB-A output port (5V 1A) on the work light (refer to Figure 2).
- Charging will begin automatically. Note that using this feature will reduce the work light's operating time.
Maintenance
- Cleaning: Wipe the work light with a soft, damp cloth. Do not use abrasive cleaners or solvents. Ensure the charging ports are dry before use or charging.
- Storage: Store the work light in a cool, dry place when not in use. For extended storage, charge the battery to approximately 50% every 3-6 months to prolong battery life.
- Battery Care: Avoid fully discharging the battery frequently. Recharge promptly when the battery level is low.
- IP65 Rating: The IP65 rating indicates protection against dust ingress and low-pressure water jets from any direction. While robust, avoid submerging the device in water.
Troubleshooting
| Problem | Possible Cause | Solution |
|---|---|---|
| Light does not turn on. | Battery is depleted. | Charge the work light using the supplied USB-C cable. |
| Light is dim or flickers. | Low battery level. | Recharge the work light. |
| Cannot adjust brightness or color. | Incorrect operation. | Refer to the "Operating Instructions" section for correct procedures. |
| Device not charging from USB-A output. | Work light battery is too low or cable is faulty. | Ensure the work light has sufficient charge. Try a different USB cable. |
If the problem persists after attempting these solutions, please contact customer support.
Specifications
| Feature | Detail |
|---|---|
| Brand | Northpoint |
| Model Number | NP-RWL-25 |
| Power | 20 Watts |
| Luminous Flux | 2000 lumens |
| Voltage | 5 Volts |
| Light Source Type | Light Emitting Diode (LED) |
| Color Temperature | Variable (Cool White / Warm White) |
| Material | Aluminum |
| Dimensions (L x W x H) | 17 x 6 x 16 cm |
| Weight | 650 grams |
| Ingress Protection (IP) Rating | IP65 |
| Charging Port | USB-C (Input 5V 2A) |
| Output Port | USB-A (Output 5V 1A) |
| Features | Continuous dimming, color temperature control, memory function, foldable handle, hanging hook, strong magnets, battery level indicator. |
Warranty and Support
Specific warranty information for the Northpoint NP-RWL-25 Cordless LED Work Light is not provided in the product details. For warranty claims or technical support, please contact the seller or manufacturer directly.
Information regarding the availability of spare parts is also not provided.


