
1. Introduction
Thank you for choosing the 9imod AM32 80A RC Crawler ESC. This Electronic Speed Controller is designed for 1/8 and 1/10 scale RC crawler trucks, offering advanced features for precise control and reliable performance. It comes pre-installed with AM32 custom firmware, allowing for smooth and quiet operation. The adjustable BEC voltage and multiple protection features ensure a robust and adaptable solution for your RC vehicle.
2. Safety Precautions
- Always disconnect the battery from the ESC when not in use to prevent accidental operation.
- Ensure all connections are secure and properly insulated to avoid short circuits.
- Operate your RC vehicle in a safe environment, away from people, pets, and obstacles.
- Keep the ESC and all electronic components dry. While the product may feature some water resistance, prolonged exposure to moisture can cause damage.
- Monitor the ESC temperature during operation. Excessive heat can indicate an issue or improper setup.
3. Product Features
- AM32 Custom Firmware: Pre-installed for optimized, smooth, and quiet crawler performance.
- Adjustable BEC Voltage: Output 5.2V, 6.0V, 7.4V, or 8.2V via DIP switch, with a maximum current of 10A, suitable for high-torque servo applications.
- Advanced Performance: Excellent low-speed linearity and strong explosive power for both climbing and high-speed maneuvers.
- Wide Compatibility: Suitable for Axial SCX10, TRX4, TRX6, Redcat, RC4WD 1/10 RC crawlers and other 1/8, 1/10 scale RC trucks.
- Programmable: Settings can be adjusted via programming card or transmitter.
- Enhanced Heat Dissipation: Upgraded heatsink for improved performance during prolonged use.
- Multiple Protections: Includes Low Battery Protection, Overheat Protection, Startup Throttle Protection, Signal Loss Protection, and Abnormal Voltage Protection.
4. Package Contents
- 1x 9imod AM32 80A Brushless ESC
- 1x USB Linkable Programming Module
5. Setup
5.1. Connection Diagram
Refer to the diagram below for proper connection of the ESC to your motor, battery, and receiver.
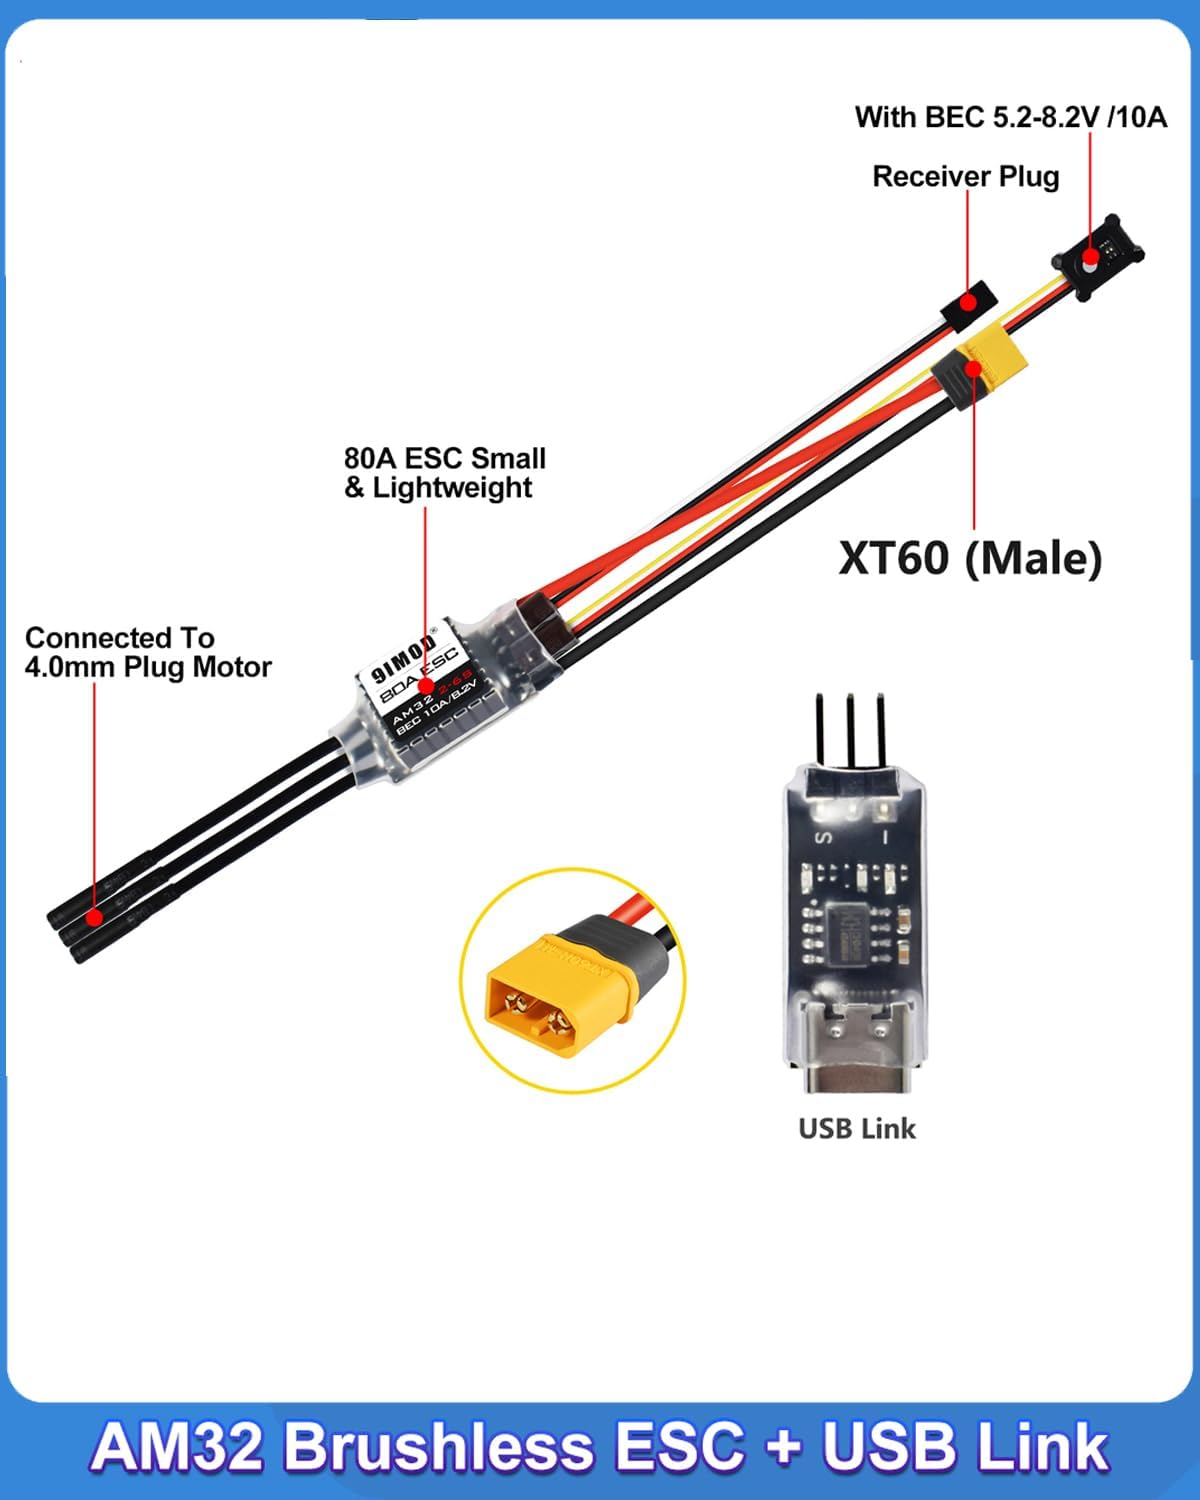
5.2. BEC Voltage Adjustment
The BEC output voltage can be adjusted using the DIP switches on the ESC. Select the desired voltage (5.2V, 6.0V, 7.4V, or 8.2V) according to your servo requirements.

5.3. Firmware Upgrade and Programming
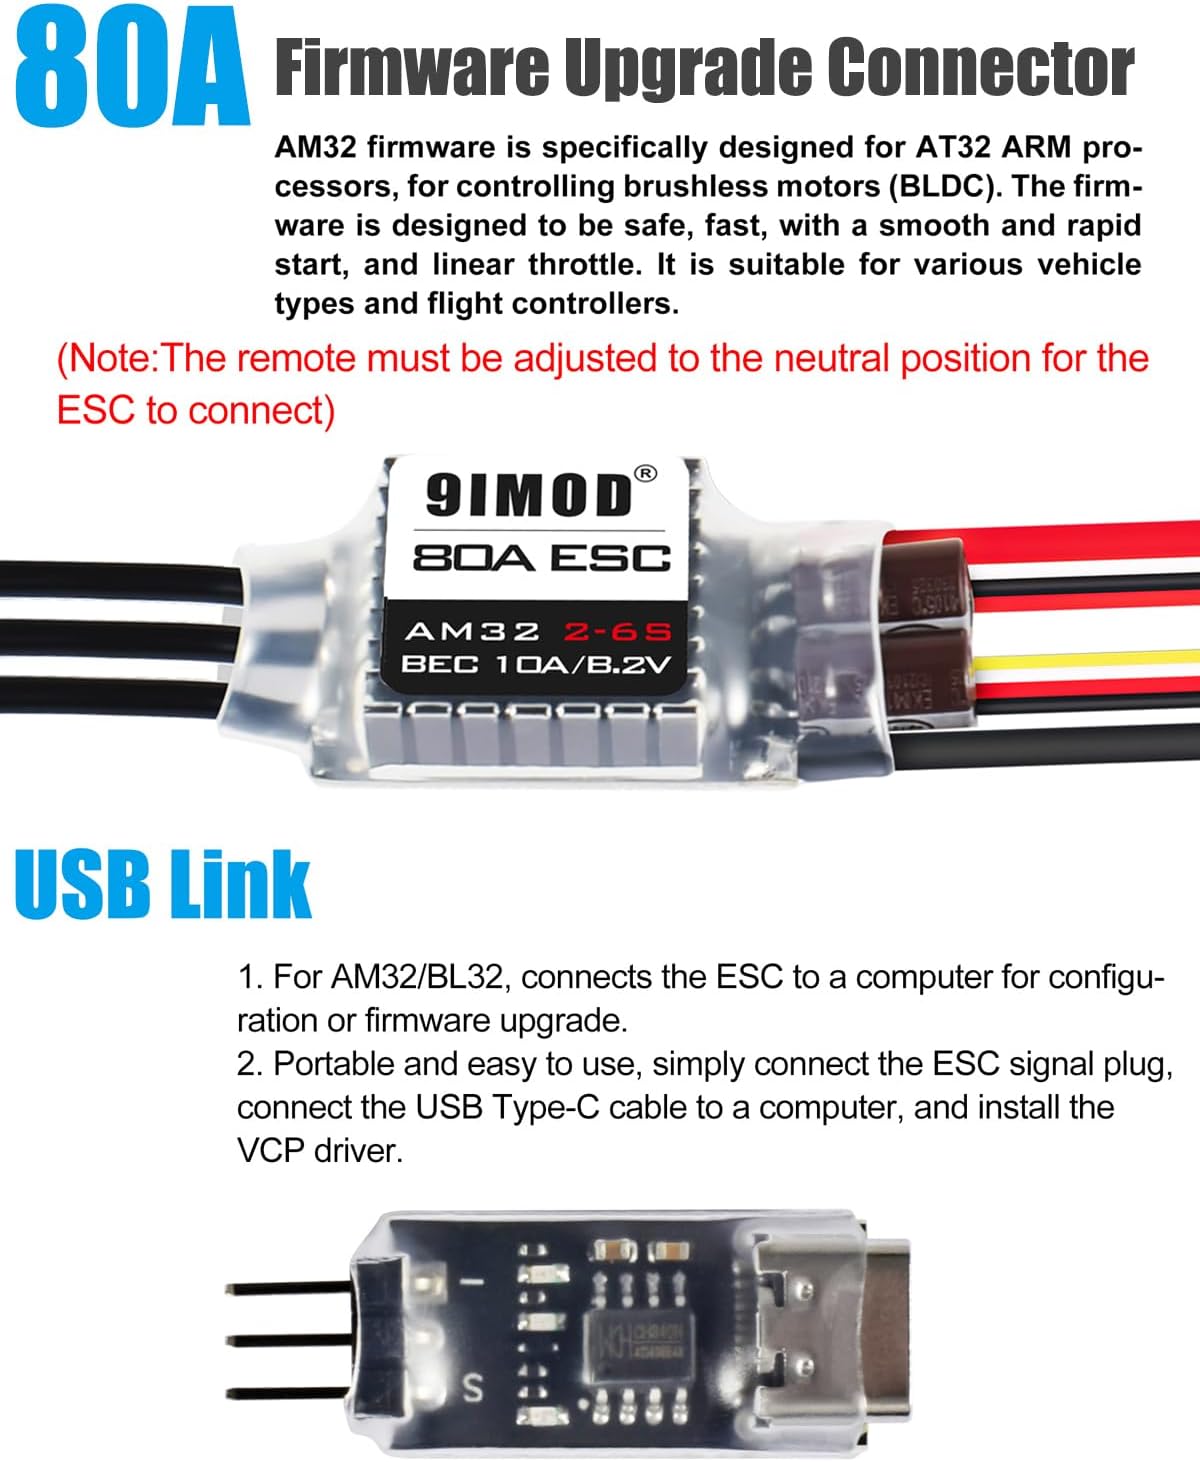
The ESC supports firmware upgrades and parameter adjustments via a USB Link module connected to a computer. Ensure the remote control is in the neutral position before connecting.
5.4. Visual Setup Guide
Watch the following video for a visual guide on connecting the ESC and flashing firmware.
This video demonstrates the connections and waterproof capabilities of a similar ESC, providing insight into robust design.
Another video showing connections and waterproof testing for a crawler ESC.
A further demonstration of a crawler ESC's connections and waterproof features.
6. Operating Modes and Settings
The 9imod AM32 80A ESC offers various operating modes and settings configurable via jumper caps. Refer to the table below for detailed configurations.

6.1. Mode Switch
- Normal Mode: Remove Jumper Cap 1, Remove Jumper Cap 2.
- Brake Mode: Insert Jumper Cap 1, Remove Jumper Cap 2.
- Racing Mode: Remove Jumper Cap 1, Insert Jumper Cap 2.
- Climbing Mode: Insert Jumper Cap 1, Insert Jumper Cap 2.
6.2. Battery Type
- Non-lithium Battery: Remove Jumper Cap 3.
- Lithium Battery: Insert Jumper Cap 3.
6.3. BEC Output
- 5.5V Output: Remove Jumper Cap 4.
- 7.5V Output: Insert Jumper Cap 4.
7. Specifications
| Attribute | Value |
|---|---|
| Brand | 9imod |
| Model Number | 80A ESC |
| Battery Compatibility | 2-6S Lipo |
| BEC Output | 5.2V/6.0V/7.4V/8.2V (adjustable), Max 10A |
| MCU | 32-bit |
| Material | Metal |
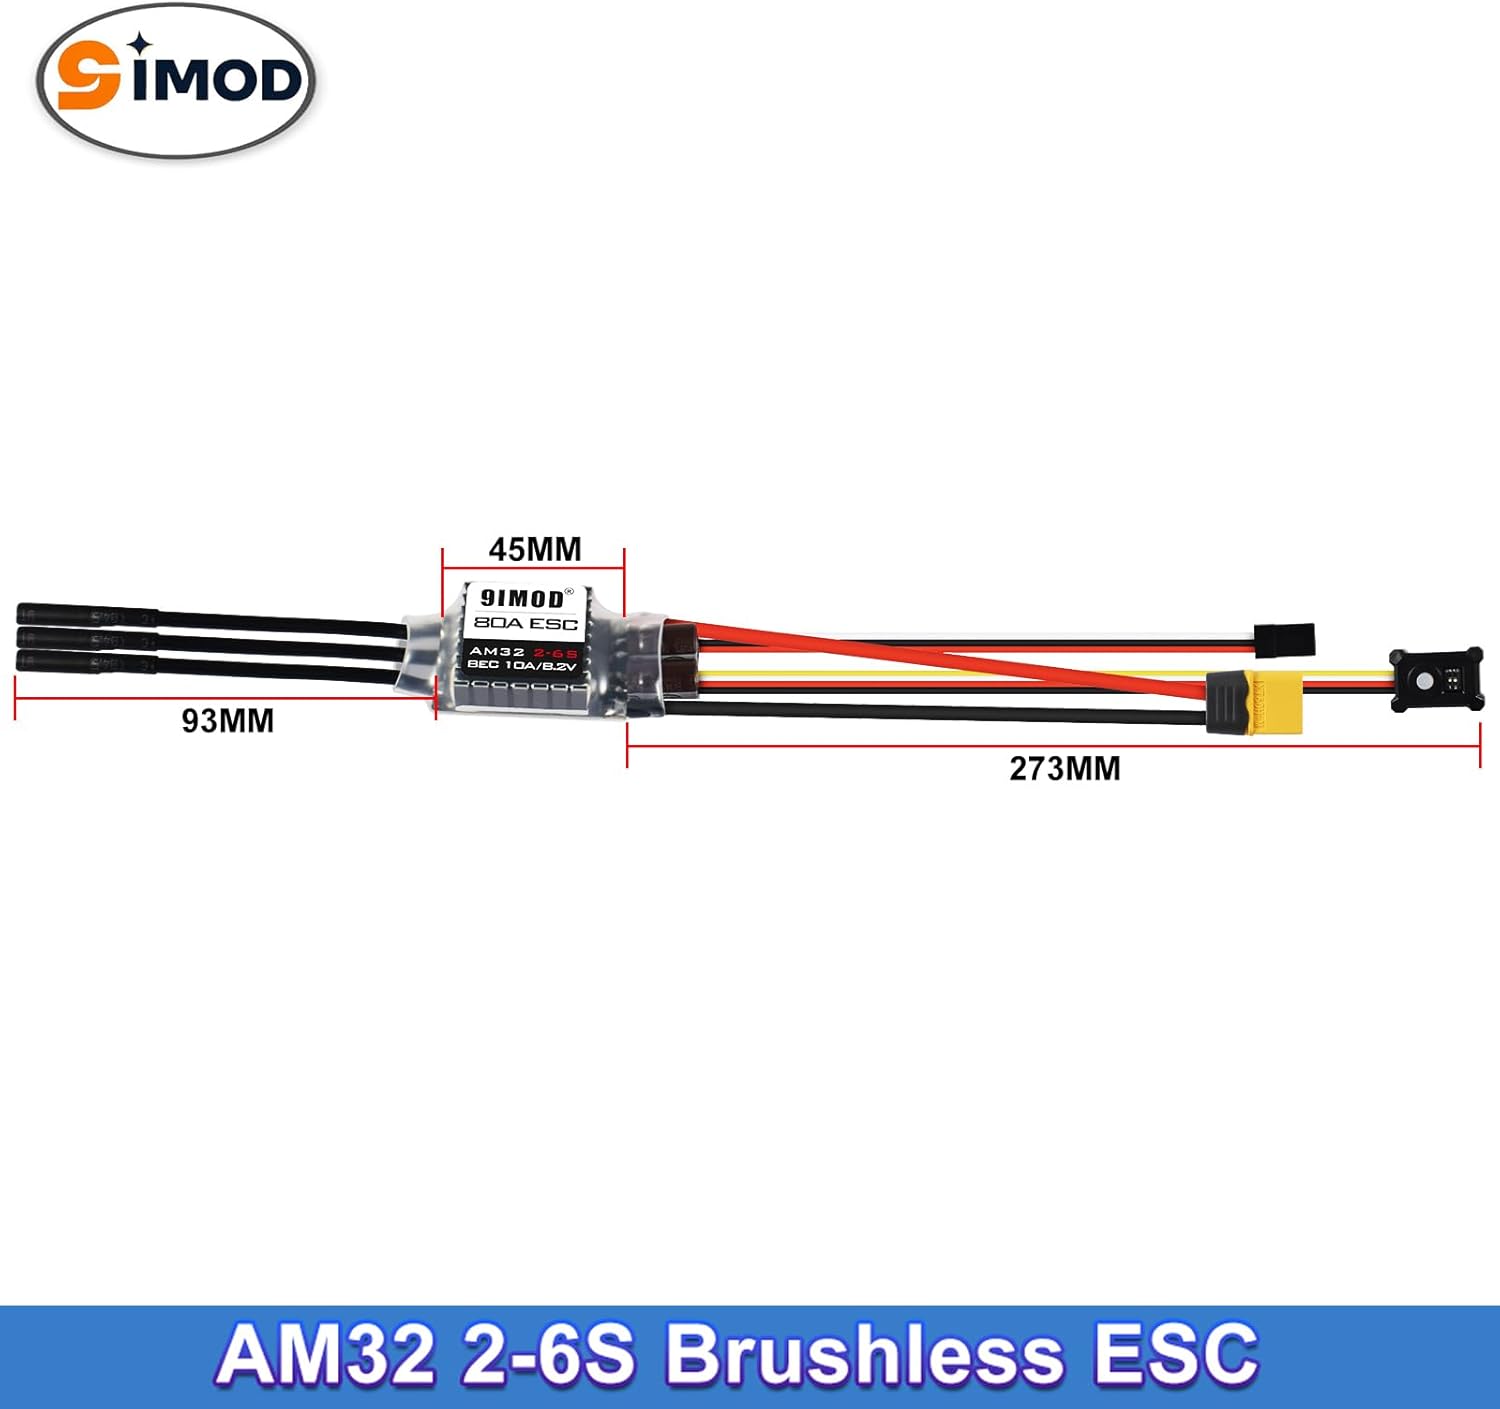
| Item Weight | 2.4 ounces |
| Package Dimensions | 0.2 x 0.1 x 0.1 inches |

8. Maintenance
- Regularly inspect all wires and connectors for signs of wear or damage. Replace any damaged components immediately.
- Keep the ESC clean and free from dirt, dust, and debris. Use a soft brush or compressed air for cleaning.
- Ensure the heatsink is clear of obstructions to allow for proper airflow and cooling.
- Store the ESC in a dry, cool environment when not in use.
9. Troubleshooting
9.1. Common Issues and Solutions
- Motor Not Responding:
- Check all connections to the motor, battery, and receiver.
- Ensure the battery is charged and properly connected.
- Verify that the remote control is powered on and bound to the receiver.
- Recalibrate the throttle range if necessary.
- ESC Overheating:
- Ensure adequate airflow around the ESC heatsink.
- Check for excessive load on the motor or drivetrain.
- Consider using a motor with a lower KV rating or a smaller pinion gear.
- Erratic Motor Behavior:
- Check for loose motor wires or damaged connectors.
- Verify that the motor timing settings are appropriate for your motor.
- Ensure no interference from other electronic devices.
- Low Battery Protection Triggered:
- Recharge the battery.
- Ensure the correct battery type is selected via jumper caps (Lithium vs. Non-lithium).
10. Warranty and Support
For warranty information and technical support, please refer to the product packaging or contact 9imod customer service directly. Keep your purchase receipt as proof of purchase.