
LANDERPOW LANDERPOW-3500W-PSW
LANDERPOW Pure Sine Wave 3500W Power Inverter User Manual
Model: LANDERPOW-3500W-PSW
Brand: LANDERPOW
1. Introduction
The LANDERPOW Pure Sine Wave 3500W Power Inverter is designed to convert 12V DC battery power into clean, stable 120V AC household power. With a continuous output of 3500W and a peak surge capacity of 7000W, this inverter is suitable for a wide range of applications including RVs, trucks, homes, off-grid systems, and solar power setups. Its pure sine wave output ensures compatibility with sensitive electronics, providing reliable and efficient power wherever you need it.

Figure 1: LANDERPOW 3500W Pure Sine Wave Power Inverter with included accessories.
2. Safety Instructions
Please read and understand all safety instructions before installing or operating the inverter. Failure to follow these instructions may result in electric shock, fire, serious injury, or death.
- Ventilation: Ensure the inverter is installed in a well-ventilated area. Do not block any ventilation openings. Adequate airflow is crucial to prevent overheating.
- Proper Wiring: Always connect the inverter to a 12V DC power source using the provided 1AWG battery cables. Ensure correct polarity (positive to positive, negative to negative) to avoid damage to the inverter and battery.
- Grounding: Connect the inverter's ground terminal to a proper earth ground using the provided ground cable.
- Avoid Overload: Do not exceed the inverter's continuous power rating (3500W) or surge power rating (7000W). Overloading can damage the inverter and connected appliances.
- Dry Environment: Keep the inverter away from water, moisture, and flammable materials. This unit is not waterproof.
- Professional Installation: For hardwired applications, it is highly recommended to have installation performed by a qualified electrician to ensure compliance with local electrical codes.
- Built-in Protections: The inverter features multiple safety protections including undervoltage, overvoltage, overload, overheating, short circuit, and reverse connection protection. These features are designed to protect the unit and your devices.

Figure 2: The inverter's built-in protection safety system.
3. Package Contents
Verify that all items listed below are included in your package:
- 1 x LANDERPOW Pure Sine Wave Inverter 3500W
- 2 x 1AWG Battery Cables (2FT length)
- 1 x Ground Cable (1.65FT length)
- 1 x Remote Controller (15FT wired)
- 1 x Professional User Manual (this document)

Figure 3: All components included in the LANDERPOW 3500W Inverter package.
4. Product Features
4.1 High Power Output & Efficiency
This pure sine wave inverter provides 3500W of continuous clean DC to AC power with a 7000W surge capability, ensuring stable operation for demanding appliances. Its efficiency of over 91% minimizes conversion loss, protecting sensitive electronics from damage and handling heavy startups like window AC units and power tools with ease.

Figure 4: High continuous and surge power capabilities.
4.2 Pure Sine Wave Technology
The LANDERPOW inverter produces grid-quality Pure Sine Wave AC power, superior to modified sine wave units. This ensures safe and efficient operation for inductive and capacitive loads such as refrigerators, home theaters, and sensitive medical equipment, eliminating hum or flicker and extending appliance lifespan.

Figure 5: Pure Sine Wave output ensures stable power for all devices.
4.3 Versatile Output Ports
Equipped with three standard AC outlets, a hardwired terminal for high-current appliances, a 5V/3A USB port, and a 30W PD USB-C port, this inverter offers extensive connectivity for various devices. This multi-interface design provides reliable power for RV trips, job sites, and emergency situations.

Figure 6: Multiple output options including hardwired terminal.
4.4 High-Quality Battery Cables
The inverter includes two 1AWG/2FT high-quality thickened battery cables, designed to ensure safe and efficient power transfer. These robust cables prevent overheating during use and contribute to higher conversion efficiency.
4.5 Smart LED Remote Control
A 15ft wired remote controller with a smart LED screen allows real-time monitoring of battery levels, output wattage, and error codes. This feature enables convenient power management and timely battery swaps from a distance, ideal for installations in trucks, RVs, or remote setups.

Figure 7: Remote control with smart LED display for real-time monitoring.
4.6 Intelligent Cooling Fans
The inverter is equipped with intelligent cooling fans that activate automatically when needed, preventing overheating and ensuring long-term reliability. The rugged, heat-dissipating full metal shell further enhances durability and protection against environmental factors.

Figure 8: Efficient cooling system for optimal performance.
5. Setup Guide
5.1 Connecting to a 12V Battery
- Ensure the inverter's power switch is in the "OFF" position.
- Connect the ring terminal of the red (positive) 1AWG battery cable to the positive (+) terminal of the inverter. Tighten securely.
- Connect the ring terminal of the black (negative) 1AWG battery cable to the negative (-) terminal of the inverter. Tighten securely.
- Connect the other end of the red (positive) cable to the positive (+) terminal of your 12V battery. Tighten securely.
- Connect the other end of the black (negative) cable to the negative (-) terminal of your 12V battery. Tighten securely.
- Connect the ground cable from the inverter's ground terminal to a suitable earth ground point.
- For optimal performance and safety, ensure your 12V battery system is adequately sized for the inverter's output. The inverter is compatible with various 12V battery types including Li, LiFePO4, GEL, SLA, FLD, and AGM.
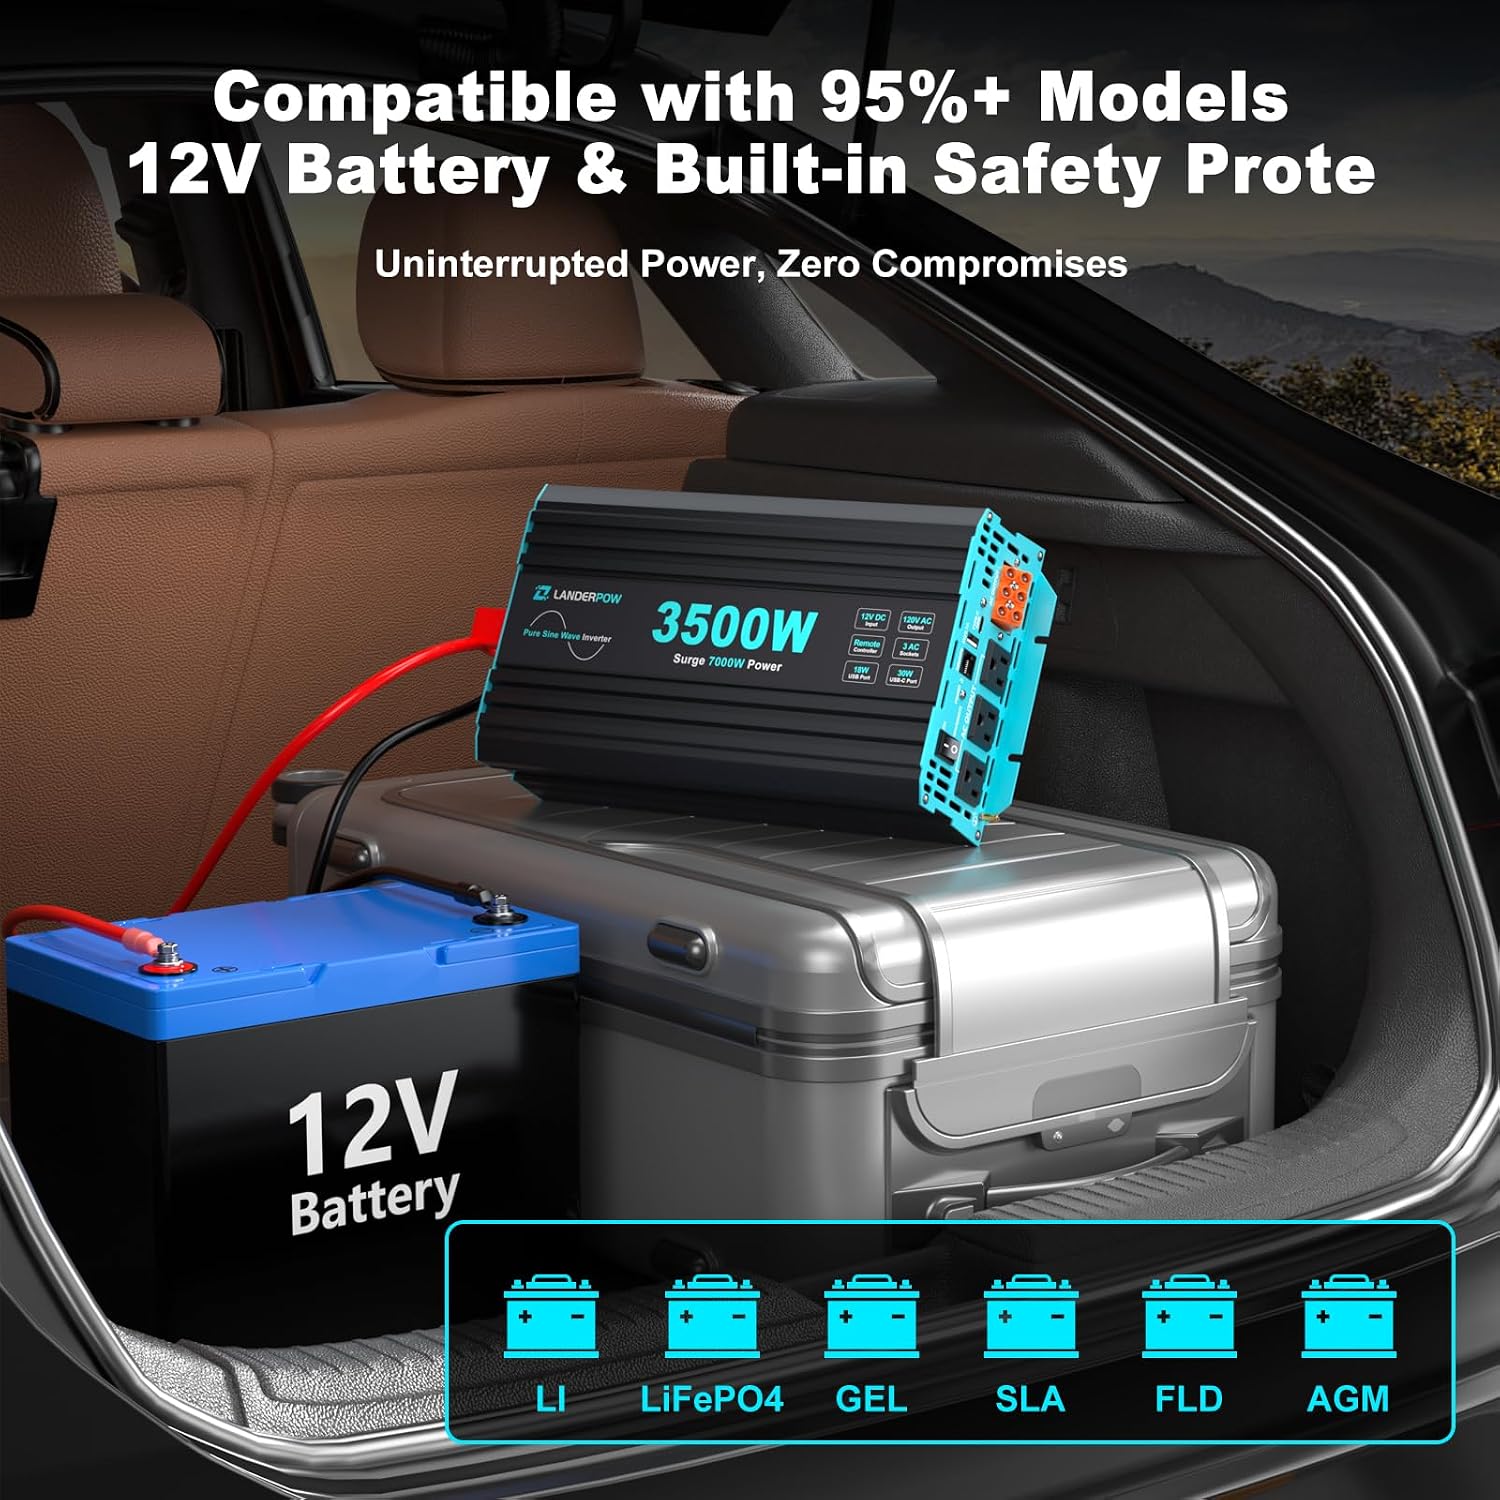
Figure 9: Inverter connection to a 12V battery and compatible battery types.
5.2 Hardwire Installation (Optional)
For permanent installations or high-power applications, the inverter features a hardwired AC output terminal. This should only be performed by a certified electrician to ensure safety and compliance with all electrical codes.
- Ensure all power sources are disconnected before beginning hardwire installation.
- Access the hardwired terminal block on the inverter.
- Connect appropriate gauge AC wiring (Live, Neutral, Ground) from your electrical system to the corresponding terminals on the inverter.
- Secure all connections firmly.
- Verify all connections are correct before restoring power.
6. Operating Instructions
6.1 Turning the Inverter On/Off
- After connecting the battery cables, switch the main power button on the inverter to the "ON" position.
- The remote control's LED screen will illuminate, displaying real-time information.
- To turn off the inverter, switch the main power button to the "OFF" position.
6.2 Using the Remote Control
The 15ft wired remote control provides convenient operation and monitoring from a distance.
- Power Button: Use the power button on the remote to turn the inverter ON or OFF remotely. Note: The main power switch on the inverter must be in the "ON" position for the remote to function.
- LED Display: The screen displays critical information such as DC input voltage, AC output wattage, battery remaining capacity, and error codes.

Figure 10: The remote control provides instant readouts and control.
6.3 Connecting Appliances
Plug your 120V AC appliances into the AC outlets on the inverter. For USB charging, connect your devices to the USB-A or USB-C ports. Ensure the total wattage of connected appliances does not exceed the inverter's continuous power rating.
Video 1: Demonstrating the inverter's capability to power various household and power tools, including coffee machines, hair dryers, and circular saws.
7. Maintenance
- Cleaning: Periodically clean the exterior of the inverter with a dry, soft cloth. Do not use liquid cleaners or solvents.
- Ventilation: Ensure the cooling vents are free from dust and debris to maintain proper airflow.
- Cable Connections: Regularly check all battery and ground cable connections to ensure they are tight and free from corrosion. Loose connections can lead to overheating and poor performance.
- Storage: If storing the inverter for an extended period, disconnect it from the battery and store it in a cool, dry place.
8. Troubleshooting
The remote control's LED screen will display error codes to help diagnose issues. Refer to the table below for common problems and solutions.
| Problem | Possible Cause | Solution |
|---|---|---|
| No Output Power | Inverter OFF / Low battery voltage / Overload / Loose connections | Turn ON inverter / Recharge battery / Reduce load / Check and tighten all cables |
| Overload Alarm / Shutdown | Connected load exceeds inverter capacity | Reduce total wattage of connected appliances. Check surge rating for startup loads. |
| Overheating Alarm / Shutdown | Poor ventilation / Excessive load / High ambient temperature | Ensure clear airflow around inverter / Reduce load / Move inverter to cooler location |
| Low Voltage Alarm / Shutdown | Battery voltage too low | Recharge or replace battery. |
| High Voltage Alarm / Shutdown | Input voltage too high | Verify battery voltage is within 12V nominal range. |
9. Specifications
| Attribute | Value |
|---|---|
| Model Name | LANDERPOW-3500W-PSW |
| Wattage | 3500 watts (Continuous) / 7000 watts (Surge) |
| Power Source | Solar and Battery Powered (12V DC Input) |
| Output Voltage | 120V AC |
| Efficiency | >91% |
| Product Dimensions | 11.89 x 6.97 x 3.35 inches |
| Item Weight | 7.45 pounds |
| AC Outlets | 3 |
| USB Ports | 1 x 5V/3A USB-A, 1 x 30W USB-C PD |
| Remote Control Cable Length | 15 feet |
| Battery Cable Gauge | 1 AWG |
10. Warranty and Customer Support
LANDERPOW stands behind the quality of its products. The 3500W Pure Sine Wave Inverter comes with an Extra Long 3-Year Total Coverage, which includes:
- 1-Year No-hassle Replacement: For any manufacturing defects or performance issues within the first year.
- 2-Year Extended Support: Additional support for years two and three.
If you have any questions, require technical assistance, or need to claim warranty service, please contact LANDERPOW customer support. Real humans are available to answer your emails within 12 hours.
Contact: Please refer to the contact information provided in your product packaging or visit the official LANDERPOW website for the most up-to-date support details.
Ask a question about this manual
Ask about setup, troubleshooting, compatibility, parts, safety, or missing instructions. Manuals+ will review the question and use this page’s manual context to help answer it.